Dyno Cruiser

mr.electric

10 kW
Joined
Jan 3, 2007
Messages
748
Location
San Francisco
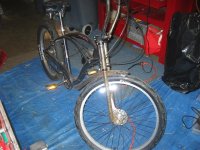
This is a new e-bike project. I am using the Currie 1000w motor and an old Zap roller drive. I was getting great power from this motor on the Currie i-zip 1000 and always thought it should work well on a bicycle. The Dyno bikes have good brakes and carry battery weight well. This pic shows the bike.
 

Attachments

  • IMG_0004 (Medium).JPG
    IMG_0004 (Medium).JPG
    89.8 KB · Views: 2,910
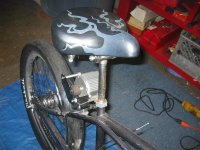
This is the motor system with a Zap motor and another with the currie motor installed
 
This is the motor on the bike
 

Attachments

  • IMG_0006 (Medium).JPG
    IMG_0006 (Medium).JPG
    79.1 KB · Views: 2,910
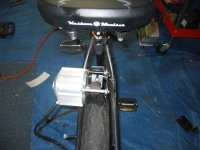
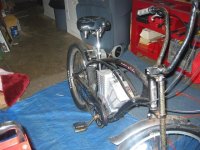
another pic of the motor installed
 

Attachments

  • IMG_0005 (Medium).JPG
    IMG_0005 (Medium).JPG
    62.5 KB · Views: 2,906
It is a simple effective drivetrain. I think it is efficient but I do not have any data . I have found roller drives to work well. Some comparissons:
-Non-geared hub motor is not efficient on take off and very heavy.
-Currie motor system has losses in the planetary gear set and eats spokes.
-Geared hub motors have gears with some losses but are probably the most efficient. Wheel set-up can be difficult.
-The roller system is an easy set up on this bike.
 
It looks like the motor barely clears that FAT tire. It will be interesting to see how it compares to the Zap motor.

What are you planning to use for batteries?
 
I like the install. Possibly the easiest bolt on drive system around, and it would be very quick to change gear ratios. I'd be interested to see some Wh/km data from the bike.
 
This is a pic of my battery pack. It holds two 12v12ah batts. I will add two more mounted on the chain stays like where paniers mount.
 

Attachments

  • 2 (Small).JPG
    2 (Small).JPG
    62.8 KB · Views: 2,887
I have not done the final adjustment to my motor mount. I think the motor and bracket will clear the tire easily. I wonder if it makes any difference to drive the tire off the center of the crown of the tire.
 
The 'battery' looks like it fits the frame perfectly. Did the bike come with that?

Another nice thing about the friction drive is it's very quiet.

Since you don't live very far from the beach, you could actually use it as a beach crusier :D
 
Has anybody tried a friction drive in the rain?
 
I used a Z.A.P. friction drive for about nine years with a single 12 volt 21 AH battery in all sorts of weather, at least the sort we get here in N. Florida. As a pedal assist device it was perfect. The tire barely showed any extra wear after all that time. Unassisted the bike went 8 mph but I have no idea of how far because I always pedaled. With careful use I had no problem getting 15 miles out of a good battery and eventually came up with a system to carry a spare that was effective.

The real advantage of the Z.A.P. system at the time I got it was that you could merely turn the cam lever and it would be totally disconnected with no drag and only the weight of the motor and battery as a deterrent which was minimal. This is unlike the 5304 with 4 SLA's on the same bike.

Before I had confidence in the 5304, I left the Z.A.P. with battery in place on the bike and it pushed everything at the same 8 MPH which was a good thing as a fuse holder decided to self destruct the second time I had the new system out and used the Z.A.P. to get home. With a new fuse holder for the 5304 battery pack in place I sold the Z.A.P. on eBay and got a very good price for it.
Mike
 
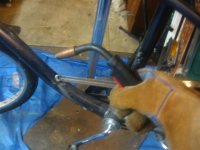
Welded in battery bracket today
 

Attachments

  • IMG_0088 (Small).JPG
    IMG_0088 (Small).JPG
    40.8 KB · Views: 1,785
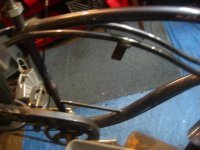
This is the top bracket and bottom bracket
 

Attachments

  • IMG_0096 (Small).JPG
    IMG_0096 (Small).JPG
    40.9 KB · Views: 1,782
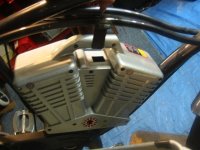
Battery fits like this, there is a groove at the bottom of the battery box. Currie used a piece of 1/4" rod across the bottom I used a piece of narrow angle iron. Top mount keeps the battery box from falling out of the frame with a single bolt. The bottom mount supports the weight.
 

Attachments

  • IMG_0098 (Small).JPG
    IMG_0098 (Small).JPG
    46 KB · Views: 1,776
This is the begining of the side mounts for one more 12-12 on each side. All the weight is pretty low like this. I will dress up these side mounts some how to match the battery box.
 
Perhaps you could make fake "exhaust pipes" to cover the batteries to keep in line with the styling.
 
I am going to make two braces from 1/4" rod to hold the batteries on top of the platform I welded on. Like this saddle bag without the slant and fancy paint.
 
There you go. The saddlebag look fits. In that case, you could make fake leather saddlebags to go over the batteries ....or just duct tape works for some of us.
 
Back
Top