Direct Drive Genesis

Joined
Jun 15, 2009
Messages
2,739
Location
MA
So I was planning to put the X5404 on this Farfle swingarm, But a few things changed as always and this motor I saw on Ebay caught my attention. It was a little pricey, but when you break it down..its no more than a hub motor. Also it has good specs and comes with some diesel sized wiring. To me this means the company that made this thing wants me to abuse it!
[youtube]vgdhNtEkNvc[/youtube]
Here you can see the crap OEM sprocket that comes on it, and the one I'm going to be using. I need to machine the center hole to 18mm partially and add a new key way in the motor shaft.
IMG_2288.JPG

Here is a picture i posted on another post before i programmed the Rshunt on the CA. These batteries are actually the 8x Dewalt DCB200 packs, they have transformed over the year or two into more versatile/easier to work with packs.
IMG_2291.JPG


-----------------------------
So sadly I put a good 6 coats of primer and paint on this darn swingarm and then I sanded it off again once i realized I needed to weld this LCD monitor plate on my swingarm.
IMG_1953.JPG

.
IMG_1954.JPG

.
IMG_1955.JPG

.
IMG_1956.JPG

.
IMG_1957.JPG

You can see the X5404 hiding in the back of the picture there.

Anyway enough of that..Onto the new stuff. I was taking apart an old LCD monitor and removing the screen from the rest of the base while building a mini vintage computer to play old games on. I have it running in a 200w 12v Pico PSU and it's a Celeron 500 processor with 64mb ram 10gb Hdd. I have it partitioned with windows XP on 1 half(for easy USB tranfser support) But the main system runs MS-DOS 5.0 and Windows 3.1

Another side story, but while taking the monitor apart I noticed it had a really nice solid piece of steel to weigh down the base! i wasn't going to let that go to waste like the rest of the plastic scrap parts that got tossed in the dumpster. It didn't take long to realize that I had just the spot for this item! Welding it onto the Farfle swingarm and using it as a motor mount.

So i started sizing up the steel plate and making some lines with a sharpie where i wanted to make some cuts. Busted out the trusty Dremel XP and went to town smoking about 20 heavy duty cut-off wheels haha (part #420 from Dremel) After wasting far too much of my life changing wheels i decided to go and buy the new Dremel EZ lock Mandrel and reinforced blades! And all i have to say is WOW...this is so much nicer and i can change wheels with my gloves on still! So much faster.
IMG_2294.JPG

Picture of the plate almost all cut to shape
IMG_2293.JPG


After that I took it over to more practiced hands. My welder friend Ben's shop. He is only about 3 miles from my house and comes in handy!
IMG_2295.JPG

He turned on the air compressor and things started happening much faster than they were in Dremel land.....Who said there isn't a right tool for the job?!?!

Sanded her down nice and quick
IMG_2298.JPG

Put it in position and made sure it was perfect. There is not much room with the pedal clearance.
IMG_2299.JPG

Started clamping once we were happy with the positioning
IMG_2300.JPG

.
IMG_2301.JPG


It's Miller time! No not that Miller...
IMG_2302.JPG

.
IMG_2303.JPG

Took the seat off and flipped the bike over, The one thing Ben says he needs for his shop is a nice work table. Maybe that was a hint for me :)
But after flipping the bike over it just happened to sit perfectly on the block and the foundation post.
IMG_2305.JPG

A couple of simple tacks will do the job for now. And it also allows me to remove it with ease or support it better later depending on how good this motor work! Lets hope she has some power.
IMG_2308.JPG


We then took a measurement of the shafts outer diameter to find of what size i need to open my sprocket to. I did not have an 18mm bit so I will be ordering that. I'm also cutting the motors shaft shorter for clearance reasons.
IMG_2309.JPG
 
So back to the drawing board with the new LCD steel plate mount tacked in place. I still need to drill this solid ars sprocket before I can start drilling holes and mounting the BHT in place for good. For now i have some mock-up pictures to get an idea of how things are going. My chain line is going to work. It will be darn close to the right upper swingarm section. But overall no worries. I have an idea for a dual chain tensioner once i actually put a bicycle chain into the mix of things.

Here is a pic of the LCD plate tacked by my friend Ben, and a little extra permanent marker from my mock-up skills of the chain line :)
IMG_2318.JPG


I dont mind the curvy look of the steel plate and kept it that way for kicks. If i end up getting new tires(like Mich Gazelles) they may hit the plate a little and at that point i will shave it down a little if needed.
IMG_2319.JPG

Keep in mind the motor sprocket is about an inch off of where it will actually be
IMG_2320.JPG

Hah a nice close-up of my shaved brake bosses! i hate those things.
IMG_2321.JPG

Just enough pedal clearance, unfortunately the front left of the motor mount hangs off the swingarm a little much, should still be fine.
IMG_2322.JPG

Closer shot of the overhang
IMG_2323.JPG

Then I slapped the chain on to get a feel for it. Plenty of room for it, but once i incorporate another rear freewheel for the bicycle chain-line things will start getting congested.
IMG_2324.JPG

.
IMG_2325.JPG

.
IMG_2326.JPG

.
IMG_2327.JPG
 
Got my HK order in the mail the other day! This can only mean 1 thing? I'm getting ready to wire a battery pack...its about time.

IMG_2332.JPG

IMG_2331.JPG
 
Miles said:
Hi skeetab,

It's a bit confusing to call it an "axial motor".......

Thanks for your input, title corrected.
 
I have my local machine shop friend working on the motor/ motor shaft today and tomorrow whenever he has spare time! It should come out pretty good. Once I get that back I can actually test the motor/bike and see if its even going to be viable.

I took a pretty sick digger yesterday on the Tidalforce BMX...Don't even want to show pictures of the carnage...(good thing I was wearing a helmet tho) Never again will I use bicycle tires over 35mph...

Front tire blow out on a corner...wasn't fun
 
I got the call yesterday, the motor is ready to be picked up. I wanted to get it but couldn't get out of work early enough. I will be grabbing it today though. I had him debur the sprocket partially to 18mm then mount it to the larger(inner area) on the motor shaft. They then pressed a pin in it to hold the sprockets keyway, and then cut what was left of the shaft(protruding past the sprockets new position)which helps me fit the motor on the swingarm and straighten out the chain line.

Here it is with the new sprocket on
IMG_2352.JPG


closer shot before i put the retaining screw in place
IMG_2353.JPG


Here you can see how much closer i brought the sprocket to the motor, and how much the shaft was cut down
IMG_2354.JPG


2 pics i posted on my Voloci thread, i had to find a piece to my master link that i misplaced. #41 chain is the same length but is wider. Luckily the part I need will work fine.
IMG_2355.JPG

IMG_2357.JPG
 
Hi Skeetab,
Glad I found this thread. I am doing something similar at the moment using the same motor ( http://endless-sphere.com/forums/viewtopic.php?f=28&t=58313&start=25 ) with a purpose built swingarm on a Kona Stinky, but without pedals.

You have already answered a few of my questions about motor shaft diameter etc with the info in your posts, but I would appreciate a bit more:
-What rear hub setup are you using.. looks as though it has 6 bolt flange both sides, or is there an adapter on one side?
-What rim / tire size is that on the back?
Thanks,
Dave
 
Alright finally had some time off of work to get the bike slapped together enough to test it out. I drilled the LCD monitor plate with a 3/8" steel drill bit in 3 spots and mounted the BHT motor. I have a new chain but decided to install the old one since it's still nice and matches the original sprockets I'm using. After cutting the chain down to length with a Dremel tool, i installed it then bolted the motor down. I temp mounted the Lyen controller to the back of the seat until I get a rack to mount it on. The motor is fast and fairly loud compared to a hub as you would expect. But I am having a little low speed/start-up cogging. The motor doesn't seem to like to start going from a stall/stand-still...not sure what is going on with that.

Bike outside for a test-ride today
IMG_2379.JPG

Drive-side
IMG_2381.JPG

New chain vs. old
IMG_2370.JPG


I wanted to get rid of the steel Voloci fork...It was holding me back. I went ahead and ordered a 20MM DMRBikes front disc hub and prepared to go to town on building it into one of the 17" SS moped rim I have. First thing I ran into which Stevil warned me about, was the Spokes i have are larger than the holes in the DMR hub. I quickly busted out the M12 and drilled them out.

Old stock hub removed from the rim
IMG_2369.JPG


Lacing is not my specialty, but I'm not scared to get my hands dirty. First thing that scared me was that I've never laced this type of pattern before. Luckily i had just bought another set of wheels from a moped vendor and i had a spare to look at and help me picture how things needed to go. This didn't stop me from messing it up TWICE..but I got the hang of it.

New spare wheel set
IMG_2374.JPG


After finally getting the wheel laced to the new DMR hub, i got a chance to put on my 2004 Marzzochi Super T pro forks with a DK bikes stem and Redline bars.
IMG_2377.JPG

DMRBikes hub outside
IMG_2383.JPG

Front end
IMG_2385.JPG


I like the look so much better now. But anyway back to the story. When I slid the thru axle thru the newly laced wheel i was so disappointed to see that the wheel wasn't even close to being centered on the bike..and this is after i spent an hour fiddling with it and spinning it by hand checking the true. But again i did not panic, I grabbed a chair flipped the bike upside down and began dishing the wheel slowly until it was perfect, half turn at a time. This may have taken another entire hour. But I am so happy with the results its not even funny.

Now that the bike is starting to take shape, and now that I'm getting the ebike itch. I decided it was a good idea to install some brakes. I went down to my LBS to get a star nut and a rear brake cable while my 20s 6ah pack was balancing. He hand me a star nut and I say "do you have a fork i can size it up with, it looks too big" He says "i checked its right" only for me to get home and the star nut be too large.. I knew it!! anyway I moved onto installing the brake cables instead. Stopping is a good thing!
IMG_2372.JPG

I have a pretty awesome 12V LED flood lamp from my work that I am planning to use as a headlight.
IMG_2371.JPG


After struggling with a few trips around the block, I notice that i need to get my 4th motor mount installed. The chain keeps tightening itself after a mile or two of riding as you can notice its pretty tight in this picture.
IMG_2384.JPG


I took the motor off and filed the holes down and remounted the motor firmly only to have the same problems arise. That is all for now
 
Test ride on the bike today, Mounted the Cycle Analyst to the handlebars. It is telling me this thing is pulling 35-75amps on acceleration. I limited the amps to 25 via the CA and it worked, lost tons of pickup and top end. Changed it to around 40amps but i still cant believe these figures are correct? somethings gotta be messed up..but my 10c batteries are sagging. once she gets going though it is loads of fun!

CA mount
IMG_2386.JPG

IMG_2387.JPG

[youtube]XJb2he2DTFE[/youtube]
 
Great job! You and bhzwindtalker both got bikes with this motor up and going this weekend! Looks like you were moving pretty good on the way back home.

What kind of wh/m are you seeing for those conditions?
 
Great to see it is up and running! Well done!

Are you still having issues with low speed cogging / poor startup? If so, it could be a hall effect sensor issue.
I'm not experienced with brushless motors, but have been doing a lot of research lately, and this description matches issues others have had, that have been resolved by replacing / reconnecting halls.

What speed is the bike geared for, and does it reach that speed ok?

Did the motor get hot on that ride?

Sorry for all the questions, but I am about to buy one of those motors for my build, so I am keen to learn everything I can about them, now there are two of you with running bikes.

Thanks for the info on the hubs.. I have contacted Stevil and a couple of the double ended disc hubs are on their way to me already.

Regards,
Dave
 
standfast said:
Great job! You and bhzwindtalker both got bikes with this motor up and going this weekend! Looks like you were moving pretty good on the way back home.

What kind of wh/m are you seeing for those conditions?

Thanks Standfast, the bike is alot of fun. I'm not really used to not having pedal power yet...starting from a stand-still is very rough. I figured the gearing would be alright this way but the low end torque is just not there. The throttle is just too responsive and the motor cogs too fast at low speeds(maybe a throttle tamer?) The problem is that I am comfortable with the top speed where it is now, probably around 40mph at the moment. Unfortunately i had my CA set correctly, but i changed a few advanced settings so i will have to get back to you with more accurate data. The numbers were so high I didn't believe them.
 
Drum said:
Great to see it is up and running! Well done!

Are you still having issues with low speed cogging / poor startup? If so, it could be a hall effect sensor issue.
I'm not experienced with brushless motors, but have been doing a lot of research lately, and this description matches issues others have had, that have been resolved by replacing / reconnecting halls.

What speed is the bike geared for, and does it reach that speed ok?

Did the motor get hot on that ride?

Sorry for all the questions, but I am about to buy one of those motors for my build, so I am keen to learn everything I can about them, now there are two of you with running bikes.

Thanks for the info on the hubs.. I have contacted Stevil and a couple of the double ended disc hubs are on their way to me already.

Regards,
Dave

Ya it would be the halls I guess, i would be pissed if they are dead already since i purposely have not abused the motor yet.. I will test them but I feel it is more related to the gearing/reduction that's not present.

The motor gets fairly warm after a good speed ride/ but cools down rather fast also. It seems to reach top speed pretty easy as long as it has enough juice. I'm sure if i tried to climb a hill with it right now that motor wouldn't last long though, I'm worried without a 2nd stage reduction this wont be adequate enough for my hilly terrain. Not sure on that yet though.

P.S. there is a good vendor online for these wheels if you want a set
 
standfast said:
It looks like you have about 4:1 reduction right now? 11/46? Maybe needs closer to 6:1? Whats the diameter of the rear tire?

21 1/2" rear tire diameter. Ya its 45 rear 11 front at the moment
 
I have some issues with low speed cogging too but the kelly has a ramp up that I think is increasing the issue. I run 13-60t in 18S and get about 40mph, my rear wheel is equivalent to a 26".

Pulls like a freaking train from 5 to 50kph. I will reprogram the kelly when i'll get my new batt, wire in the CA and see what it tells about power.
I am experiancing fast heatup too. Watercooling the motor migth be next...
 
bzhwindtalker said:
I have some issues with low speed cogging too but the kelly has a ramp up that I think is increasing the issue. I run 13-60t in 18S and get about 40mph, my rear wheel is equivalent to a 26".

Pulls like a freaking train from 5 to 50kph. I will reprogram the kelly when i'll get my new batt, wire in the CA and see what it tells about power.
I am experiancing fast heatup too. Watercooling the motor migth be next...

I was just about to ask you on the other thread if you are running 26" wheels..Your top speed seems to be higher than mine even though I am running 20s. I just ordered a bunch of different sprockets, so I will have to play around with a combo that works. I just hate to sacrifice top end. Did it pull the full 130a of the kelly? Mine peaked at 74amps probably limited by my controller...but to be honest that is a little higher than id like for the performance I'm seeing.
 
Here is what It runs now
ratio1.png


and the 60t I'm about to try
ratio2.png


looks like I will lose just over 10mph :(

this is based on 33r/v and 78volt average then rounded to 2550
 
skeetab5780 said:
I have a pretty awesome 12V LED flood lamp from my work that I am planning to use as a headlight.
IMG_2371.JPG

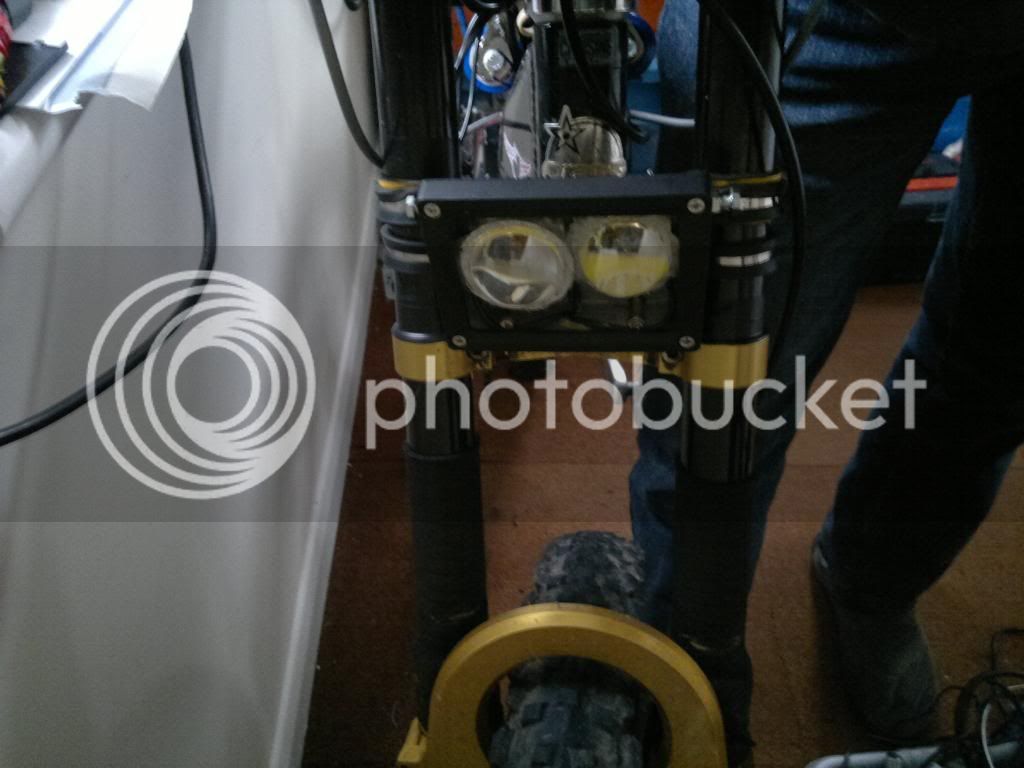
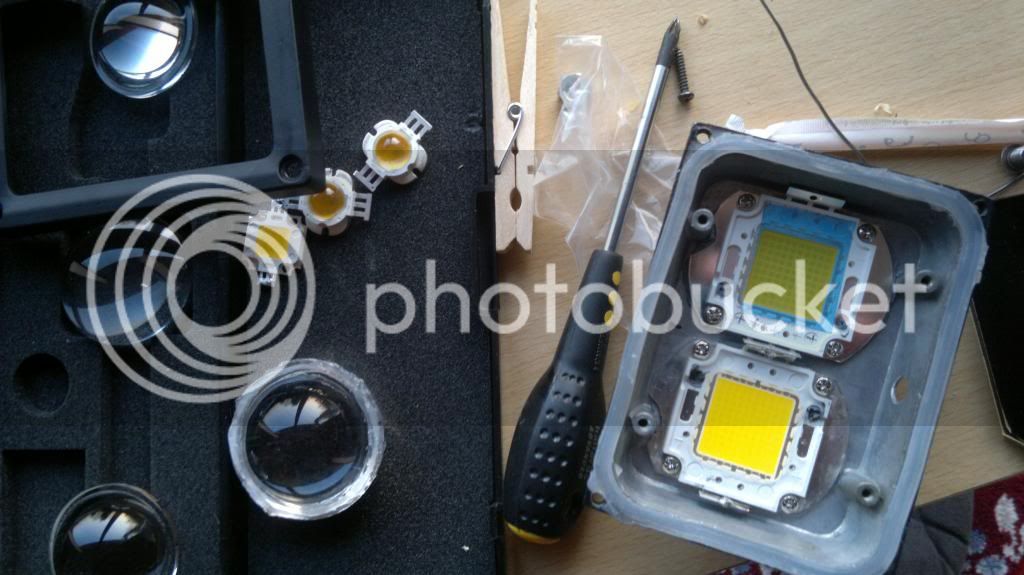
I took my 10w led out of mine and removed the back box as its just empty then installed 2x100w warm 3000k leds on a pwm driver. 30-32v each is fairly safe at around 1-2amps per led in cool night air.
2013-02-24-258_zps582485a2.jpg.html
2013-02-24-258_zps582485a2.jpg

http://s1239.photobucket.com/user/bionicdan/media/2013-02-24-258_zps582485a2.jpg.html
2013-02-19-255_zps509cb831.jpg

I think 40mph should warrant more than 10watt leds :)
 
Back
Top