LightningRods mid drive kit - Iron Horse Sunday

Rotems

100 mW
Joined
May 28, 2014
Messages
46
Hello,

I'm, as many others, bought the GNG 650W and install it on my wife hard tail bike for testing and the feeling was that it’s not going to hold for long and that it’s very unreliable and noisy, so after googling I run into Mike’s site and after few mails I ordered the needed parts to upgrade the kit to belt drive.
Meanwhile, I bought my Iron Horse Sunday.

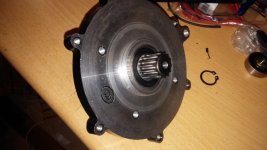
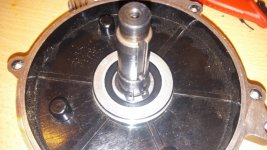
After long, long waiting (few months) the parts arrived:
 
One part was missing, the GNG 450W motor shaft.

One email to Mike and the motor shaft was on his way.

Meanwhile I opened the motor case in order to pullout the 650W motor shat and replace the Chinese bearing to American brand.
I went to my friend workshop to use his 20t press and cracked the motor front case.
Again, email to Mike and a new case is on his way (This guy is unbelievable).
20140730_115848.jpg
20140730_115852.jpg
 
While waiting for the shaft and the front motor case I decided to try and check how the kit positioned on the bike so I started to assemble the kit.
I saw that the upper shits bolts are to long so I replaced them with shorter bolts.
View attachment 1
20140801_110544.jpg
 
Placing the new 148mm ISIS BB with new kit:
View attachment 3rsz_20140801_115848.jpg20140801_115854.jpg20140801_120039_1.jpg

As you can see, the motor is not as close as possible to the bike frame because of the upper mounting sheets angle, I hope Mike will have several upper mounting sheets with optional angles for different kind of bike frames.
 
Wow, looking great. waiting for the videos 8)

and the best part is that youre local - never thought there are any serious bike builders around :)
 
The control unit is not locate at a comfortable angle.
20140805_215924.jpg

So I had to modified it.

Because that the plastic extension is touching the break...

20140805_215949.jpg

I had to cut it
rsz_20140805_221942.jpg


Now it does locate properly.
20140806_235905.jpg
20140807_000010.jpg
 
The shaft and the new motor front case are arrived.
I installed the new front bearing to the front motor case.
 

Attachments

  • 20140812_223834.jpg
    20140812_223834.jpg
    94.1 KB · Views: 1,645
  • 20140812_224106.jpg
    20140812_224106.jpg
    136.5 KB · Views: 3,617
Now it’s time to assemble the motor, so using the 20 ton press to insert the rotor back to the motor shaft.
20140815_075822.jpg
20140815_075829.jpg
20140815_075900.jpg
20140815_075906.jpg
 
According to others, the motor phase connector should be replaced, so I replaced it with Polymax 5.5mm Gold Connectors.
20140827_162914.jpg
 
I assembled the kit to the bike and went to a ride hoping that the secondary chain tension issue will skip my bike, but unfortunately it suffers from the same symptom.

View attachment 3

After a consultant with ferret, we decided on the following actions:

1. Because that the BB is 83mm additional spacers is needed at the lower sheets.

LR cut a metal tube to 3 pieces of ~9mm each, the problems are that these kind of spacers don’t have enough contact area with the two sheets and the right size should be 10mm so we replaced them with 10mm aluminum spacer (this is just a prototype, later I will prepare the final version).

2. The U metal sheet (the one with the tensioner bolt) started to bent under tightening force of the lower sheets bolts so we added nuts on the bolts (we didn’t have a metal tube).

3. We welded two additional tension bolts at the sides of the U metal sheet in order to support the motor sides and prevent it from tilting under the chain torque force.
20140905_111558.jpg
20140905_111606.jpg
20140905_111613.jpg
 
Back
Top