Kona Coilair Supreme - MAC 6T Build

GMUseless

100 W
Joined
Jul 13, 2011
Messages
246
Location
Gulf Coast, Alabama, US
Another Hubmotor Commuter Build (yawn):

Well I managed to run my first build for about 6 months before starting on number two. I’ll start by saying there was absolutely nothing wrong with the first build (link). I was getting a solid 25 Wh/mile, at an average speed of 25 mph for an 18 mile commute.

The main motivation for build number two was really just an accumulation of many smaller issues:

1) I wanted a higher top speed for the sections of my commute that don’t include bike paths.

2) The donor bike for my first build was a light, all-mountain Cannondale that I’d like to return to a pedal only bike for off-road and state park trails where I’d rather not take an eBike.

3) After seeing how kick-ass they are, the wife wanted an eBike. So it was a good chance to get myself an upgrade without having to ask.


Anyway, the donor / core bike for this build was a 2007 Kona Coilair Supreme. I got it off eBay, on which the auction included the 7 inch travel frame, Fox DHR shock, Marzochi Bomber fork, and seatpost and saddle.
The goal was a top speed of 35mph, the ability to have as much pedal input as possible, a 20 mile range, and consumption target of less than 35 WH / mile.


Frame Overhaul and Component Spec:

I didn’t start taking pictures until I began to rebuild the frame…so I don’t have much BEFORE to show here.

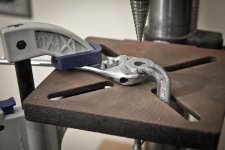
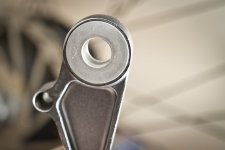
After receiving the frame I removed the fork, headset, and other misc components. Then I broke apart the rear triangle, pulled all of the bearings and pivots, and removed the swing arm. Pulling the swing arm was a bit of a bitch. I finally managed to press the bearing out using an 8” vice, a ¼” drive 1” hex socket, and a brass napkin holder ring (which provided an offset between the frame and the vice allowing the bearing somewhere to be pressed to.)
Once I got everything broken down, I thoroughly inspected the frame and each piece of the triangle…looking for any show stopping cracks or damage. There were plenty of paint chips, but no major damage. There was a small indention (like 3 mm across) on the bottom of the frame just above the bottom bracket. Other than that, everything looked pretty good.

Also, the previous owner had recently replaced all of the bearings and bushings…so there was very little play in the rear triangle and all of the pivots in looked in pretty decent shape.
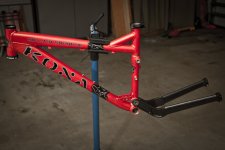
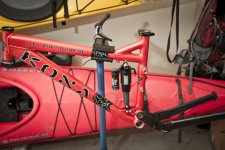
The pic below is the first one I took of the build, which at this point I had already re-attached the swing-arm. The paint on the rear triangle is just a flat spray coating, with a Hammered finish spray paint on top of that. That paint has a bit of polymer in it so you get a slight rubbery feel to the finish…and it seems to hold up well. But, really it looks nothing like a professional paint job.
IMG_4223.jpg

The frame came with a Fox Air DHX 5.0 shock that I popped in here. There’s a choice of placement that affects the head angle. I believe the front one being the less aggressive of the two. I could be totally wrong here.
IMG_4225.jpg


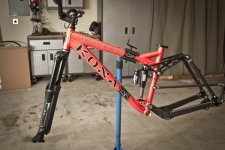
I then re-assmbled the rear triangle, the floating brake arm, the dropouts, and the front headset and fork.
IMG_4519.jpg

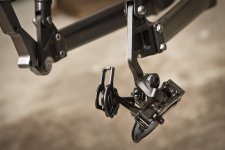
On my last build, I rarely used the rear derailleur, leaving the rear almost always in the 11T. I did most of my switching in the front derailleur. So on this build I got a decent Shimano XT front D, and a craptastic SRAM 3 rear D.
IMG_4523.jpg

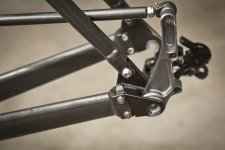
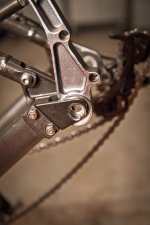
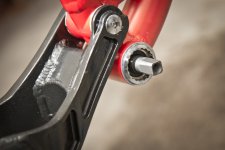
In these shots you can see how the floating brake fits into the rear dropout. Also, since the dropouts are removable, I actually fit the dropouts to the wheel first, then attach the dropouts to the bike.
IMG_4536.jpg
IMG_4527.jpg
IMG_5000.jpg

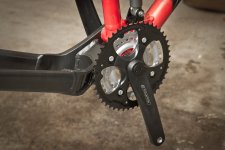
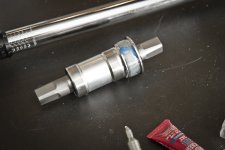
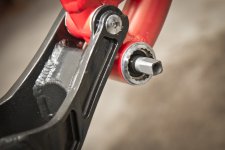
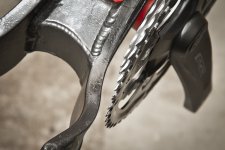
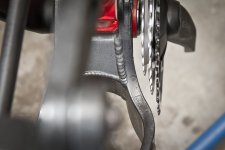
I got an FSA crank set, with a 48T large ring and square taper drive. So I picked up an old school Shimano UN73 bottom bracket (68mm shell) with a 122.5 mm length. From measuring the best I could, I figured this would just accommodate the 48T.
IMG_4533.jpg
IMG_4536.jpg
IMG_4541.jpg

Once I got the crankset on, I indeed got lucky with the clearance. I’ll have to wait and see if it rubs the swing arm when the suspension bottoms.
IMG_4542.jpg
IMG_4543.jpg
 
MAC KIT FROM CELLMAN:

I ordered a 6T MAC and controller from Cellman at http://www.emissions-free.com/ Paul (Cellman) provides a great service and great gear, just be prepared for a little slower experience. There is no Amazon prime when ordering from China, and that said, I think Paul run’s a pretty good show.

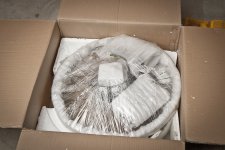
The kit arrived well packed and in perfect condition:
IMG_4992.jpg

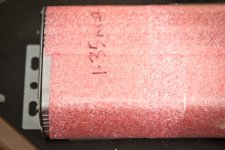
And Paul was nice enough to write the shunt value on the controller shrink wrap.
IMG_4994.jpg

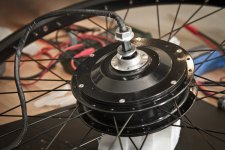
The motor ships ready to install with the hall and phase wires terminated, but I had to fit the floating brake bushing on the axle which meant separating the Andersons and pulling the pins on the hall connector.
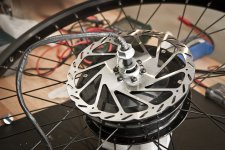
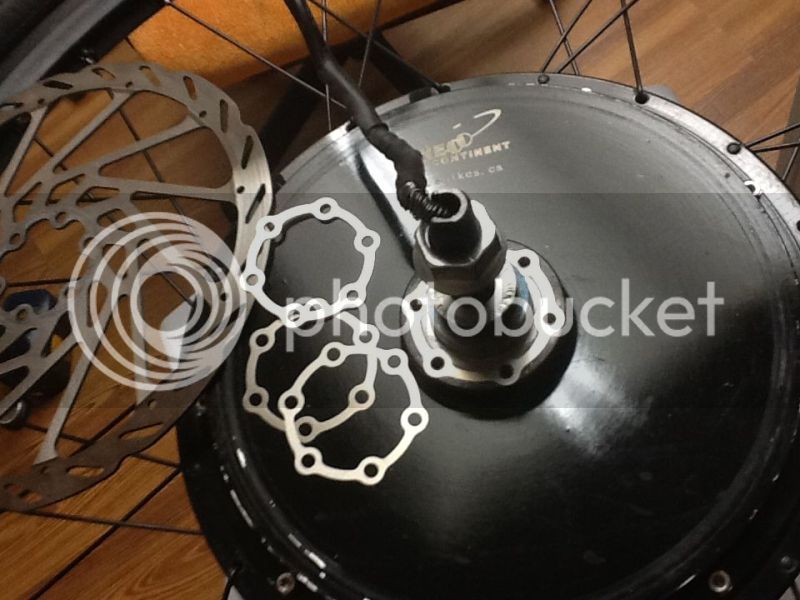
I mounted an Avid 203mm rotor to the motor:

IMG_5009.jpg
IMG_5010.jpg


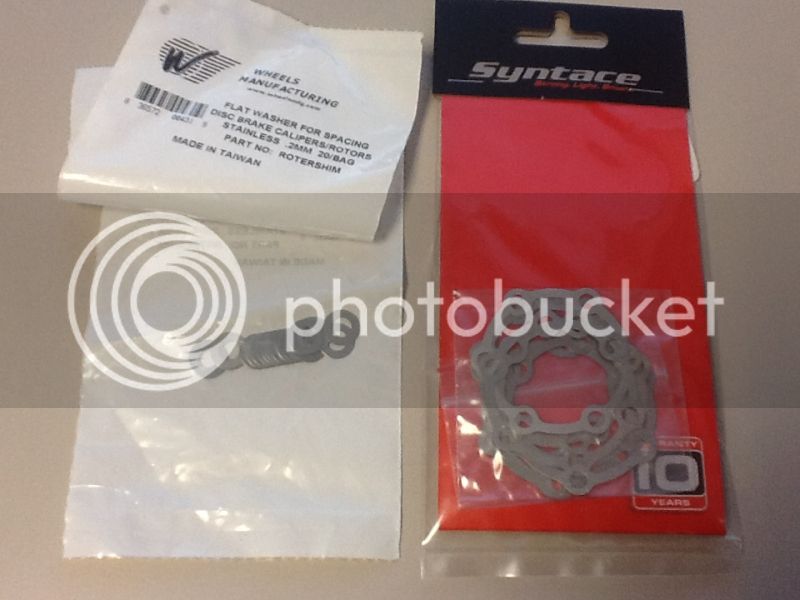
The screws that shipped with the brakes were too long, so they needed to be shimmed up with the washers shown.
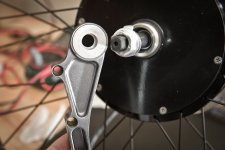
When I got to mounting the floating brake, the bushing was too small to fit on the motor axle. Normally, there is a 9mm skewer that fits into another piece of the bushing. So, I just drilled the bushing about a bit in order to fit the axle using some serious half ass mounting on the drill press…

IMG_5012.jpg
IMG_5013.jpg
IMG_5014.jpg

The end result fit pretty well. But, you’ll notice there is still a ½ mm space/lip on the hole. That resulted in a little play once mounted. Next time I pull it apart, I’ll pack that area with something to dampen the play.

IMG_5020.jpg


With the dropout mounted on the brake side, things just fit. Later with everything snugged up there’s just enough axle threads left to fully seat the outer nut.
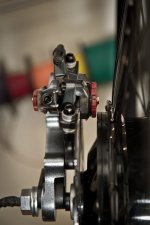
The next photo below shows the rear view…everything just fit. But, due to the wide drop out and brake mount, there’s no room for a torque arm on this side. Also, the 203mm rotor is just tall enough to clear the MAC motor. Anything else would have required some mods.

IMG_5021.jpg

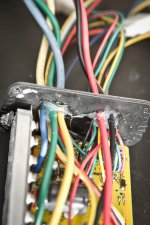
The Cellman controller that shipped with the kit is an Infineon based 12 FET. I pulled the shell to paint it black (I know that lowers the thermal conductivity a bit, but that’s ok. 1800 watts at 48 volts isn’t really working a 12 FET that hard.) While I had it open, I laid some silicone into the wire ports to seal that up better, and put some Arctic Silver thermal paste on the FET shell cooling block.

IMG_5078.jpg
 
ROAD READIFICATION:

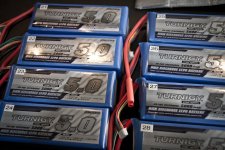
I got 8 Turnigy 20C 6s 5ah LiPo bricks from Hobby King. All of the LiPo showed up with what looked like good voltages, but one was out of balance. I numbered this batch starting in the 20’s.

IMG_5156.jpg

I tested each pack, charging and discharging each a total of 5 times with the Hyperion 1420, monitoring capacity and balance. Then I charged them all up to 4.15 volts and let them sit for a few days. I found one leaker: cell 5 in pack 8…the same one that shipped out of balance. I used it a while in the pack, but it just continued to fall out of balance. I just ordered a replacement this week.
So, 7/8 packs were good: 88% good quality. Par for the course with Hobby King. The downside to theses larger packs is it’s more expensive to order extras…and these were only $42 each. I can’t imagine how much it sucks if you’re ordering the $75 packs.

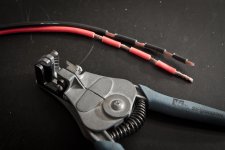
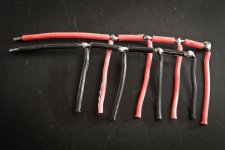
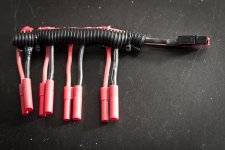
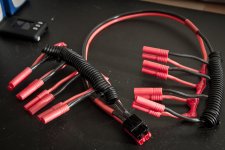
I built up some harnesses much like my previous build: section stripped some wire into a bus like configuration. I tried to align these so the solder joints were staggered between the two sides, but still used the additional black plastic as an extra insulator.

IMG_5501.jpg
IMG_5499.jpg
IMG_5500.jpg
IMG_5506.jpg

I used a pair of Andersons at each parallel group, and use a jumper on the controller side connection to series the groups into the configuration I want; in this case 12S4p.
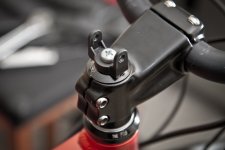
On my last build, I kept wanting my CA centered instead of offset on one side of the handlebars. So this time, I replaced the bolt holding the star nut in the headset top cap with a longer one. Then, I threaded it through the standard CA mounting piece included with the handlebar mount.

IMG_5079.jpg

That got me a perfectly centered headset mounted CA. I added a controller on/off switch just under it.

View attachment 4

For the torque arms, I only had room on the drive side to do anything. I had one of the Grin V2 arms that shipped with the kit for the last build. I then took a piece of flat mild steel and cut and filed it into to shape with a hack saw and hand files. I then drilled it and attached it to the frame using longer bolts in the rear dropout attachment. A third bolt attached the Grin torque arm. It all got the same crappy paint job. Sorry about all the dust in the photo…I just used an air blower to ‘sweep’ the garage and this got covered in sheet rock mud dust (leaky water heater replacement / dry wall repair.)

View attachment 3

There’s not nut on the axle holding the torque arm on, but the bolt holding the mounting arm has it very tightly attached. It’s not giving.

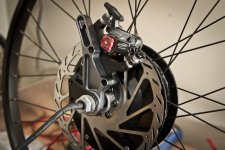
On this photo of the brake side of the motor you can see the floating brake attached. It actually hangs behind the motor. You can also see in this photo that I have the motor upside down in the drop out, encouraging water entry. I’ll have to fix that next time I pull the wheel.

View attachment 2

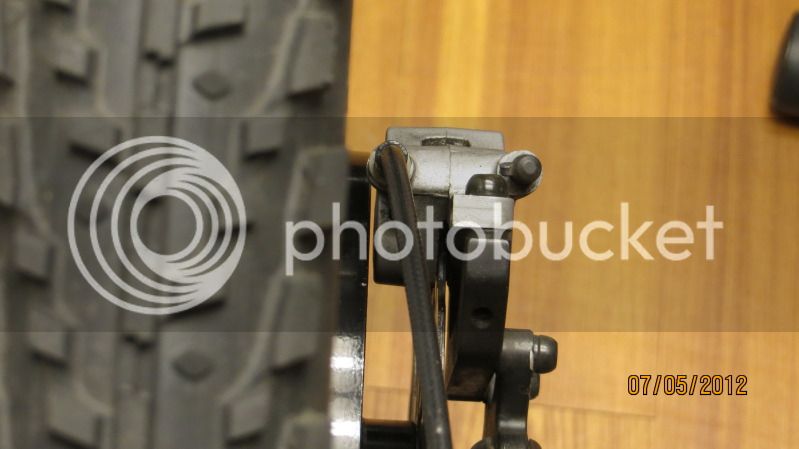
You can also see here, I’ve used some cut rubber tube and zip ties to hold the floating brake arm close to the rear triangle. It’s not tight, but just there enough to prevent that play in the brake arm bushing allowing the caliper to drift back and forth. I think once I pack that bushing with something I could do away with this.

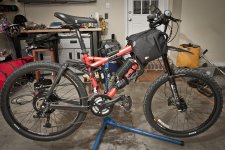
The LiPo got mounted side saddle using Case Logic DVD bags. I’ve inserted aluminum plates into the bottoms and outer walls of the backs to give some puncture resistance…but I recognize there’s still some exposure. But it sure fits in there easy. The controller is bolted onto the water bottle cage bolts. I’m going to make a plate for better mounting, but for now I’m using a zip tie on one side. Also, I’ve got some clean up to do on the wiring. I just shoved all the connectors into a cut up tube and velro’d it: cheap instant waterproofing.

IMG_6662.jpg

I’ve got Avid BB7 mechanicals on the rear, and Avid Elixer 5 hydraulics on the front, both with 203mm rotors. This is one of the best braking bikes I’ve ever owned. The rear tire is a WTB Graffiti…like a hookworm knockoff. I’ve kept the knobby on the front as it gives me a (perhaps false) sense of security.

As far as performance, I’m getting the 35mph I wanted, but a closer to 38 WH/mile on average. I can still make the 18 mile commute with no problem. The slack angle and 7 inch suspension handles that speed very gracefully…and the frame and rear triangle shows very little play at those speeds. And the 48/11T gear ratio allows me to have decent pedal input up to about 30mph.

At this point I’m pretty happy with it as a commuter. I’ve still got some obvious work left…but these things are never done are they?
 
Oh very nice!!! I like what you've done with it so far. I especially like the battery harnesses and the battery placement using the CD bags. I'll have to check in with you later to see how well they hold up to the batteries bouncing around. I haven't figured out where and how I want to mount my batts yet so I'm still carrying the batts in a backpack. I'm not sure if the Kona Coilair was more a free-ride or down hill style frame. Either way it looks pretty beefy and I think it will make a more than enough strong and stable frame for your commutes.

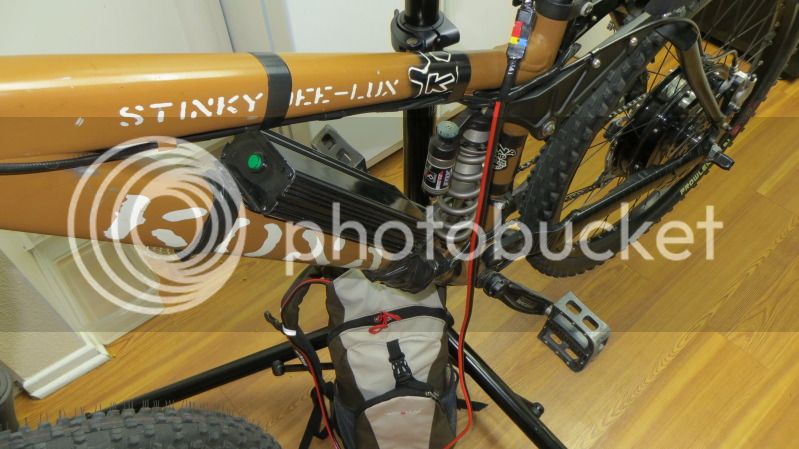
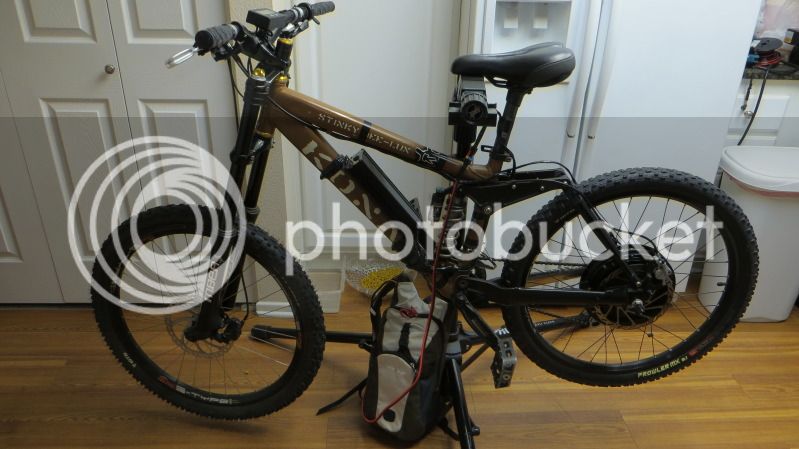
I'm in the process of building up a Kona Stinky Dee-Lux but more of an off-road bike. My rear dropouts are a bit more beefier and I'm able to put torque plates on both ends of the axle. I also don't have that floating rear brake bracket that you have. But we both have the same 8-inches of suspension travel front and back. We both have the awesome Marzzochi Bomber front fork.

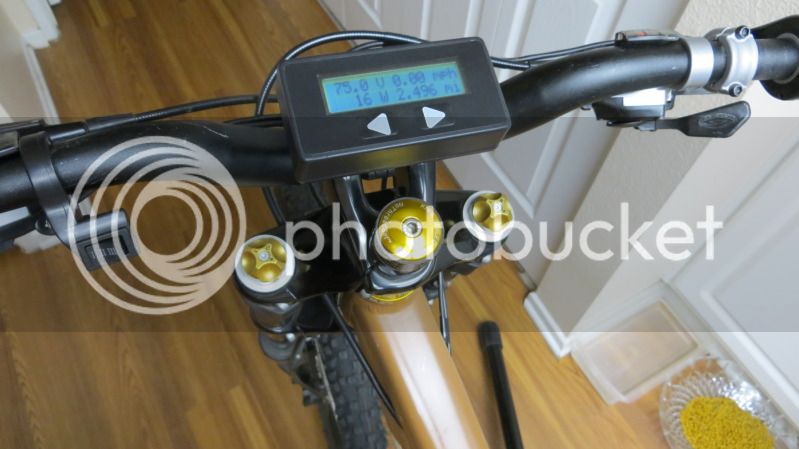
Interesting that you went from a 9C motor to a geared MAC motor.... because I went the other way. I originally had my BMC v-2Torque motor on there but changed it with a low RPM wind 9C 2810 DD motor. The buzzing and moaning of the geared motor was a little noisy on the trails especially if you're trying to get max torque at the lower speeds. The 9C has slightly more torque and can handle a lot more power and heat. And since I'm building mine for more of an off-road use I went with a larger 18-FET Lyen controller (painted black like yours). The 9C is quieter on the trails so I'm a lot less noticed and I can actually sneak up on unsuspecting hikers easier. And I'm running 24s lipo so I can actually hit 35mph on this slow wind 9C (pic with CA showing 75v is when I was only running 18s Lipo).
81FETInfineonmountedonStinky.jpg

CAshowing75v.jpg

working_in_kitchen.jpg
 
Thanks man. I love these Kona bikes. Your build looks good as well.

The Coilair Supreme was only made a few years, but the Coilair line was marketed as a lighter weight version of the Stinky...they billed it as a Freeride rig that you could still climb with. They were going for a bike that didn't need shuttling, but could still handle some downhill. so, the main difference between the two are weight savings things like a single crown Bomber fork, Fox air shock, lighter components, etc.

For the motors, you might have seen me mentioning a 9C in other threads. But I got the 9c 2810 for my Yuba Mundo Cargo bike, my third build. I'm running a bit behind on these threads! My first build used an Ezee kit from eBikes.ca, which later got moved to the wifes bike. I think for offroad you got it right. The 2810, even a 2812, is a good match. Allthough, if I ever switch this build up to a complete off-road bike, I might try some type of Mid drive.

The MAC 6T gets you some awesome incredibly efficient speed, with still some decently efficient torque on the low end when it's outside it's curve. And, it's fairly light weight.

By the way, my 9c 2810 isn't really more quiet than my MAC 6T. On the 9C I get this loud rumbling that peaks a certain RPM and then quietens back down...only happens when accelerating under high load. Do you get that on your build? But, my 9C is on a 75 lb rig, with my 200lb ass, and two 50 lb kids on the back, and sometimes a load of groceries. I'm running 18s on that one. How many amps are you running?

The DVD cases work well. They actually don't bounce at all. What I like about those DVD car cases is there's tie down loops at every corner...so the bags are pulled tightly to the frame with releasble zip ties. Tied to the frame, they get the benefit of both front and rear suspension. I pack out all void space with bubble wrap, so everything in there is nice and tight. And the aluminum plates on the bottom and exterior side keey things semi rigid and protected from punctures. The bags still just allow and inch of clearance for my knees when pedaling. With your triple crown fork, the upper stanchions will need more room to turn, so that might limit that application for you. Still, if you can figure it out, I think that's the next best place if you don't have front triangle room.
 
bzhwindtalker said:
I love your pics! Nice bike too, looks sharp

Thanks man! The camera is the Canon 7d, with a 17-55mm 2.8 lens.

One day I hope to convert this bike to mid-drive...especially after watching your videos. I look forward to seeing how you manage the new design your working out...
 
Great Job with the Build! Especially mounting the CA directly to the bike. I was Thinking about how to do that, your idea looks nice and neat.
GL with your future endeavors.
 
dodjob said:
I did exactly the same mounting for the CA. that's IMHO the slickest way to mount it ;) Very nice build!!!

Thanks man. I ended up using that Philip's head bolt because it was all I had laying around that matched that thread pattern. I meant to swap it to a 5mm socket cap bolt...but once I put the CA on I totally forget it was still there....until I posted that pic.

I was sure someone else had done that, just couldn't remember seeing it. One of the reasons to post even the most mundane, non-groundbreaking builds! :D
 
Great build, I had the same problem with the disk screws being too long,
filing them worked.
But the disk brake caliper was too fat and rubbing on the hub motor,
I see yours are just about right, do you know of any hydra brakes that will fit?
 
GMUseless-You can salvage that 6s brick, especially if the bad cell is on the end[they usually are I think].
Remove the pair of cells that contains the bad one, but leave the board on top. Then solder the primary lead at the board to the end/start of your new 4S brick.
Buy a Turnigy 2S 20C 5Ah for $15 and tape the two together. Won't look as sweet, but it works.
Ck out the thread about recycling cells in the Batt. section.
 
GMUseless said:
Thanks man. I love these Kona bikes. Your build looks good as well.

The Coilair Supreme was only made a few years, but the Coilair line was marketed as a lighter weight version of the Stinky...they billed it as a Freeride rig that you could still climb with. They were going for a bike that didn't need shuttling, but could still handle some downhill. so, the main difference between the two are weight savings things like a single crown Bomber fork, Fox air shock, lighter components, etc.
Ahhhh okay... I see the differences in weight savings now that you pointed them out. Thanks


GMUseless said:
For the motors, you might have seen me mentioning a 9C in other threads. But I got the 9c 2810 for my Yuba Mundo Cargo bike, my third build. I'm running a bit behind on these threads! My first build used an Ezee kit from eBikes.ca, which later got moved to the wifes bike. I think for offroad you got it right. The 2810, even a 2812, is a good match. Allthough, if I ever switch this build up to a complete off-road bike, I might try some type of Mid drive..

You're right a mid-drive would get the weight off the wheels and with the right gearing would have superior torque for climbing. Problem for me is that I haven't seen a mid-drive system yet that's runs as quiet as a DD hubmotor... and I do like running quiet and stealty as much as possible. I'm anxiously waiting for Justin to make final developments to that switchable geared/DD motor that he introduced in his last VEVA presentation.


GMUseless said:
By the way, my 9c 2810 isn't really more quiet than my MAC 6T. On the 9C I get this loud rumbling that peaks a certain RPM and then quietens back down...only happens when accelerating under high load. Do you get that on your build? But, my 9C is on a 75 lb rig, with my 200lb ass, and two 50 lb kids on the back, and sometimes a load of groceries. I'm running 18s on that one. How many amps are you running?
Well I'm a BIG guy and so I weigh as much as you and your kids combined. I do get that low rumbling noise only between 8 to 18 mph when under heaviest throttle and I'm pulling over 3 kilowatts, and yes it quiets down fairly quickly at higher speeds or if I just ease of the throttle slightly. But the 9C's low rumbling sound is not attention getting as the moaning/whining noise of the BMC geared motor. In fact it's not much different sound (and could be mistaken) for the sound my knobbie tires make on pavement. I've actually had someone ride my bike by me a few times under heavy acceleration (while I stood stationary in the street) and that's the sound I was hearing.

With my BMC geared motors the moaning at low rpms and the whining is very distinct and very much more motor-like sounding. There's no way you can mistake it for humming knobbie tires on pavement. The best example I can give is this video clip with a BMC V2-torque motor one my latest commuter ebike (6th ebike build). The BMC V2-T motor is more equivalent to a MAC 10T motor so it might sound different from your MAC 6T motor. The motor sound you hear on the video is probably 10 times louder than what you hear as the rider because the GoPro camera mouted to the frame picks up the motor noise much better.
[youtube]AYh8gBR-Hcg[/youtube]

As for power... I'm running 24s Lipo (88.8v nominal, 100v hot off charger) with an 18-FET Lyen controller (where I haven't beefed up the shunt traces yet nor changed any amp limit in the software setting). I'm seeing as much as 4400 watts on the CA and getting MaxA readings of 98A.

GMUseless said:
The DVD cases work well. They actually don't bounce at all. What I like about those DVD car cases is there's tie down loops at every corner...so the bags are pulled tightly to the frame with releasble zip ties. Tied to the frame, they get the benefit of both front and rear suspension. I pack out all void space with bubble wrap, so everything in there is nice and tight. And the aluminum plates on the bottom and exterior side keey things semi rigid and protected from punctures. The bags still just allow and inch of clearance for my knees when pedaling. With your triple crown fork, the upper stanchions will need more room to turn, so that might limit that application for you. Still, if you can figure it out, I think that's the next best place if you don't have front triangle room.

Great info. Thanks. I'll have to consider all this when I finally decide how to mount my batts. I"m also looking into those Falcon EV frame bags that Neptronix raves about but the triangle on our Kona frames aren't that big and don't give much room for mounting very many batts. So I'll be looking at canvas CD cases in the stores to see if I can make them work for me. But for now, since I'm just going short distances while riding off-road, carrying the batts in my backpack seems to work fairly well.
 
Wizzbit said:
Great build, I had the same problem with the disk screws being too long,
filing them worked.
But the disk brake caliper was too fat and rubbing on the hub motor,
I see yours are just about right, do you know of any hydra brakes that will fit?

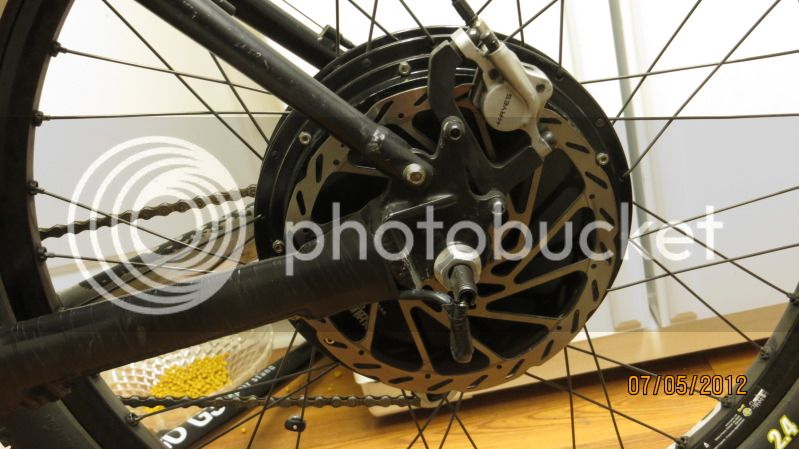
I had the same problem with my Hayes hydraulic brakes. They were scrubbing on the side of my 9C motor's side covers. You need to move both disc and brake calipers farther outboard (away from your hub motor's side covers). Put washers or spacers between disc rotor and motor (I used the spacers). This is the easy part.
IMG_0933.jpg

fd11d25f.jpg

discbrakespacers.jpg


Now you have to move your calipers farther outboard as well. The mechanical Avid BB7's has plenty of adjustability in the inboard/outboard movement but most hydraulic brakes don't have any adjustability at all. You can do what I did and that is to remove material from the caliper bracket (the part that faces flush against your bike frame)... making it thinner and thus pulling the caliper farther outboard. I took my bike to my LBS to do this since they have a special tool that does this job properly. It shaves the material down flat and perpendicular to the screw holes.

My hydraulic calipers now clear the side covers of my 9C motor by just 1.5mm.
IMG_0921.jpg
 
motomech said:
GMUseless-You can salvage that 6s brick, especially if the bad cell is on the end[they usually are I think].
Remove the pair of cells that contains the bad one, but leave the board on top. Then solder the primary lead at the board to the end/start of your new 4S brick.
Buy a Turnigy 2S 20C 5Ah for $15 and tape the two together. Won't look as sweet, but it works.
Ck out the thread about recycling cells in the Batt. section.

I've done four builds with Hub motors thus far. Everyone, I've done with Avid BB7 mechanicals on the rear...except for the wifes bike which used BB5's. (who care's if she's stops huh?)

Everyone so far has fit without mods. But, I've found a few tricks. First, there's TONS of play in the Avid mountings thanks to the spherical washers, and that allows for some lateral adjustments. Second, thanks to these washers, you can easily file the mounting bracket with NO accuracy whatsoever and still be able to mount the caliper true to the rotor.

If you can't fit things, try filing that mount. I've got several Avid mounts sitting around. If you screw yours up and need one PM me and I'll check if I've got one you need.
 
motomech said:
GMUseless-You can salvage that 6s brick, especially if the bad cell is on the end[they usually are I think].
Remove the pair of cells that contains the bad one, but leave the board on top. Then solder the primary lead at the board to the end/start of your new 4S brick.
Buy a Turnigy 2S 20C 5Ah for $15 and tape the two together. Won't look as sweet, but it works.
Ck out the thread about recycling cells in the Batt. section.

Thanks man! Yeah I've thought about salvaging the bad LiPo. But to be honest...I'd realy rather just order a new cell. For lights and odd jobs, I've got some LiFePo4 cells from my kids RC cars and stuff....so it's really more trouble than it's worth.

I'm all about reliability...since I charge in my garage and at my controls bench at work.

Plus, I tend to stockpile and ship all 'recoverable' and 'reclaimable' items to the ES Recylcing Resusing Blackbelt: Amberwolf!!! ( Got some more goodies building up for you AW!)
 
I've used Avid BB7's on my last 3 commuter builds too and I've found another trick with them.
Notice that there is a difference in stack heights of the 2 spherical washers groups (on each side of
the bracket). One group has a stack height shorter than the other. You can simply swap the location
of the 2 washer groups if that gains you a better position for your caliper.
 
Sacman: Dude, I did some work at a Swedish Steel mill a few months back...and there was this electrician there that...instead of calling everyone 'man', or 'dude', or 'hand'...he called everyone 'Sack'. He never said it, but everyone assumed he meant as in 'Nut-sack'. So we all called him 'Sack' in response. Absolutely silly. But as a teen, the 'Sacman' was the bagman...i.e. the dude carrying the dope!

Anyway, I've got a video of me wrecking my first build which was on a Ezee gear motor. My MAC is almsot exactly as loud as that one. Fof the video, I'd mounted some of my Pro Audio gear to the bike to capture some real audio...and just happened to bite the shit out of some wooden boardwalk that morning. I'm using a redhead deadcat windscreen which kills almost all wind noise. You can see it at the end of the video. Anyway, the sound is so precise you can here my chain running through the gears...and the gear motor. But the chain gives you a reference to how load things are....that and sonic boom when I finally eat shit at the end!

http://endless-sphere.com/forums/viewtopic.php?f=6&t=34291&hilit=+wooden

I've never saddles a BMC, but so far the EZEE and my MAC haven't really been much louder than my 9C.


As far as the Back pack battery....I've always considered this an option for offroad riding. BUT!!!!, you need to get a pack that mounts on your hips...not your shoulders. The shoulder straps are to keep things in the place. All the weight should be low on your hips. Look into Skiing and Snowboard specific bags. I routinely carry 25 lbs of laptop, lunch, and clothes in my Gregory Drift...a snowboarding specific pack...and the sholuder straps are usulally loose floating above shoulder with all the weight on my hips. The difference to being on your back is huge!
 
Sacman said:
I've used Avid BB7's on my last 3 commuter builds too and I've found another trick with them.
Notice that there is a difference in stack heights of the 2 spherical washers groups (on each side of
the bracket). One group has a stack height shorter than the other. You can simply swap the location
of the 2 washer groups if that gains you a better position for your caliper.

YEAH!!! You're right. In fact I had to do that with this build since the floating mount sat so far back behind the rotor. Good point Sac!
 
MAGICPIE3FOCUSPOWER said:
Do you now have any play in your bike dropouts?

Not really, no. Everything is still pretty tight back there. I had a clutch problem a few months ago, removed the motor and checked things out pretty thoroughly. Every thing looked good. No wear at the dropouts, or torque arm either.
 
Thanks!

Because I had this frame for normal cycling, but the dropouts worn out (play).
I really love this frame, maybe I had some bad luck.

I really would like to use this frame for E Bike project, but have to find new dropouts first...
 
Yeah, I love the frame too. The drive side dropout is available from a lot of places (since it's essentially the derailleur hanger), but the brake side one is probably going to be tougher to find. I managed to find one when doing this build, and bought it in case the floating brake didn't work out.

It's pretty simple...and you can probably machine it yourself...or get someone to do it. Let me know if you need pictures or dimensions of it.
 
Back
Top