Reviving old e-bike

Joined
Nov 29, 2014
Messages
50
Location
Salt Spring Island BC
Hello, I am new here but have been reading up on the battery information posted here! It has been really helpful, and I am hoping to get some information specific to my exact situation.

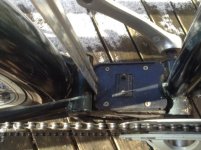
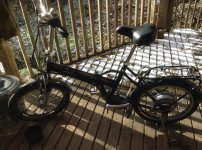
I bought a relatively inexpensive electric bike back in 2008, and I am hoping to get it back on the road. The bike was made in China and I see where on the the gears it says Wuxing so I am thinking this is the manufacturer of my bike. I see where they have one that is similar still for sale. It is a folding bike with a brush-less 350 watt rear hub motor, and it originally came with a 36 volt 10 amp hour lithium battery. The controller has a 15 amp peak output capacity.

I live about 5 hilly miles from the nearest town, and only have time to go in about once a week. I used the bike during good weather for about a year and a 1/2, and then the battery lost the capacity to make the 10 mile round trip and I could not afford a replacement so I stopped riding it. (when I bought the bike I was told the battery was good for 1000 charge cycles and that a new replacement battery would cost $200... which was incorrect! The lithium batteries are good for 1000 cycles or two or 3 years, and loose capacity which each year, regardless of how many charge cycles there is)

So my ebike is 6 years old, but it has only been ridden about 300 miles, and except for a dead battery, I think it is still in perfect working condition.

I have saved up and I am planning on getting a 36 volt 15 amp hour Ping battery. As I understand it the LifePo4 batteries do not have such a strong tendency to loose capacity with each year and with care, this new battery should last me several years. I thought about getting the 10 amp hour, which would probably be sufficient, but about 1/3 of the route to town is up hill, and in 5 miles the road goes from sea level to an elevation of 400 feet. So the additional output capacity the 15 amp hour is capable of will probably help the battery survive longer.

My challenge is going to be connecting this up properly to my ebike, and creating a way to cycle the battery regularly, even if I do not ride the bike regularly. (Like during the winter) Electronics and wiring has never been something I have had any aptitude for. With the internet it seems it is possible to learn, which is what I hope to do!

I have been reading here, and Ping has been really helpful as well. But I am hoping people here can help me with a few of the details of how to do this, and I want to make sure I have the parts I need to do this when the battery arrives.

I would like to be able to easily unplug the battery from the controller and I see where many people recommend 45 amp Anderson power poles. But the people recommending this had 48 volt 20 amp hour batteries. Are Anderson power poles still the best way to easily disconnect and reconnect the battery and controller? Do I need 45 amp power poles for a 36 volt 15 amp hour battery, or would a lower amp rating for the power pole connectors be better for this type of battery?

I have also been reading that there is often a spark when the battery is first plugged in and I really would like to suppress this! I do not want to feel afraid of my electric bike and also it can be bone dry here in summer and sparks are just not a good idea.

Ping said for a small additional charge he can include a properly sized circuit breaker that can also work as an on off switch, so I am hoping that if I use this and have it off when I plug in the battery, that there will be no spark.

But any additional advice on how to avoid sparks would be appreciated!

I have connected up a trolling motor to run on a SLA battery and installed a circuit breaker in the 10 gauge positive line, so I am hoping if I managed to do that, I can also wire up the Lifepo4 battery to my ebike.

I am also hoping to have something like maybe a 36 volt head lamp that I could plug the battery into to drain it down 80 percent so I can then recharge it and cycle the battery during times I may not be able to ride the bike enough to keep the battery healthy. I have found a 36 volt 10 watt scooter head light that might work to do this. Would this work and if it would, roughly how long would it take a 10 watt 36 volt light to use up 80 percent of a 36 volt 15 amp hour battery?

I would post some pictures, but I need to figure out how to do that!
 
Please update your user profile to include your physical location. City, State or Country, depending on how specific you would like to be. At the very least we can refer you to a local ebike expert to get you back on the road.
Your battery replacement sounds like an easy enough task. Ping makes great batteries, but I still would not expect them to last more than 3-4 years. If you don't use it much, cycle life may be a moot point.
You may just want to look at replacing the lithium cells in your existing battery. High-capacity cells like the Samsung 29E or Panasonic ncr18650b may suit the modest needs of your 15A controller just fine.
 
Learning Curve said:
I live about 5 hilly miles from the nearest town, and only have time to go in about once a week. I used the bike during good weather for about a year and a 1/2, and then the battery lost the capacity to make the 10 mile round trip and I could not afford a replacement so I stopped riding it. (when I bought the bike I was told the battery was good for 1000 charge cycles and that a new replacement battery would cost $200... which was incorrect! The lithium batteries are good for 1000 cycles or two or 3 years, and loose capacity which each year, regardless of how many charge cycles there is)

So my ebike is 6 years old, but it has only been ridden about 300 miles, and except for a dead battery, I think it is still in perfect working condition.
It's probable that there was at the time of original problem only one cell might've had a problem. After a long time of sitting around it's possible there are other issues with it, but you might still be able to fix it up to use it for extra range if you ever needed it.

As for claims by sellers for anything to do with ebikes, I'd always take those with a shaker of salt. ;) The cheaper it is, the more doubt I would have on the claims, in general (though some are honest, many don't even know what it is they are selling and just copy info from somewhere else to display on their pages. There is worse, too, but that's not nearly as common.


I have saved up and I am planning on getting a 36 volt 15 amp hour Ping battery. As I understand it the LifePo4 batteries do not have such a strong tendency to loose capacity with each year and with care, this new battery should last me several years. I thought about getting the 10 amp hour, which would probably be sufficient, but about 1/3 of the route to town is up hill, and in 5 miles the road goes from sea level to an elevation of 400 feet. So the additional output capacity the 15 amp hour is capable of will probably help the battery survive longer.

Most likely, it'll help, and you will also have the extra range to go farther if you need to right now, plus you will still have enough range later as the battery ages (or if you end up with adverse conditions on a ride sometime, like extra detours or high headwinds. :) )

There are also other chemistries that can last a long time, depending on how they're stored when not used, and how hard they're used, but the Ping should last you a long enough time if cared for properly.


My challenge is going to be connecting this up properly to my ebike, and creating a way to cycle the battery regularly, even if I do not ride the bike regularly.
Wiring it up is easy enough. If you don't intend to keep the old battery at all, you could move the connector from it to the new one, splicing the wires together via any of a number of possible ways.

If you have andersons installed on the Ping, you'll also need a pair to put on your bike's battery input wires, and soldering them on can be done, or crimping. Same thing with any other connector. Or you can see about having the matching connectors preinstalled on a tail of wire that you can splice into the existing wires on the bike.

As for cycling the battery (assuming you mean fully discharging and then recharging it): you don't really need to do that. Just make sure it isn't left sitting fully discharged or fully charged for long periods and it should be ok. If you prefer, then yes, you can cycle it by just sticking it on the charger every so often to let it recharge and balance itself, and then ride the bike to drain it down some for storage, cuz that's not much work.

Or, if you don't mind the extra work, you can check it's cell voltages periodically, which will let you know if it is starting to have a problem that you can fix, either by simply recharging it as a whole pack and letting the BMS handle the balancing, or draining down any high cells with a resistor or charging low cells with a single cell charger.

There are a few ways to maintain a battery, depending on your level of expertise and time you want to spend on it. :)


I would like to be able to easily unplug the battery from the controller and I see where many people recommend 45 amp Anderson power poles. But the people recommending this had 48 volt 20 amp hour batteries. Are Anderson power poles still the best way to easily disconnect and reconnect the battery and controller? Do I need 45 amp power poles for a 36 volt 15 amp hour battery, or would a lower amp rating for the power pole connectors be better for this type of battery?
The Ah rating doesnt' have anything to do with the connectors you use, but rather the amp draw from the controller when you are riding at the highest load (like uphill). There are 30A versions of the andersons, and other types. There's a lot fo easy to connect/disconnect plugs, if you need to do that.

I have also been reading that there is often a spark when the battery is first plugged in and I really would like to suppress this! I do not want to feel afraid of my electric bike and also it can be bone dry here in summer and sparks are just not a good idea.
For that you can search here on "precharge" and there's a lot of ways to set that up.

But I think there is a way to add a switch to the Ping BMS to "turn it off", and this would also stop the spark.


I am also hoping to have something like maybe a 36 volt head lamp that I could plug the battery into to drain it down 80 percent so I can then recharge it and cycle the battery during times I may not be able to ride the bike enough to keep the battery healthy. I have found a 36 volt 10 watt scooter head light that might work to do this. Would this work and if it would, roughly how long would it take a 10 watt 36 volt light to use up 80 percent of a 36 volt 15 amp hour battery?
If you really need to do that, then 10 watts divided by 36 volts gives you a little less than 300mA. The actual voltage of teh battery will be higher than 36, but we'll use that for this anyway.

80 percent of 15Ah is 12Ah.

So 300mA is 0.3A, and 12Ah divided by 0.3A is 40 hours. So ti'll take nearly 2 days to do it.


I would post some pictures, but I need to figure out how to do that!
http://www.endless-sphere.com/forums/viewtopic.php?f=13&t=14748
 
Thanks for the information! It helps!

It is good to know it is not urgent I have it figured out how to cycle the battery without using the bike if I do not have time to ride anywhere for a couple weeks. Ping told me the batteries will last longer with regular cycling, so in the long run I would like to know how to do this if there is a stretch when the bike is not used. But it makes sense to figure that out after I get the bike running on a new battery. I could always just leave the headlight on a couple days with a cloth over it. I would not forget it was on...

I gave the old battery to my son years ago as it still had enough juice to use on camping trips. He still has it, probably hasn't maintained it well, and lives quite a ways away. So I probably am not able to do anything with the old battery or it's parts.

When I bought the ebike I did not know about the limited shelf life of most lithium batteries and the battery was about a year older than it should have been.

I was always careful not to over discharge it, and I never stored the battery full or empty, always with 1/2 a charge. I also managed to ride it once a month and do a charge cycle, even in the off season. But I suspect it had not been taken care of while in the store. I did talk to a semi local store about rebuilding this and was told I would be looking at about $700. Which if it looses 1/3 of it's capacity every year, is more than it makes sense for me pay for once a week transportation for a year and a 1/2. I am thinking that the 15 amp PIng battery will probably give me at least 3 years of functional use and that even if it looses 1/3 of it's capacity in that time, I will still have enough power to get to town and back, and 3 years of use is worth the price of a new battery.

I do not have a car. I work out of my home, and about once a week I need transportation. I think the Ping battery is my most reliable and economical option in the long run.

So Anderson power poles that are rated for 45 amps would be a good way to plug and unplug my battery once there is wires that terminate in Anderson power poles connected to the into controller? Or would 20 amp Anderson power poles be better with a controller that is rated for 15 amp peak? Or would 45 amp be fine? I know it is usually better to use over rated parts on electrical wiring than underrated...

I was imagining maybe I could make some sort of waterproof plug with faston connectors that would attach the battery wiring to the existing plug on the controller box, and on the other end of this put an Anderson power pole? But maybe it would be simpler just to wire it directly to the wires going into the controller at the base of this plug? I have successfully used crimps to connect 10 gauge electrical wire, and if the wires are not as heavy a gauge I could probably manage to solder them.

I am planing to put the Ping battery in a metal box with inner padding on the back rack, not the original slot under the seat.
 

Attachments

  • show ebike plug.jpg
    show ebike plug.jpg
    49.8 KB · Views: 2,623
  • IMG_0671.JPG
    IMG_0671.JPG
    110.1 KB · Views: 2,623
Learning Curve said:
I could always just leave the headlight on a couple days with a cloth over it. I would not forget it was on...
Just be careful covering a heat source up like that. 10W of heat doesnt' sound like much, but there are soldering irons that don't put out much more than that. ;) If you trap enough of that heat in there, and the cloth is dry enough and flammable, you could have a potential for fire.


I do not have a car. I work out of my home, and about once a week I need transportation. I think the Ping battery is my most reliable and economical option in the long run.
Most likely. Though I don't work from home, I don't have a car either--with CrazyBike2 (and others I've built, and trailers) I don't need any other transportation 99% (or higher) of the time. :) I'm not sure how long each kind of battery will last in practice in my usage, as so far I haven't had a single kind in use for long enough to tell, as I have gotten "upgrades" of various types in shorter intervals than it's taken to wear them out (except for teh SLA and NiMH batteries I've damaged via charger problems and/or inattentiveness, and an already-used RC LiPo pack that has seen a lot of intense summer heat and seems to have suffered because of that and keeping it topped off all the time).


So Anderson power poles that are rated for 45 amps would be a good way to plug and unplug my battery once there is wires that terminate in Anderson power poles connected to the into controller? Or would 20 amp Anderson power poles be better with a controller that is rated for 15 amp peak? Or would 45 amp be fine? I know it is usually better to use over rated parts on electrical wiring than underrated...
PP45s will be fine. I use PP45s and SB50s on most of my power connections, though they do have their disadvantages, and if you want waterproof there are better connectors (mostly from the automotive world). There are a few threads on plugs and connectors, including some in the Technical Reference area, if you're interested in other types.

PP45's can be made somewhat waterproof, by filling the back side with things like Shoe Goo, but because they are actually designed to ahve th contacts "float" in the shell, they can't mate like they were designed if you do that, and may end up with high resistance connections if the contacts don't sit flat against each other (this is what usually causes people's melted shells on motor phase wires and such).

So if you need to make the PP45 connections water resistant, you can fill them front and back with dielectric grease (the jelly stuff you put on car battery terminals, available from most any automotive parts store). As long as it doesnt' get hot where you live, the stuff will stay in place, but if it either gets hot (like here in Phoenix, AZ) or if you need to connect/disconnect them, they get messy. :( (imagine vaseline all over things--it picks up dirt and grime and stuff and it's really hard to clean off; I did this on mine, and wjhile it keeps water out, it's yucky).


I was imagining maybe I could make some sort of waterproof plug with faston connectors that would attach the battery wiring to the existing plug on the controller box, and on the other end of this put an Anderson power pole? But maybe it would be simpler just to wire it directly to the wires going into the controller at the base of this plug? I have successfully used crimps to connect 10 gauge electrical wire, and if the wires are not as heavy a gauge I could probably manage to solder them.
It's probably a lot better to wire directly, and remove (or at least disconnect from) that plug entirely. If you can crimp hard enough, it's mechanically better than solder, beause if the solder wicks up into the wire then vibration and bending can break the wire off teh contact easier than if it were crimped.

I am planing to put the Ping battery in a metal box with inner padding on the back rack, not the original slot under the seat.
Unless that rack is welded as part fo teh bike frame, and not just bolted to the bike, the weight fo teh battery wiggling back and forth on it with pedal strokes and road bumps may well break the rack off.

Even if the rack is "rated" for the weight, remember that every bump you hit may multiply the weight the rack actually "sees" momentarily, and most racks are badly designed for side-loading and sway. I've broken so many over the years just with regular cargo (groceries, etc) that I ended up bulding my own whole cargo bike to get past the problem.

If you do have to mount it on the rack, put it as far forward under teh seat as you can, and don't just strap it on, but make somethign that actually bolts to teh rack that will securely hold it without any motion, and use hard closed-cell foam or padding if you are going to use any, so it doesn't shift around. And recheck teh rack's moutning points and whatnot each ride to maek sure it's not gonna break on your next ride. :)


If there's a way to put the Ping into the original spot, you'd be better off (but you may have to have Ping custom-shape the pack to fit that spot).
 
It's probably a lot better to wire directly, and remove (or at least disconnect from) that plug entirely. If you can crimp hard enough, it's mechanically better than solder, beause if the solder wicks up into the wire then vibration and bending can break the wire off teh contact easier than if it were crimped.

I think I can do that, but I could also make a custom made, more or less permanent plug that would fit very tightly with good permanent contact over the 2 existing prongs. I could cover over the metal parts of this connection once it was in place with molded silicon seal, or maybe something that dries even harder. In this plan, the disconnecting plug would be further along the wires closer to the battery.

PP45s will be fine. I use PP45s and SB50s on most of my power connections, though they do have their disadvantages, and if you want waterproof there are better connectors (mostly from the automotive world). There are a few threads on plugs and connectors, including some in the Technical Reference area, if you're interested in other types.

I have found a wealth of information on Anderson Power Poles here

http://www.endless-sphere.com/forums/search.php?keywords=anderson*&terms=all&author=&sc=1&sf=titleonly&sk=t&sd=d&sr=topics&st=0&ch=300&t=0&submit=Search

After reading many of these threads I am feeling a bit uncertain of my ability to make the proper crimp without the special crimping tool, though there is some excellent information on how to do this.

http://endless-sphere.com/forums/viewtopic.php?f=2&t=18238

http://endless-sphere.com/forums/viewtopic.php?f=14&t=2742


This is what I used to make a quick disconnect harness between my SLA battery and a trolling motor, but I don't see anyone recommending these for use in the connection between an ebike battery and the controller.

http://www.amazon.com/CES-Gauge-Quick-Disconnect-Harness/dp/B0057ZQJ12

Our local automotive supply shop sells these, and I know I can do the necessary wiring crimps, which is a plus. Would these make a good and reasonably safe connection, or is there a reason I have not seen them recommended?

I avoid using my bike in weather that may be really wet, so making a connection completely waterproof is not such a big concern. I think I can position the plug so it has some shelter above it and having a piece of saran wrap handy to wrap the plug in an unexpected down pour will probably be sufficient. ( I hope?) Or I could just travel with emergency grease...

I want to be able to easily disconnect the battery from the bike with a plug, and I would do this regularly, so using the grease all the time, would probably be too messy!

I mainly want to use this battery for my ebike, but with a 36 volt dc to 12 volt dc converter and a waterproof box, I may be able to also use it to power my trolling motor and replace the heavier SLA battery I am using. I like tools that are flexible enough to have multiple uses!

And I will be careful of the heat of the head lamp and that the battery box is secure on the back rack! The safety suggestions are much appreciated!
 
That ebike looks like it used one of those standard "fish" battery styles. I see positive and negative power poles on the bike. Easy to hook up a new battery to.

With this bike it looks like a good cleanup and new battery is all it needs.

:)
 
Yes it did have one of those aluminum fish batteries with the black plastic tops and a key. Ping said the 15 amp battery cannot fit into that slot and it will have to go on the rear rack. But if I can make a permanently wired tight fitting connection to the existing prongs, it seems that would be easier than going into the controller and removing the plug.

The bike frame itself is built like a tank. It is heavy but it is hard to imagine it ever coming apart! And even though it is weighty, it goes up steep hills without too much work when it is powered. When I first got it, the 36 volt 10 amp hour battery could go 15 miles on a charge, and that was letting the bike do as much work as possible, and a 400 foot climb above and back to sea level twice.

One thing I am really liking about what I am learning here is that it seems most parts are replaceable or can be upgraded! As I live in a isolated area, I would really like to learn how to build and maintain my ebike, and all the information here makes it seem entirely possible to learn!
 
I find 9 times out of 10 with an old ebike its only the battery that needs replacing. Average people don't know/or can't replace it themselves. The other parts like throttle, motor, controller, etc seem to work fine.
 
Learning Curve said:
`
I think I can do that, but I could also make a custom made, more or less permanent plug that would fit very tightly with good permanent contact over the 2 existing prongs. I could cover over the metal parts of this connection once it was in place with molded silicon seal, or maybe something that dries even harder.

Some type of epoxy or polyurethane would be better than silicone, because silicone stuff can attract and absorb water over time--and if it gets enough water passed thru it into the contacts, it'll corrode them.

But even the other adhesives and sealants aren't perfect, so if over time the seal expands and contracts with heat and cooling differently than the material of the base and/or the wires/connectors, water will seep in there directly and corrode the contacts, and you may not be able to see it. That's the main reason I recommend wiring directly if it's possible--you wouldn't have a flat surface for moisture (even just dew) to pool on and seep into the cracks.

It might not cause any problems at all...but if ti does you end up with less power available and/or voltage sag under acceleration that makes it look like the battery has a problem when it doesn't really.


Also, if the Ping you order doesnt' nromally come with a separate charging connector, you mgiht want to ask for one, so you don't ahve to disconnect the battery to charge it every time. It saves a lot of wear on teh connectors, and makes it less likely to ever short it out or break a wire inside it's insulation between battery and controller. It also means you don't have to worry about doing anything else to prevent sparking at connection.

After reading many of these threads I am feeling a bit uncertain of my ability to make the proper crimp without the special crimping tool, though there is some excellent information on how to do this.
Ther'es other tools that work just as well; I use an old Molex crimping tool that happens to have an A and B crimping point set that works for the PP45 and other variants of that size Anderson contacts. These days I personally have trouble squeezing it hard enough, but I use a rubber mallet to whack it with it set down on concrete and do teh final compression once I've squeezed as hard as I can. :)


This is what I used to make a quick disconnect harness between my SLA battery and a trolling motor, but I don't see anyone recommending these for use in the connection between an ebike battery and the controller.
http://www.amazon.com/CES-Gauge-Quick-Disconnect-Harness/dp/B0057ZQJ12
I'm sure that would work, too, but it doesn't make as good a connection, especially after a number of disconnect cycles, so higher currents thru it tend to drop more voltage across it so less power gets to the controller/motor. I used that same type to connect an old Vpower LiFePO4 pack to CrazyBike2 for a while, because I didn't have any more andersons to use (all of mine were recycled from other things at that time), and it didn't work as well as andersons would have (whcih I did use on the other batteries for the bike).

Ther'es also "bullet" connectors, of which there are a number of types. And Deans connectors, a number of Molex types, Tamiya, Canon, etc. All have their advantages and disadvantages, which is why there is no one single connector for everything. :)

ONe major reason Andersons get used a lot here is that they are easy to make into "keyed' connections, with the four sides ahving "puzzle" interlocks, so you can snap them into blocks that will only fit one way, making it impossible to plug something in backwards, or to plug one connector into another not meant for the same voltage`, but to still use the same basic contacts and shells for everything on a bike--and that means it costs less to do, cuz you can order dozens or hundreds at a time and save a little on each one. For those tha tbuild a lot of bikes or experiment a lot, or build them commercially, it can be cheaper and "safer" that way, if one is prone to just plug stuff in without checking first. ;)


I avoid using my bike in weather that may be really wet, so making a connection completely waterproof is not such a big concern. I think I can position the plug so it has some shelter above it and having a piece of saran wrap handy to wrap the plug in an unexpected down pour will probably be sufficient. ( I hope?) Or I could just travel with emergency grease...
Keep in mind most of the water wont' come from above (especially if its under the seat--that means it's under you, too). it comes from splash-up off the tires on puddles and wet spots. So it doesn't ahve to be rainign at all--just a wet road even without puddles at all you could soak yourself and the bike pretty thoroughly from that. (don't ask how I know :lol: )

But if water isn't a concern, then you could connect it however you want and not worry about sealing it up.

Here in Phoenix we don't have to worry about it very often, but when it DOES get wet, it gets REALLY wet (flooding, often enough). That's one reason I started soldering connections directly on many things, with about the only thing still using a plug is the SB50 battery connection to the rest of the bike itself (which I still use dielectric grease in, though in summer I have to clean it off a lot and sometimes put new grease in), and the charger port (which is a separate PP45 port). I've got some old Canon aircraft connectors around here somewhere that I will eventually locate and change the charging port to, cuz tehy're essentially weather proof, but they're really expensive so I myself wouldn't use them fi I didn't already have them off old aircraft stuff and test equipment. (I'm cheap by necessity)


I mainly want to use this battery for my ebike, but with a 36 volt dc to 12 volt dc converter and a waterproof box, I may be able to also use it to power my trolling motor and replace the heavier SLA battery I am using. I like tools that are flexible enough to have multiple uses!

Just make sure you get a converter that can handle the peak current load of the motor, and potentially very large current spikes, as motors can generate some huge spikes when they startup, especially brushed ones, and may also have a lot of RF spikes coming back on the line that can damage some other electronics.
 
I really appreciate all the information!

I will keep shopping around for the best connectors for my needs, Thanks for all the names. That makes it easier to know what I should be looking at. Someone in my neighborhood may have the proper crimping tool for Anderson power poles, and if not I can probably find someone in town with the tool who could do a few crimps for me. I would like the connections to last!

I used to always bring my bike into the house and let it dry in the wood heat after riding it on damp winter days. But even if I can dry out any moisture quite fast, it sounds like direct wired sealed connections are preferable and I will try to get the parts and tools I need to do this and to practice few times!

Also, if the Ping you order doesnt' nromally come with a separate charging connector, you might want to ask for one, so you don't have to disconnect the battery to charge it every time.

I am really glad you mentioned this! I had assumed from the wiring guide that the Ping battery had separate cables and installed connectors to charge the battery!

http://www.pingbattery.com/content/wiringguide.pdf

I will be sure to ask about this!

And yes, I am looking for a small converter that can handle unusual peaks from the 7 to 15 amp max trolling motor I use on my kayak. The battery has a 30 amp circuit breaker on the positive line, so I am thinking if I decide to use the Ping battery for this, I need a converter that can handle at least 30 amps. Or maybe someday I will get another smaller 12 volt 10- 20 amp hour Lifepo4 , for a little help paddling home against the wind. In some ways I would rather have another smaller, lighter, less valuable, less high powered battery in my kayak. It is very stable, but the smaller the battery the more comfortable I feel.
 
In the past, a pingbattery has a separate connector for charging.

My approach, one I used on an old ebike I got hold of who's battery was long gone, would be to take apart the bike a little bit more and remove the original battery contacts.

Then wire up some good connectors directly to the wires that used to lead to those contacts.

Then build some kind of protective box, to carry the new battery in the same place. Put something soft under it, so it doesn't chafe on the side that is down.

15 ah size a great idea. You should still have some decent capacity in a ping into year 3. More capacity in year one means the battery gets less stress when it's new, and you have longer range for other trips. Then in year 4, you might still have 10 ah of usable capacity left. 4 years is about the max.

I don't think you need to "cycle" the battery. But keeping it balanced is paramount. So if stored all winter, it's a good thing to periodically do a full charge overnight to keep it balanced. IMO, getting it balanced again before you use it is more important than storing part discharged in cold weather. IMO, the damage is done in the summer, when you have it out on the road in hot weather. If you charge, then discharge for storage, I wouldn't take more than 10% off the top myself. You can do that by lifting the wheel off the ground, and running the bike for a few min.
 
So my Ping battery arrived late yesterday. I was very glad not to get any additional fees from Canada customs!

After some further discussions with Ping who was very helpful, we worked it out that for a small additional fee he could install the 45 amp Anderson Power Pole connectors I need, which saved me the problem of trying to make a proper crimp without the special tool or the skills.

I held off building a box for it until I actually had the battery, so I could make sure the system I create is the best fit possible.

And I have a few questions! Probably other people with next to no technical skills will also benefit from the answers.

One thing I had not anticipated is that the BMS is attached to the top of the battery, the top being elevated by the highest side. The picture on Ping's website shows this, but I was too overwhelmed with all the new information to notice and consider what this would mean in building a battery box.

I have 2 options to create a box. I can build one out of plywood, or I can use a metal box I have with a lid, and attach that to a supportive plywood and metal carrier rack. Both options will be attached to the bike rack at the back of my bike. (That is the only practical place for me to put this battery)

But can I safely mount the battery so the BMS sits on the side? I could create some padding to protect it in the case of a collision.... I was thinking of using some of the 1 inch thick Styrofoam pads it was shipped in to create a buffer. And some soft cloth on the bottom.

If I do this, I would have to remove the battery from the box to charge it. As the LED lights would be hidden from view.

Or I can make a less conveniently shaped taller battery box from plywood with a hinged lid, that will keep the BMS at the top.

I am also wondering if I insulate / pad the battery if over heating could be a problem. It rarely gets up to 80- 90 degrees here. Do I need to leave some space for air flow?

I have a couple other things I need to ask, but I will do that in a bit, after I take a couple pictures...

Your much more experienced advice is greatly appreciated!
 
Hi Learning Curve!

I have one suggestion: using coroplast, make an "initial enclosure" to put around your Ping battery - something that fits very snug around it that you can close up with simple packing tape. I say this because it will protect your valuable Ping battery from dents and dings that could ruin it quickly. I make this same kind of enclosure for my batteries by cutting up political signage and taping it together with packing tape. Works like a champ.

Then, make an "exterior hard-case box" in the material of your choice - plastic, metal or wood.

Good luck!
 
Thanks so much for the suggestion jkbrigman! I have a couple sheets of corro plastic on hand and building something from corrugated plastic and duct tape is entirely within my comfort zone! I am already 1/2 done with that! I think I am going to incorporate this into a protective cushioned cloth bag with straps and a vented styrofoam supported plexiglas window that allows me to remove the battery from the box for charging and also see the LED lights.

I would prefer to use the metal box I have, which means the BMS would be on the side. I think I can make something that is lighter weight has the most strength if I can use the metal box I have.... And I think I can put enough buffers on that side of the box with buffers and venting around the BMS so it will be entirely protected.

But if there is a safety concern with this design, I would appreciate knowing!
 
Jeez! You've made hard work of this. You can get really good silver fish batteries these days with Samsung or Panasonic cells that would've slottled straight in. They go up to about 17ah and are much lighter than your Ping - probably a lot cheaper too.

To connect your battery, first remove the plate underneath where the original battery went. That plastic piece with two prongs is removable. There's a connector on the other side. You should remove the piece and run your wires through the hole and connect them to the connector that's already there, otherwise you'll have too many connectors. You can make a simple cover-plate to go over the hole, which you can glue in place with silicone sealant or something similar.
 
Thanks for the heads up d8veh. I have more or less surrendered to the fact I am going to make lots of mistakes, because I barely know what I am doing. As long as I don't hurt myself, or destroy the new battery, and as long as I can use my bike again, I guess it is OK if I learn by wasting a lot of energy doing things the hard way several times over.....

I spent the day happily making the internal cover for the battery using corrugated plastic, duct tape and plexiglas. It was nice to feel competent for a while. But then I ran into some problems attaching the metal box to the back rack. The only U shaped metal straps available at the hardware were too large to hold things snugly or they are the right size but made of copper and seem to be too soft to be reliable connections. I can hammer the steel ones out and reshape them, but that probably weakens the metal. I only get into town once a week and it looks like I will need to go back and find something else I can use. Or maybe I can find something here I can recycle that will work.

I haven't even started on the wiring yet, and I hope it is OK if I leave the battery sit a few days in the state it was shipped without charging it...

I would like to have my system set up when I first do that.
 
Learning Curve said:
I was thinking of using some of the 1 inch thick Styrofoam pads it was shipped in to create a buffer. And some soft cloth on the bottom.
If it is regular styrofoam, then it will compact and crush as vibration and bumps push the pack against the styrofoam.

If it's closed-cell foam, it won't squish permanently, but it will provide some shock protection.

Good mousepads are closed-cell, as is one of the common blue foams used for packing--it's flexible and soft, but not very squishable.


If I do this, I would have to remove the battery from the box to charge it. As the LED lights would be hidden from view.
You could add a clear plastic port to see them.

I would actualy recommend that any padding you put between the pack and the box specifically *not* go between the BMS and the box, because if there is more pressure on the BMS than the pack side for any reason, it will push the BMS into the pack/sense wires, etc.

So on the side with the BMS, just leave a "hole" in the padding where the BMS itself is.


I am also wondering if I insulate / pad the battery if over heating could be a problem. It rarely gets up to 80- 90 degrees here. Do I need to leave some space for air flow?
Wouldn't hurt to do it for the BMS, but the rest of the pack shouldnt' need it.

If you don't want to make the clear window, you could make a hinged cover over just the BMS area that can be opened during charging to see the LEDs, and also to give it airflow if needed (sometimes the MOSFETs can get hot).
 
Thanks for the additional tips Amberwolf! The help is really appreciated.

I managed to get into the hardware store, and the metal box is now securely attached to the back bicycle rack. And I think I managed to securely make a crimped connection between the wires going into the controller and the positive and negative wires Ping included with the battery that terminate in Anderson Power Poles. I practiced crimping on some 10 gauge wires before I did the wires to the controller, I could not pull them apart, so I hope I have figured this out and done this well enough.

The next thing I have to do is the part that scares me. I need to cut the positive wire a few inches from the battery, strip of a bit of the insulation connect an inline circuit breaker I can use as an on and off switch. This is the first time i have worked with a wire that is connected the battery.

I have been reading and and watching youtube videos, and if I understand this correctly, it is entirely safe to cut and work with the positive battery wire as long as it does not come into contact with the negative battery wire or anything that could possibly conduct a current between the two. Is there is any additional safety information I should be aware of? I have not yet plugged in the multi pin connectors or charged the battery for the first time. I was planning on installing the circuit breaker first.

And I also want to be absolutely sure I put the ends of the wire in the right place in the circuit breaker. I spent hours looking for instructions and all i managed to find was very detailed explanations about how a miniature circuit breaker works, but not where exactly the wires go in. In the picture below I am pointing to an opening which has a little foot at the bottom the comes up making the hole smaller and smaller as I turn the screw. Am I correct in guessing this is where the wire will go, and also that it will not matter which of the 2 openings for the wire are closest to the battery?


image.jpg

There is also a couple pictures of the battery in a coroplastic duct tape and plexiglas case, and the soft bag I made to hold it. The soft bag with carrying straps fits into the metal box. There is still some fine tuning I need to do, but I am close to hooking up the battery to see how it all works...

A couple other things I am wondering...

Should I charge the battery outside or is this type of battery very safe to charge inside?

Is it OK to charge it using a 70 foot extension cord that is heavy enough to run an electric weed eater?

If the circuit breaker on the positive line, between the battery and Anderson Power Poles is turned off when I plug in the Anderson Power poles, will there be no spark? Will there be a spark when I flip the circuit breaker switch to on?

And I read some where that Lifepo4 batteries in an ebike should be fully charged, and then only used for a short ride around the block before the battery is charged again giving the cells a chance to balance, and this short discharge and recharge should be done a few times before the bike is ridden to full capacity. Is this true? Any advice on how to treat my battery then first few times it is used?
 
Learning Curve said:
The next thing I have to do is the part that scares me. I need to cut the positive wire a few inches from the battery, strip of a bit of the insulation connect an inline circuit breaker I can use as an on and off switch.
Alternately if you have extra PPs you could just put them on the wires from the CB (you can use very short pieces). It'll have better contact if you directly connect it, but if you feel safer not cutting into the battery wire it'll work fine this way, too.


And I also want to be absolutely sure I put the ends of the wire in the right place in the circuit breaker.

Your breaker looks almsot identical to the one on CrazyBike2. I can't quite see the details on your wire clamp but generally as long as you insert the stripped wire between the two sections of clamp, then the screw (from the front, side with the toggle) will secure the wire in the clamp just fine.


I spent hours looking for instructions
It is possible the manufacturer has a specific manual for that model, but you would need to contact them to find out, if it is not on their website.


and also that it will not matter which of the 2 openings for the wire are closest to the battery?
That part depends on the breaker. SOme are polarized. Some are not. If yours is, you'll have to see if there are any markings on it for + and -, or Pos and Neg, etc., or if the manufacturer has a manual.

Should I charge the battery outside or is this type of battery very safe to charge inside?
It's generally a safe type, but nothing is perfect.

If you are watching it during the whole charge process, and have the ability to quickly remove it from the house/etc while it is burning if anything ever happened, any battery is pretty safe. If you do unattended charging, it is safer to do it outside or in a fire-safe place. Any battery, regardless of chemistry, stores a lot of energy and if something goes wrong with it (or it's charger or it's BMS or it's wiring, etc) in the wrong way, it could fail catastrophically. It's not a *likely* occurence, but it *could* happen.

If you're charging it while it's inside the metal box, and it is not near anything that can burn, it's reasonably safe, given the type, but how safe it really is depends on what happens if anything does.


Personally, I bulk charge my NMC and RC LiPo packs somewhat unattended in that I am not always in the same room during the whole charge cycle, but they are also contained inside ammocans with a single vent (which though presently untested for fire containment, *should* work). I store not-in-use packs and batteries outside longterm in an old disused oven, with teh "cleaning cycle" handle locked in place to keep my St Bernards from being able to paw open the door and check out what's inside (Yogi would probably try to eat them).

I am VERY paranoid about fire, having lost my group of four previous dogs to a house fire of unknown cause (best guess by investigators was spontaneous combustion of asbestos mastic under old plastic tiles). I do everything I can to ensure that can never happen again, some of which is probably completely unnecessary but cant' hurt.


Is it OK to charge it using a 70 foot extension cord that is heavy enough to run an electric weed eater?
I don't see why not, it's unlikely to be drawing much current thru it. Probably an amp or two at most.


If the circuit breaker on the positive line, between the battery and Anderson Power Poles is turned off when I plug in the Anderson Power poles, will there be no spark? Will there be a spark when I flip the circuit breaker switch to on?
Correct, to both. The spark when switched on will be inside the breaker. If you need to turn it on and off regularly via that breaker, you can wire a parallel circuit to it for Precharge, with a momentary button and a resistor, so that you hold the button for a few to many seconds (depends on resistor size and voltage and caps in the controller), so it moslty charges up those caps, and then switch on the breaker after releasing the button, and no spark will happen.
 
I talked to my son who is a lot more familiar with electrical stuff than me and he reassured me it is OK to cut the positive line to install the circuit breaker, and as long as I don't somehow connect the positive and negative together it will be fine. I prefer the most secure connection and my crimping skills and tool is mediocre at best, so the direct screw tight connections seems best.

The company doesn't have any instructions on it's website...

My son thinks the direction the switch points on the circuit breaker, when it is off, is probably the connection that should be closest to the battery, and this is supported by the fact there is a diagram on it with an arrow pointing at that hole.


Tomorrow morning I will get this wired into the positive line and charge up the battery, and go for the first short ride. See if my wiring works .... See if the bike still works after sitting under the house for a few years...

I always prefer to err on the side of caution, so I will probably charge the battery in a metal tub or bucket I can get out of the house if I have to. I would charge it outside, but today I read somewhere it is best to charge these batteries in temperatures between 10 c and 30 c. It is colder than 10 c outside these days. So in the winter I guess I will charge it indoors.

I will have to figure out the best place to safely store the battery.

you can wire a parallel circuit to it for Precharge, with a momentary button and a resistor, so that you hold the button for a few to many seconds (depends on resistor size and voltage and caps in the controller), so it moslty charges up those caps, and then switch on the breaker after releasing the button, and no spark will happen.

:shock:

That will have to wait until my son makes it out here for a visit...Because I tried reading about precharge and I have not got even a faint clue what is being discussed... Until then I will put the circuit breaker in a plastic bag, in the battery box, with tape sealing the wired openings and wear rubber gloves to turn it on and off.

Thanks to everyone for all the information and support. I will let you all know if my bike works!
 
Learning Curve said:
Until then I will put the circuit breaker in a plastic bag, in the battery box, with tape sealing the wired openings and wear rubber gloves to turn it on and off.
No need for that--any sparks will be entirely contained within the CB housing and safe. :)
 
The circuit breaker is installed, and nothing scary happened! And the multi pin connector is plugged in and the battery is being charged.

But I wish it had come with some instructions so I had a better idea of what to expect. The first couple minutes after plugging in the charger, none of the lights on the BMS lite up at all, and just as I was beginning to panic and think I had maybe plugged it in the wrong way, all the lights came on. The have not been blinking on and off at all. At first the chargers fan was noisy and the 2 lights on the charger were red. Then after about 1/2 an hour one of the charger lights turned green and the fan shut off for a minute or 2. Then both lights on the charger turned back red and the fan came on. Then a couple minutes later one of the charger lights turned back to green and the fan turned off. It did this a few times for maybe as long as an hour, but now the charger is showing one red light and one green light and the fan has not come on , and the green light has stayed green for about 1/2 an hour.

Which from what I read means the battery is fully charged, the cells are fully balanced and it is ready to be unplugged from the charger?

But from what I read in other places, the first charge of this battery can take 10 hours... And it has been nowhere near that!

Should I leave it plugged in or should I remove the charger now?
 
Oh and Amberwolf... I checked out Crazybike 2 and it made me smile... You have to be very good at what you do to create something that works but looks that discombobulated!

And the circuit breaker is in a baggie. It makes me feel more at ease with it even if it is silly.
 
I took it off the charger. Near as I could tell the cycling had finished and the battery is fully charged. Today is dark and really rainy so my first test ride will have to wait till tomorrow when it is supposed to be dry and sunny!
 
Back
Top