#1 The long road

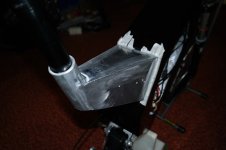
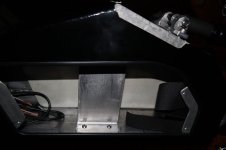
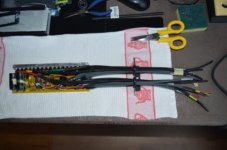
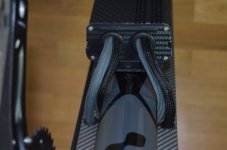
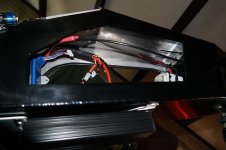
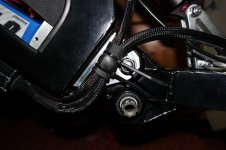
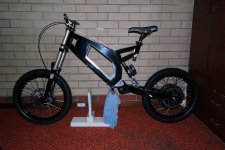
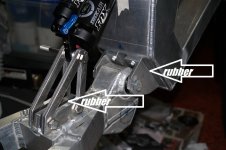
Looks like my rubber shim between swingarm mount and frame is compressing im loosing bolt tension and will fail over time so have seen a mate who is going to mold me some custom material 8). fitted the wide screen v3 ca and it fits nice notice no bolt clean fit.
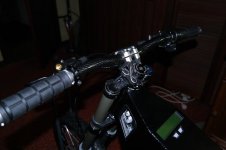
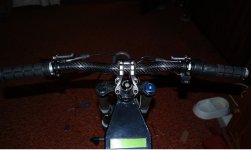
I havent even played with a ca yet but it feels great to have it ready and fitted.
 

Attachments

  • SAM_0881.JPG
    SAM_0881.JPG
    94.4 KB · Views: 4,236
  • SAM_1535.JPG
    SAM_1535.JPG
    64.1 KB · Views: 4,233
Well back at to the fabricating challenges, seat frame is welded, soon as i saw it i thought its out... after mounting and a good look the seat post tube is not straight :( 
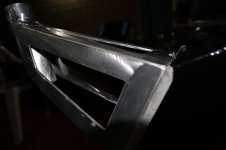
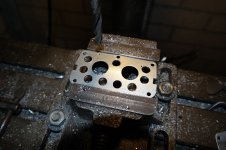
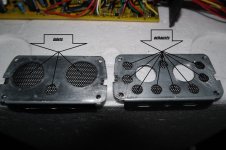
i made sure all plates were vernier accurate.
I hope bolting it to something carefully heating side panels and with a bar inside the seat tube and bending it will work.
 

Attachments

  • SAM_1711.JPG
    SAM_1711.JPG
    72 KB · Views: 4,229
Fixed!! held it in a large vice and inserted a long 32mm tube and then some gentle persuasion is all that was needed, didnt need any heat.

I then cut slots in the top/side panels for looks and for access for some extra internal seam welding just for insurance.this build is back on the road again. :pancake: :pancake:
 

Attachments

  • SAM_1768.JPG
    SAM_1768.JPG
    66.3 KB · Views: 4,201
Small update the new swingarm mount material seems to be working lower compression percentage than rubber. while i wait for last welds to the seatpost frame i replaced the rubber spacers on the bottom shock mount to aliminum had to press out and trim the bottom shock bush to match but all back in and a improvement on how it was.
Next is the controller extending all wires and a crafty cooling mod :)
 

Attachments

  • JJ_004612 - Copy.jpg
    JJ_004612 - Copy.jpg
    183.9 KB · Views: 4,150
Emoto said:
file.php


Well that sure is looking sleek. Who build this bike? Got any more pics?
 
Here is my internal frame brace i spoke of earlier, it connects to the seat post bolts and im looking at it now, and when i designed it i think i dived off the its not going to be strong enough cliff :pancake: .
But now i think i wont need it and it will make my batt configuration cleaner.
 

Attachments

  • SAM_1812.JPG
    SAM_1812.JPG
    67.9 KB · Views: 4,066
Seat frame back from getting the internal welds done he's done well... ive drilled it and it bolts up perfect now just got to do the seat clamp cutout/slit and can prep and paint the sucker, i think thats the last of the fabricating :lol: .SAM_1844.JPG
macribs said:
Well that sure is looking sleek. Who build this bike? Got any more pics?
EDIT madin88 has been to the show and took some pics :mrgreen: more info here "The motor can do 15kW continuous" http://endless-sphere.com/forums/viewtopic.php?f=3&t=61795&start=757eeae0da5082e21d79f2094de006fe01.jpg
Nicolai RN-1 video
[youtube]DKHsDqdL1hA[/youtube]
 
Seat frame painted 6 coats , it is black just grey in photo.SAM_1896.JPG
I have been meaning to make a loading ramp for transporting the bike but this little beauty popped up on special for $89 LENGTH 1.8M WIDTH 290MM
[ at super cheap auto only 2 days left at that price hurry Aussies ] after paying a kings ransom for aluminum welding its a bargain all aluminum folding and i might be able to make a work stand out of it im stokedSAM_1892.JPG
 
GiantEV
Yes automotive 2pac paint job, very unforgiving to paint { especially gloss black magnifies any imperfection } and 2 pac runs faster than usaine bolt, but really durable as you prob know and if put on thick enough/ several coats you can buff out scratches in the future worth the effort i reckon, no clear coat as two much hassle if you are going to repair/buff later, and as you can see in some pics this stuff im using is nice and glossy anyway, the pics dont do it justice.

Just giving the epoxy flow coat on the carbon panels a final buff.SAM_1909.JPG
And some ventilating ????
 

Attachments

  • SAM_1566.JPG
    SAM_1566.JPG
    94.6 KB · Views: 3,962
A bit of a set back on the painting wile curing it got contaminated with silicon eye tried to buff it out but to deep so back to preparing it for painting and have another go.
Moving forward .. i bailed on the internal controller mounting idea, my gut is telling me using the frame as a heatsink would only be able to disipate at a certain rate, so mounting outside and as this is the first build i just want to ride /can experiement later.
While im extending all controller wires itsSAM_1556.JPG "Controller cooling mod time" side plate venting for airflow something easy, low tec / reliable. Should be err cool
 

Attachments

  • SAM_1575.JPG
    SAM_1575.JPG
    94.2 KB · Views: 3,956
Controller 18 fet done, wires extended with braided sleve all connections done and controller painted black i remember reading long ago that black will dissipate heat quicker one of methods controller threads i think.SAM_1929.JPG
The Blower :) SAM_1668.JPG
 
Seatframe done! mounted tried it for size and its perfect good high ect custom fit, as you can see in previous pics welder sanded the weld's looks clean but that weakens the weld so thats why i got him to weld internally on those seams
SAM_2015.JPG

Build is gaining momentum every day i get somewhere dare i say it i can see the end of the "road" :D controller mounted , ca is working fitted motor temp sensor reading correct all good.. doing the electric's trimming wires ect so they fit nice takes longer than you think.
 

Attachments

  • SAM_1795.JPG
    SAM_1795.JPG
    84 KB · Views: 3,788
Grips arrived cut and fitted, 3speed switch and half throttle done i like these easy bits rewarding, still to fit Regen button/ ebrake/ and ignition switch.
 

Attachments

  • SAM_1978.JPG
    SAM_1978.JPG
    74.4 KB · Views: 3,701
  • SAM_1984.JPG
    SAM_1984.JPG
    74.7 KB · Views: 3,701
Its ALIVE
No load Motor test vid http://vimeo.com/108218925
Nice to know motor its ok no hall motor issues ect as you never really know till the first test
On my black perferated controller Im pulling power wheelies CA says @ 50 amps in my first driveway tests :D more fun to come when i reprogram controller. 8)
 
Small steps, wiring routing almost done iv'e used a 1mm rubber strip as a bit of strain relief from the cable ties a- bit ghetto.. but i like it, next is phase / hall connection's got to get that just right with the rear suspension travel, dont want connectors being pulled out do we.
 

Attachments

  • SAM_2067.JPG
    SAM_2067.JPG
    89.4 KB · Views: 3,527
thewmatusmoloki :D That is what im hoping man!! and something to look at and compare while i decide on my next build, im injured atm cant even work on her for a while.
Speaking of looking here is a sneak peak / mock up pic, back when i was making/improving the new seat frame :D
 

Attachments

  • SAM_1336.JPG
    SAM_1336.JPG
    122.2 KB · Views: 3,416
Back
Top