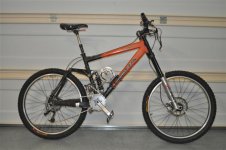
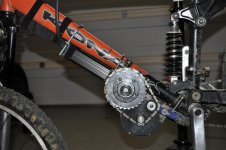
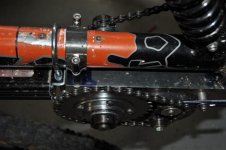
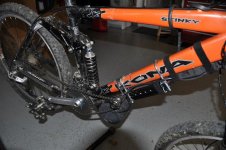
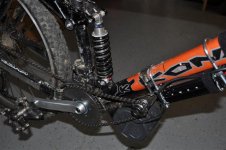
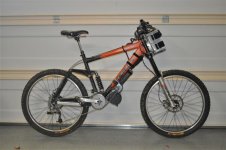
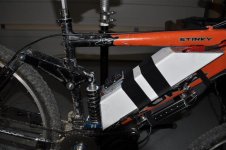
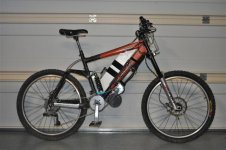
Kona Stinky GM BLT-500 mid drive- frame mounted batteries

Qwiksand

100 W
Joined
Nov 10, 2009
Messages
160
Location
Bowie, MD
The plan is to take a 2004 Kona Stinky (size large) frame,
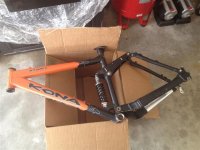
kona frame.jpg

and use the smallest of the BLT series motors from Golden Motors, the BLT-500, to drive a free-wheeling crank set up.
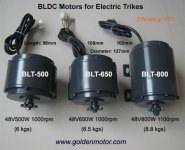
GM motors.jpg

I'm using a freewheeling crank set-up from sickbikeparts.com and miscellaneous sprockets/parts from staton-inc.com.

Optimally, I'm designing this bike as a pedal-assist running 10s lipo and a fun, pedal-optional toy running 20s lipo. I'm using a 72v, 40amp controller from ebikes.ca and can switch my planned Lipo pack (4 x 5s 8000mah zippy packs) from 10s, 16ah to 20s, 8ah by swapping a connector plug. Early testing suggests that I should be able to run on 10s (max of approx 1500 watts) pretty much continously, where running the 20s (peaks of around 3000 watts) will need to be intermittent. I'll be adding a temp sensor in the near future before I push the 20s limits.
 
My journey down the crank-driven Stinky path started with a foray into the cute hub motors from BMSbattery.com. I picked up a couple of the 128's almost 2 years ago and used one in another test build. I was using the little geared hub motor to make the build as light as possible, but it ended up being a bit anemic on power.

DSC_0180.JPG

By placing the hub in the frame, I had hoped to keep my downtube clearance as a lot of places I ride require log crossings.

DSC_0181.JPG

There was a very small reduction on the first stage, if I remember correctly it was a 17 tooth sprocket on the hub motor and a 20 or 22 tooth on the jackshaft. 2nd stage was the main reduction with a 10 tooth on the jackshaft and a 36 tooth on the free-wheeling cranks. Chain tension was adjustable in the first stage via the slotted hub motor mounting bracket (as well as being able to slide the bottom tube clamps, but that adjustment technique is very fiddly since you have to keep the mount square.

DSC_0183.JPG

The jackshaft mounted to the seat tube and the chain tension was adjusted by sliding the entire mount up/down- difficult to maintain squareness to the hub motor and cranks though, partly why I scrapped this approach.

DSC_0184.JPG

DSC_0189.JPG

This was a front hub motor, non-disk mount- it was easier to use the 3 existing bolts on the left side of the motor to mount the sprocket. Ideally, a front hub motor with a disk mount would be used and the first reduction stage would happen on the non-drive (left side) side of the bike/jackshaft.

View attachment 1


This mounting method turned out to be a major pain in the rear to get adjusted correctly. That, and the weak cute-128 hub and this drive project was quickly forgotten.
 
Before I started the "under-the-downtube" mounting project, I was toying around with using my previously built jackshaft to directly drive the rear cassette. This set-up would eliminate the need for a free wheeling crank, just use a standard BMX type free wheel on the jackshaft. It also has the benefit of potentially using more of the rear cluster/cassette as a reduction stage to increase motor input efficiency. I pedalled the bike around like this and it rode nicely, but the fiddly nature of the sliding adjustment of the seatpost mounted jackshaft made me go back to the drawing board. If I ever design a custom frame, I will have another serious look at this set-up.

View attachment 2

DSC_0200.JPG

DSC_0201.JPG
 
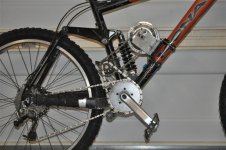
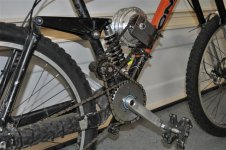
The GNG set-up really caught my attention and made me think seriously about an "under-the-downtube" mounted motor set-up. If built sturdy enough, there's no reason it can't stand up to some log crossing knocks. The little BLT-500 is certainly sturdy enough, weighing in at nearly 13 pounds just by itself!

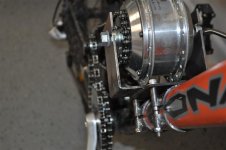
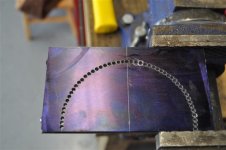
The motor ships with a mounting bracket that would allow you to attach it to a flat surface, but I wanted to get the motor as close to the downtube as possible. After thinking about it for a while, I decided to mount it using the existing case bolts cradled in a chromoly 1/8" plate saddle.

Making the main cradle sides:

DSC_0198.JPG

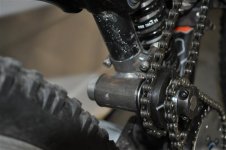
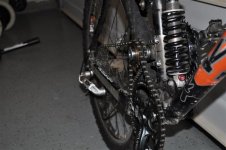
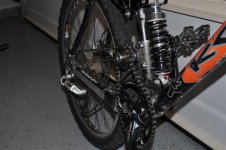
The jackshaft is incorporated into the motor mount, so the only fiddly adjustment entails sliding the entire unit up the downtube to adjust 2nd stage (crank drive) chain tension. The idler sprocket seen in these pictures is only there as I fine tune gear ratios. I plan on making the jackshaft (1st stage) chain tension adjustable wihtin the motor mount itself- as pictured, the jackshaft mount is tack-welded in a fixed position.

DSC_0205.JPG

DSC_0206.JPG

Using a couple u-bolts to temp mount the controller. Wiring hidden by one of those wonderful, stretchy velcro sleeves they sell at ebikes.ca!

DSC_0202.JPG

DSC_0203.JPG
 
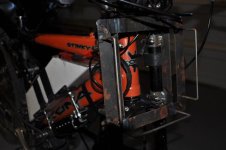
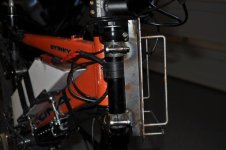
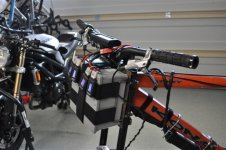
To mount the batteries during the testing phase, I'm using a plastic junction box that I found at Home Depot and mounted it the forks with a bracket I fabbed up.

DSC_0034.JPG

DSC_0036.JPG

Some cell log-8s to monitor

DSC_0207.JPG

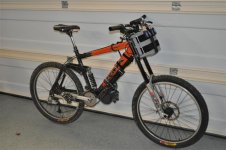
And here she is in full test mode

DSC_0210.JPG

DSC_0209.JPG

Fork mounting batteries is fine and dandy if you're staying on paved trails or areas where quick steering response is not needed. For off-road use, putting 10-12 pounds of weight on an already heavy fork just kills your fine-turning feel and speed. But, putting the motor/reduction down so low makes it the least noticeable electric drive I've ridden thus far. Even with the batteries on the fork and some 16+ pounds of electric drive hanging off the downtube, I'm still able to bunny hop this beast- a couple inches anyway ;)
 
Gday Qwiksand,
You certainly have good metalwork skills why not fab up battery box to fit in the frame to keep
the weight central.

Brettster.
 
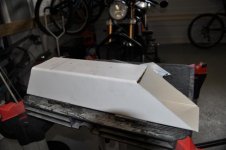
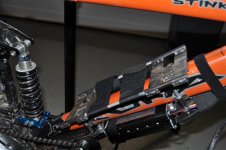
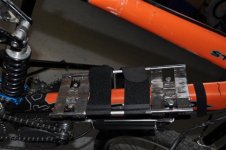
I needed to get the batteries in the frame: this will help with weight balance as well as create a battery system that will be "hot-swappable". Stealing some more ideas from ES, I picked up some 4" vinyl fence posts to use as battery tubes, or battery tube since this is the only one I've got.

I traced a shape to use all availabe triangle space.

DSC_0218.JPG

Using 1/8" x 4" aluminum sheet, I made a couple end plates- they're currently just packing taped on, but I'll remedy that eventually.

View attachment 9

DSC_0023.JPG

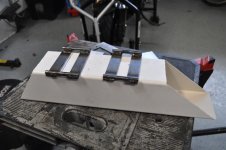
Now, to mount the battery tube to the frame I fabbed up a couple brackets and am using some velcro straps to keep it snug.

DSC_0217.JPG

DSC_0001.JPG

DSC_0004.JPG

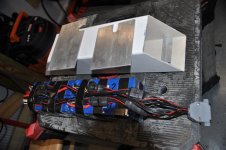
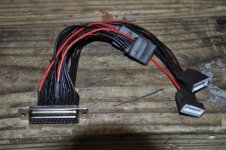
Using a 25 pin connector to mount the cell logs and battery balancing taps

DSC_0214.JPG

DSC_0024.JPG

This is the business end: by swapping this plug, the pack goes 10s or 20s.

View attachment 3

How it sits in the frame

DSC_0028.JPG

And how she looks all up

DSC_0032.JPG
 
Brettster said:
Gday Qwiksand,
You certainly have good metalwork skills why not fab up battery box to fit in the frame to keep
the weight central.

Brettster.

You type faster than I can post pics, my friend! Ask and ye shall receive...
 
Neat job mate, If you the painted battery box orange it would be very stealthy.
Does the rear shock spring hit the box ? seems very close.
 
Brettster said:
Neat job mate, If you the painted battery box orange it would be very stealthy.
Does the rear shock spring hit the box ? seems very close.

Thanks man!

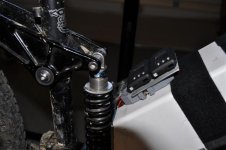
The battery is close to the spring and was a problem when I first installed the box. If you look closely at the battery pics you will see a pair of blue anodized pieces of aluminum mounted at the bottom of the shock. These brackets keep the clearance between the battery and the shock and they're adjustable in case I should need to tweak the location a bit.

Eventually, I'll probably strip the frame to bare aluminum and paint the drive assembly and battery tube black. I'm not a huge fan of the orange and the white plastic battery tube just makes it worse :)
 
Reduction/Gearing Numbers:

First stage: 9 tooth on the motor, 30 tooth on the motor side of the jack shaft = 3.33 ratio
Second stage: 10 tooth on crank side of the jack shaft, 36 tooth on the freewheeling crank = 3.6 ratio

Total reduction = 12.0

No load amp draw from motor/reduction drive (rear wheel disconnected) = 1.2 amps @ 41.1 volts.

No load crank RPM = 110 @ 41.1 volts. Using the known crank RPM (measured via cateye astrale-8 w/ cadence feature) of 110, multiplied by the total reduction of 12.0 I guestimate a motor RPM of approx 1320 @ 41.1 volts. This particular wind of motor then is approx 32.1 kV.
 
How is the motor handling the 20s power? Very nice fab skills my friend! I'll be watching this for sure! Some bids would be cool as well if possible!
 
Heeyyy.. any idea what that motor actually weighed? it's 6kg on the golden motor site, but those numbers aren't accurate..
 
Whiplash said:
How is the motor handling the 20s power? Very nice fab skills my friend! I'll be watching this for sure! Some bids would be cool as well if possible!
20s is a lot of fun,but I've only been tooling around on 20s. The most I've ran through it is about 5ah continuous and after that (seeing peak watts right around 3000- 40 amp controller) the case was warm to the touch, but it was also a pretty cool day. I've got a temp sensor to throw on it the next time I take it off- ill feel better pushing the watts when I can see the temps at the windings. Vids to come, but you and bzhwindtalker set a high bar for action!
 
neptronix said:
Heeyyy.. any idea what that motor actually weighed? it's 6kg on the golden motor site, but those numbers aren't accurate..

I'll weigh it again here when I pull it out of the drive next, but if I remember correctly, it was a bit over 13lbs- website's accurate on this one. I've also got one of the BLT-800 sitting here and it weighs 20.12 lbs- now that's a serious hunk of metal. As you know, these BLTs are mostly case and the actual construction leaves a bit to be desired. I'm following your thread over in the motor section with great interest.
 
Lenk42602 said:
qwik,

where did you obtain your blt 500?

thanks,

Len

Got mine direct from china- goldenmotor.com. I don't see the BLT-500 on the Canadian site, do they stock it? I'd rather order from Canada.
 
He should be stocking it come Dec 15. Last time i talked to him, he had a few on hand. I think he was asking $89 for them, but don't quote me on that one.
 
A quick run through the gears comparing 10 and 20 series LiPo.

http://www.youtube.com/embed/4fzinvZcByA
[youtube]4fzinvZcByA[/youtube]
 
Nice, looks like you could use a tensioner but i can't wait to see how this thing runs!
 
Great build. That motor flys with 74v on it. Did it gain rpm all the way up to 2,300 with the overvoltage? I have a recumbent that I plan to use the BLT-800 with as I have plenty of room under the seat for a long (wide) motor. Thanks for the tip on the Staton-inc site. I was having trouble sourcing sprockets for #41 chain. I wonder why google doesn't hit them at all. Does the 9T that came on the motor run well or is it a little too small on teeth?
 
Back
Top