AussieRider's beach cruiser

Joined
Jul 30, 2010
Messages
332
Location
Seaford, Australia
G'day folks.
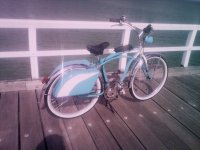
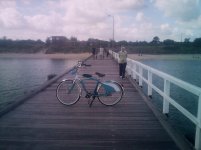
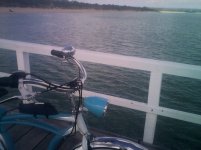
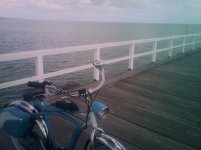
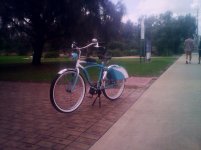
I'd like to share my latest project with yous. A beach cruiser based on a Mongoose Renaissance alloy frame.
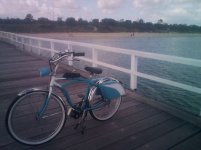
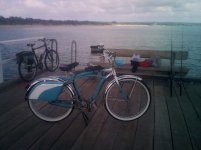
I was aiming at a 1950's Chevy style. Big whitewall tyres, lots of chrome & shiny bits.
IMG_20301117_134214.jpg
IMG_20301117_132631.jpg
IMG_20301117_132834.jpg
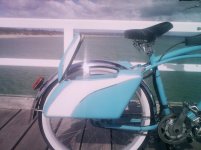
Fibreglass panniers give a bagger style to it. Made them myself.
IMG_20301117_131420.jpg
IMG_20301117_131537.jpg
IMG_20301117_132521.jpg
Made the 4 speed T-bar shifter & headlight to keep the style I was after.
IMG_20301117_131612.jpg
IMG_20301117_132223.jpg
IMG_20301117_132602.jpg
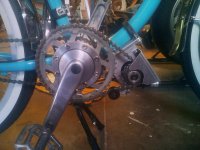
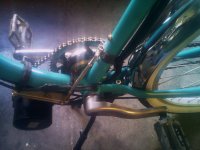
Power is from a 24V 250 watt Elation ( Cyclone ) mid drive through a Shimano Nexus 4 speed hub.
IMG_20301117_141860.jpg
IMG_20301117_141926.jpg
I'm running 7S / 2P 6000mAH Lipos giving me a range or about 30km & a top speed of 35Km/h unassisted. I've still got a bit of fine tuning to do.
Hope you like it.
AussieRider.
 
im too also using 7 cells x 2p for cyclone kit. is 10amps lipo so i run about 10km then i go for charging. i have another set of batteries 6cells x 20amps. 4p. 4p 6cells is slow by 3km/h but i havent find out the range. im sure it can go more then 15km or 20km.

going 7cells look better feeling for speed , at least you can see 28kmh.
 
AussieRider said:
I was aiming at a 1950's Chevy style. Big whitewall tyres, lots of chrome & shiny bits.
Hope you like it.
I do indeed!
Color and all the whole look is outstanding.
The hard panniers are perfect - they look like they were born for that bike - details?
 
spinningmagnets said:
Beautiful work! May I write about it for electricbike.com, and do you have any more pics, particularly from the process when you built it?
Thanks for the kind words. Unfortunately, one of my kids borrowed the camera, needed more memory & wiped the build photos I'm very sorry but yeah, feel free to write about it. It's how we get inspired.
 
teklektik said:
AussieRider said:
I was aiming at a 1950's Chevy style. Big whitewall tyres, lots of chrome & shiny bits.
Hope you like it.
I do indeed!
Color and all the whole look is outstanding.
The hard panniers are perfect - they look like they were born for that bike - details?
Ah, the panniers. I shaped a couple of blue foam blocks. I followed the line of the mudguards for the back & just angled the front to what looked right to me. To stop the resin attacking the foam I sealed the cores with PVA glue, a layer of aluminium foil & more PVA to be sure. Laminated up with chopped strand mat which follows curves beter than woven. 4 layers for top & sides, 6 on the bottom. Cut out the lids on a bandsaw & dug out the cores. The right pannier has the batts in a partitioned compartment that also has the charge socket & fuse. Added hinges & flush mount latches, painted & applied chrome pinstripe tape before 6 coats of clear. Simple as that NOT!!
 
AussieRider said:
Ah, the panniers. I shaped a couple of blue foam blocks. I followed the line of the mudguards for the back & just angled the front to what looked right to me. To stop the resin attacking the foam I sealed the cores with PVA glue, a layer of aluminium foil & more PVA to be sure. Laminated up with chopped strand mat which follows curves beter than woven. 4 layers for top & sides, 6 on the bottom. Cut out the lids on a bandsaw & dug out the cores. The right pannier has the batts in a partitioned compartment that also has the charge socket & fuse. Added hinges & flush mount latches, painted & applied chrome pinstripe tape before 6 coats of clear. Simple as that NOT!!

Does look very simple when I read it :lol:

Pictures please :)
 
That's a really beautiful custom cruiser, well done!
 
Hey nice work! I'll miss that old school steampunk one on the group rides though!
 
cwah said:
AussieRider said:
Ah, the panniers. I shaped a couple of blue foam blocks. I followed the line of the mudguards for the back & just angled the front to what looked right to me. To stop the resin attacking the foam I sealed the cores with PVA glue, a layer of aluminium foil & more PVA to be sure. Laminated up with chopped strand mat which follows curves beter than woven. 4 layers for top & sides, 6 on the bottom. Cut out the lids on a bandsaw & dug out the cores. The right pannier has the batts in a partitioned compartment that also has the charge socket & fuse. Added hinges & flush mount latches, painted & applied chrome pinstripe tape before 6 coats of clear. Simple as that NOT!!

Does look very simple when I read it :lol:

Pictures please :)
CWAH, I've got bad news.
I did have the whole build covered from getting to doner bike to shaping & laminating the cores to building the shifter & polished alloy brackets, the lot.
BUT,
My teenage daughter broke her camera & needed to borrow mine "URGENTLY".
When I got it back, the build pics were wiped & all there was left was videos, selfies & other crap for You-Twit-Face.
"But Daddy, since the bike's finished, I thought you were done with them" she told me through teary eyes & all the emotion of Lindsey Lohan in court.
I suppose it's too late to adopt her out.
Sorry guys, no in progress pics.

Dennis.
 
Back
Top