"E-Zilla" w/ Cro Motor mid-drive * UP-DATE Chopping Frame!!*

Got the signs installed, and my first delivery + service call which turned into a new request for a custom battery box!

 
Had some issues with a damaged trailer wheel (it is a converted kid hauler) that wasn't apparent until tubes exploded on me a few times! :shock:

The last one was right in front of the shop while parked with virtually nothing inside, so at least I know it wasn't happening due to speed (I rarely go over 15 mph, usually more like 10 mph with the trailer).

Got a new headlight!

https://www.wish.com/search/motorcycle headlight#cid=54fd5ff873f9e1476bdef190

It's all plastic, was hoping for metal, but it looks decent, very bright and diffused so I doubt it will blind people like a Magic Shine.

I'll load a picture tomorrow, my digi camera is dead (heat must have caused the battery to go pretty fast).
 
Ugg! Terrible Pic, I will try to get another one soon so you can see the headlight better, I guess my digi is starting to show it's age. :?


And here is a close-up of my new battery:

 
Warren said:
Those are pretty amazing cranks. Never saw those before. Are those extra pedal holes for varying crank length? Who made them?

Thanks! Actually, I don't know, I will have to ask Al, he has had them for a while, the holes are just decorative.
 
Made some changes, added mirrors & a chopped down Yuba Boda Boda centerstand, man, I parked this thing in the middle of a group of Harleys at church last Sunday and Al couldn't pick the bike out lol!


Most people tell me it resembles one of the earlier models of Indian motorcycles, all I know is, it's GREAT for promoting electric bikes in general, I get more "thumbs up!" and other well wishes from the average person more than just about anything I have ridden!

There is a pastor at the church who builds custom Harleys as a side job, and I am going to stop by his shop soon to get some pointers on how to better clean-up our chain lines (they work, but just need some refining, and he's got great ideas for styling tips too) and maybe add some more "bling" to the bike (I'm thinking grips with tassels possibly, etc.)

I know now why they call it an "iron butt" rally when all the hard tail motorcycle riders go the distance, when I go slow and long distance, I start to really feel it with this seat! :oops: :shock:

That said, I feel foolish all the years past when I rode "crotch rocket" motorcycles, and never considered the more laid back riding position of a cruiser.

Now I get it!

Funny that now there are "flat foot" and "crank forward" bikes as if it's something new! :lol:
 
Ok!

I got the bugg again, after talking with some old timer who flagged me down at the Goodwill, I am going to take plunge into the deep-end, and modify the frame! :twisted:

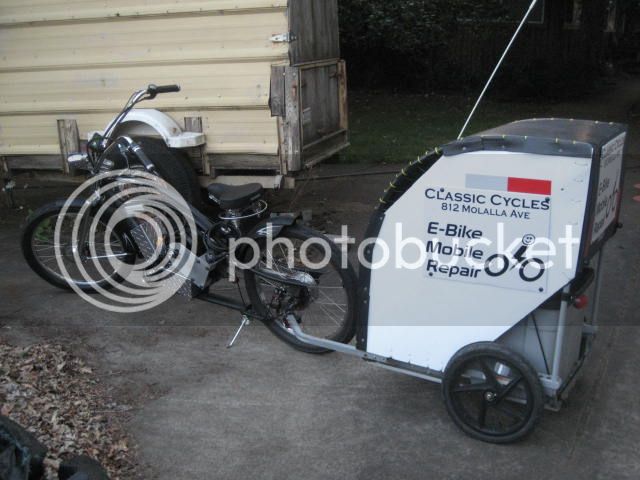
I was really surprised to get such a positive response from this Harley Motorcycle builder, who is very excited about the E-Zilla, and has consulted in the building of electric motorcycles (he has more ink than most tatoo shops, complete with ZZ top beard & hair!), after talking to him for a few hours in his shop he convinced me to change from other ideas of making a cruiser like recumbent, and said "Not much turns my head, and THAT bike is a winner!"

So I have decided to stay with this frames' design, and in the process of defining it as a type that I plan to use on long trips, (I hope to duplicate this in lighter weight chromoly steel once I am happy with this prototype) I hope the classic lines & high torque motor will be a good selling point.

I have always wanted to have the motor as close to the rear wheel as possible, well I got the "OK!" from Al, so out comes the angle grinder! :mrgreen:

Here are the planned mods:


You will notice that there is an "A" frame just below the saddle with a separate box in front for the battery, I have been toying with this idea for a while, and now that I am at the point of either having to make/buy a custom crank spindle, I have instead decided to move the motor back where it will be below and behind the pedals enough as not to interfere with them.


Removed the original mounts to see how everything lays-out.


(Fortunately this old cake pan is almost exactly the same diameter of the Cromotor, so it helps get the spacing right. I will have to wait for the aluminum tube however, I always get the Fastenal guy shaking his head, he almost NEVER has what I need in stock :p )

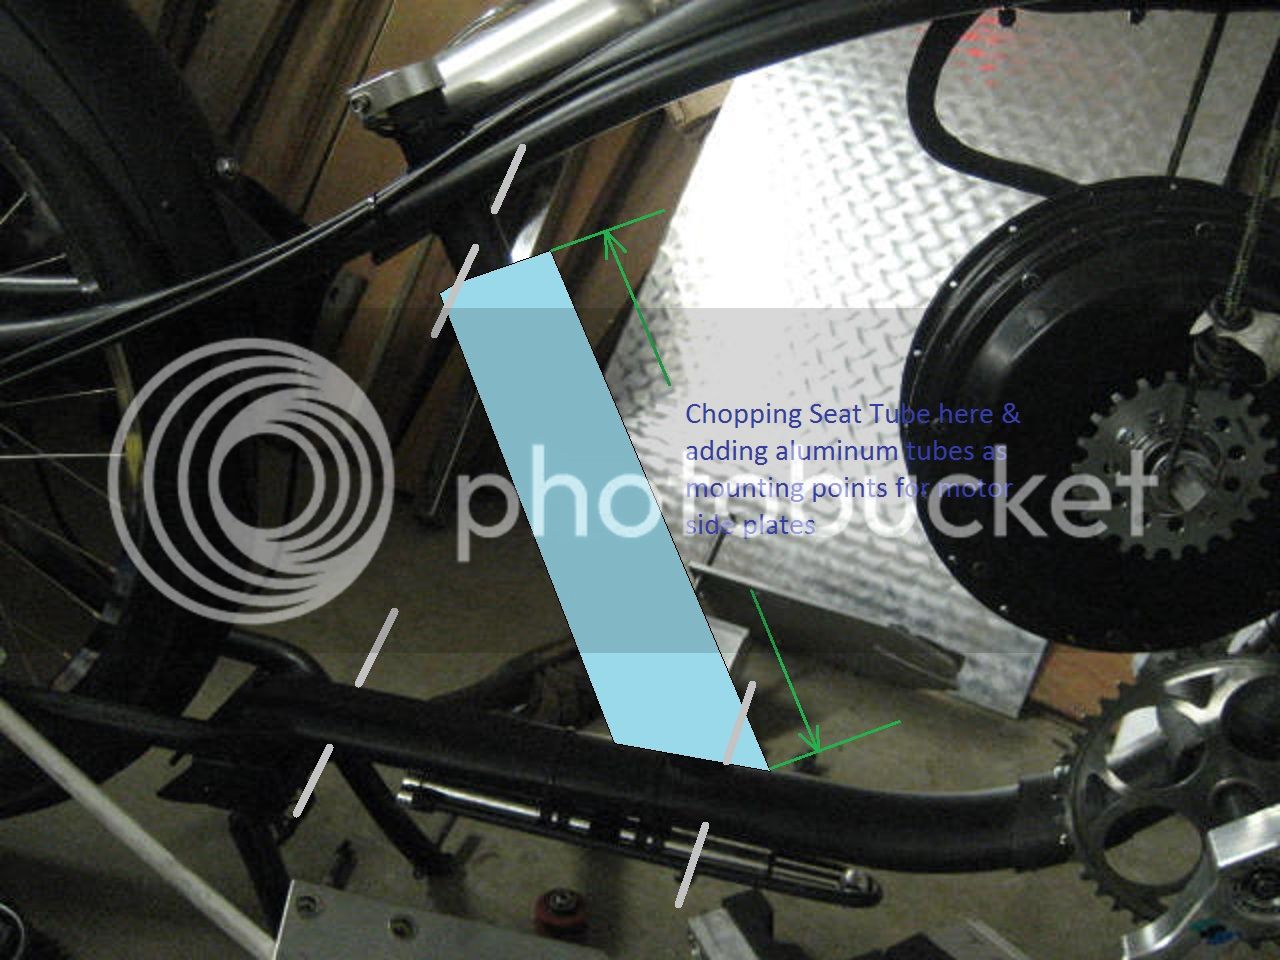
I will of course need to chop the seat tube to make room for the motor, and I will be bridging that gap with the motor mounts.

This time around, instead of using the clamps mounts, I will be adding tubing at each point of the "A" frame that will go through the last bit of the seat tube on the inside the frame up top, and after removing all else of it, I will drill holes through the down tube having perpendicular tubes going through that will also be JB welded to the frame (I am using aluminum tubing to go through though the steel frame) so there will be no compression on the down tube, as it is an odd shape, and not ideal for clamping anyway).
 
Slowly but surely!

Got the aluminum tubing I needed, not terribly expensive, and borrowed a jig saw (thanks Al!) to get at least one side plate done (had trouble with the wrong blades for the saw, got the right ones now!) and drilled some holes!


Finally taking shape!


Drilled the pilot holes in the frame for the 1/2 inch tubes.


I found a great way to make the through-hole to the other side easy, just use the seat tube as a make-shift jig! (it's easy to sight down the tube of the seat post and then you just put it into the seat tube, and drill through the second hole)


I have also re-designed the clamping dropouts (clamp outs?) to be more simple, and this time from aluminum as the steel was over-kill, and I believe between the clamping of the CO's and the compression from the axle nut, I should have no issues.

I will be going with the final design on the bottom of the picture.


The idea is to cut a slot into the "a-frame" so when it is time to insert the motor, it just slides in, and the clamp can then be installed over it, there are two bolts going upward through a thin stationary piece, with a vertically sliding top half that will be slotted, and then once the bottom bolts are tight (there will be 10mm spacers between not shown in the pic to fill the gap where the bolts clamp things down) the top two bolts for the upper clamp will be secured.

I haven't yet cut the slot in the "a-frame" as I want to make sure I get it optimal for maximum space between the top, bottom and rear to make room for some hub fins! 8)
 
Well, the build is moving along, little slower than I'd like, but that's life! :roll:

On the plus side, one of the delays (getting my folk's Saturn Vue into the shop for them) means I get to drive around a Chevy Spark! (It's the loaner while they fix the car!) 8)

up-loading some pics as I write this ....
 
Got the seat tube hole & down tube holes done, here is the aluminum tube that will be installed -


I will be using as much aluminum as possible to finish this prototype since it fairs better than steel in the PNW.

Cutting down a seat post to fit over the tube when installed, to add support to this very short post -


JB Welded tube -


Now the fun parts! I guess now it truly becomes a "chopper" and later a "bobber" as well! 8)


Now the "bobbed" bit, need to make more room for the Cromotor!


Time to finish up the "A" frames -


Drilling the pilot holes for the bolt holes, and using them as a way to make the left side a mirror image of the right -


Now the clamping drop-outs, "clamp-outs"


Now installed for measuring with the Cromotor sitting inside -


My only concern with this design so far, is that there is considerable space between the (1/2") ID of the tubes for the motor mount and the bolts (3/8").

I looked for some bronze bushings but nothing fit as tight as some nylon ones that will have to do for now.

With too much play, it will make noise every time i hit a bump, and could compromise the frame, my next project after this will be to build my own frame from Cromoly tube of a similar design that will be stronger & lighter.

For now, this will test the theory of the design (when I build my own frame, I will not use any plate, just tubing for greater strength and less weight, though the "A" frames are considerably lighter than the previous generation mounts.

Top half of the clamp-outs -


There will be a spacer between the two clamp halves to join the opening of the clamp-out so there is a completed "triangle" the reason for opening up the front of the "A" frame is for ease of installation of the motor.

More pics coming! :D
 
Here is the clamp-out sitting on my desk, the block nearest to me (while I took the pic) is a stand-in for the axle, the other at the open end will complete the "A" frame structure to the mounts as there will be one on each side, and the axle nuts being used as a stressed member.


I doubt this will be a problem with the motor causing frame/mount flex (at least now at 250 - 1800 watt loads), but the frame will probably flex a bit (particularly at the saddle and make noise with bumps, etc.) until I come up with more solid spacers between the bolts & tubes (just using the closet bushing I could find at Wilco, might wrap some electrical tape on them to make a snug fit to stop it from making noise as I go along.
 
More pics!

"Golden Cut" as in never going to happen again :roll: :lol: (cut with a hack saw)


So .... I have been foolishly using my dad's 4 1/2" die grinder with out the guard (he has this thing about removing guards on power tools ...)

And today, it got away from me, time to invest in a face shield (I usually just wear goggles & ear muffs) and borrow/buy a die grinder that has a shield! :p


Fortunately, it didn't do much damage to the left side bracket (or my face) as it just chewed off a bit of metal and hit the off switch ... someone was looking out for me!

And it managed to take that chunk out of the flapper wheel and fling it into my mustache so no real damage, but a little blood and lesson learned. :)
 
Added the chain tensioner, and it's a rolling (pedaling )chassis!


Pedaled it around the yard a bit, and it's doing great! Got my dad to help take some pics :) .


Attaching the battery (will take about 5 minutes!) and heading to the shop so I can put in a standard BB and get rid of the problem child one that is in there now (extra wide cranks) should be able to keep the crank arms however, 8)
 
More pics to come in the morning, didn't get a chance to take more today, but I got the battery strapped back on as before but with the wiring better routed, and I am very pleased! :D

This design has the added benefit of allowing you to FEEL the motor through the frame, as you are SITTING RIGHT OVER IT!!!! :shock: :twisted:

It's not the same as an adrenaline pumping gas engine roar, but compared to any other Ebike I personally have ridden, it has been amazing!

MUCH better than the disconnected feeling of the "springer" seat that was on the bike originally and just made me feel completely disconnected from the bike giving NO feedback at all, and bouncing on every little crack or bump in the road, now sitting atop my beloved Brookes B72 (THE most comfortable saddle I have found this side of a recumbent mesh hammock for me anyway) I could spend hours in it with no problem! 8)
 
Ok, more pics!

Was given a saddle by a friend, and it's really great! Nice wide "tractor" like seat, the kind that will fit a wide range of folks, funny how when you move the cranks forward and have a more relaxed seat and less need for "bike fitting" since you're no longer riding on a compromised set that is less focused on comfort! :)


Still working on where I will be able to build my frame, but I have a good start on the necessary tools!


I got a great deal on a bench vice too, Wilco sold me this:

41c2hy7xzOL._SX450_.jpg


https://www.amazon.com/Jorgensen-30...994&sr=8-1-fkmr0&keywords=30855+5"+bench+vice

For just $32 on sale! :D ($98 on Amazon!)

Next once I know where I will be able to build the frame, I will buy a tubing bender (NOT pipe bender) and notcher from HF as well as a better drill press vice & possibly V-blocks to hold the tube still as I notch it, etc.

I will also look into what is available for the Shop Smith I use as drill press, but I have very tight budget, but once I build & test the working frame, I will seek more funding.
 
Going to start a new thread for my frame build, got the rest of the stuff I need for the welder, and just waiting a few things in the mail! A friend of a friend has offered me shop space to build in along with the use of their shop equipment!

I will keep this thread just for E-Zilla for now. :)
 
New Pics! Moved the controller down with the battery, still not satisfied with the look and mount, but it works, want to do a more stylish and functional battery box, just haven't decided how I want it to look yet.


That's a great looking bike!
But I'm curious if the Nuvinci can survive the Cromotor powering it. What peak power do you feed into it?
 
That is a good Q! I won't know the answer until I have sufficient funds to put it through the paces, currently, I have swapped in a MXUS 3000w motor since I haven't put more than about 1600w through it. I have been told that even when you exceed the 95 ft/lbs of torque, the worst that should happen is slipping, and darkening of the fluid with no real damage to the hub drive, but, until I am able to afford a much larger battery, I won't know. :)
 
Back
Top