N.E.S.E. the no solder module

agniusm said:
helno said:
Have you got some pictures of how it all goes together?

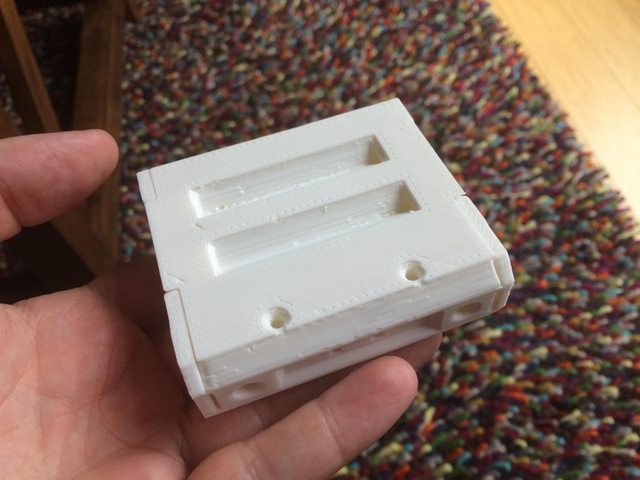
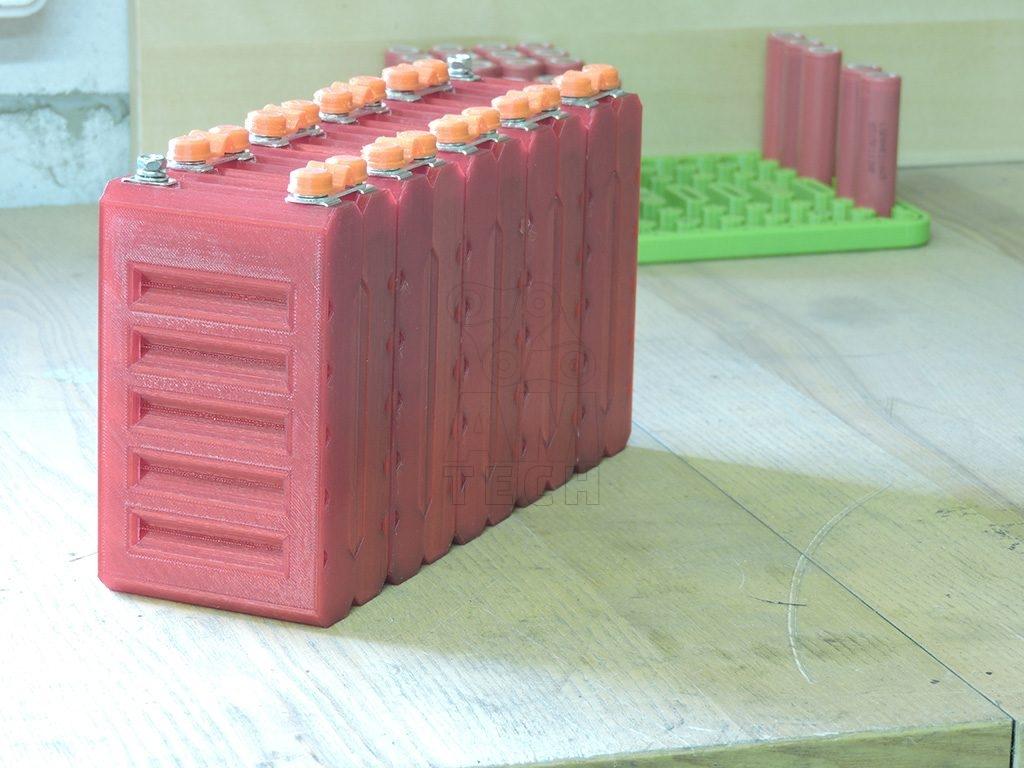
I will do a vid how to assemble one which should take around one minute. I am building 20s6p pack of these modules and the last enclosure is printing as I type.
Modules could be assembled with zip ties if you prefer quick and dirty, using SS straps (like A123) and double sided tape or placed in an enclosure.


Did you make the assembly video yet?
 
No. Need to reprint my enclosures. I have printed mine to early so have to reprint and some other prototypes off topic are occupying the printer at the moment. It will be done and posted so you dont have to ask again ;)
 
For 12S: 12 tabs without padding and 12 tabs with padding. This is to restrict excessive movement of the cells if both sides were padded.

P.S. I mean the pads are attached to the tabs on 12 tabs
 
Printed out a 3p module to see how it goes.

Seems to print just fine without supports. I would prefer to have the sides smooth and just let the triangle cutouts get filled with infill, it would cut down on curling while printing.


Thanks for posting. The triangles are there to support strapping whole battery pack with stainless steel lockable straps. Also i kept the wall as thin as possible so more heat would come out and make it less of a thermos. Let me know what you think on my notes
Thanks again for trying this
 
I mean the cutouts on the sides of the modules. The thin walls with overhangs make that part print poorly.

Have you got any plans for a better terminal cover? Something that can cover the entire top to hide any balance wires and completely cover the exposed terminals? Should be easy enough to have something that snaps over the heads of the bolts in the same way your small caps do.
 
No plans for the cover yet. I dont know why but mine prints fine. If by curling you mean warping, you can use brim.

As promised, here is a video of assembly, sort of tutorial and guide. Its a 2gb vid so it will take some time to load, my inet is slow :(
[youtube]04lDZh19k64[/youtube]
 
I am not talking about peeling from the print bed. I have been selling 3d printed parts for a few years and I have learned my lessons about what is easy and reliable to print.

You have a feature on this design that has a 45 degree overhang combined with a thin wall. Where the bevel and the cylinder shape form a wall it slowly tapers since the inside and outside are different shapes. As the wall thins it tends to curl back because it cools very rapidly, the corners do it much more.

In this picture you can see the taper in the center cutout. If you left that part solid it might actually en up lighter due to the whole section being filled with infill.


You might have better luck because you use PLA but it is no good for things that are used in warm environments. Trust me the Rpi cases I designed have gotten saggy even with active cooling on hot days when made from PLA.
 
Is there a USA source that is printing these? You listed a UK source that seemed competitive. I guess im still confused. What we buy from you is the hardware, and print files? Correct?

I found listings of printers but theirprices were exorbitant. I this something that would make for a group purchase?
 
Check out 3Dhubs.com for local print service and ask for quote. You buy the hardware from me to fill the enclosures you print locally. You download any enclosure 3D files at will at no charge in resources area. This leaves you an option to DIY this system yourself (make tabs, buy bolts) or pay me for the development and the work i do with upped price on tabs, bolts & nuts.
 
Great work agnuism. You've clearly put a lot of thoughts into this. This will be the base for my first diy battery build.

Are the sound on the video somehow messed up? I can hear a lot of white noise, some low qual music in background but it seems impossible to hear your voice clearly. I will try again tonight when I am home, from the computer. Just tried from cellphone and it was difficult to hear your voice.

Another thing I noticed is you seem to forget that you are doing this video for battery newbies as well as more experienced builders. Two quick examples is when you use your voltmeter you place the voltmeter so you can see it the output, your camera should also capture the screen of the voltmeter. Same goes for when you put the completed module on the scale. Show the display and let people know what the weight is.

As to the plus and minus sides of each brick, maybe you should consider to make some sort of color coding? So that when batteries are placed into the modules according to the color coding, one look at the color coding later on would let you know what is plus and what is minus. Just a thought for more ease of use.

One thing I struggled with is how to connect a BMS for monitoring, charging and cell balancing. It seems not possible to get each cell in balance? Maybe I am wrong, I admit I have yet to do my very own battery. I really hope you make a follow up video how to connect more similar sub modules into desire'd battery size, like 20s12p or even 20s18p for those with deeper pockets or in the need of more head space.

One more thing, I remember you got that shaker thing. Maybe you could do a durability check for nuts and bolts? Like let the pack vibrate non stop over a given period to check if bolt and nuts come loose? As the nuts are not of the nylon type I fear vibration over time might loosen a connection. Maybe just use blue locktite to be on the safe side, or don't you think it is needed?

Keep up your great work, I really think your system is state of the art.
 
macribs said:
Great work agnuism. You've clearly put a lot of thoughts into this. This will be the base for my first diy battery build.
Are the sound on the video somehow messed up? I can hear a lot of white noise, some low qual music in background but it seems impossible to hear your voice clearly. I will try again tonight when I am home, from the computer. Just tried from cellphone and it was difficult to hear your voice.
Youtube did not liked i have some music in the background, copyright, so instead of re filming, i had it remove the copyrighted song.
Another thing I noticed is you seem to forget that you are doing this video for battery newbies as well as more experienced builders. Two quick examples is when you use your voltmeter you place the voltmeter so you can see it the output, your camera should also capture the screen of the voltmeter. Same goes for when you put the completed module on the scale. Show the display and let people know what the weight is.
the scale was up to 2kg and it was out of range, nothing to show. Voltmeter is for me to see the polarity, not the viewer to see my module voltages cause its irrelevant. The video is about assembly.
As to the plus and minus sides of each brick, maybe you should consider to make some sort of color coding? So that when batteries are placed into the modules according to the color coding, one look at the color coding later on would let you know what is plus and what is minus. Just a thought for more ease of use.
Its up to user to mark their battery as they wish. I dont need it, i always double check with voltmeter. You can use a marker to place a dot near negative or positive side of the module.
One thing I struggled with is how to connect a BMS for monitoring, charging and cell balancing. It seems not possible to get each cell in balance? Maybe I am wrong, I admit I have yet to do my very own battery. I really hope you make a follow up video how to connect more similar sub modules into desire'd battery size, like 20s12p or even 20s18p for those with deeper pockets or in the need of more head space.
You need one wire per series connection for balancing. Its basic stuff, i should not teach that on the sales thread. There is plenty of info on ES in battery section.
Keep up your great work, I really think your system is state of the art.
Thank you very much, i am flattered
 
Don't know what to answer to your reply, but I can tell you how your reply makes me feel. That I am not being taken seriously. You are the one in the market with a new product, you are the one that need to show us how it works, how well it works and why we should buy it. When you get asked questions try to answer them rather then rationalize your point of view on the subject. Because your point of view is not what is important here. It is to aid and guide prospects and potential buyers to become paying customers.

After reading your answer, guess if I am more tempted to buy your products after reading your answer or less? You are after all asking a pretty penny for your product and should maybe hone your people skills?

Maybe I overreacted or misread what you wrote and if so, I am sorry. I will go out riding for a while to cool off, and I will re read your response later tonight.
 
Sorry but I meant no disrespect. You did ask for assembly video and this is what I have delivered. I don't see how I could make you upset.
Maybe my second to last answer got you wind up but it is what it is. My module is like a cell. If you can wire one cell to a BMS you will have no problems wiring this module. Further more there are many BMS'es on the market and it would be unproductive for me to explain one way but your chosen BMS would wire differently.
Peace
 
Here is assembled 10S6P battery:

pc0nWVe.jpg


Full weight comes out at 4.45kg
 
agniusm said:
Here is assembled 10S6P battery:

pc0nWVe.jpg


Full weight comes out at 4.45kg
Amazing! I finally found a fir price from a printer and look forward to my 10s4p build! As soon as I can budget I will have a 14s6p next.

This and the vruzend for lower power are the two most exciting products I've seen in my scant 4 years. Fantastic! I've been following Agnuism from day one. What a fantastic project!. Two of the most forward thinking projects have come from the same region, This and the JP welder. I need to immigrate!
Adopt a grandfather?
 
good stuff, and decently priced, honestly. Making these custom contacts is not cheap. I ordered some (as you know) to test out yours, which are much lower profile than mine. I had some spring loaded connecters molded up, and am now upgrading the spring, but they hold. They are much taller though, so packs are larger =\. Anyway, I was thinking about toying with your 3d model and the contacts, to make an internal replacement for the SHARK pack... my spring loaded connectors larger size made that idea hopeless, at least with any capacity fitting inside the shark packs.... so maybe it will work with your smaller contacts...

either way, great work on this. the research, design, testing, development... very good work!
 
tomjasz said:
Adopt a grandfather?

If its hard in the US for senior citizens, in this part of the world it would be imposible :)

riba2233 said:
I had something similar like this already modeled 2.5 years ago, but I never got it to production because I got a job. Nice work agniusm, I know how hard this is to produce.

Appreciate that. Only people who did/try to make something can truly understand the involvement and commitment that goes into making something that is not vapourware.

I need some 40 cells to complete my 20s battery plus another 6 Sony vtc 35a cells to push modules further till they can take no more, we have to find the ceiling of these bad boys, need to wait, my bank account is dry as death valley.
 
well lets do the rain dance and get it going. your the man right now! I cannot wait to get these contacts... cheaper from you retail than I am paying for mine bulk (factoring the molds) :shock: I'm still redesigning my contacts, and buying YOURS!! :D AND HAPPY TO DO SO :mrgreen:
 
Back
Top