Converting Derbi Senda to electric

Rain

10 mW
Joined
Mar 22, 2018
Messages
22
Hi everyone!
Not much of a poster but decided to create a blog of current build.
I've been doing it just as a hobby for few years by now. Started with simple bicycle conversion to 350W motor, then took a fat bike and 1.5kW motor, then current kit - Golden Motor HLDC 3kW motor, Kelly KLS-H controller and a bit of battery.
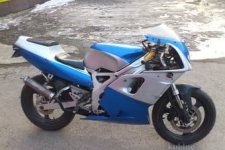
First plan was to use the kit on a Yamaha TZR-125. The e-motor was actually chosen by torque numbers of original motor.
Built it so far that it ran but it looked ridiculous - sportbike looking thing capable of doing about 60km/h.Frame was too heavy too.tzr125.jpg
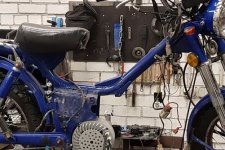
Then bought a chinese Tmec moped (Jawa Betka). Got it running fine and drove it around entire last summer. Ran fine, top speed around 72km/h.
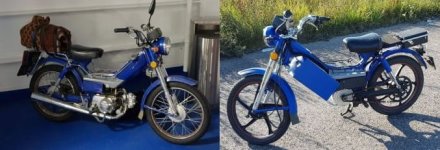
jawa.jpg
But as looks and frame was not really what I wanted in the long run, it was now time for another upgrade.

Now looked for biggest moped frame there is and found a year 2000 Derbi Senda R1 50ccm enduro-like thing. It is about 24 cm longer and quite a bit stronger frame while weight is still ok.
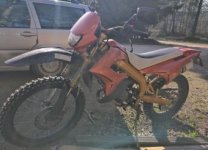
derbi1.jpg
This photo is from its "good side". Right side has taken some beating, plastics broken and missing.
 
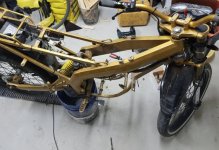
Took it to garage and as first thing removed remains of plastics and of course engine.
frame1.jpg
Quite beefy compared to chinese single tube frame.

frame2.jpg
 
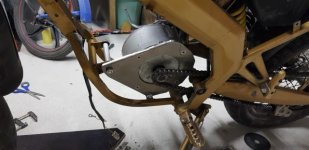
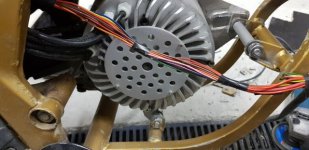
Got the motor mounted.
Aluminium faceplate (6mm) once made for Yamaha is now in use again.
2.jpg
Used original mounts with some spacers and long bolts.
5.jpg

This motor only has fixing points if front but fabriced a small one to rear side too.
Will see in time if 2+1 fixing points will be enough or will it need more.
Just in case left some room on top of faceplate for additional fixing.
 
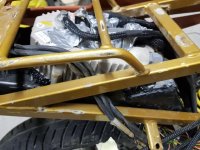
Found a suitable location for controller
kelly1.jpg
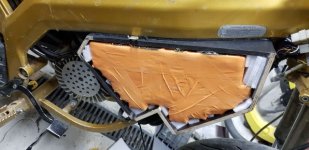
Attached through rear mudguard and under the seat, completely hidden but still cooled enough.
Most definitely will need some kind of hard cover on top. Quite happy with it :)
 
Looks good. Nice donor choice too. Will you put smaller road wheels on? The Senda came as a supermoto also I believe.

Cheers
Tyler

 
Thanks!
Nope. As I am 190cm I think for me the current look will work just fine.

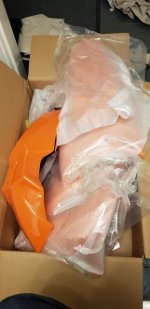
Some new parts arrived. Some orange stuff.
13.jpg
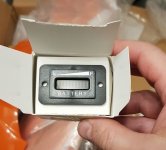
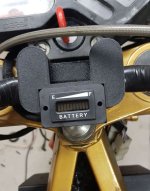
And then battery gauge. Will see if this one works any better.
14.jpg
 
Some work progress too.
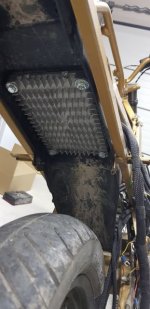
This is how the controller looks from other side. Cooling should be fine, especially on rainy days :)
11.jpg

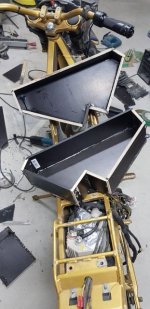
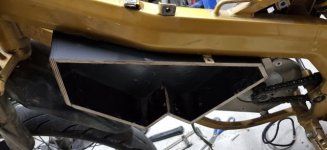
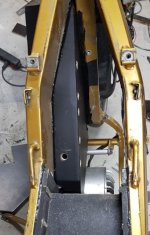
Most time spent on battery boxes.
12.jpg
15.jpg
16.jpg
Both attached.
19.jpg

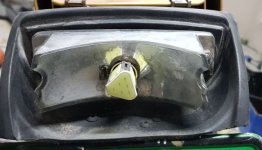
Also led bulbs for rear arrived. Reflector is in quite bad shape. All the reflecting stuff is gone, resprayed from inside with a silver paint but result is still not too good.
17.jpg
 
Interesting how narrow the 2 battery boxes are, what batteries/cells are you using?

Cheers
Tyler

 
They really are not that narrow - 8.5cm internal height.
Panasonic NCR18650PF's are used. 112 elements on either side and then enough room for at least 70 more on top.
Plan is to add third pack later, when I can see how much room there will finally be.

21.jpg
 
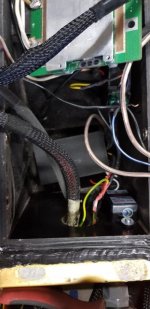
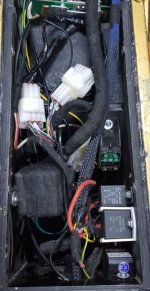
Did some wire connecting, everything soldered.
Fuses, blinker relay & step-down in place, also connected startup relay and battery bms.
23.jpg
24.jpg


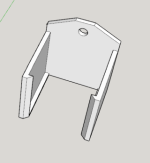
As the 48V relay came without holder or any means of fixing - made one myself. Printing will finish in 2 hours...
relee hoidik.png
 
Connected everything and it is alive.
Only strange thing is that pre-charge resistor now appears to be of too high resistance.
Voltage drops from 50 to 11 volts and Kelly KLS-H is not happy, making whistling sound.
Will try with smaller resistor and see what happens.
As it is the same resistor I had there from day one, it is weird. Resistance measured to 1k as it supposed and all else looks fine.
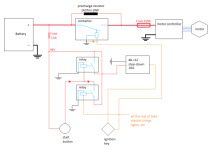
elektriskeem1.png
 
Figured the pre-charge thing out finally.
I connected the pin 7 - Power - which powers the controller on straight to connectors motor side - so it was powered on when connector was triggered which is fine. What is not fine, is that even through pre-charge it got enough power to attempt powering on.
Moved the pin 7 wire to output line of small relay which switches the 48->12 and all is good again.
 
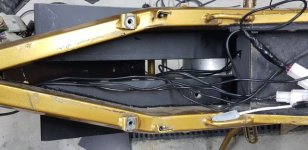
Two battery halves now connected into one. Plenty of room for one more additional battery.
28.jpg

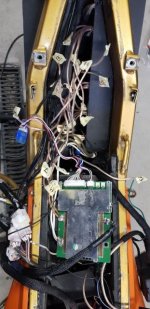
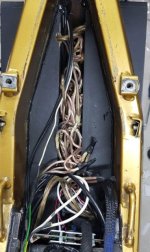
All the wiring is also getting somewhere. All is connected and ready to go.
27.jpg

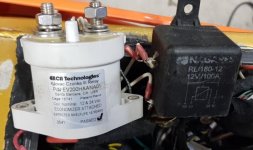
Main contactor (big black thin on the left side) will be replaced soon with a stronger one. Current is actually meant for 12V systems and has 100A switching.
New one coming in soon is a EV200HAANA - switching 500A and up to 900V with 12V coil. Should be enough...

And battery level meter got an fixed.
26.jpg

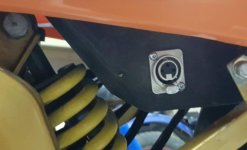
And charging port attached.
29.jpg
 
Rain said:
All the reflecting stuff is gone, resprayed from inside with a silver paint but result is still not too good.
use a matte white instead, over the entire inside surface of the non-transparent parts of the light housing, you'll get a more even lighting of the lens from the led unit.

the reflector was designed to spread/focus the light from one specific small point / line, where the bulb filament is in the incandescent.

the led bulbs don't present light from the same place, so the reflector doesn't really work the way it was meant to anyway.
 
The white might also work well.
At moment I am happy with it as is. Light is strong enough.

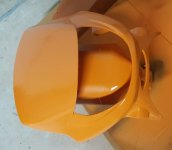
Got the front mask sanded and painted.
30.jpg

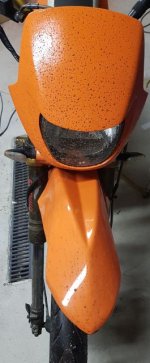
And also attached and even made first trial.
The result - rear sprocket needs to be replaced with bigger one, as was expected.
Front mudguard is not doing its job at all. Needs either to be lowered a lot or replaced entirely with something attached to front wheel attachment somehow.
At moment I could see the water and dirt flying over the front lip and onto myself, clothes etc.
About 1 km trip result
31.jpg

I need something like this..
https://cdn.touratech-usa.com/c/w_1000,h_1000/M05861-20-lg.jpg
 

Attachments

  • M05861-20-lg[1].jpg
    M05861-20-lg[1].jpg
    44.4 KB · Views: 2,483
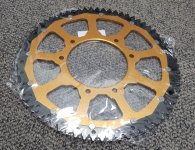
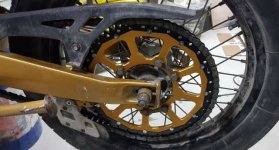
New rear sprocket arrived, now 69 tooth. Really big thing, almost 29 cm in diameter.
ketiratas.jpg

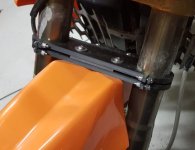
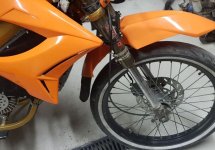
Also made front fender clips for testing. Got fender lowered quite a bit.
20200226_184551.jpg
20200226_184600.jpg

It really has all gone a lot easier than I expected. Kind of like bolt-on-kit almost...
 
Positive surprises keep coming.
Interesting fact are that I was able to first change chain from 420 to 428 and then buy rear sprocket for that chain for Derbi Senda with correct bolting and middle hole. And after buy second sprocket and upgrade the size from 59 teeth to 69 and still have it with correct bolting holes. And after that change the sprocket and still keep the original chain guide and cover...
Had to move chain guard to one upper hole but this hole was already there.
Same thing with the chain guard - moved it a bit away from sprocket and there was already threaded bolt hole for that on frame.
I think it has to do with 125ccm engine being used on exactly the same frame with 428 chain and different sprockets. All is already prepared for that engine.

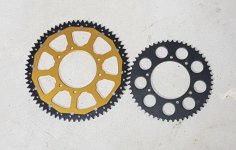
Difference in size:
20200227_084019.jpg

All set and ready to go.
20200227_092909.jpg
 
That looks really nice. Do you have any pics of how you built the battery?

Cheers
Tyler

 
Not really.
I built it a year ago already but there is nothing special to it too. Just common nickel weld and smart bms.
On the other side also nickel weld and then connected to together with 2.5mm cables.
 
Ok thanks. The welding is what I'm interested in, but worried about doing myself.

Cheers
Tyler

 
I plan not to do it anymore or unless I get hold of proper welder.
With current one the results are far too unstable. One weld is perfect, next is too weak and did not happen and next burns hole into battery.
I am quite good with soldering, been doing it for years and have an ok station at my disposal.

But a question too - can someone point out how to limit amps drawn from battery in Kelly KLS-H controller?
They have a 'Battery limit' field pointed out in manual which is supposed to do that but it seems not to.
Motor I have is supposed to take a bit under 100A as max but today on full throttle at about 140 amps my BMS is starting to cut power.
Limited this Battery limit from 100% to 50% but no change really.
Rised the BMS overcurrent to 150A but still cuts out. As soon as I let throttle go, the power is back and KLS is beeping with error.
 
I don't know about Kelly settings but 140A seems like RMS of 100A draw. If BMS is measuring peak draw across the PWM frequency that might be what you are seeing. In another thread the contacts for Kelly are mentioned, I think the QS motor thread. Worth contacting them.

Cheers
Tyler

 
I think I might have the answer.
(3)CurrentPercent:phaseCurrentPercent.Range:20~100Functionaldescription:Themaxmotorcurrentis(TheValue*PeakCurrentoftheController).Suggestion:Factorydefaultis100%.

So as my KLS-H has peak of 220A and desired is around 100A -> value should be about 50%
Hopefully it will not be that slippery tomorrow and can do an actual test.
 
Did some modifications to battery - separated two 24Ah sides and added one more BMS.
So now battery max amps should be at 200A and whatever this 3kW motor is asking is there - should be max 80A but I've seen 150A draw..
Also upgraded main contactor from current 100A/12V switching thing to Kilovac EV200HAANA01. Max should now be at 500A and 900V. The thumping sound of relay switching is really serious...
20200410_174045.jpg
 
One question to which I have not yet found a solid answer - what is the normal working temperature for a 3kW Golden motor bldc motor?
I have 100 degrees Celsius set as max and 90 as thermal release set as default values at moment.
Somewhere I read that no harm will happen even at 150 degrees.
At moment I am probably pushing the motor quite a bit and I get overheat beeping and waiting times. Is it safe to rise the limit to maybe 130 degrees? And release to maybe 100 or something?
It all has to be internal heat as from outside motor is slightly warm when touching with bare hand...
 
Back
Top