Update
Decided to take a break from the battery enclosure today, have reached
my fiberglass tolerance threshold for the next few days, so
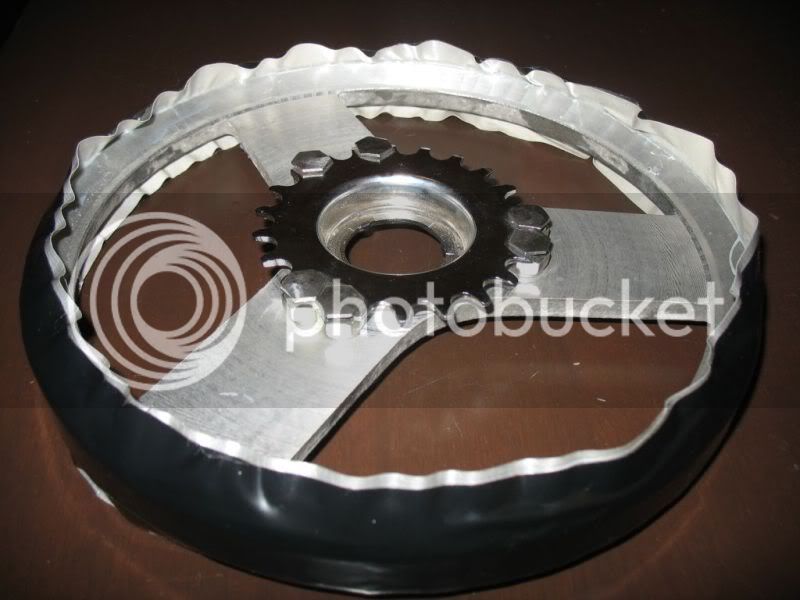
i worked on fitting the sprocket too the rear pulley, stretching the chain stays
out to allow room for the pulley while also gaining adequate room on the left of the hub
for the left hand thread freewheel to be fitted.
Matt Parks (
1000watt) as many have seen fitted a extra wide hub with the same
pulley i have chosen too use, here's how
Matt went about this-->
Now if you look closely you will see the gaps between the bolts differ, this
is due to the tooth count its not possible to have the same gap between the bolts
holding the sprocket on. I was initially going to copy this method as
Matt has done,
as its very solid & looks ok, then I thought,
well, why not remove the teeth and notch
my own recesses for the bolts rather than using the pre-existing teeth for the bolts to 'grab' on too!
(
drilling isn't an option the sprockets are hardened steel)
So, Here's how i went about modifying the sprocket -->
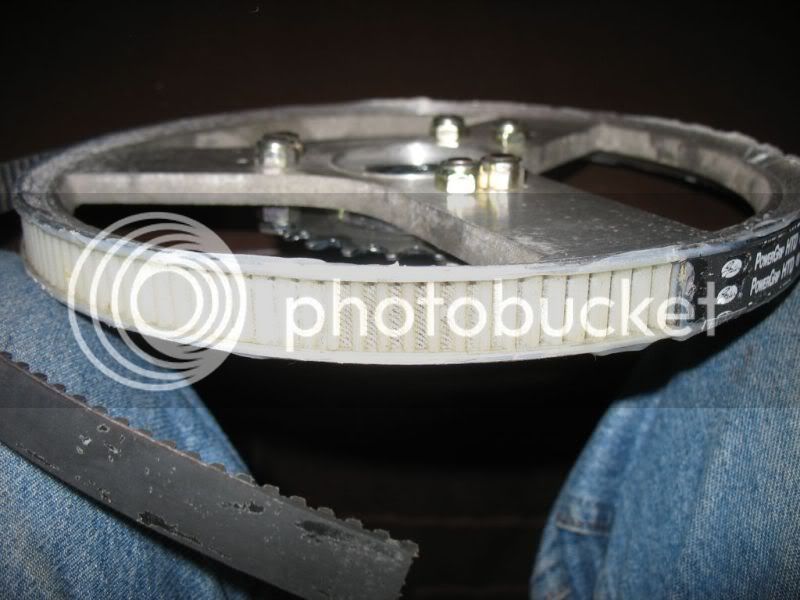
The pulley has been drilled and tapped using 8mm high tensile steel bolts, The bolts fastening
the sprocket too the pulley are still an issue however, they hit the chain stays
by the
sliiiightest of margins, a slight grind would fix this BUT i decided better option
would be too use button head cap screws SO i rang
Coventry Fasteners checked availability
thankfully they have stock of 8mm x20mm stainless steel cap screws SO i ordered 10
and have mate picking them up for me, the rounded head of the button head cap screws
will give me that
liiiittle bit extra needed, very slight clearance all round BUT
thankfully i now know i have the room! I was sweating over having to notch the chain stays
i really didn't want too do this, since none of the motor mounts had been welded in place
yet, stretching the chain stays apart another 15mm was an option...thankfully widiening th gap
and using a couple of 5mm spacers either side has given me
the extra room required...(
we wont talk about the 4-5 threads left each side
on the hub axle for the nuts too screw onto though LOL....thankgod for Loctite right!! )
I shall update the above pic when i have fitted the stainless steel button head cap screws
I spoke to
Matt Parks on the phone today, he rode his cruiser too bicycle show on the weekend
and informed me all is not well with the extra wide 3 speed hub (
same as i have) Its making bad noises
looks like the innards aren't any different from the standard size 3 speed Sturmey Archers
(
I have seen a few fail on motorised bikes i recall Safe blew one) I was mindful
of this when i decided to use one, i new this motor would easily destroy it if given the chance,
i was hoping though if treated kindly it would do the job for a reasonable time. I shall
order in a standard freewheel extra wide hub along with a Eno freewheel from Sick Bikes.
THIS was ALWAYS on the cards for future dual motor setup, i will simply have to bring this forward
and have it here ready too go when needed. I have a spare
20x4.25 rim/tire too lace it into
so the 3 speed setup wont need to be touched until such times it breaks or
i head for MotorPlex for some fun on the 1/4 mile...im at least hoping the 3 speed lasts until
i can afford the second motor setup, not alot of point trying it on 1/4mile with the one motor and no
point at all trying with 3 speed will blow the guts out of it if given too much on take off i think.. Least its not
a
Honda Civic blowing axles at 1500 bucks a pop right (
wasn't it?)
Luke hahaha...
KiM
Edit: Button Head cap screws now fitted (see above pics), as expected it
did gain extra clearance but not quiiiite enough, if the hub is positioned well back in the dropouts
we have room, I will have to trim a few millimeters from the right chain stays BUT nowhere
near as much as i would have IF i didn't spread the chain stays that extra 15mm. Rather
than notch the chain stays what i will do is 'cut and shut' the tubing ~inch from the end. I
will do this on both sides its not needed on the left but too keep the symmetry of the frame
in tact and to satisfy my pesky perfectionist outlook it will needed to be done this way :: sigh ::

Maybe in that shed