Surron controller upgrade

Wattster

10 W
Joined
Oct 31, 2022
Messages
71
Most of the controllers available for the Surron are overpriced for what you get. I stared doing some looking and came a crossed the Votol Controllers. The EMRON kit from Electro and Co uses the em150/2 controller and is a decent price for what you get. I chose the em150 as it seems to be more reliable to connect with. You can order the em150 non CAN bus and program cable from QS motor and with the DKD display for less then $300 shipped to the USA. Goal of this thread is to get all the docs, diagrams and videos in one place. If you would like to follow along and do the same please do!

This content, files and documents are meant to be used for the DIY builder not someone to copy and build a kit to sell to others. Electro and Co already does a nice kit if you want to buy one.

ES thread on the Votol,
Votol EM-100 & EM-150 controllers

My general wiring video,
 
Last edited:
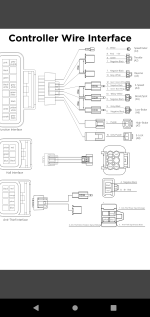
Controller wiring
 

Attachments

  • 5eb951d2-9ff0-415a-9516-729182c4b61d.png
    5eb951d2-9ff0-415a-9516-729182c4b61d.png
    205.1 KB · Views: 41
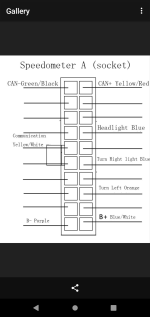
DKD display wiring,
Hook Lin from the controller to the yellow/white wire on the display. Battery positive and negative are needed and the rest can be used if needed or ignored
 

Attachments

  • Screenshot_20230308-065251.png
    Screenshot_20230308-065251.png
    244.9 KB · Views: 23
Last edited:
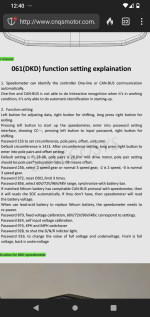
DKD Display programing
Password
856 set battery voltage
153 change circumstance until your speedo is accurate, cc=1000 speedo about right with 54t and 19" wheels PL 24-10. Change the cc up and down till your speedo reads right for your gear and tire size.

928 turn off D/N/R light
 

Attachments

  • Screenshot_20230308-124024.png
    Screenshot_20230308-124024.png
    850.8 KB · Views: 25
Last edited:
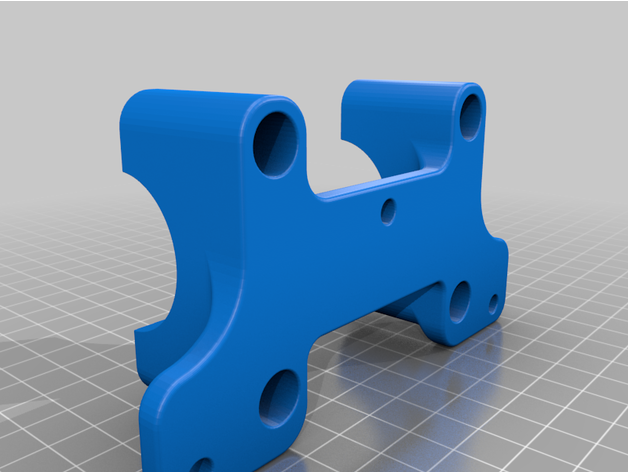
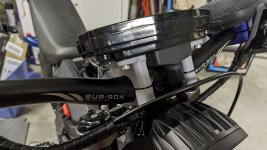
Display mount .stl file and required hardware,
 
Last edited:

 
Last edited:
Stock bike wiring for my 2022 LBX

Throttle wires from grip:
Brown = 5v
Black = Ground
Blue = Signal

Bike:
Black = 12v all common
Green = Ground all common
Red w/ white = Batt +
Red w/ black = switched Batt +
Green w/ blue = Kickstand goes to 12v when down
Green w/ yellow = brake goes to 12v when brake is pulled
White w/ green = Mode switch, Sport is grounded and Eco is open

Motor phase wires & extension length eye to eye
Blue = U 6"
Green = V 9"
Yellow = W 12"
 

Attachments

  • e676257a-8b3c-4423-b00b-3fcf791acf2c.jpg
    e676257a-8b3c-4423-b00b-3fcf791acf2c.jpg
    2.5 MB · Views: 10
Last edited:
How to connect:
Power up bike
Plug dongle into bike
Plug dongle into USB port
Download and update drivers
Open software
Select proper com port
Click open
Click connect
Save a factory configuration file as a backup and create new backups as you make changes.

Make changes with care and some port setting changes can cause you to no longer to be able to connect to the controller.

Settings:
85amp for stock battery
Outside mag type
5 pole motor
60° hall
Surface mount magnets
Page 1

Page 2

Page 3

Display

Ports
 
Last edited:
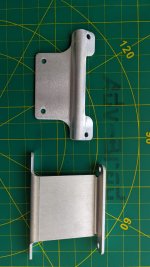
Brackets showed up, it's going to be a late night
 

Attachments

  • abae951e-a6e5-4c08-ad14-b9190800739e.jpg
    abae951e-a6e5-4c08-ad14-b9190800739e.jpg
    1.7 MB · Views: 10
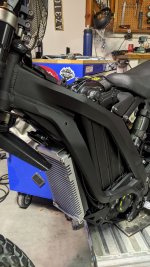
All the hardware mounts up, now for the fun part.
 

Attachments

  • 8877e77f-766b-4df8-8348-492136ab9867.jpg
    8877e77f-766b-4df8-8348-492136ab9867.jpg
    1.6 MB · Views: 15
  • e42cb885-c984-469c-a749-079ffdb0f50c.jpg
    e42cb885-c984-469c-a749-079ffdb0f50c.jpg
    2 MB · Views: 14
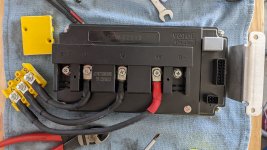
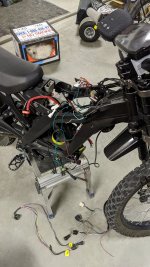
So after cutting all the cloth tape off I got excited and cut everything that had to do with the stock controller. It thins down nice.
There is a red with white coming off the battery that goes to a fuse then the key then it turns to red with black and will be used to power the display and boot the controller via the ING wire. There is a green wire off the batt that goes to the common ground.
Horn and wires powering the horn button and sport/Eco switch can be left alone. You just need the white with green to hook up to the sport wire on the controller.
DC/DC can be left alone if you don't cut any of it's 4 wires and will power the black wires with 12v. One quick look at the wire size will tell you it's only going to take low amp draw.
 

Attachments

  • b1cc8cde-0a74-4762-81c4-804c2c7e112e.jpg
    b1cc8cde-0a74-4762-81c4-804c2c7e112e.jpg
    2.4 MB · Views: 12
Ich habe Surron-Stecker zum Votol gemacht. Den Surron-Kabelbaum in Ruhe gelassen. Der Surron Controller ist so, zurück in 10 min.
 
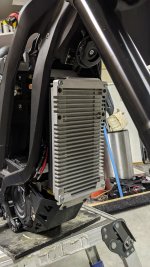
All buttoned up and the motor even spins when I hit the throttle!
 

Attachments

  • 75a3040b-499c-4ad7-ad21-3a45f5a27e96.jpg
    75a3040b-499c-4ad7-ad21-3a45f5a27e96.jpg
    1.8 MB · Views: 16
With a bypassed battery this thing boggies!
 

Attachments

  • PXL_20230410_005238597-01.jpeg
    PXL_20230410_005238597-01.jpeg
    4.3 MB · Views: 15
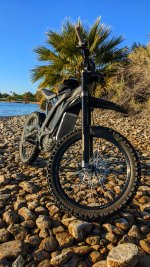
Have the amps capped at 90. Didn't take any data from before the change but there is a big difference in the seat of the pants dyno. Very happy with the controller and glad to have a speedo on the bike too.
 
Back
Top