Fechter's Sur-ron Modifications

fechter

Administrator
Staff member
Joined
Dec 31, 2006
Messages
16,536
Location
California Bay Area, USA
The information here was spread out on the other two topics, so I decided to make a dedicated thread for my Sur-ron.

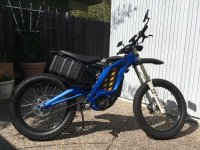
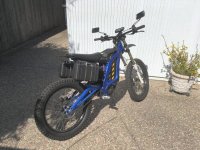
Here's the bike fresh out of the box. It was well crated and did not suffer any noticeable damage from shipping.
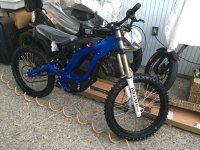
Img_0860A.jpg

The first issue I had was around my house, there isn't anyplace I can legally ride the Sur-ron off road, so I went about installing turn signals, brake lights and mirrors so I could get it licensed as a moped and legally ride on the street. Technically, it's a bit too fast to be a legal moped in sport mode, but in EP mode it would satisfy the requirements in CA. Another issue is it does not have a real VIN number, just a serial number. At least a few people reported success getting a moped plate so I gave it a try. I used the serial number where the VIN goes in the application and made sure to note that it was electric on the application. Well, it worked and about a month later I had a plate.

The Sur-ron has a 12v dc-dc converter for the headlight and tail light which seems to have plenty of extra capacity. Tracing the wires was a challenge but not too hard with a voltmeter.

Below is a schematic of the wiring that is mostly correct:
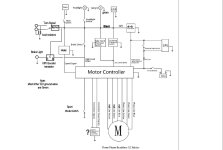
Light Bee Wiring Diagram 3.jpg

12v goes to the headlight, tail light and brake lever switches in the stock configuration, so I tapped into the wires in the front wire ball under the key. Later I figured out it was easier to just remove the battery and loosen the panel that makes the front of the battery compartment and pull it back for access to the giant hairball of wires.
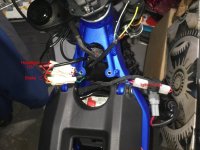
Hairball 2A.jpg

The turn signals and rear tail light were eBay items. For functional turn signals, I had to replace the left side sport mode switch with one that had turn signals.
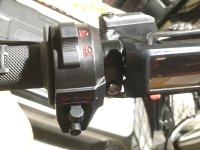
Img_0899.jpg
The high/low headlight switch was repurposed to work as the sport mode switch. Now if a picky cop wants to check it out, I just make sure the headlights are on "low beam" and the top speed will be compliant. I took the switch apart and replaced the stock wires with a much skinnier cable made from stranded CAT 5 cable. Since the stock speedometer mounted to the sport mode switch housing, I had to come up with a way to mount that separately.

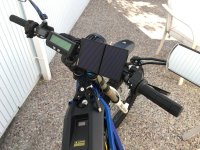
I sawed off a short piece of aluminum "U" channel and used strong double sticky tape to mount the speedometer to the piece of channel. The channel was drilled with holes for a zip tie to go around the handlebars.
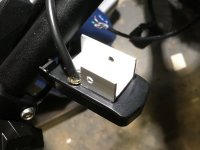
Img_0888.jpg

This allows the speedometer to be placed anywhere on the bars and has the added feature of being easily adjusted for angle. I found this to be very useful when riding in the sun where often the stock position was difficult to read. I highly recommend this mod. Another benefit is in the event of an impact, the speedometer will just spin on the bars instead of breaking off.

The front turn signal lights are a strip of LEDs that wraps around the top of the forks.
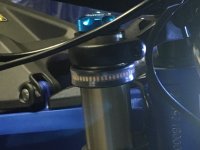
Img_0892A.jpg

They have a dual color function so shine white as running lights when not signalling. These were impressively bright and are easily seen during the day. I used a long skinny zip tie through the channel of the LED strip to keep it secured to the fork.
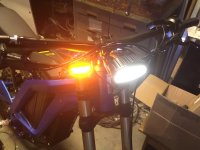
Img_0893.jpg

I used a solid state flasher made for LED lights. But it did not work properly without adding resistors across the LED lights. Something like 100-150 ohms made it work properly.

For the rear, I found a brake/tail/turn signal light with everything integrated along with a plate holder. I made an angle bracket from some scrap aluminum so I could mount it to the stock tail light holes.
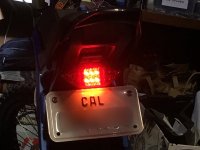
Img_0894A.jpg

Parts I used (as far as I can remember):

Rear combination brake/tail/turn signal/plate holder
https://www.ebay.com/itm/12V-red-20...e=STRK:MEBIDX:IT&_trksid=p2060353.m2749.l2649

Front fork mounted turn signal lights
https://www.ebay.com/itm/2pcs-Switc...875501?hash=item1a309efced:g:lK0AAOSwcIxdP-6s

Handlebar mounted switches
https://www.ebay.com/itm/2x-7-8-Uni...e=STRK:MEBIDX:IT&_trksid=p2060353.m2749.l2649

LED flasher module
https://www.ebay.com/itm/Two-Pin-LE...763899?hash=item3b25979e3b:g:VCoAAOSwXMxcG-dq

OK, now I could start riding it around!

I quickly figured out that the stock knobby tires were not really good for the street and I wanted fatter tires anyway.
For the front, I found a Shinko SR241 in 2.75 x 19. This just barely fits with a few mm of clearance to the fork. I was warned by someone else to snip off the little mold sprue rubber thingys that stick out on the side of the tire. Even after just one ride, those things had sawed a nice notch in my fork.
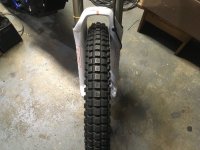
Img_0905A.jpg

For the rear, the next wider tire in a Shinko was 3.5", which I figured might be too wide, which would suck. As a compromise, I found a Duro in 3.25 x 19 with a matching trials tread. The Duro fits with a good amount of clearance on the sides. A 3.5" might just barely fit, but I'm happy with the 3.25"
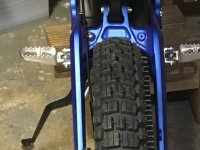
Img_0902B.jpg
Img_0903A.jpg
 
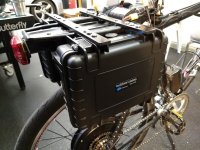
The next part of the project was a bit more ambitious, but I had plenty of time during our near record rainy season. The plan was to make a quick disconnect rear battery pack that would effectively double the battery capacity. Experiments by others indicated the stock pack was really the limiting factor for power upgrades.

I was inspired by the pack built by Wturber that used a pair of hard cases:
Wturber pack.jpg

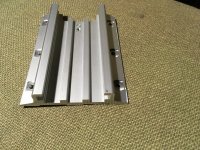
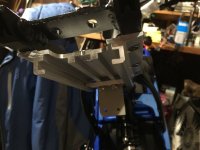
I actually had one Pelican case about the right size in my junk, so only need to buy one more to make a pair. The key of the quick mount system was a piece of surplus GCX wall channel. This stuff is common in the hospital, and I've probably recycled dozens of old ones. I had this piece lying around, so the price was right.
Img_0991.jpg

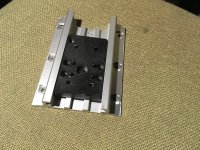
GCX makes a bunch of accessories that fit into the channel and I had those lying around too. These all have a square metal plate that is covered with nylon that slides into the grooves on the channel.
Img_0992A.jpg

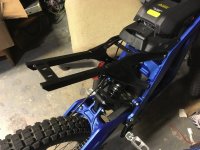
The rear frame of the bike was just the right width for the channel.
Img_0990A.jpg

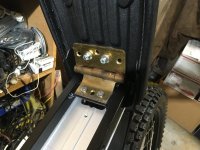
The channel was drilled along the sides with 6 holes for mounting. The frame was drilled and tapped on the bottom for #10-32 screws (about 4mm). I figured if I only drilled the bottom side, it would be in compression and not be weakened by the holes. I could have drilled all the way through and used nuts, but the tapped holes have worked well so far.

Img_0995A.jpg

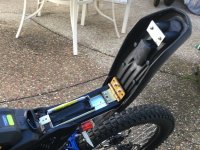
While building the rear pack, I also wanted to install a hinge for the seat. The hinge was an old door hinge that I cut with a hack saw and bent with a hammer (very crude but it's hidden).
Img_1003.jpg

The rear of the seat has to be raised by about an inch to have clearance for the seat bolts. When the seat is down, the bolts on the seat almost touch the bolts holding the hinge to the frame.

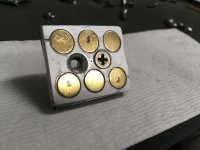
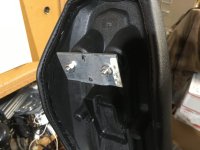
In the front, I made a custom super strong magnet to hold it down.
Img_0996.jpg
I looked around for an off the shelf one, but decided to just make one from some disk magnets I had. There is an aluminum bar with holes drilled for the magnets and about a 3mm steel backing behind them. Everything was stuck together with epoxy. The aluminum takes all the compression so slamming the seat won't crack the magnets.

On the seat side, I mounted a steel plate to attract the magnets. There are spacers between the plate and the seat. A few mm of the bolts stick out past the nuts and engage the holes in the frame. This keeps the front from sliding sideways. So far this has worked out very well and survived some vigorous off road riding.
IMG_1004.JPG

I found a small plastic box just the right size to fit between the frame rails that now holds the tool kit and my registration papers.
Img_1022a.jpg
 
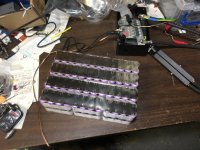
Next was the battery build. I had a bunch of Panasonic CGR18650DA cells from another project that were just gathering dust and needed some work before they go bad. The cells were surplus from some defunct power wall project and are several years old, but never cycled. Originally they were taped together and had a sheet of nickel on one side. Part of why I got them cheap.
Img_1043.jpg
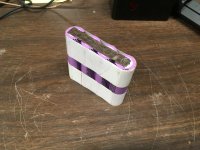
These were made up of 4 cell groups taped with some really good fiberglass tape. This tape is super strong and very heat resistant.
Img_1044.jpg

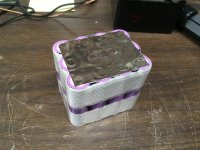
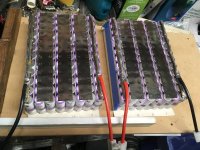
The pack configuration is be 16s, 12p, split into two sections. The 4 cell groups were lined up and glued together with silicone.
Then I used sheets of nickel to make the connections.
Img_1034.jpg
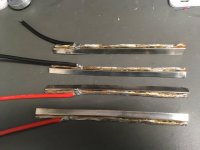
For the collector rails on the ends of the pack, I soldered 8ga copper wire to some sheets of nickel, then spot welded them to the pack ends. The nickel sheets were then folded over.
Img_1045.jpg
Img_1095.jpg
Img_1097.jpg

Img_1098.jpg
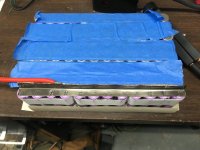
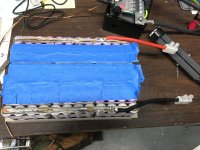
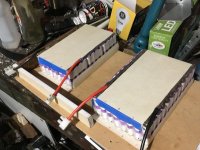
Once all the welding was done, I covered the faces with heavy Nomex paper for insulation.
Img_1099.jpg

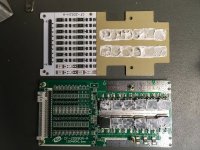
The pack has a cheap BMS that was supposedly rated for 85A. I beefed up the traces and added an extra shunt resistor to make it about 100A trip.
Img_0988A.jpg
Wires pass from one part of the pack to the other where the BMS is located.
Img_1121A.jpg

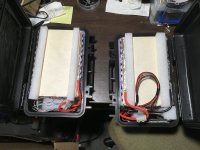
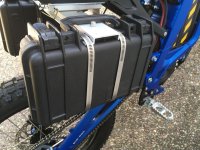
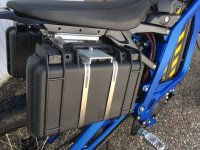
I used a piece of aluminum "hat channel" that came from a big screen TV mount to connect the two halves of the pack. The channel is bolted from inside the cases and also has a pair of gigantic stainless steel hose clamps around the outside to keep the plastic parts in compression. There are small drain/vent holes in the bottom of the cases to let water out if it somehow gets in.
Img_1131.jpg
Img_1144A.jpg
Img_1145a.jpg
Img_1146A.jpg

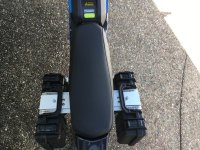
The rear battery assembly weighs in at 13.5 lbs. It really doesn't affect handling much and seems to be rock solid so far. Battery capacity is now about double, so I can ride all out for at least 40 miles. There is less sag under load, so I should get a little more out of the stock pack before EP mode kicks in. I can now support more power to the controller, which was really the main point of the rear pack.

The rear pack is locked into the GCX channel with a set screw that comes down from the top. Once the screw is tightened, the whole thing becomes very rigid and won't go anywhere. Just loosen the screw and unplug the battery cable and the whole thing slides off in less than a minute. This is pretty handy when loading the bike in the van or for working on it.

Cheap eBay rear view mirrors. These have a ball joint at both ends of the stalk so are very adjustable and won't break off too easily. They survived amazingly well riding off road.
Img_1147A.jpg

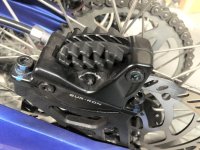
Another upgrade was the brake pads. These are Shimano Saint metallic pads with heat sinks. Way better than the stock pads, but I would probably get the semi-metallic next time.
Img_1158.jpg

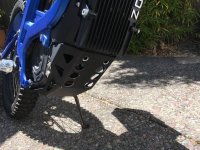
I punched big holes in the "skid plate" for extra cooling air. Running at top speed for long periods of time really heats up the motor more than going slow on trails. Extra ventilation seems to help a lot.
Img_1163A.jpg
 
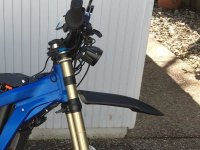
Not mentioned previously, The front fender I'm using is a Topeak DeFender in 29er size. I'm only using the front half of the fender. Installation couldn't be easier, with a single bolt that expands a plug in the fork head tube. It's a little floppy, but sure beats getting a face full of mud. I read one report of the Topeak breaking (the metal part that goes between the fender and the attachment). This part on mine seems to be made of stainless steel and not aluminum. So far, mine is fine, and the cost is reasonable.

My backside still catches a lot of crap, so the rear fender needs some extension to be effective. I don't ride in wet/muddy conditions much, so I just wear my old jacket when I expect to get a mud bath.

Img_1143b.jpg
 
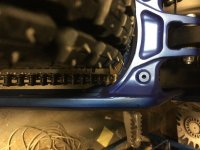
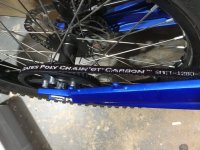
I decided to go for the belt kit. Since I ride mostly on the street, I'm not worried about mud getting into the sprockets. Installation is a pretty major job, but everything was pretty straightforward. I used the Gates belt tensioning app on my phone, which worked great.

Major teardown. I found it much easier with the bike flipped upside down.
Img_1315.jpg

Belt installed:
Img_1318.jpg

The belt is so much quieter than the stock chain. Before, about all I could hear was the chain. Now I can hear the primary belt, the motor, even the tire noise. The wind blowing on my helmet makes more noise than anything. Sweet.

I've seen reports of noisy belts by others, but mine is about as quiet as you could expect. There are some speeds where you hit a resonance and it sings, but I really had a hard time to make it stay at that speed. I let one of my kids test ride it and do a pass by. With the chain, I could hear him coming from a block away. Now I don't hear it coming until it's within about 50 feet. And the noise it makes is sort of a whirring noise instead of that raspy chain noise.

One donwside for me is it made the gearing taller. I was good with the stock gearing. The taller gearing would be ideal for using the smaller 17" moto wheels. I'm going to be on the lookout for a larger sprocket.

The gearing difference isn't huge, but significant. I need to do a little math and see exactly how much.
 
OK, I did the math on the gearing. It changed by a factor of 1.197, which is pretty significant. I estimate my top speed will be about 50 mph now if the motor makes enough power. I'll have to do more ride testing and try to mount my GPS for a check.
 
fechter said:
OK, I did the math on the gearing. It changed by a factor of 1.197, which is pretty significant. I estimate my top speed will be about 50 mph now if the motor makes enough power. I'll have to do more ride testing and try to mount my GPS for a check.

You can't just get a different belt sprocket. You'd need a matching belt too with less teeth, difficult to get spot on.
 
Tommm said:
You can't just get a different belt sprocket. You'd need a matching belt too with less teeth, difficult to get spot on.

Right. I calculate the rear sprocket should have about 75 teeth to match the stock ratio. The problem is there are only two sizes available, the one from Luna and the one from Allex. The Luna sprocket is 63 teeth. Not sure how many teeth Allex's is.
There are only certain sizes of belt available too, but I'm pretty sure I could get one that fits.

I'm going to play with it for a while like it is. I might decide I like the taller gearing.
 
fechter said:
Tommm said:
You can't just get a different belt sprocket. You'd need a matching belt too with less teeth, difficult to get spot on.

Right. I calculate the rear sprocket should have about 75 teeth to match the stock ratio. The problem is there are only two sizes available, the one from Luna and the one from Allex. The Luna sprocket is 63 teeth. Not sure how many teeth Allex's is.
There are only certain sizes of belt available too, but I'm pretty sure I could get one that fits.

I'm going to play with it for a while like it is. I might decide I like the taller gearing.

If you get it close enough, you can play with sliding the wheel in the axle slot, but you have to be pretty close.
 
I finally got a chance to do some more road testing. I made a makeshift mount for my GPS so I could calibrate the speedometer on the CA.

Img_1328.jpg

After a few tries, I got the CA dialed in so it matches the GPS within 1mph or so. On flat ground, no wind, full tuck position, I reached 50mph. Sitting upright, it was more like 47mph and sucking watts like crazy. This worked reasonably well on my favorite winding canyon road ride as there is about a 2 mile stretch of 45mph speed limit getting to the windy part. Now at least I can go close to the limit so the cars don't stack up behind me. Once I hit the curves, the limit drops to 35mph and I lose the cars quickly.

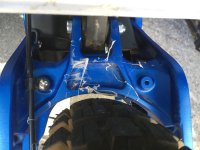
Now I'm thinking a slightly smaller rear tire would be good. As much as I like the Duro, it's huge. With the belt, the tire just barely clears the swing arm. (note the nasty piece of chewing gum I ran over and flung onto the frame).

Img_1322.jpg

The Duro is nearly 2" bigger in diameter than the stock tire. The Shinko I have on the front is only about 1" bigger, so might be a more reasonable size.

One other thing I noticed was when I got over about 45mph, I started getting some steering instability. There was a slight wobble that wasn't too bad but quite annoying. Part of this is likely due to a combination of the taller rear tire and saggy front fork, which makes the steering head a bit too steep. I'll have to look at installing spring spacers on the fork and if I go with a smaller rear tire, it should get the steering geometry back to where it should be.

For belt noise, I couldn't be happier. The thing is nearly silent under most conditions. On hard acceleration from a stop, it passes through one speed where I get a little squawk, but I can't make it sustain for more that a split second. Also, if I hold it right at about 23mph, I can get it to make an alternating hum that comes and goes with every revolution of the motor or jack shaft so it makes a pulsating whine that sounds like the space car from The Jetsons.

After running near full throttle for about 30 minutes, the motor gets pretty toasty. Maybe close to 60C. The sides are cool, but where the fins are gets hotter than you can hold your hand on it. The air flow just isn't very good on that part of the motor even with the big holes I put in the skid plate. It was a pretty warm day here, so I think it will be OK long term.
 
Until you change to a smaller rear wheel/tire diameter , it looks like you have a good 5 mm or more that you can adjust on your front fork. You can Lower the stanchion's down on the triple clamps and see what that does to the steering wobble .

That and the spacers you mention on the lower race . Interested ( as well as I am sure most Sur-ron owners ) to see what difference you experience then.

You are going up a canyon road ( he is in the South Bay going up Sierra Rd. ) a little faster than another bay area Sur-ron owner that has top of 30 up hill , Is that because of the extra battery pack ?

Are you talking about Hwy . 84 from Woodside up to Alice's ? Wonder what the grade % 's are on that road ?
 
I might try moving the forks down a bit. Spacers I was referring to would be on top of the fork springs to increase the preload. The stock forks are a bit soft for my weight.

My road is Lucas Valley Road in Marin. It starts about 2 miles from my house and I can take it to Nicasio and back. Very nice on hot days with all the shade.

On the belt noise, it seems to only get loud at very specific speeds, which makes me thing something is resonating. So I went around the bike banging on things with a screwdriver handle to see what rings with about that frequency. Ringiest thing I found was the spokes. I will try putting zip ties on the spoke crossings as an experiment to see if it changes the sound.
 
Im waiting on mine...I have a question about the extra Battery you made..is it the same Ah?...I will be making another 60 volt 30 ah pack run in parallel, to get a little extra range.
 
johnnyz said:
Im waiting on mine...I have a question about the extra Battery you made..is it the same Ah?...I will be making another 60 volt 30 ah pack run in parallel, to get a little extra range.
It's pretty close. 29.4Ahr based on datasheet for the cells. Actual capacity is probably less since the cells are about 7 years old.
 
My supplier tells me that chinese BAK cells rated at 2900 mah are the best they make and 10 amp capable. I ordered 200 and a 80 amp BMS so ill try it out and see.
 
Loved seeing what you’ve been doing. Any more updates or mods? I’ve added a second factory battery for range. What a huge improvement.
 
I upgraded the controller to a modified X controller (XX). I get peaks of around 183A and I love the enhanced regen. I removed the big Duro tire on the rear and replaced it with a Shinko 244. This gives a little more torque off the line and lower top speed by just a hair. I replaced the brake pads with Jagwire DCA705. These are the best so far. No more squeaking. Other than that, I've just been riding it. Someday I want to upgrade the seat to something more cushy. My 9-year old add-on pack is still working like new.
 
There are rumors that the software can be reprogrammed via the port on the controller board, but nobody outside of the factory has the programming software. I don't know if this is true or not. Otherwise, de-potting is the only way to do a hardware hack.
 
Back
Top