'91 Suzuki DR 250S

L.E.S

1 mW
Joined
Nov 11, 2021
Messages
15
Location
Steamboat Springs
Hello all!

I found many of the build threads on here very helpful while planning my build, so I will pass it along and have a build and iteration journal

My primary use case is a bike to scoot around campus and town when I move to Denver in the autumn of '22 and secondary use case is for dirt riding, mainly trail with some MX/Track riding

AM-JKLWffaSBanuRxbHgOlONDll4UYA4sYGSM-ix_jnVtceNUS7rcC8Nme3R5Dv3zg1QzUU4mUHxmanl1O0tHcyjrMCdWU9bWzWsUEFTGQJPUPuNzmVV6AJ12QhyYfWKd93YCEcHt4okxx5wdxOV8Ct5RNy6=w2048-h1536-no


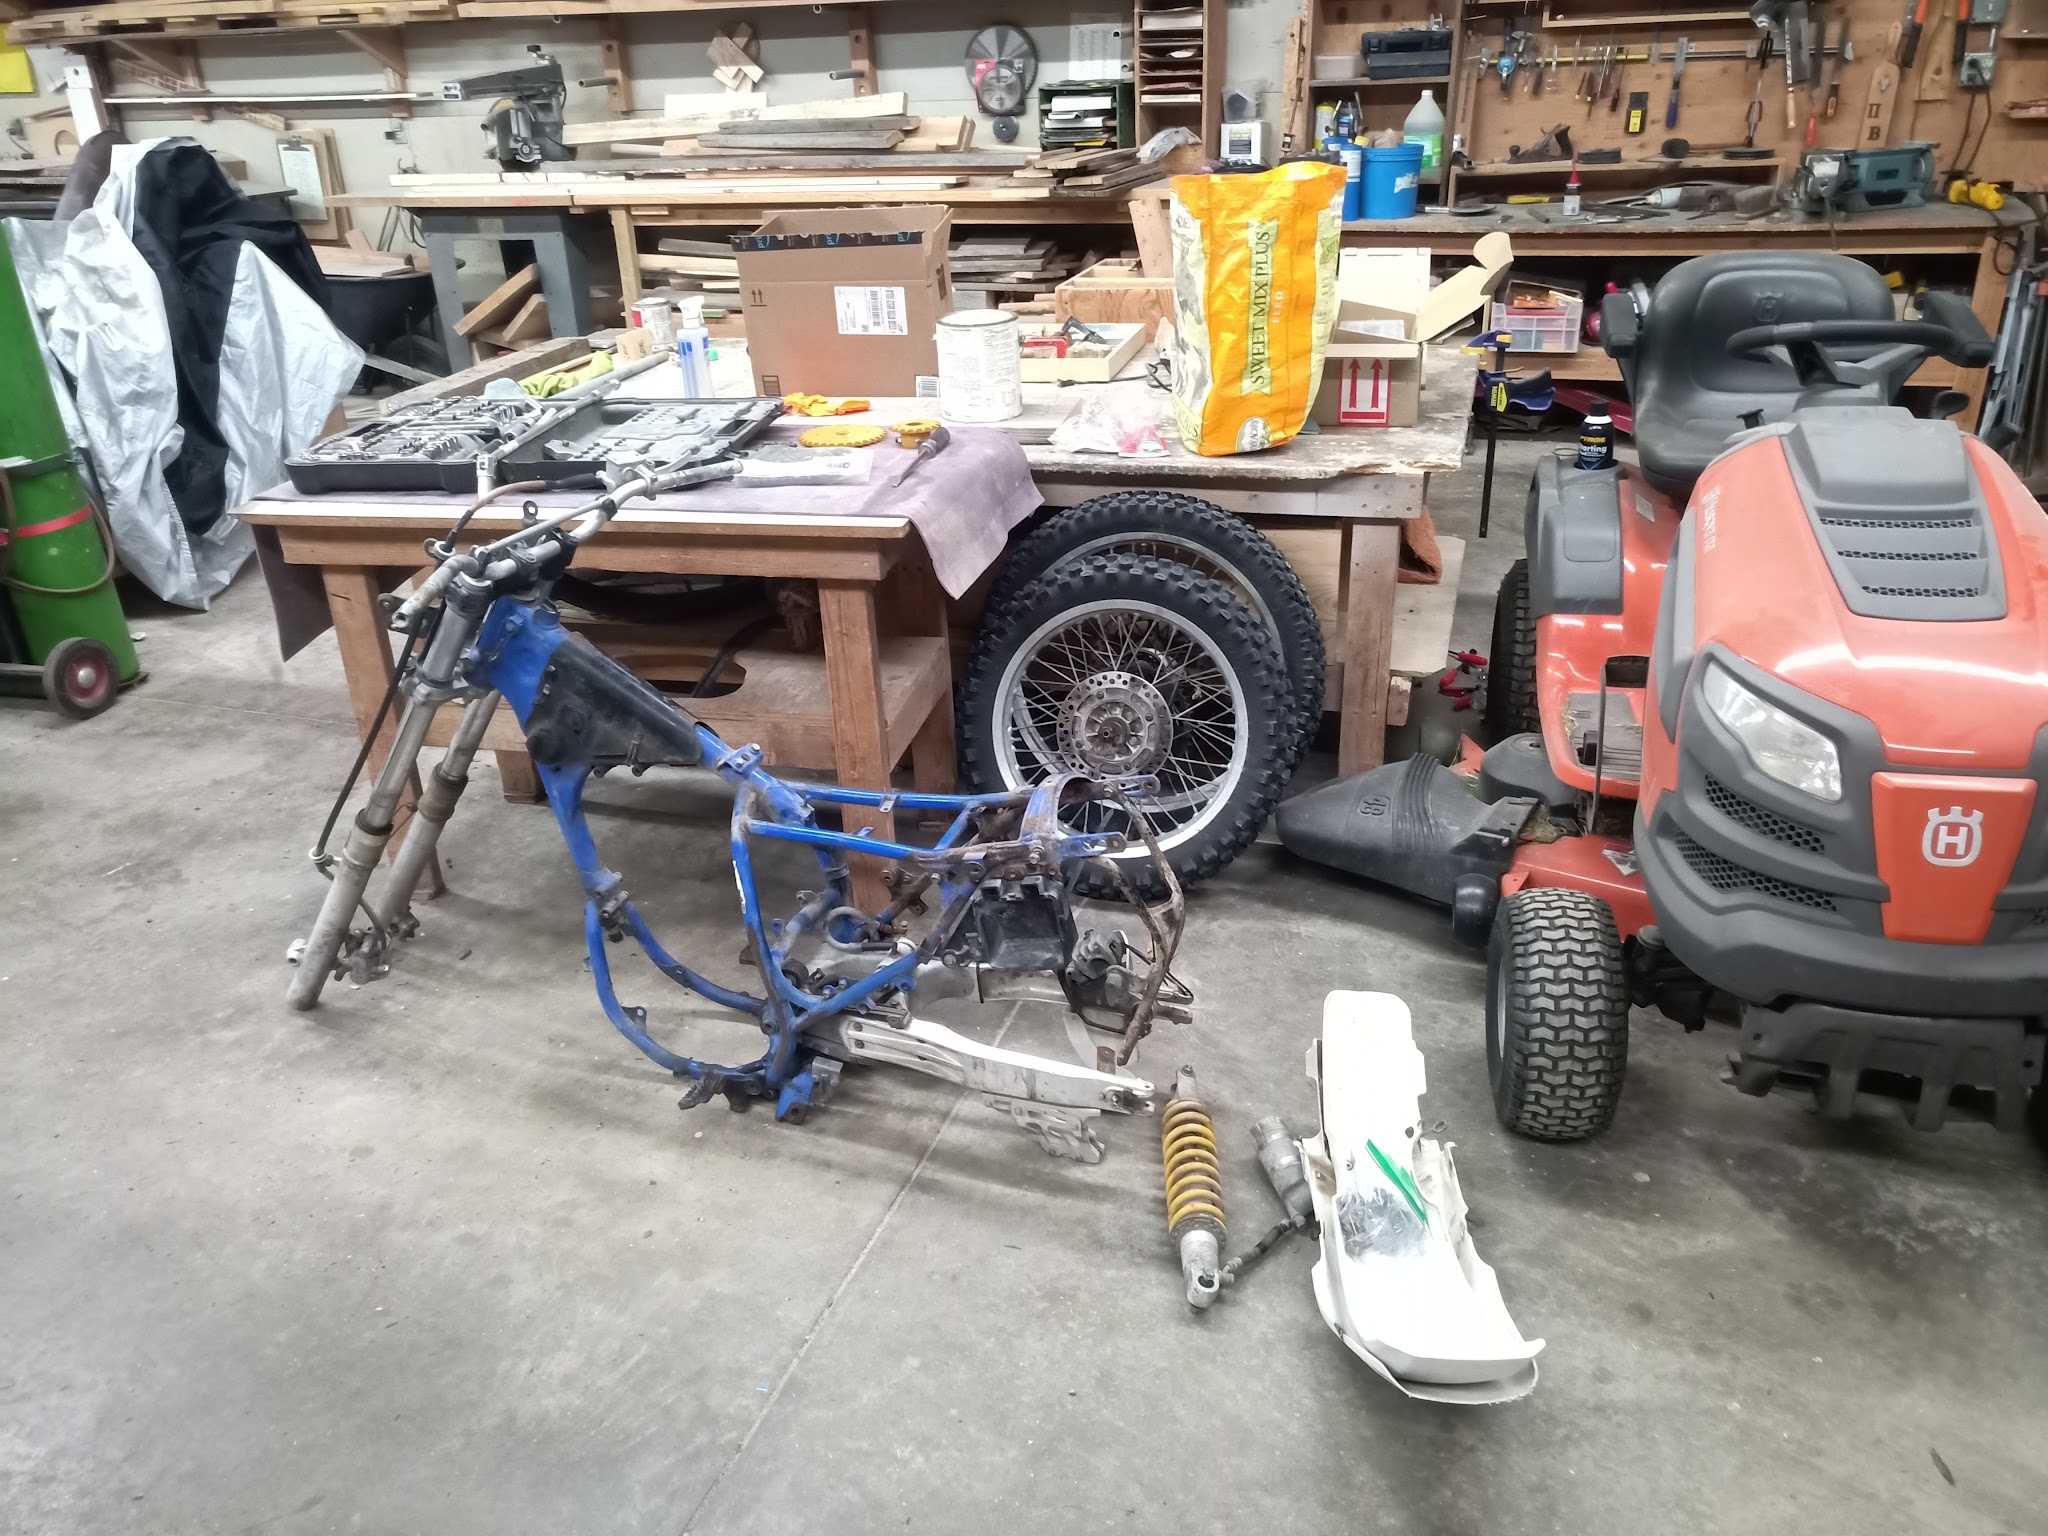
Because of this when a 1991 Suzuki DR 250S came across my desk for under $200 I jumped at it being a dual sport seemed to fit my criteria quite well (Granted I thought it was a 350 but being so cheap and good bones for a first build I'm not too worried about it)

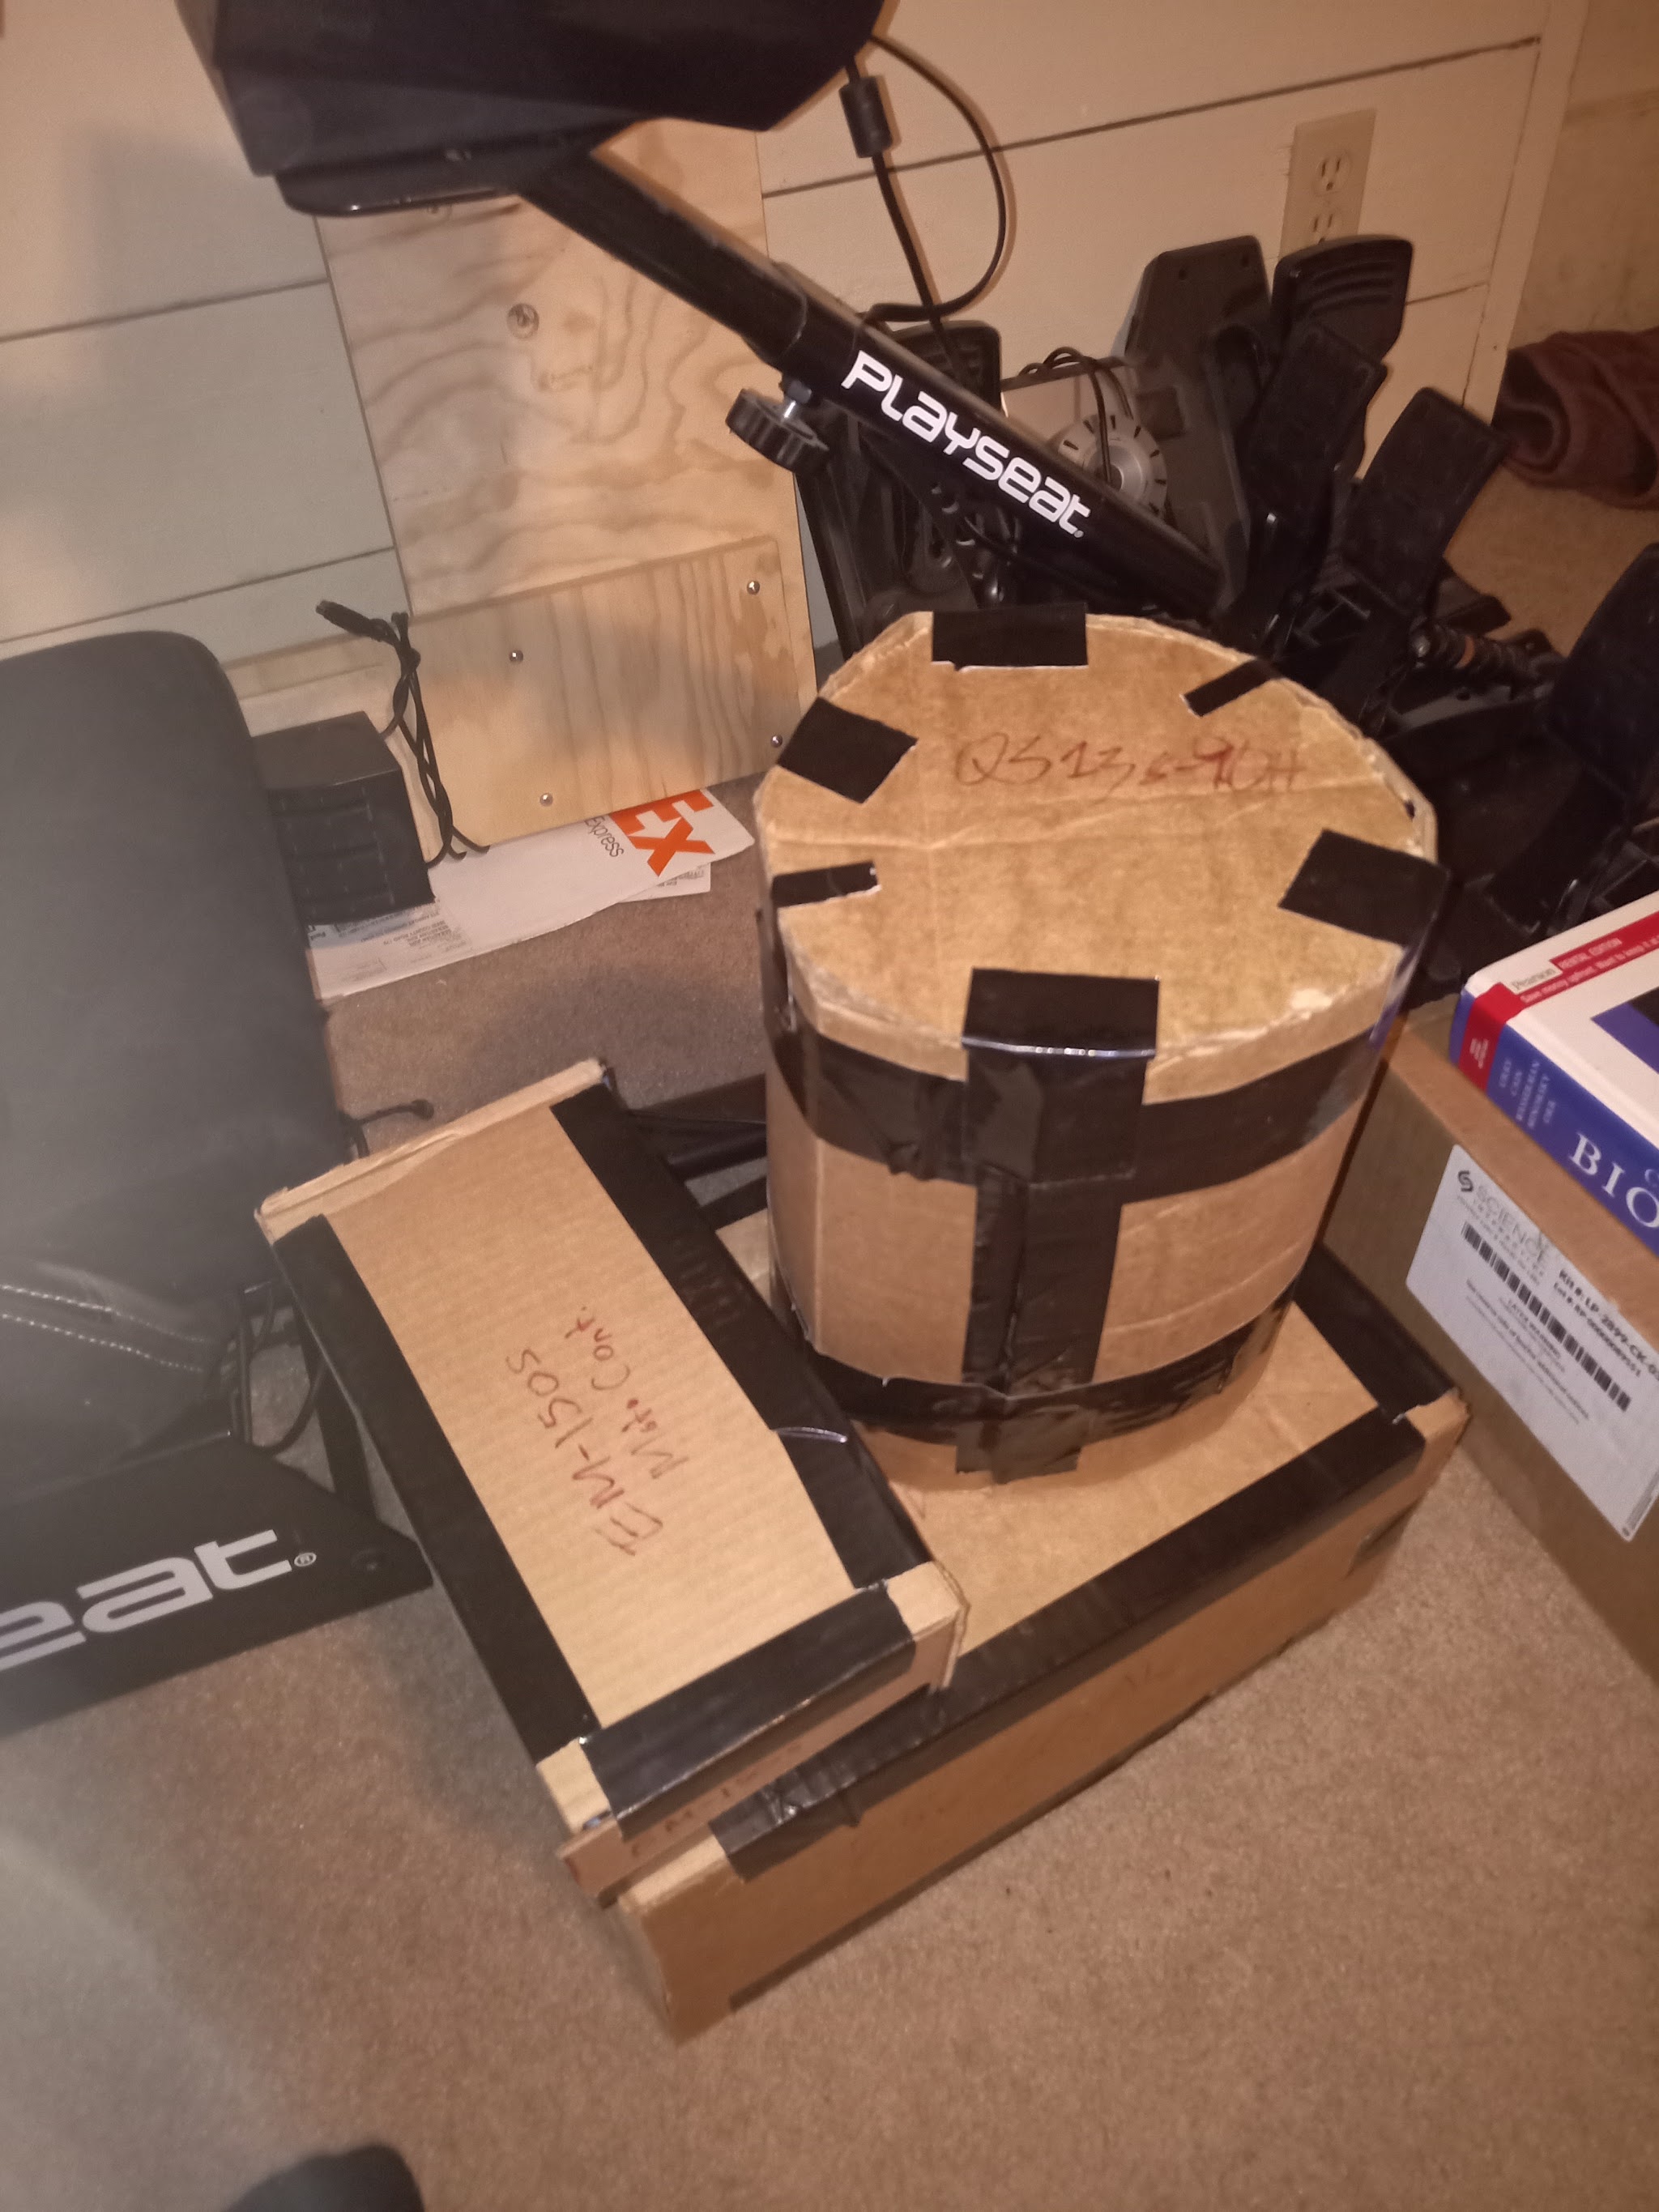
With my primary use case and affordability in mind I chose the QS 138-70H with EM-150 controller as I was able to get them and a few other bits (speedometer, cables, throttle etc..) in a kit from directly from QS. The kit will be paired with two 72v 50Ah batteries so aiming for around 60-70 mile range without having to do any hypermiling. While I have ordered the electric components last night I do have cardboard versions of them at the moment

AM-JKLWueoftY4tvUMgIyrY_Di_oU7pkj-H-O61BUNegSHwc9qiBskmfiLqR64DIUYZO94m2VELc4aAOy3NLammoaN14THPMgC6FIeUJRm-Xp6JTJg7pzO-D8osWmsc32S_RKO5nsQc2CQlUYabN4fST2DnO=w2048-h2732-no


(I have an excel sheet with all of the components linked and priced including shipping/taxes to Colorado, if you want to check it out shoot me a message)

I did purchase the electric drive components on 11/11 (the Chinese and their love of numbers, 11/11 is a holiday over there with some great deals to be found) and have been planning it out for a couple months now with learning & research going a couple years back.

Onto the bones of the build I have had them about a week, pulled apart mostly all degreased and cleaned, working my way through de-rusting the frame and sanding/polishing the aluminum (Dremel makes some great attachments for this check out part numbers 511E & 512).

AM-JKLVLlY6unP4zKM7IyAIWBFrjvY9brRRe2jCBhyDEtouIZVXWpi2yGPwNjGAuNeKXEwk31HQEx7eKcDVDHNzWLPvcVAsFzBW4TT8p1VuMQg8JV2uwSrU_XDihBsIZEdgnAdmXyxeaZAHbW-IkMScDF-bY=w2048-h1536-no


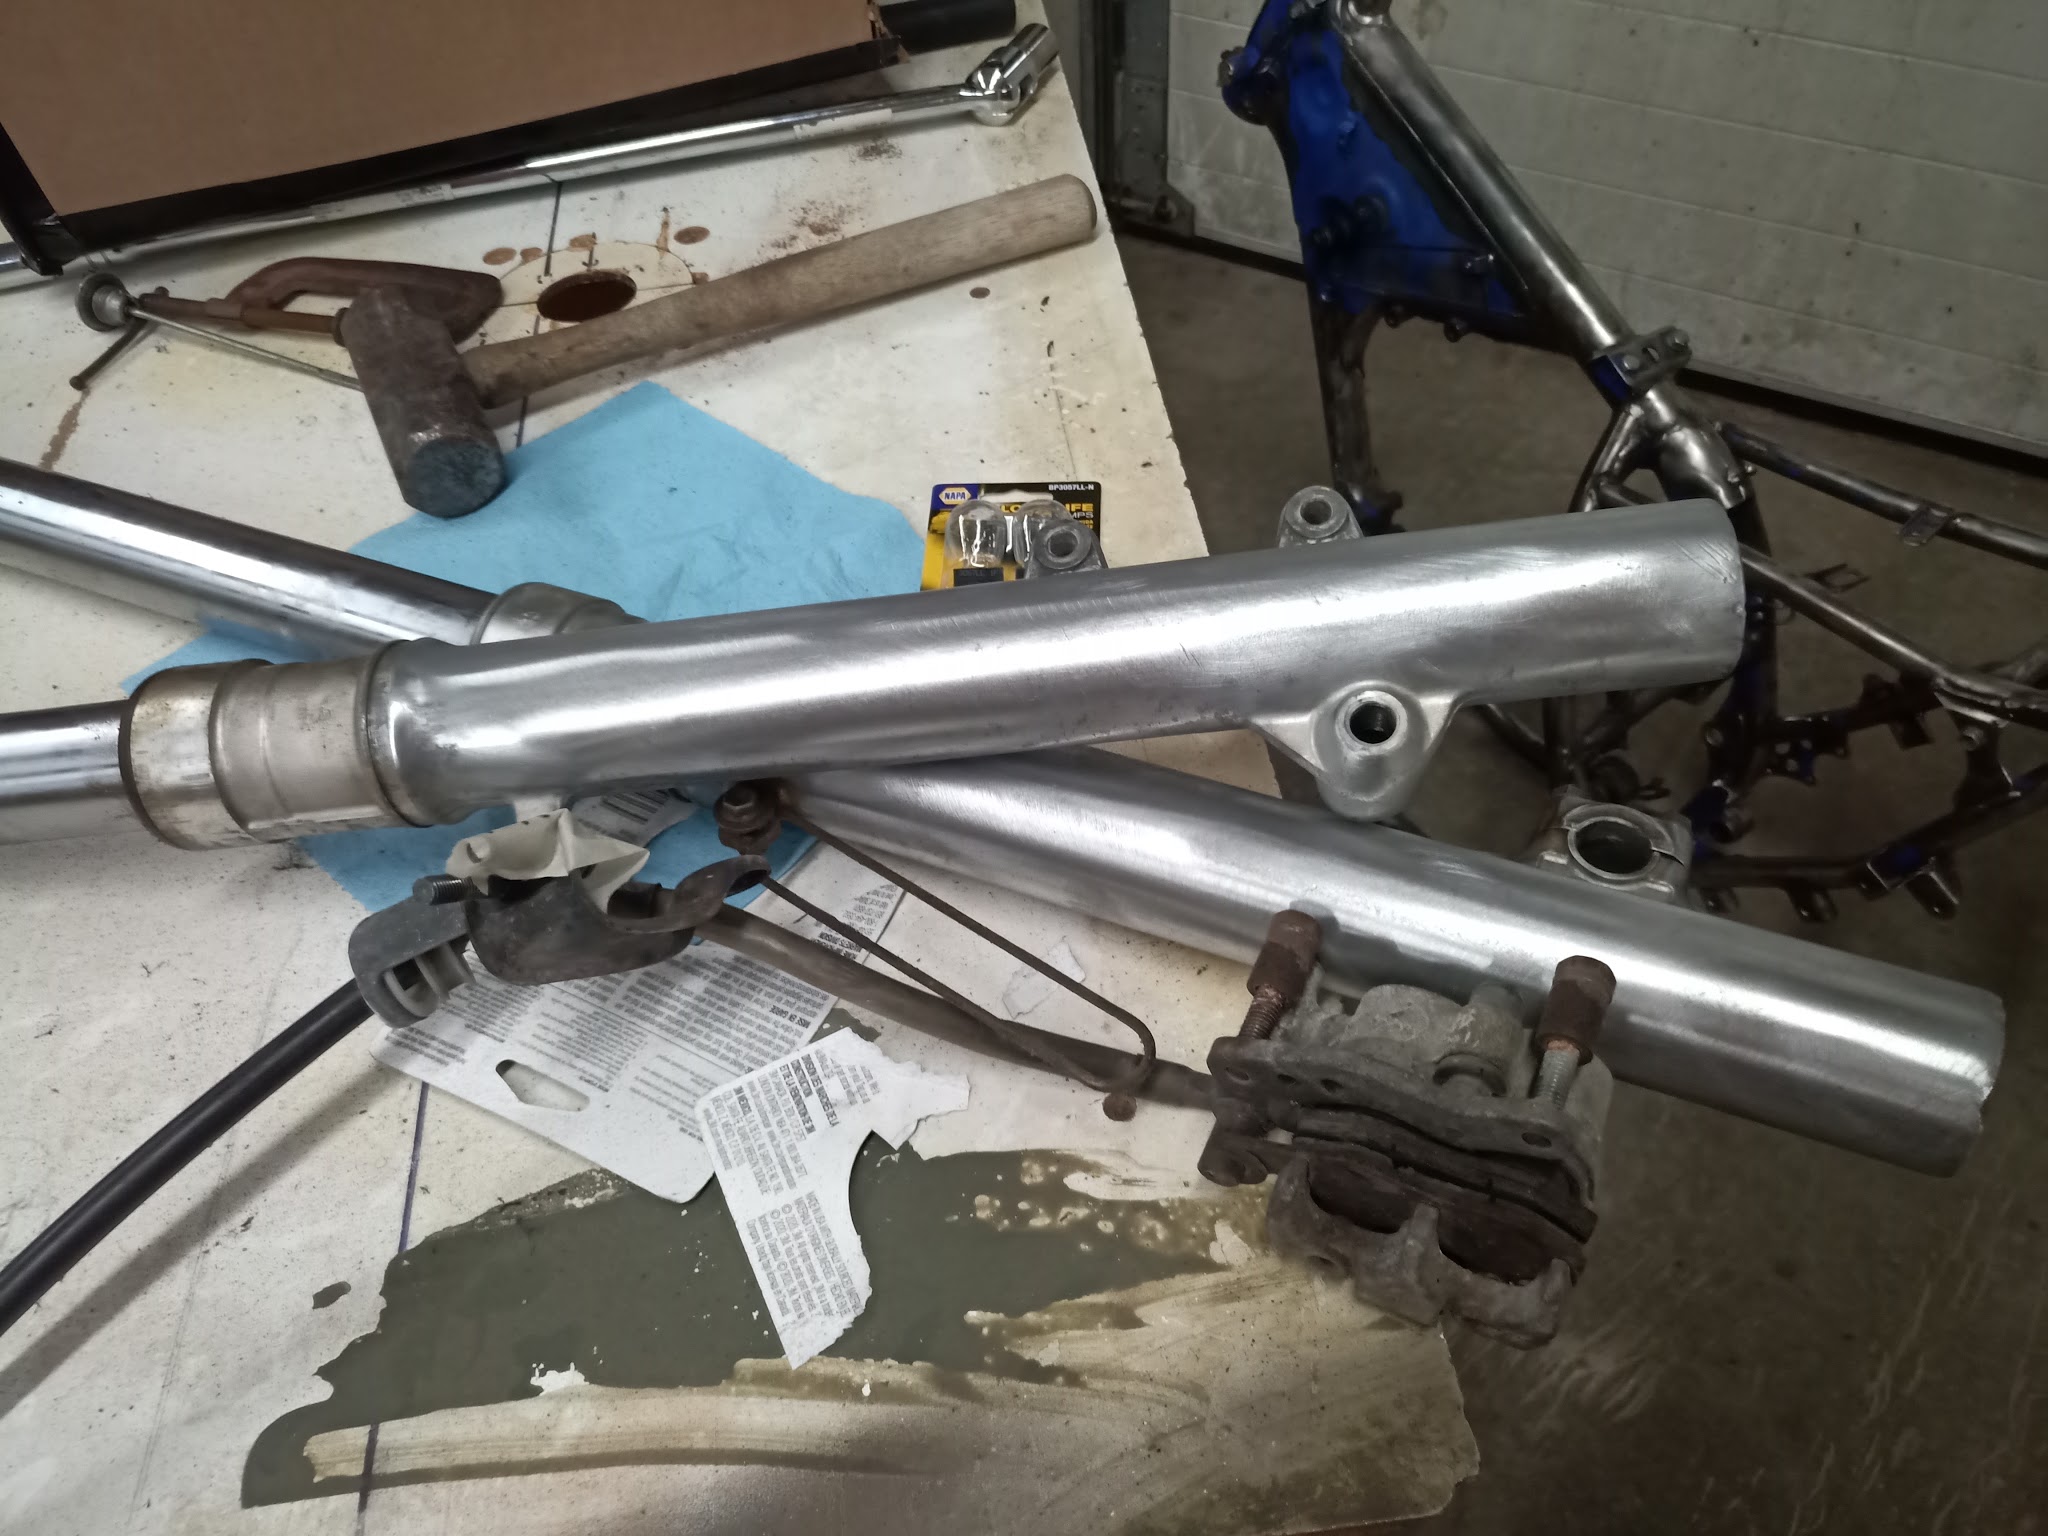
I did need to weld up one problematic looking crack, but it turned out to be not that bad and overall in a good spot for it to occur making it easy to fix and not worry about frame integrity. Over the next week or so I will be trimming unneccessary tabs and metal things to clean up where the dual batteries are going to be mounted, saddle style.

Additionally I will begin priming the frame to prevent any more rust appearing as the batteries are guaranteed to be delivered before Jan. 17th (two months). And yes I have decided on a colour scheme, mostly, for the bike. The rear suspension component is a lemon yellow that was bumped and bruised, but I do like the underlying colour, with the lemon yellow as a secondary accent and Nardo gray for the frame and other bits as a primary accent, and maybe white as the primary maybe just forged carbon the primary I haven't decided on yet and luckily don't need to!

https://i.imgur.com/30xxtoO.jpg Nardo gray for the uninitiated
 
If you need a spare frame and transmission, I have a very similar one gathering dust here in Phoenix, AZ, if you can come collect it. Might still have the fork pieces too.
 
amberwolf said:
If you need a spare frame and transmission, I have a very similar one gathering dust here in Phoenix, AZ, if you can come collect it. Might still have the fork pieces too.

Thanks for the offer, I'll see how it goes with the frame I have, as for the transmission I may be interested in it but initially I am going to try a direct drive style setup on this bike

a quick update on the frame cleaning those scotch bright style dremel pads are more amazing than I previously thought and got a 70 pack of them so there are enough after for other projects
 
You’re going to want a bigger/better controller than the em150. If your battery is 72v 100ah, you’ll be able to pull a couple hundred amps and you’re gonna need it with all that weight. Check out the ASI BAC8000 or a Kelly controller that can do 500a+.
 
SlowCo said:
This I will follow. Love to see conversions like this. Good luck and enjoy building :thumb:

hootje, bedankt!


You’re going to want a bigger/better controller than the em150. If your battery is 72v 100ah, you’ll be able to pull a couple hundred amps and you’re gonna need it with all that weight. Check out the ASI BAC8000 or a Kelly controller that can do 500a+.

I have got a handle on most of the maths for continuous amps wh/mi but peak amperage I haven't learned yet, how would it be calculated and can it be calculated in relation to weight of the machine i.e. similar to lb/hp or kg/kw?

Thanks for the insight, the em150 came with the motor and other bits in a kit so will definitely be looking into some of the others, I heard good things about Kelly cont.s but what about BAC [edit ASI]... I assume they are different from the company that manufactures the Mono?
 
It may be hard to sell a controller by itself. However...I recommend getting the package running, and able to provide test-rides.

Then, sell the controller/motor/ throttle as a running package...keeping only the rolling frame and battery.

Then you can order a more ideal package, once you've seen how the current parts fit your user profile.
 
spinningmagnets said:
It may be hard to sell a controller by itself. However...I recommend getting the package running, and able to provide test-rides.

Then, sell the controller/motor/ throttle as a running package...keeping only the rolling frame and battery.

Then you can order a more ideal package, once you've seen how the current parts fit your user profile.

This is exactly along the lines I was thinking, especially with paying for Uni. in the meantime!
 
On a relatively flat commute, the motor will only need to provide max amps for a few seconds, then you will be cruising along, maintaining speed, and drawing much fewer amps...

Sooo...for hilly country, you really need to cap the amps. But for flat land, you can raise the amps a surprising amount.

If you can fit a larger controller on version V2, I highly recommend a "big amps" controller, and then setting the software to establish the appropriate ceiling.

A larger controller that is only being given light duty on a daily basis will last decades, and it will still be working fine when you sell it in 30 years.
 
The main thing about peaks amps is how much current it takes to let the motor push you as hard as you need for startups from a stop or other momentary needs. This is rarely more than a few seconds, at most.

As long as the controller will handle continuous current to do the uphills and other longer duration heavy loads (headwinds, fast speeds, etc), without completely maxing it out all the time, it is likley that it will handle peak currents needed as it is.

If it doesn't work as it is now, it might be possible for the controller can be programmed / setup for a specific length of and/or amount of current burst for peaks, while still having the original max continous current limits.
 
Ok both of those comments are very knowledgeable

So if I understand it correctly continuous amps ~cruising current whereas peak amps is ~acceleration current?

Certainly seems to be an important piece of gear & concept

Which motor controllers are user friendly in terms of programming? I understand the Sevcons to be modifiable in nearly every possible option but am more interested in riding the bike rather than needing to tweak settings all the time, old UI's I don't mind as long as the UX is intuitive

It seems the Votols are kind of similar as above, but not inclined to comment on it too much before having it in hand or playing around with the software
 
Quick mid-week update

QS shipped the kit incredibly quick, from pick up to delivery was 3 days and 5 days from order
Naturally and I suppose unsurprisingly the batteries haven't arrived yet but I am under the impression that LiFePO4 batteries are safer so maybe they still ship via Air?

Still waiting on many bits but have begun test fitting components and further planning for other components
Not sure how much I like the motor being this high up in the frame, but it does fit well with regards to a lack of chain drag on the swingarm

IMG_20211117_193951.jpg

I've been using a chain that I just replaced off the snowblower which runs a 520 chain to line up the placement, amazing how well the motor mounts on the frame and motor match up. If there is chain drag with a different placement of the motor are there ways to reduce/remove any chain drag other than a idler/tensioning sprocket?? Ive calculated with the current placement requiring a 143 link 428 chain which is already quite long and am under the impression it shouldn't be too much longer.... correct me if I'm wrong

IMG_20211117_194145.jpg

Overall pretty happy with the battery placement as it is not too wide but the form factor very much dictates the placement of them, but for the price 7.2kWh I'm willing to work around their form factor, which reminds me that they have a built-in BMS which I will need to hack around a bit to play around with amperage, but that's further in the future

IMG_20211117_193958.jpg


Thanks for reading! If you have any questions or suggestions I am very open to conversation

and a photo of some alpacas enjoying dinner

IMG_20211106_181127.jpg
 
The placement of the motor sprocket seems to be much higher than on ICE engined bikes. I think it should be lowered 5cm (or more) and checked with compressed suspension when on the ground with all the weight including rider on it.
 
Check at the right riding height, but also test the whole range by taking off the spring.
The motor should probably sit lower than you might think, on the ktm I have more wear on the underside on the chain guide than the upside.
But it is just at the pivot point, so it is probably from when the suspension is compressed a lot. Maybe it cant be avoided, at least with small front sprockets.
 
j bjork said:
Check at the right riding height, but also test the whole range by taking off the spring.
The motor should probably sit lower than you might think, on the ktm I have more wear on the underside on the chain guide than the upside.
But it is just at the pivot point, so it is probably from when the suspension is compressed a lot. Maybe it cant be avoided, at least with small front sprockets.

I agree with Elektro that is quite a good idea, I have the motor mounted maybe 3-4cm lower than the previous photo, now the distance from swingarm to chain is more even on either side. Is that the aim to get an even distance on either side, assuming lined up with the pivot point it should be possible to get it pretty close where the only time it rubs would be lifting the bike without a spring and bottoming out the bike?

It is going to be more a street/supermoto type commuter bike for uni with occasional trail/track use (its a small backyard track, no enormous jumps)

I am going to more properly test this (a short 520 chain off the snowblower makes it a bit hard) once I get the new rear sprocket and chain put on


In the mean time waiting on kits with bearings and seals for all the bits that need it (stem, linkage etc...) and designing some new fairings
 
L.E.S said:
Is that the aim to get an even distance on either side, assuming lined up with the pivot point it should be possible to get it pretty close where the only time it rubs would be lifting the bike without a spring and bottoming out the bike?

Yes, in the most frequently used position (this would be with a rider sitting on the bike)
the chain shouldnt touch anything except the sprockets,
and all three rotation axles (front sprocket, swing arm, rear sprocket) should be in a line:

chain sprocket alignment.gif
 
Elektrosherpa said:
L.E.S said:
Is that the aim to get an even distance on either side, assuming lined up with the pivot point it should be possible to get it pretty close where the only time it rubs would be lifting the bike without a spring and bottoming out the bike?

Yes, in the most frequently used position (this would be with a rider sitting on the bike)
the chain shouldnt touch anything except the sprockets,
and all three rotation axles (front sprocket, swing arm, rear sprocket) should be in a line:

chain sprocket alignment.gif


Ok I've got you now

Great diagram I am a visual learner so helped immensely :bigthumb:
 
It's been a while since I've posted an updated but I started a full time job that is very busy around christmas & new years

However, I have got the wiring harness more or less ready (still waiting on the indicator lights to arrive), I had to splice the whole harness a few times and change up a few connectors, but I did finally get around to start to watch the Sopranos while doing it at least

The motor is mounted temporarily but securely so once I finish putting in the new bearing in the dog bone and swingarm I can really test the placement, I decided to go with a 47T rear sprocket in a 428 size to match the motor shaft sprocket sizing, and managed to get a beautiful aluminium example made by Rebel Gears out of Tennesse (and suppliers of the Yamaha factory offroad team!)

Otherwise, I am still waiting on the new battery, it has shipped, but I cant wait to get 7kWh of fun so I can start fab-ing the mounting brackets and protective bits, I may look into eventually making a heat exchanger for cooling/heating the batteries as just this morning it was a frosty -20 celsius (-12 F)
 
Have some updates:

+ The batteries finally arrived
+ Got the motor spinning and display work

+ Got some battery box layouts from SendCutSend
+ Meeting a local fab master to fold and weld the boxes
+ Meeting with colleague's husband to help weld battery box brackets

+ Bearings and bores have all been cleaned regreased and replaced with new bearings!!
+ The batteries I got are 2x 72v 50aH but came with a rather limited amperage throughput b/c of the bms, so will begin tearing one of the batteries down to bare bones and replacing with a higher performance BMS

The only current issue is getting the motor controller to hook up to the software correctly as I can't get it to recognize it as it should
 
Back
Top