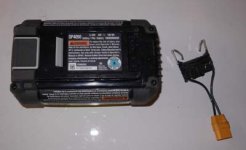
Understanding and Using EGO Power+ Batteries

Even at 6% the conductivity of copper, the resistance is still quite low. But it might get warm at high current. The amount of material in the blade is significant, so essentially there are a bunch of parallel paths through the blade to the wire. I just haven't found anything better other than pure copper which tarnishes badly in a hurry.

I could go a different direction, and use silver plated copper. I have the silver plating powder that works on copper switch and relay contacts as well as printed circuit boards (best used before the holes are drilled), it would work fine on some copper sheet. Let's see how bad this alloy is first.

It partly depends on whether one is going to parallel two packs, then the current through each contact drops in half. But let's see how much resistance is in one of these contact blades:

The cross sectional area of the contact is 0.8 x 20mm = 16 square mm which is equivalent to a wire of 4.5 mm circular diameter. which is about 5 gauge and has a resistance of about 0.31 Milliohms per foot in copper. We're going about 0.7 inches here, so 0.018 milliohms across one contact if it were copper, for this nickel-silver alloy (which contains no silver, it's just a name), is 17 times higher so the resulting resistance is 0.31 milliohms per contact. At say 20 amps this will dissipate 0.124 watts. At 30 amps it would be just over twice that value. It might warm up a little, but probably not much. Paralleling two packs would reduce the heating quite a bit, 1/4 in each contact, 1/2 total due to I squared R.

I don't think I'll order any copper just yet. Let's test it and see if we have any problems with the nickel silver first.
 
The Prototype Contact Material arrived.

Specs:
Metal - Nickel-Silver (trade name, contains no silver)
CDA #752
65% Cu
18% Ni
17% Zn
20 gauge sheet (measures 0.80mm)
6x6" (150x150mm)

From Integrity Beads via Amazon (probably on ebae also)

I was concerned about the stiffness of the material, however this is very stiff. It should be plenty strong enough to do the job required here. It came well packaged and sealed. It is a matte finish, my understanding is that it can be polished to a jewelry finish. I don't think that is too important for us. It is nice that it is not a thin surface over copper in one sense - polishing or scraping will not penetrate the surface and yield bare copper that quickly corrodes. It is less conductive than copper, as was discussed above.

Pure copper in the same configuration is a bit cheaper, so a silver plate over copper would actually be a better solution from a resistance standpoint. If you have a good way to plate copper it might be worth considering. Plating should be thick enough to not easily be scraped away

This will probably be easier as no plating is necessary. It is said to solder well.
 
The four wire milli-ohm meter is a tool that doesn't get used every day, but is the right tool for this job. Each of those clamps makes two connections, one side of each pair is for inserting the current and the other is for measuring the voltage drop accurately. Pretty clever setup that allows it to accurately measure really low resistances accurately.
 
Nice job finding the material, will be looking forward to seeing the finished connectors and would be interested in purchasing a couple if you happen to make a few extras.
 
Too bad my Ryobi weed whacker only uses 36V. Mine came with a a 2.5AH battery. I used a $20 online coupon to get the Ryobi 5AH battery for $120 from Home Depot. I have used them to run my small hub motor bikes. I believe both are 10S-2P, with the 5AH model using 2500 mah cells.

As far as contacts. I took apart a cigarette lighter receptacle to get the springy metal. It work hardens quite fast if bent and will snap, so it was a little tricky, but after cannibalizing two receptacles, I made a crude connector that works well enough for me.
ryobi1.jpg

I put it in a small bag and either hang it under the seat or on a rear rack.

Turns out though that the $39 36V 4AH hoverboard batteries I picked up last summer seem to be just as good, although I have to keep them in ammo cans.
 
If there is enough interest perhaps a separate thread on the Ryobi 36V batteries should be started. Most of my bikes don't run very well at that voltage. I use the Ryobi 18V packs for some tools and they are fine, but in a higher power application the cells need good cooling. From what I've seen the EGO batteries are leading the pack in heat management and cooling design. (Apologies for the bad pun).

I decided to order one of the 7.5AH batteries since they are on sale for a relatively low price. I could use them in my yard tools, but at just over double the weight of the 2.0/2.5AH packs I'd generally rather use the lighter packs and take a break when one is discharged. I see the 7.5's are on backorder, which means I should get a very recent date code pack, but I'll have to wait a little.

As was noted before, I received metal for the battery connection contacts but this project has not made it to the front of my todo list yet. I went ahead and ordered some copper in addition to the nickel silver in case I decide to try it. Either would be fine, the Nickel Silver will be more corrosion resistant. The Copper should probably be plated to protect it, I do have a bottle of Kool Amp silver plating powder that could be used to apply some silver to the copper. But it probably isn't worth the effort. I have other uses for the copper so I procured it anyway, it is actually cheaper than the nickel silver.

I relocated this thread by searching for EGO, apparently our hard working forum support has succeeded in making 3 letter search terms work.. Thanks!

If anyone is interested in helping with this project, a good task to tackle would be to try and decode the BMS serial communications. If we can do that I will add that pin to the connector and we can get the advantage of the BMS data which should provide cell level low voltage information and better protection against pack overdischarge. A small Arduino or similar could be added to the connector to provide audible LVC warning, or even switch the controller logic power off.
 
So you are feeling like additional monitoring would be good in addition to an EGO charger’s overcharge protection and whatever voltage indicator people are using in their bikes to keep an eye on pack voltage?
 
I'm not concerned about charging, that is taken care of by the charger which makes all four connections, so it has the BMS Data connection and the Temperature connection to work with.

I would like to be able to get BMS information for improved discharge protection on the bike during discharge and regen. The output connections on the pack do not go through the BMS in the pack, so if a cell is getting low before the rest then the terminal voltage may not drop enough to protect that cell. I'm expecting that through the Data connection we might be able to better protect.

The best we can do is set a fairly high overall pack LVC without the individual cell voltages to monitor. Lots of folks operate their packs without individual LVC protection, if the cells are well matched they will go down together and this will make the overall voltage a good indication. As the pack ages this may change and one cell may deplete earlier and be drawn to a lower voltge causing stress on it.
 
Hey gang, first post here. I'm invested in the EGO batteries as well and I found something that might help. I own a couple OneWheels and saw someone who 3D prints a mount for the battery pack designed to ride on the fender of the OW. I think with a little modification to the mount it could be used in any number of applications. He shares the file on Thingiverse.
https://www.thingiverse.com/thing:2949738
-Alex
 
I bought this EGO 3D printed mount on eBay (https://www.ebay.com/itm/141994625700) and used the tabs from a EGO battery charger that I took apart to create a slim mount for my 7.5Ah battery. Unfortunately, I haven't had any luck with it since the tabs don't go far enough into the battery to get a consistent connection.

At one point, I did have my EGO battery pack on top of half of a EGO battery charger working but I wanted to slim it down further to stick in a rear rack bag along with the controller. If someone wants to go down that route, eBay usually has chargers for ~$20. The chargers are fairly easy to pull apart and remove unnecessary pieces.

@Alan B - how did the Nickel-Silver 20 gauge Sheet - 6" x 6" work (https://www.amazon.com/Integrity-Beads-NKSHT20-Nickel-Silver-Gauge/dp/B00JDVVYNO) for you? Does it get too hot? How did you end up cutting the sheet?
@XanderChop - did you end up buying or making that mount? If so, how did it turn out?
 
Anyone still working on this?
I'd like to be able to mount the EGO battery quick and easy but believe I can't just attach to the two outside connectors on the battery. I believe I need to attach somehow to the T or the D connecting port in addition or battery will not work. Yes/no? Perhaps an easier solution is what I found in another thread here on Endless Sphere where guys have simply opened up the case, soldered new red/black wires to the main power lines inside then running these new red/black wires out new holes on back end of battery case. This way you can use it on your bike yet still charge with stock charger. One downside is Downside might be that this bypasses batteries circuitry though I don't know if the battery circuitry analyzes individual cells for either min voltage or over current protection during discharge so may not matter. I'm guessing that during charging the cells are monitored and all brought to full charge. My controllers will shut it down at 42v and prevent over current.

I have some Razor MX600 electric dirt bikes and a couple of electric go karts all I've modded to 48v brushless 1800w motors, 48v brushless controllers and 16s A123 LiFePo4 cells 4500mah and capable of insane current discharge like well over 60A, assembled with BMS. Big benefits of the LiFeP04 cells are recharge at 5C not a problem and discharge 50C no problem and 1000 cycles. It would sure be easier to buy these Li Ion packs to use. I have one of the 7.5Ah EGO packs for their excellent mower and a 2.5Ah pack too. The 2.5 Ah pack quit accepting a charge after 5 cycles so they're sending me a replacement. I broke apart the pack and discharged each cell to see all cells great just something in the circuitry. Here I've read the cells are likely 20A max so I did some testing. Testing each of the following from 4.06v (charge of each cell when taken apart) to 2.9v chosen cut off at constant discharge current listed. Note the starting voltage of 4.06v is not full charge and cut off of 2.9v could have been lower if trying to find max capacity. Also to test for max capacity I'd have fully charged and run down to 2.8v at about 1A or less. I wanted to know what the cell was capable of without over heating to reduce life span. Starting temp 71F. All different cells from same pack.
Amp discharge Temp increase mAh Time it took to reach 2.9v
2A 6F 2194 1 hour 5 minutes
3A 6F 2158 didn't record
5A 22F 2144 26 minutes
7.5A 37F 2153 didn't record (note slightly higher capacity recorded, interesting but only 0.4% higher)
10A 47F 2108 13 minutes
12.5A 49F 2050 10 minutes 5 seconds
This last test went from 73F to 122F in 10 minutes. No sense testing higher for me. I'd not want to go beyond this temp personally.
I would feel totally comfortable using in a bike that might frequently hit 15A under heavy acceleration but not at a consistent 15A. For the 1800w set up I'm using I can hit 30A but only when accelerating from a stop and not likely above 15A at full throttle once at full throttle. I'd need two of these 2.5A packs in parallel or a 5A. Clearly a 7.5A could handle it all with no issue so long as the internal wires are capable of 30A. Any thoughts on my original questions above? The Samsung inr 18650-25r cells (2500mah) are available at vruzend.com for $4 each. Not sure if there is a better source. To build your own 7.5 Ahr pack you'd need 42 $168, $34 BMS, $34 3A charger. In addition, spot welder or the vruzend battery kit (actually two as each kit holds 30 cells) $34/kit. Total $304 to build and have charger. ebay has the EGO 7.5A battery for $280 new w/ free shipping. You'd need a charger if you don't have one.
 
I have not worked on this project for awhile.

Not selecting the smaller packs (2.5AH or less) over 15A continuous is reasonable. I think at a minimum the 7.5AH or a pair of the 2.5AH packs in parallel should be used for ebikes.

It would be good to analyze the data lines and see if the (probably serial) info there is easy to decode. The temperature channel is apparently a simple sensor and not too hard to read out. It would be nice to read those while using it on an ebike instead of just relying on a proper LVC value in the controller.

Lately I've been working (on another project) with some heat-set threaded inserts for plastic that would make the EGO battery mount easy to bolt onto the bike and clamp the battery. I look forward to improving the 3D printed designs at some point when I get back to this work.

Too many projects..
 
Alan B, did you make any progress on a EGO battery adapter?
 
I just finished building a bike for my neighbor with a Q100 hub and a 7ah EGO battery. I bought a used charger on EBay, gutted it, hid the controller inside the charger case and mounted it on a rear rack. It works great and makes a clean installation with all the connections out of site. The only problem is that on bumpy roads the battery will slide out enough to break contact so she puts a bungy cord around it to hold it in tight. The deal was that I would motorize her bike and she could use it for the season free. If she liked it she would pay me for the parts and keep it. If by the middle of April she didn't like it I would remove the parts and put her bike back as it was.
Needless to say she loves it and paid me for the parts after one day. I could see the ebike grin on her face from half a block away. Priceless
I think this may be the answer for some of us that would like to build and sell a few bikes. I've been asked about it in the past and always declined because of the liability and warranty issue of lithium batteries. The other plus is that if the buyer decides they need longer range all they have to do is order another battery from the orange building supply place.
 
If someone wants to work with one of my plastic mounts contact me via PM, I don't have the time right now to make the metal bits but could provide a limited number of the plastic parts.

The biggest risk here is the current is bypassing the BMS, as I understand it. The tool normally communications with the BMS while drawing on the battery, but we haven't figured out how to do that.
 
I bought the eBay 3d printed battery mount (link in an earlier post). I had to work with the seller, who is great btw, to adjust the length and height of the slots. I gutted an old Ego battery charger to get the metal tabs with the wiring. I put that into the 3d printed battery mount and installed it vertically so that when I ride over bumps the battery doesn't pop out. It's been working fine so far.
 
I just created an EGO battery mount on my 3D printer and installed it on my bike. It accepts the 56V (really 52V) EGO tool batteries. I have a couple of their 5Ah batteries for an underused EGO battery powered snowblower and a 2Ah battery for one of their leaf blower. These should be good for shorter rides or to carry along as a spare for longer rides. Sure was cheaper than buying a broken EGO tool for the socket... but a lot of work. Hope someone else here can make use of this.

https://www.thingiverse.com/thing:3415459
 
Refurbished ego batteries $34.95 https://www.amazon.com/EGO-Power-Lithium-ion-Equipment-Refurbished/dp/B07BL512Y2/ref=asc_df_B07BL512Y2/?tag=hyprod-20&linkCode=df0&hvadid=309821031964&hvpos=1o13&hvnetw=g&hvrand=81019171741343055&hvpone=&hvptwo=&hvqmt=&hvdev=m&hvdvcmdl=&hvlocint=&hvlocphy=9031538&hvtargid=pla-575511859375&psc=1#
Sounds scary to me.

[moderator edit: that's a charger, not a battery.]
 
It sounds like some builders are buying the smallest and cheapest chargers, and then gutting them to use the shell and contacts as the battery mount
 
I thought of using a battery charger to tap the battery power. I have an extra small one that came with my leaf blower that I could have sacrificed. And these can be had for about $20 new. But the cases are kind of bulky and they lack the locking tab that the tool battery sockets have. I guess one could add something to lock the battery down or just stuff it in a pack or whatever. I wanted a slide on/off solution with locking so I went the 3D print route, although it turned out to be a good bit of work and several iterations using the basic TinkerCAD program and my basic CAD skills.
 
Looking at this from the opposite direction, can the EGO charger be used to charge our 52V e-bike battery packs? These packs have only + and - connectors so I assume the BMS is fully self contained and doesn't require talking to the charger. So could one tap the + and - feeds from the charger to charge, say, a 52V Samsung Q cell pack? Or do the other terminals on the EGO charger what reports voltage back to determine charge termination in which case this wouldn't work without some other connections.
 
Has anyone figured out a good and reliable mount design? I'm wanting to use these batteries on my razor dirt bikes and go karts that I've already modified for more power.

If anyone makes them I'd love to buy a couple.
 
Back
Top