The SB Cruiser : Amberwolf's 2WD Heavy Cargo Trike & Dog Carrier

So far, at night, I'm getting anywhere from no change to several feet more room behind me both while moving and stopped at a light, with the new lights on the rear (and the old ones removed).

No change in daytime, but I didn't expect any. Even in daytime, when the lights are significantly less visible (a concentrated spot of light does work better in daytime than at night, as it isn't blinding with all the other light already there), the brake and turn signals still work to communicate with others on the road, just as the DOT stuff did before.

I am considering a couple of changes to the system, however, which will need some electronics development. Simple stuff, but have to work it out and possibly do some experimenting.

I'd like to put a light sensor on the trike, probably underneath it near the center, so that when there is sufficient light from daylight hitting it, it would turn off the taillights (or dim them extremely), for better contrast with the brake lights (which brighten the taillights to full as well as turning on separate brake-only strips), and with the turn signals that are immediately parallel to the taillights.


I'd also like to make the tail and brake lights dim or even cut out entirely, during a turn signal, on the side the signal is flashing on, for the strips that are immediately parallel to the turn signals. This would be for day or night use.


The light sensor would probably just be a photocell in a voltage dividier biasing a transistor in series with the light strips I want dimmed or brigthened. I have photocells in various old self-dimming lamp fixtures (meant for nightlights that sit directly at the outlets), where the fixtures don't work anymore (bad SCRs probably). I have plenty of transistors of assorted power ratings, and heatsinks if I need them.

The other electronic switch would also just be biasing that transistor above, possibly with a diode from the turn signal power to force the transistor off. Dunno yet, have to draw it out to find the lowest-component easiest design I can make with what I already have.

What makes it a bit more complicated is that I'd like it not to blink the tail/brake in opposition to the turn, which is what I *do* want to happen to the side marker lights, but rather to simply turn off the tail/brake on those strips until the turn signal is turned off. I can probably do this with a capacitor that is charged by the turn signal voltage, that whent eh signal shuts off drains down to the point where the tail/brake can turn back on about the same time a new turn signal pulse would come along, so they never get to turn back on until the pulses stop coming in. If I can't do it with a straight cap, I can use a 555 timer in one-shot mode, but that's mroe complicated (which usually means it's more prone to failure).


Have run into a couple of problems with the front end:

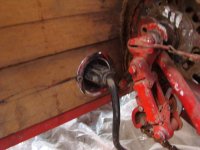
The speedo sensor wire appears to ahve broken somewhere along the area behind the headlight before it goes up the tiller. If I touch it along that area it sometimes starts working again, but whenever I move the tiller it stops. No idea why it would have failed; it worked fine on my way to work yesterday, and didnt' work on the way home. No signs of anyone messing with it, so I guess it just failed between those times. Need to find the bad spot and splice around it.

The narrower rim causes worse brake rub from the back-front set of pads, due to the angle the bosses are at vs the fork/rim (since they're bolted to teh *back* of the fork rather than the front). It causes the back tips of the pads to rest against the rim all the time even when the cable is so loose you can't even brake at all with them. No such problem with the front-front pads, as those bosses are at the normal angle. This was a bit of an issue with the wider rim, but not nearly as much as it is with the narrower rim, because narrower causes the pads to be at more of a splayed angle to be where they can sit that braking properly clamps them against the rim.

Only fix for this is to do what I planned back when I put the second set of brakes on the fork, whcih is to make a "wedge" cup on the back fo each end of the boss-arch to chagne the angle the assembl sits against teh fork legs, to force teh bosses to be parallel with the rim like the frotn ones are. Not sure when this will happen.

Until it does, then keeping the pads where they have to be to allow full braking means pad wear on the rear tips, and a noticeable loss of efficiency (couple wh/mile!).
 
I've finally had enough time here and there to get the CAv3 setup with the 3.12b3 firmware (vs 3.1 I'd had before), and reset it to factory during the FW upgrade to clear some "invisible" bad settings that were causing me problems with power limiting when running the throttle thru the CA (so I could use the Torque PAS).

So now, thanks to Teklektik over in the CAv3 beta thread, I've got pedal control of the righthand motor (presently teh crystalyte HSR3548 till I finish fixing the axle on the MXUS 4503), with as much power as if I were using the throttle for it. I have the CA set to speed limit at 20MPH, so I can use the pedals as a kind of cruise control, meaning that as long as I'm pedalling with sufficient cadence, it'll keep me at that max speed without me trying to handle the throttle controls.

That's important because my hands randomly go numb (somtimes one, sometimes both) and I can't easily tell what I'm doing with them unless I'm looking at them. Happens more and more frequently, so I've been working on alternate control methods, especially the PAS since its' "easy".

Needs a lot of "tuning", since right now I can *only* get full power out of it with PAS, so I can't just keep pedalling at lower speeds like in parking lots, etc., as *any* pedalling gives me full power. I'm sure there'sa happy medium somewhere, just have to keep trying the various parameters (gains/etc) and find what lets me still startup with max power from a stop for quick acceleration, but also lets me gently control the power (and thus speed) when I need to do that.

It is possible I'll have to make separate presets for the two modes; if I do I have the 3-mode switch already on the handlebars to switch presets with.

For experimentation I'm already working with it like this, a main default-power-on preset that operates at the full power, and a second preset I can switch to that I can keep turning down parameters on until I can control it at low speeds easily via PAS only.

Then I can determine if it's possible to have both in one preset, or if two are required. Annoying to have to switch if it turns out I do, but tolerable, since I don't generally need to have low-speed control on the roads, or high speed control in the parking lots or bike paths, etc., and there's generally plenty of opportunity to switch between modes as needed.


I still have throttle control over that rightside motor if needed, so it can be oeprated at low power without pedalling. The left motor is still completely independent of the CA control, as well. (eventually need to link it up, too, after I come up with the electronics to apportion more power to the outside wheel in a turn, based on the steering angle--that is probably going to be quite a while).


Howeve,r until I work out either the two-preset mode thing, or get it combined into one, I'm going to make an override switch on the bars that disconnects the CA from between throttle and controller, and passes throttle straight thru, so that I can pedal at whatever speed I like or need to, without affecting motor operation at all.

I have a growing number of switches that I need to make a panel or dashboard to mount them to, that are not yet installed on the trike because of that, so my next work on the trike will probably be to make that panel and mount switches on it, so I can wire them in as needed. Later on I can work out an optimal layout for the switches, once I have figured out all the functions I need to control that way. (lights, modes, etc). Will probably also add a wattmeter (old CA2.x smallscreen, most likely, if I can get it working again) for the lighting pack.
 
For now I've basically created three presets identical except for the speed limit. 1 = 20MPH, 2 = 10MPH, and 3 = 5MPH.

If I need a speed other than one of those but still want to pedal, I can switch to one that's lower than what I need, and just use the lefthand motor's throttle (not routed thru the CA). Works, but isn't the final solution (since eventually I want all the motor power to be controllable via pedals).


There is one major issue I have run into; I can unreliably replicate it in general, though I haven't found the exact specifics on what causes it.

If I am stopped, like at a light, etc., and feet on pedals ready to go as soon as the light changes/etc., I will sometimes hear/feel a "twitch" in the righthand motor. If this happens, then I will get zero assist when I attempt to pedal or use the righthand throttle (both passing thru the CA to get to the righthand controller/motor).

The only thing that appears to correct this is to start moving using the lefthand (non-CA throttle/controller/motor, then come to a complete stop. Usually this then allows the CA to provide assist based on either throttle or pedals.

Sometimes it does not. When it does not work, then I can switch presets (from any to any other), and it will then work. Switching to a different preset, then switching back without moving pedals or throttle, will also work in this case.

I haven't determined what causes it to happen, as I didn't see any limit flags on the flag screen when it occurred the one time I was able to recreate it with that screen up.

It does appear to only happen if I am putting some pressure on either of the pedals, letting my foot rest on it at about the 1-o-clock position. (or actively putting pressure on it to hold my position vs the crown of the intersection, vs using the mechanical brakes) I haven't yet duplicated it while watching the PAS torque sensor screen, so I don't know how much pressure I'm applying during the event itself, to know if it is more than what I apply when it does not happen.

No ebrake is in use when it occurs.

However, the way the CA presently works (v3.12b3), assist is activated at all simply from the torque sensor; it requires a certain RPM from the cranks. Since during the event, the cranks are not rotating at all, nothing should trigger the assist. But something does, and then cuts it off so quickly it is hard to notice that it happened at all. (the first few times it happened, I only knew something was wrong because the assist didnt' work, didn't engage at all--it took me a while to notice the "twitch".)


Tomorrow, if there is time, I will get the laptop out to the trike and read the settings off the CA, and post a settings file and screenshots of the utility showing the settings. Maybe me looking at the whole thing will let me see what might be the cause.
 
Today all I got done on the trike besides the above troubleshooting was to finally install the AC-input jack for the charger, replacing the simple regular power cord with it's end ziptied to the frame.

The previous cord required two hands and getting down on the ground to plug in. The jack just requires one hand, and kneeling or bending over to reach it with any common US-style single-outlet 3-prong extension cord for 115VAC; with any of the rectangular, square, triangularish, or large round heavyduty plug versions.

Been planning to put that on there for well over a year, since whenever I first built the seatbox. Just didn't get the hole drilled to put it in and wire it up; partly because I kept changing the internal configuration of the box, and wasn't certain of where I should put it.

Today I just decided to put the thing on there, and if I have to change things later I'll worry about it then. Between the colder temperatures and my aging and other issues, it's just getting more difficult for me to get down there to plug in teh charger, and occasionally both hands aren't working at the same time, making it difficult to do. Sometimes I have had to leave it and come back later when both hands are working (whcih can mean that I don't remember to do it, and is one more reason I use a much larger battery than I really need to). Now I won't have to do that.

At present the AC jack only powers the Meanwell HLG-600H-54A that charges the main traction battery. Eventually it will also power a trike-mounted charger for the lighting pack (perhaps the Satiator, which is presently used for that, but is not mounted on the trike) so that both get automatically charged up just by plugging in.


And now for something completely different:
st bernard bicycle pillow il_fullxfull.1475816710_icnd.jpg
 
Forgot to add the pics of the AC plug; this is with a regular extension cord plugged into it.
 

Attachments

  • dsc07921.jpg
    dsc07921.jpg
    41.1 KB · Views: 2,073
I haven't really accomplished anything on the trike, mostly due to holidaze exhaustion from work, but I did get my proposal worked out to send to the Pole:
dsc07935.jpg

dsc07931.jpg

dsc07933.jpg


The reindeer don't last long, though:

dsc07928.jpg

dsc07915.jpg

 
amberwolf said:
I haven't really accomplished anything on the trike, mostly due to holidaze exhaustion from work, but I did get my proposal worked out to send to the Pole:

file.php
file.php


Cute.
Merry Christmas!
 
On a trip for work in the middle of a shift, due to a failure on my part to verify via streetview or satellite view that the streets I needed to take actually went thru, thus forcing me to go a total of several miles of detours around gated communities, I ran my EIG NMC 14s2p 40Ah traction pack down to below what I'd call LVC, below 3.5v/cell for most, and the most positive cell down to 2.6v.

Since I still had to take a lunch when I got back to work from the trip, I used that to check the actual cell voltages (was just going by the CA's "average cell voltage" display and the total V display until then), where all but the top cell were within a few hundredths of each other, while the top one was almost a volt lower. :shock:

Not having any viable options to get home after work other than recharging the pack at least partially, I turned the charger (Meanwell PSU bolted to the bottom of the trike) current down to 4A (0.1C) and let it charge while I measured voltages of cells again, and none of the cells varied (other than the top one) by any more than with no current flowing.

Once it had been charging for the rest of lunch (around 20 minutes) the top cell was now only a tenth of a volt below the rest of the cells.

I let it charge while I worked the rest of the shift (another half hour or so) and the top cell was within a couple hundredths of the rest. I turned up the current to the full 12A at that point, and they all stayed within a couple hundredths at that point. Then I unplugged from the wall, and went home.

Once home, I left it charging, and kept checking on it, and it stayed normal the whole way to full. It's been fine since then, too, no abnormalities, including voltage sag under discharge loads up to 50A (bunch of heater elements in parallel).
 
Today, my third day of a 9-day "vacation" (really just time off from work spent mostly at home), I went on a shopping trip for a few things, and to check out the local goodwills, etc. ON the way out, I happened to be holding the left throttle at full for a startup from a stop with traffic behind me, when I hit some of the usual bumps and asphalt waves in an intersection, and the thumb throttle tab snapped off. :/

Since I need that for at least two reasons, then the next parking lot I stopped in I took a drywall screw out of the hinge in the forward wall of the cargo hold, and screwed it into the base of the broken tab's spot, to ahve something to push against. It's still there now, until I can think of a better solution.


The first reason I need that throttle is that for some startups from a stop, like those at a traffic light with traffic waiting behind me, I have to use both motors at full power to get going quickly enough to keep from causing problems with that traffic having to wait. Also for startups when heavily loaded or pulling the trailer full of stuff, and also for hard right turns to push with the leftside motor to make sharper turns.

The second reason is that I have been unable to find any resolution for the problem with the CA, where it glitches a very short burst of power while stopped, with no throttle or PAS input, and then wont' respond to throttle or PAS input. Since the only other way to get started up is with the leftside motor, have to have that throttle working. (I *can* pedal to startup, in lowest gear, but that is only practical if I am completely out of the way of any form of traffic for a very long distance, and I will at best be able to reach 4-5MPH, if that, and only for a very short distance before I'm exhausted or in too much pain to continue).


Iv'e gone thru all of the wiring and all of the settings, and found no problems. No variations on the settings I can change (and still have it work) will prevent the problem from happening.

It only happens once in every few stops.

It only happens when stopped.

No limit flags show up.

If it happens, I can switch presets down to the 5MPH speed limit preset, then use the other (un-CA'd) motor to reach that speed, and then switch up to the 10 or 20MPH preset, and then the CA'd motor will begin operating normally from the PAS (although it may still not respond to throttle until I push it to full and release it and then push it up again; this also causes the PAS to stop responding until I release the throttle).


A second CA problem is that even though I have no power or current limiting setup, at startup from a stop, if I hold the throttle for the left (un-CA'd) motor to full, and the throttle for the right (CA'd) motor to full, I get "cutout surges", where power on the rightside motor cuts and restores and cuts and restores, at a rate I would guess is 3-4Hz. Hard to say for sure.

If I let either throttle go and then push it back up, then it usually stops happening; if it doesn't stop it's lessened and then quickly stops, probably because the trike is no longer pulling enough current or watts to be higher than the "limit" the CA appears to think is in play.

I have yet to see any of the limit flags show up when this occurs; if one is showing up it isn't visible in the instants I have to look at the screen while this is happening.

Unfortunatley both of these things seem to happen only when I really need full power to smoothly apply, when there is traffic and I cannot focus on the CA or deal with the problem very well.


What I am going to have to do until I find out why these two things are happening is make a bypass around the CA for the handlebar throttle for the right motor, but still use the throttle out of the CA to feed into the throttle input of the controller at the same time (maybe a pair of diodes, cathodes connected to controller throttle input, anode of each to either PAS or throttle, as needed.

That way I can still use throttle to instantly override whatever problem the CA is causing, until I find the setting(s) at the root of the problem(s). (assuming it's not a bug in the CA code itself, perhaps only happening in high-range mode?)
 
I had another thought about motor axle replacements, that would be much simpler than the "cake" idea I posted and linked to previously.

However, it has some gotchas I have to think of a way past.


Basically, just press out the original broken motor axle, then hand-file or dremel or whatever some deep "splines" into the hole in the stator the axle came out of.

Then use a long hard lag bolt, which has smooth sides most of it's length, and threads at the end, that fits exactly into that hole. Long enough to weld the head of the bolt to the inboard trike frame, and still have it's threaded end stick out past the outboard side of the outboard motor cover to allow a washer and nut to fit on it.

Weld tabs onto it to fit those splines, close fit but not a press fit, so the motor wheel can be pulled off the trike without special tools.


However...the main gotcha is that to get the splined bolt inot the motor, it'd have to have a much larger ID inboard bearing, or else the splines can't pass the bearing. (the bolt itself won't fit either, if using one large enough to fit the hole in the motor, but only a slightly larger ID would be needed to deal with that).

The other gotcha is that there's nowhere to get the wires in (without making channels in the bolt, whcih I don't want to do cuz it would weaken it).

Thankfully, I think the fix for both is the same: Use a large-ID inboard bearing, with also a larger OD, modifying the inbaord cover to accept it. Inside the ID of the bearing would be a ring, machined to fit it's OD to the ID of the bearing, and it's ID to the bolt surface--but wtih slots for the splines matching the ones in the motor stator support structure.

THe tabs on teh bolts would be made long enough to reach these splines, to ensure they both stay lined up to pull the motor on and off easily.

Then drill holes for the wires in the ring.


So my first step would be to measure the OD of the existing axle, and see if I can find bolts with that OD. Then measure the inboard side cover's "hump" that is meant to hold a freewheel or disc rotor (whichever cover I end up using) and find a bearing with an OD smaller than that, but an ID significantly bigger than the bolt's OD. Order those, then when they arrive, make and perfect a ring to fit between them.


I've crossposted this over on the other thread about the "cake" mod.
 
With other household projects and dogs and whatnot taking up most of my vacation, I hadn't gotten to any of the stuff on the trike till today, but I got a couple things done.

The mirror on the left side keeps folding forward with bumps, vibrations, or hard decelerations, and just tightening it didn't fix it. I had to take it off, then take the nut/bolt that constrains the pivot point off, add loctite to the threads, plus another washer under the bolthead, then tighten it down hard, and reinstall it. Now it can still pivot if it gets banged into, but it shouldn't move under other conditions.


The most important thing to fix though was the IGH and pedal chainline--I started to pedal around teh yard to test the above mirror fix (wihtout power on cuz the dogs were running around the trike in random patterns), and the IGH didn't pass pedal power thru to the wheel; when I looked down while pedalling I could see the axle & nuts turning. Checked them and found them very tight, so that meant the axle flat wasn't secure in the dropout.

Further examination revealed the hub actually flopping around on the axle, so I thought maybe the axle had broken, but it hadn't. Somehow, the inboard right axle locknut had spun away from the hub body, forcing the flatted part of the axle inboard of the dropout, leaving only the round axle in the dropout. :?

I couldn't get a wrench in there to do what I needed to, without taking the IGH out of the frame, which meant breakign the chain from it's output to the rear transfer axle. Taking the IGH out, I fixed the locknuts, but before reinstalling it I decided to finally take care of the chain tension on it's output stage, because on the bumpiest roads (some of which feel worse than some offroad stuff), the chain will come off the rear transfer axle input sprocket, and its' really hard to get it back on there without tipping the trike on it's side to get to it. I've meant to put a tensioner or something on there for ages, just never got to it.

So I got out an old shortcage derailer, and a dropout cut long ago off a junk frame, and a few links of BMX chain. Added teh chain to the existing one, welded the dropout to the main "keel" tube as far forward of the transfer sprocket as I could (under the seatbox cargo floor) and used two bolts thru the derailer's hanger to secure it to the dropout. Used the limiter screws to adjust the derailer left/rigth till chainline was perfect.

So now the chain goes straight back from the bottom of the IGH output sprocket to the first derailer jockey wheel, down from there and around the other jockey wheel, then angles back and up to the bottom of teh transfer sprocket. Chain wrap on that is now a few teeth less, but as good as I can get it with the design of the frame as I have it now. (would'vbe been more ideal to use a tensioner that just pushed up on the bottom fo the chainline to do it, but that would cause it to rub on a part of the frame I can't remove.)

Reinstalled the IGH (and now it's possible to take it out without breaking the transfer chain), and rode around a bit. So far it seems to have fixed both problems.


I had also planned to weld a stub of tube onto the frame up above the cranks so I could put a front derailer on there to get the other two gears, but it took the rest of the day to do the stuff above, and was getting too cold for my hands by that time. I might get that done tomorrow, last day before returning to work, but I still have other things I need to do, so probably not.


One of those things is getting back to testing Incememed's SFOC5 controller, which I stopped shortly after getting it back because of stress at work and whatnot, and not being able to beef up the stuff on the leftside motor to ensure it can't break it like happened on the rightside (which is another thing I still need to repair--had planned for that this week, too, but there's always too much to get done and not enough time / energy to do it).
 
First, pics of the chain tensioner from yesterday:
View attachment 11
View attachment 10
View attachment 9
dsc07947.jpg


Then, the only thing I got done today was to shape and weld on the new stub of axle on the broken side of the MXUS 4503, which I've been planning on for weeks (months?) now.

Because I still haven't run across any of the stuff I needed to do the alternate larger ID bearing and ring with wires in the ring between axle and bearing, and I need to use this motor and wheel back on the trike, reliably, with the SFOC5, I ended up just basically making a new flatted axle. :/

I started with the remains of the bolt I'd mentioned before, which used to hold down a railroad tie to something, and was about as big around as my thumb.
View attachment 15

Slowly grinding the threads down a little at a time, basically rolling the bolt along the angle grinder's disc surface, and frequently checking to see if the motor cover bearing would fit over it, I got it down to a nearly threadless shaft.

Then I cut it flat at the ends as perfectly as I could by eye with the angle grinder, and the same with the broken stub of the axle on the stator itself, rechecking each of those frequently to make them match and have the new axle end as straight as I could get it. I'ts not perfect, but it's good enough.

WHile working on the stator, I kept the motor cover on it so I couldn't slip and damage any of the windings, like I did with the old Crystalyte X5304. :/

Then I set the welder on highest current, and welded the new axle end to the stator's stub, all the way around; heated the entire axle bright orange for about half an inch either direction in the process of ensuring good penetration--I'm sure it's not welded all the way thru to the core, but it's as good as I can get.
dsc07940.jpg
View attachment 13
View attachment 12


After taht I ground off the excess slag, and filed it until it was round at the joint, and the bearing would slip down over it to snug back into it's spot on the stator's original axle spot.

I did not fill in the original wire hole, so that I could grind it out a bit and use it as a slot to get some of the wires out under the bearing.

Then I flatted the axle parallel to the flats on the other end, but left it 12mm thick instead of 10mm, tested with a wrench frequently as I went. It's flatted all teh way to the circlip on the stator face, so that I can also use some of that space under the bearing for wires. I figure flatting it that far back is probably not any worse than just welding on a new axle end. :lol:
dsc07948.jpg
dsc07949.jpg
View attachment 6
View attachment 5
dsc07953.jpg
View attachment 3
View attachment 2
dsc07956.jpg


I should be able to get semi-thick phase wires under the one side, and hall and temperature sensor wires under the other.

I ran out of time and energy to do any more, so I still have to dig out the wires to rewire it with.

I haven't rewelded across the join where I ground the flats into it, but I should, to ensure it's penetrated deeply there, too, then grind it back to flat there.


ONce it's done, I wil need to modify the outboard dropout (where the thicker axle will go, because it's easiest to modify), so it is wide enough for the 12mm flatted section (was made for 10mm). Then I'll have to modify the attachement point I have for the present 10mm wrench being used to secure the Crystalyte HSR3548's outboard axle, so it will work for the 12mm wrench I'll be using for this motor.

Since this axle is not threaded anymore, I can't put a nut on it, which would normally make it a better candidate for the clamping end of things which is on the inboard side. That's also where the wires ought to come out, to keep them shorter so they don't have to do like the leftside motor and run all the way around the wheel to reach the controller. But I already have the Ubolt mechanism to secure the outer end of the outboard axle on this side, so I dont' *require* a nut on that end (it would just be better that way).

I *could* cut apart the clamping structure on the inboard side and rebuild it for 12mm, and use the threaded axle end on the outboard side, which would simplify / shorten wiring, and make the outboard end more secure; not sure which way to do it.


But I have at last a week before I can manage it, as I am working the next several days, and its' going to take at least a day to do the changes to put the wheel on the trike so I can even test if it works. If it doesn't, then I'll need to be able to change back to the HSR3548 (the only other one I can put on here right now, already in a wheel that fits the trike) before I have to go back to work after my two-day "weekend".
 
Been an exhausting workweek...but I've determined that my first priority tomorrow (first day off) will be to create a throttle bypass around the CA, so the throttle on the handlebars goes direct to the controller, while leaving the PAS still able to control the throttle output of the CA that also goes direct to the controller.

The reason is that whatever is causing the limiting in the CA of watts / amps (despite having no limits set, just the default maxes which are well beyond what the CA shows in it's stats, I can see the W or A limits engage on the limit screen), is preventing me from being able to accelerate quickly enough sometimes.

It's intermittent, and unpredictable, and thus dangerous.

If I could figure out the pattern, it wouldn't be such a big deal, because I could predict it and work around it, or fix it.


Anyway, I could probably use a diode on the CA's throttle output, as well as on the actual throttle on the handlebars. But I know that will cause a definite change in the output voltage, and I'm not sure how it will affect the system.

A 1k ohm (maybe 5 or 10k) resistor in series with each throttle signal line should protect each one from the other, but not have that kind of voltage drop (since there is very little current). I'll try it out and see what happens.


Once that's working right, I'll work on finishing the 4503 motor repair and reinstallation, then if I have time I'll get the SFOC5 back on the 4503 and restart testing with it. (or beef up the 4504 and figure out the rest of the settings for it to work with the SFOC5).
 
looks like no need for diodes or resistors:

https://endless-sphere.com/forums/viewtopic.php?f=4&t=37964&start=3000#p1130299
justin_le said:
That would also work just great. There is no problem at all parallel connecting two throttles together and combining their outputs. Since the throttle output signal can source current but it can't sink current, then whichever throttle has the higher voltage signal is the signal that dominates. So simply split your throttle wires to go to both the left and right hand throttles and you'll have made.

Tested and appears to work fine this way. Even though the PAS still limits, the handlebar throttle doesn't (since it now goes around the CA), so no more intermittent dangerous power cutouts while accelerating. Not the way I want it to be, but at least it works, and I can use the PAS for cruising, and throttle for anything the PAS can't do, until I can resolve the issues.
 
After I paralleled the throttles and did basic testing to verify operation, I took a lunch break and painted S.B. Cruiser on the left side of teh cargo pod, along with a big pawprint, as steadily as I could (not very) with the smallest brush I had. I had some fabric paint handy, so that's what I used since I didn't want to dig for stuff. The black went on first, as the "shadow", then white. Then a kind of "clear coat" using glow-in-the-dark, which is rather translucent. I will probably go back over the white a few times with more GITD, since it's pretty dim except where I made it globby by accident.

Some pics, first with the downlighting on (I painted where I did because the lights shine there), then with it off using camera auto, then using camera nightvision (with the IRLED blocked, so it's just moonlit).
dsc07958.jpg
dsc07960.jpg
dsc07966.jpg


I also moved the 3-speed switch, which had just been ziptied to the handlebar where it tended to move whenever switching speeds (can't put it *on* the bars; it won't fit where I can reach the button), so now it's bar ring is wrapped around the tension bolt of the mirror mount, which clamps it down hard and keeps it from moving when switched. It's mounted sideways, but the switch is easily thumb-activated near the turn signal switch.

dsc07963.jpg


After testing the throttle bypass vs the PAS, I haven't come up with any new theories or results on the PAS limiting issue.


HOwever, I did find info on a completely different issue: what I had thought was an extremely intermittent power surge on the right wheel was actually a momentary loss of power on the left wheel. I couldn't tell this before, because with the limiting also affecting the righthand throttle I couldn't be sure what exactly was going on; it just felt like the power on the right would come back hard after having faded out (the fadeout still occurs with PAS-only control of the right motor).

Using just the throttles direct to the controllers, no PAS or CA control, I rode around the neighborhood, stopping and restarting over and over, until I had the "surge" happen, and then I could feel it was just the left motor cutting out (actually felt like it might be braking a bit, but that side has very hard braking, not just regen but active "EABS" forcing the wheel to stop, so I don't think that was it).

Now knowing that it's the left side, I put the trike up tilted against the wall, so the left wheel was offground, and throttled up and down repeatedly until eventually I got the cutout. It actually happened twice in the same throttle up, once just after I started to throttle up, and once after it had sat at full throttle for about half a second.

I pulled the PP75s for the phases apart and reconnected them a few times (it's really hard, so this took me more than half an hour. It would probably have been faster to leave them disconnected and find a tool to scrape or clean the contacts...but I was already sitting there and it was easier to stay sitting there and pry them apart and tap them together repeatedly.

I retested what must've been a hundred or more times without seeing the problem again, so hopefully that fixed it (but as I said, its' extremely intermittent).

So now, hopefully, the two major safety problems I had are fixed.

But I ran out of time to do the rest of the motor repair so I can put the heftier one back on the trike. (still have to install phase and hall and thermal sensor wires, and modify the trike frame to hold the new axle, etc).
 
Still rewiring the motor (found some phase wire to use, already had hall/etc wire ready).

I think I've got two, maybe three viable designs of axle clamp to replace the inboard one with, so it would be "adjustable" to accomodate either the standard 10mm like on the HSR3548, or the 12mm I've built on the MXUS4503, since I don't know if my axle fix will hold up or not, and I'll need to be able to quickly swap back to the HSR if that happens till I can make a better axle fix.

I also have a design for replacing the outboard frame bars that the outboard axle is supported by (presently welded to the rest of the frame), with a section that is removable, would bolt onto the trike. It would make changing the wheel much easier, or any other wheel/tire work. (whcih thankfully is very rare, but a PITA when I do have to do something).


For some time, I have also been looking into various ebrake improvements, for reasons given here:
https://endless-sphere.com/forums/viewtopic.php?f=2&t=583&p=1439429#p1439429
In that post/thread, there's an idea to use a brushed controller as a proportional-regen controller, paralleled with the actual brushless motor controller. The brushed controller's FETs would have their drains disconnected from the original hookups, and the phase wires individually connected to separate FETs (or groups, if there are enough FETs to divide into three groups--or in my case, six groups because I need to brake two wheels simultaneously).

Dunno if I'll do that, partly depends on the responses I get over there, but it's a nifty idea that might work, if I can get such a setup to pull enough current to do sufficient braking, but still allow me to control the braking from zero to full.
 
Oh, and today I did a grocery run, and ran into the "extremely intermittent" problem of the left (non-CA-controlled) motor cutting out during startup, in various different ways and amounts. almost every single time I started from a stop and/or accelerated hard with it. But it stopped just before I got home and I couldn't replicate it at all the rest of teh day. :(


I was going to monitor the throttle voltage, and the battery voltage, *at teh controller* while the problem occurred, to see if either could be the cause. For instance, throttle voltage either dropping out or going above whatever the error level is (if it has one), or battery voltage sagging below LVC (which I doubt).

Throttle could be the cause; the thumb tab on this one broke off while I was pushing it to max and hit a pothole, somewhat recently (week or two ago?), and I had to put a screw into the former tab location to continue my ride. I havent' done anything to it since then, so it's still there. The thought occurred to me that it might be affecting the magnetics somehow, either by the metal of the screw changing the fields or by the screw physically displacing a magnet (I have no idea where they are within the throttle). The intermittent nature of the problem would point more to displaced magnet.

Opening up the throttle would require taking it off the bars, which I didn't want to do if I didn't have to (PITA). I don't have another thumb throttle to replace it with (except another that also has a broken tab), AFAICR, though I have a bunch of full-grip throttles I could probably cut down and add a tab to, one way or another, if I have to.

I'm nto sure what else could cause it, since the phase connections are good (now, if they weren't before).
 
THrottle voltage varies normally and smoothly, even if I tap on it, so it's not something in there causing it.

HOwever, the problem *is* worse teh lower the battery voltage gets, though it does not sag enough to be causing this, from waht I can see on teh CA display.

I rechecked all the cell voltages with the pack at about half discharged, and they're all around 3.6v, within a couple hundredths above that. Started recharging at 12A (just over 0.25C), all cells stay balanced then as well.

I tried measuring battery voltage / sag at the controller, but I was too tired and couldn't get the leads to stay on the wires so I could do a loaded test on-ground.

So I just went ahead and swapped out the battery pack, for now, with the spare pack. Was too worn out ot actually test it after that, so just made sure it was charged, and will find out if it's still problematic tomorrow.

If I get time I'll load test the other pack and see if any cels have trouble with sag.
 
There was no change in the problem with the alternate pack.

However, on my way home last night, about halfway home at a stop light, the left motor began surging repeatedly without me touching the throttle and I had to hold the ebrake until the light turned green. It no longer responded to my input on the throttle. I had to pull into a parking lot and shut off power until I could get the trike's leftside frame up on a curb to hold that wheel offground, then got the multimeter out, stripped the cable insulation back an inch or so out of the throttle body, and checked the voltages. The power was steady at just under 5v. The signal kept jittering from about a volt up to over 2.5v; don't know how fast or often as the voltmeter has a really slow response time.

So I just cut the signal wire until I could get home, and used just the right hand motor/throttle until then. If I'd thought of it I would have added a wire from the righthand throttles signal output to the lefthand controlelr's throttle input, so i could have the full power of the motors to accelerate me quickly since there's construction, lane blockages, etc. Didn't think of it till after i got home, though. :/

I'm considering (when I build the dashboard, which may happen much sooner now) adding a "crossfeed" switch that lets me do what you can in an aircraft cockpit, where some controls/etc can be switched so either the pilot's or copilot's is connected to a particular device. (in my case, just so the left and right can be either controlled from one control (either one), or separate ones).


Anyway, when I got home, after doggie greetings and playtime, I pulled my last unbroken thunb throttle off CrazyBike2 (which is by now basically just a frame. :/ ), and replaced the wierd throttle with that one, splicing in the wires at the point I'd cut earlier.

Now it works just fine, and worked on my commute today flawlessly.

Wierd...that the throttle kept measuring correctly every time I checked it, until the failure yesterday.

I opened it up, expecting to find a magnet floating around in there..but there's nothing wrong at all, that I can find. Wiring to the sensor is fine, etc. The only thing I see that's unusual at all, is that there is a LOT of metallic dust / particles inside the throttle stuck to the magnets. But that shouldn't cause what I've seen (I expect all my throttles ahve that kind of debris in them, between me grinding stuff near them, there's also the flinty and metallic dust in the air around here. I'll get some pics tomorrow.
 
After the last couple days of rain, I had a problem on the way to work with the righthand motor--it began to have occasional stutters, and I stopped trying to use it (including not pedalling, as that triggers the CA to use that motor) and just used the lefthand motor via throttle.

When I got to work, I had a bit of time left before starting, so I raised the right wheel off the ground and used the throttle to see what the problem might be, but there was no response at all. No response to the PAS either. So I left it as-is and jsut used the left motor for the trip home, once I was done for the day.

Once home, and done with doggie dinnertime and play, I checked everything connected to the rightside controller, voltages, continuity, isolation, etc., and the only two things I found unusual were that the blue hall didn't change values anymore, stuck around the center of the hall voltage range, and that it didn't respond to the throttle input even though the throttle voltage did change, starting just over 1.4v, and went up to around 3.7v.

I cut the blue hall wire, to see if the failure was on teh controller or motor side, and used just a 10k resistor from hall power to the blue signal, and it still just sat at about half the supply voltage. So the motor hall itself is dead. :(

Well, I don't have time to take apart the motor and rplace the hall, so I dug out the old sensorless controller I used before I pulled this grinfineon off the front wheel of CrazyBIke2's 2WD system, some time back. It's not a great controller, but it will work whether the hall does or not.

I cut the Grinfineon out of the trike's system and replaced it with the generic sensorless, but still no go.

The generic would respond to the gbrake lever, making it hard to turn the wheel (as it doesn't just have regen, but also has the "EABS" that actively fights wheel rotation). So the controller is working...just not getting a usable throttle signal, which is impossible, because I can read the voltage right there at the wires coming out fo the controller. Popped the lid off and read the same voltages on the PCB itself.

So, controller works, motor works, throttle works, but controller doesnt' respond to the valid throttle input?!?!?! :?

Ok.

So.

Well, I have the CA throttle output paralleled with the actual throttle output. Maybe...somehow that just doesn't work anymore? Even though it makes a valid throttle output signal?

Ok, then, disconnected the actual throttle, but no response from the controller.

Disconnected the CA throttle output and reocnnected the actual throttle, and now the contorller makes the motor spin like it should.


So...something is wrong with the CA's throttle output now, for no reason I can think of.

Similarly, the hall sensor failed for no reason I can think of (the wiring from motor to controller has no connectors, it's all heatshrunk and soldered, for everything except phases).


Anyhow, I didn't have mroe time to deal with it, since it now works at least via throttle, it's good enough to get me to work and bakc home tomorrow. Then I'll have a couple days off and maybe I can figure out the actual problem wth the throttle / CA, and fix it.

If I'm really lucky, the CA's throttle output is blown up, and the CA will now be useless for anything but monitoring. :roll:
 
Well, the CA's output is working fine, hardware wise, it outputs the correct voltage range as set in the CA.

Also, sometimes the controller does respond to the CA, if I power cycle the system enough times.

I am still unsure what causes the problem; I will have to dig into the wiring from the JSTs that accept the CA throttle output and hardware throttle output to the controller, and see if there is an issue there.

However, while trying to get to the heart of that issue, I also did some testing of the CA to try to get the PAS to be able to actually *control* the amount of power the motor gets, rather than just pushing as hard as it can up to the speed limit set in the preset. (which is the only way I got it to work at the beginning, and didn't have time till now to play with reducing that to something more usable/controllable).

In the process, I found a couple of "issues" with the CA's behavior. I don't know if they're bugs, or just stuff I don't like, but I'll post them over in the CA3 beta thread here:
https://endless-sphere.com/forums/viewtopic.php?f=4&t=37964&p=1443891#p1443891
 
Finally added the second hinge (and modified the lock to still hold the door closed) so the front panel of the cargo hold / dog carrier area also folds down inside, so the whichever dog(s) is (are) with me can stick their heads out beside me while we're riding.

Jelly's not quite sure about that (she's in another of her skittish-puppy phases), but Kirin LOVES it, and so does Yogi. PeanutButter is still working on the idea of getting in the trike at all, and not just immediately turning around and leaving. I don't want to try closing the back door and keeping him in there, much less riding around, until he's decided it's completely ok and safe to just be there, like the rest of them have. (otherwise he might freak out during a ride, and that could cause quite a disaster).


First, though, I fixed another issue I had been having with the paralleled CA-throttle-output and the hardware-throttle-output (which originally worked fine, and then began having issues last week). The problem was that the hardware throttle was being "dragged down" by the CA output, and the CA output wasn't going as high as it should (or as high as it said it was on the throttle/limits screen). IT didnt' happen all the time, so I thought it was a medium-resistance short to ground somewhere on the throttle line (eliminated by a few different tests), or a problem in the righthand controller (eliminated by changing the controller due to failure to respond to any throttle input). This meant I never got full power on the righthand motor, causing problems with starting up quickly from a stop.

So I ended up doing what I talked about some posts back, putting diodes between the two throttle outputs, common cathode to the controller's input, and now it works "fine"...except, of course, it doesn't exactly. :/ There is no voltage drop across the hardware throttle's diode. It reads within a hundredth of a volt the same on each side, regardless of throttle voltage. But the CA throttle diode does have a drop, of about what I'd expect of a bit more than half a volt. That means that via pedals, I cannot get full power (or speed) out of the rightside motor.

I swapped which one is on which diode and the issue follows the CA output. I don't pretend to understand how that can be the case, but it is. Thankfully the CA has configurable throttle voltage output limits, so I just upped it by the same amount as the diode drop, and it works fine now. But that was a couple of hours or more used up on all that.


After that, I was too frustrated with all the little electronics/etc problems I've had, to do any of the other stuff that needs doing...so instead i chose to do something that makes it easier to interact with the dogs, cuz they greatly reduce any frustrations I am ever experiencing, :) and did the front panel hinge thing.


I did get one bit of testing done, though:

Incememed sent me an isolation tester, to make sure there were no problems with any of the motor windings shorting to the stator, or to non-phase wiring, etc., which coudl cause all sorts of havoc with controllers. The good news is that there's no problems with those.

I still want to test for inter-phase shorts, but to do that I have to disconnect the Wye-point inside the motors, which means opening them up. Not a problem for the 4503 I'm still working on the axle-fix for, but it is for the ones still on the trike.

Since I'll have to take the HSR3548 off the trike to fix the blue hall anyway, I can do the other tests on it whiel it's open. To test the 4504 I'll have to take it off and open it up whether it needs it or not.


However, I suspect there is such a problem with either the 4504 motor itself, or something wrong with the generic controller presently running it, because it's had a growing problem: Once I reach just under 20MPH, if I continue keep the lefthand throttle (which only runs this controller) above what's needed to maintain that speed, I sometimes begin to get a stutter, or a "catch", on that motor, as if it had a wrong phase/hall combo, but it is a sensorless controller so that can't be it. But it could be bad capacitors, so that as the BEMF gets higher, and spikes / noise generated in the system gets higher, they're not filtering it out and it's affecting the system. I would expect that to also cause problems at low speed and high current, but it doesn't.

I will have to take the controller off to open it up first, since that's a lot easier than taking the motor off and apart for the other test. I have generic sensored controllers I can replace it with if I have to, since I did run hall wires out for that motor last time I was in there. And of course I can use the SFOC5 on it (just havent' because I coudln't seem to dial in the motor resistance/inductance correctly for it, and there are no definite specs anywhere for the 4504 that I can find, just some probably-close ones for the 4503).
 
amberwolf said:
Since I'll have to take the HSR3548 off the trike to fix the blue hall anyway, I can do the other tests on it whiel it's open.

I haven't done the isolation tests yet (probably wont, at this point, unless I come up with an axle fix; see below), but I did have to take the HSR3548 off due to a growing mechanical problem.

Remember the cover bolts keep working out on this motor? Even if I superglue them in place, or use loctite, and even if I also use lockwashers of various types? And even using varying kinds of bolts with different head shapes and sizes, lengths of threaded area, etc?

Well...I never fully investigated why that happens, but I had assumed it was an out of round condition somewhere. It is...one of the side covers (freewheel side) is more than a mm, maybe two or more, out of round. Not sure how they managed that, but it is. So that's what's been causing the problems the whole time. And at this point it's finally caused a much worse problem than loose cover screws, to where it is now unsafe to use the motor at all.

Several days back, I began to *really* notice a "shift" in the trike rear end in turns and acceleration and braking...the kind of shift that in the past has indicated a broken axle.

It is not that, thankfully...but it's no easier to fix, without getting my lathe setup. The out of roundness has caused the very hard bearing ID ring to wear teh softer axle down, by presumably first pressing into it enough to slightly depress the surface, and then banging into it over and over and over, harder and harder as the depression ring deepened, until finally it's actually a visible depression (see pics below), and you can actually grab the tire and wiggle the whole wheel back and forth in any direction enough to rock the tire inboard/outboard several millimeters! It's bad enough to have allowed the cover to move close enough to hall leads to rub insulation--didnt' wear thru anything yet, but it could. Worse, it could hit the windings if it went just a tiny bit further! It's also hit another internal wire and did wear thru it's insulation, but it's for a thermal sensor I installed, but didn't yet hook up to anything externally.

It's worse in the forward/backward direction than the up/down direction, for reasons I don't understand (would've expected the other), but it's bad enough at this point I don't trust something not to break, even if it didn't cause the tire to rub on the frame under some conditions. :/


So even if I hadn't already planned to do it this week, I have to finish fixing the MXUS 4503 and put it back on the trike's right side. To that end...the rest of the post.

dsc07994.jpg
dsc07995.jpg
dsc07996.jpg
View attachment 10
dsc07998.jpg
dsc07999.jpg
dsc08000.jpg
View attachment 6
dsc08002.jpg
dsc08003.jpg
dsc08005.jpg
dsc08008.jpg


There was also a little rocking in the axle on the leftside motor, but that's just wear on the axle and dropout spreading on the outboard end, fixed with another shim for now:
dsc07976.jpg


To test the 4504 I'll have to take it off and open it up whether it needs it or not.
This probably won't happen this week; too much other stuff to get done.

I got the phase wires installed today; because I used thick-insulation 12g wire, it took some doing to get them all thru the axle, and was only possible by doing two on one flat side and one on the other. As it was, I screwed up *twice* and ripped the insulation before I thought to lubricate the wires, the axle, and the bearing ID ring while installing the cover. :roll: So that took something like three hours to do, having to resplice in the wires each time.

I did not run any hall or other wires out yet, as I will be using this on sensorless controller(s) anyway at this point--preferably the SFOC5. This simplifies the whole thing, which was bad enough above already.

I did not yet screw the cover down...because I remembered that I have not yet undone the WYE point to test for inter-phase shorts, which I need to do before reconnecting this motor to the SFOC5 (or really, to any other controller, as they have less protection than the SFOC5 does!). So I have to take the cover back off again to do that...and hope I don't damage the new phase wires yet again. :(


Before I remembered that I had planned to NOT do this :oops:, but instead flip the motor and use the thick end on the outboard side, I also started to modify the inboard clamp to allow the 12mm wide flatted section (vs 10mm previously) to fit. I basically just cut one half of the clamp off completely, and will put it back on after drilling two new holes in it to fit bolts thru to the other half (with the drill press, hopefully), which I will also have to drill matching holes in (this will be a PITA as I have to do it with a handheld power drill, unless I cut off this plate too, which I'd rreally rather not do). The holes will be as close to the flat plate end as I can get them, the end closest to the motor itself.

I intend to also use a 12mm wrench on the axle as close to the cover as I can, vertically mounted above the axle, just as I am using a 10mm wrench on the unbroken outboard end, in case the clamp fails somehow, so the wheel is still held in position by the trike weight and can still be ridden home (even if I don't use motor power on it).


Depending on spacing of axle, motor, cabling, etc., I may have to remove the freewheel threads from the cover to give me a place for the wires to clear everything with no chance of rubbing. I'd rather not, in case I ever need to use this motor on the left side. I *think* I can swap the left and right covers on this motor (where I don't think I can on the other one; I think that has differet diameter axles on each side where the bearing goes). If so, then I can swap them and remove the disc mount instead; that is a lot easier to "replace" if I had to do so later on. (unlikely)


Anyway, I'll get back to it tomorrow ASAP, cuz I cna't use the trike now until I finish the above stuff, since there's nowhere to put a right wheel.

Apparently I frogot to take any pics of this stuff. :(


However, I suspect there is such a problem with either the 4504 motor itself, or something wrong with the generic controller presently running it, because it's had a growing problem: Once I reach just under 20MPH, if I continue keep the lefthand throttle (which only runs this controller) above what's needed to maintain that speed, I sometimes begin to get a stutter, or a "catch", on that motor, as if it had a wrong phase/hall combo, but it is a sensorless controller so that can't be it.

This I solved; it is something in the controller that happens when it's 3speed switch is in a certain mode. Apparently the switch (a momentary pushbutton that toggles between 3 modes, mounted on the bottom of the trike with the controller because I never got around to extending the wires long enough for the bars) got pushed, or toggled via moisture, or whatever, into a mode that limits the wheel speed (apparently by trying to brake the wheel). What that limit is supposed to be I have no idea, but it equates to about 20MPH in the wheelsize I"m using, which is probably about 21-22" diameter with the Shinko tires on there. I'm sure I could assume it's designed around a 26" wheelsize, and find the RPM of the limit based on my wheelsize, and calcluate what speed that would be in a 26" wheel...but I don't really care, as long as I can keep from going back into that mode. ;)

So I will be testing in each of the three modes, then disconnecting the switch wires inside the controller once it's been switched to the mode I want to keep it in...so this cant happen again. :/


OH...also, before I started all the above stuff, I finally got the trailer hitch reinstalled. I did it a totally different way than planned, simply because right now at least I don't want to cut into the wood stuff. It was easier and much faster to simply move the hitch bar mount back by one frame member, cut the hitch bar just prior to where it would exit from under the cargo module, add "risers" that lower the actual hitch by almost 3" from the original plane equal to the bottom of the cargo deck. That had to be done because the door would't otherwise clear the top of the trailer's hitch locking lever. (cant' just cut a hole in the bottom of the door....).

When I first tackwelded it tgoether and test fitted it, it didn't clear the door, intersected by about 1/4"...I ahd measured and rechecked everyting a buhcn of times but still screwded something up. so I fixed it by trimming the bottom fo the risers from completley flat to angled slightly, to force the outer end of the htich downward to clear eveyrhting by about 1/4" now.

If this causes a prolem wiht the traielr bottom front edge clearing things like driveway/curbs/etc., I will have to modify the trailer itself to put it's hitch down 3" lower to match the trike. (it's raised up a few inches from the base of the trailer deck already, so it would line up wiht the old hithc position on the trike.) If the hitch itself won't clear stuff...I'll just have to notch out the cargo deck and door as orginally planned, but I don't want to do that.

I repainted the hitch bar while I was at it, since all the cutting and welding burned paint already there. After painting I realized I hadn't welded on the gussets I'd planned to...so we'll see how it works without them first. :oops:

View attachment 17
dsc07986.jpg
dsc07987.jpg


Side note: Someime in the last few days, as mall piece of the whte "clearance lights" strip on the frnot of the canopy has been ripped off. I haven't hit anything (low treebranch , etc) while riding that could've done it, and it oculdn't have come off like this by itself, as itwas held down at the left end by the gorilla tape that covers a hole in the canopy material there; the tape is still there, as is a tiny bit of teh silcone that used to beon that end of the strip,sutck on the back of the tape at it's edge. I don't see why anyone would rip off just a piece of the strip, so...I don't know what happend. I'll ahve to repalce it with another secton of strip, and solder across the "joint" to cnnect them.

dsc07988.jpg

Second sidnoet: almost got a flat...but the moped tires saved me where bike tire probbly owouldn't have. roofing nail in the edge of the tread forced up the sidewall inseatd of ind the tube.
View attachment 20
dsc07975.jpg
dsc07982.jpg
 
Well, the new thicker wiring is a bust. The insulation, while thick, is just too easily damaged by squishing (not as bad as silicone) and stretching, and there is just not enough space in the bearing-to-axle-flat areas to hold them, so putting the cover on either tears or squishes thru the insulation just enough to touch the bearing ID to the phase wire(s).

Last night I'd gotten the wires "finished" and covers on, and everything was fine, even isolation-tested with the new tester. But today, or rather tonight, a couple hours ago, I finally got to the point of test-fitting the wheel into the rebuilt dropouts (which also didn't end up the way I planned), and manually rotated it to ensure it wasn't going to rub on anything...but it had obvious cogging, and I could also hear sounds from inside the motor of rubbing/scratching. The ends of the wires hanging from it were not touching each other or anything else, so I opened up the back cover (non wire side), so I could see inside the motor without changing anything about the wiring positions.

I could see the green phase wire actually bunched up between the bearing and the stator support, crumpled and crushed..but it wasnt' shorting to anything--verified a moment after the below by cutting it (reaching thru the stator supports) from the motor side and rechecking with it still in position. I could also see that the insulation for the phase wires to actual coils junctions was touching the isnide of the cover, barely...but that was the noise.

I had to open it up to find the actual short; it was between the other two phases. The blue was shorted via the phase/coil junction to the cover, and the yellow was shorted at the bearing.

That was the point at which I decided to just go with regular thin phase wires; until I can use a larger-ID bearing I can't fit bigger ones thru (at least, not with this thick an insulation, and I didn't have any other kind handy). So I took off the phase wires from the HSR3548 that has the groove-worn-into-axle problem that I can't fix ATM, and will use them on this 4503 for now. I may also use the hall wires, since they'll probably fit in there ok with these smaller phase wires, so I'll at least have the option for sensored controller if I have to use one for whatever reason.

Too worn out to do anything more tonight.


WOuld've probably gotten more done, but aside from stll being worn out from being sick with a headcold the first few days of the week, I had a few other issues today that frustrated me terribly:

I started out workiong on setting up the drill press, went to plug it in, and found the cord was missing one of the blades. :? No idea how or when that happened, but I had to change the cord. That took almost an hour to deal with, cuz I didnt' want to just do a quick and dirty fix that I'd have to fix again later.

Got the piece of bracket setup for drilling, and as soon as the bit touched it, the (previously unused) 1/2" bit just came apart. :? I had to dig the shards of it out of the chuck, rechecking several times cuz the chuck kept jamming putting in a slightly larger bit (didnt' have another the same size) and by the time I was done, another hour or more had passed. :/

OUt of frustration I decided to put that on hold for a bit, and mount the now-dry painted hitch to the trike. That at least went as planned, just a few minutes.

Next up was getting the tire off the HSR3548 wheel in preparation for putting it on the 4503. I don't know why but it was very difficult to do; I've not had any problems with these Shinkos in the past, but this tiem...huge PITA. In the middle of this, the cloudy skies (which were supposed to be mostly sunny per the forecast) darkened and it began to sprinkle. Didnd't look like real rain weather, nor feel like it in my joints (which are usually reliable), so I kept working on the tire, but over the next 30-40 minutes of trying it began to seriously rain. :/

Since I didn't really wanna sit in the rain and work on this stuff, but I still needed to get it all done, I moved the small amount of boxed stuff on the wall of the "trike shed" out into the next shed over, which took a few minutes, with the rain intensifiying as I went. (had to do this so I could have the trike on it's side to keep working on it). THen I had to undo the tire removal I started, becuase I had to put that wheel back on the trike to be able to put it back upright and roll it into the shed. Dunno how long that took, but it was still raining. I had to reinstall (but not reweld, just use the original main bolt) the rear half of the inboard dropout I'd removed to drill the new holes, so it could clamp the axle enough to let me roll the trike, and reinstall the ubolt to hold the outboard axle. More time...still raining.

Rolled the trike into the shed, and managed to bang the front wheel against the boxes on the far wall, knocking them down and spilling their contents, preventing me from being able to get the trike all the way in and rolled over. :( Cleaned that up...more time, still raining, getting pretty tired and very frustrated at all the one-step-forward-five-steps-back going on.

Eventually got to where I had the trike where it had to be to work on it again, on it side, etc...and the rain stopped and sun came out. :roll:


I dunno how long it all took but I guess it was early afternoon at that point...and I was tired, and hungry, frustrated, so I went ahead and made lunch and laid down to eat and check email/ES/etc. for a while. I think I dozed off a few times. The dogs decided that was all overwith at some point, so i got up and playtime ensued, til I couldn't do it anymore, and I went back to working on the trike, surrounded by a herd of disappointed dogs (who shortly just kept playing on their own).

I had already taken the wheel and clamp off the trike before going in earlier, but I didn't (and don't) remember doing it. Hadn't taken the tire off yet, though.

At this point, I was too tired to do this the way I had planned, and wanted to get the trike operational by tonight (which sitll didn't happen, but...). So I deicded to go with the original plan and put the 12mm axle (with wires) on the outboard side, and the 10mm axle on the inboard side. So rather than modifying the clamp, I just reinstalled it...but this required rewelding it in place. I didn't want to put the wheel back on and roll the trike back to teh house again (in case the rain came back, becuse there were obvious storm clouds in all directions here and there, just not overhead). and the welder extension cord is about 25 feet too short to reach the shed.

SO I also had to make an extension cord for that...easy enough, but more time. I forget what all exactly I did between then and the final wire-problem / decision, and quitting for the night, but I think most of it was just redoing the dropouts/clamp to fit the axles as tightly as possible, which was a LOT of filing and test fitting (after I filled in some dents and distortions on the outobard dropouts by welding over them).

Anyway...long and almost pointless day; her'es hoping tomrorwo is bette.r
 
Got the phase wires replaced.

To ensure the problem of the wire/winding connection point ever rubbing on the side cover couldn't happen, I used the dremel to very carefully grind a dip in the edge/lip of the aluminum stator support, where that clamps the stator itself, directly under where each winding/wire connection point passes over it. Tehre's plenty of metal there, so it isn't going to compromise anything, and it allows seating of the WWCP down actually below or level with the windings themselves, so no more worries about that.

That includes with two layers of heatshrink over the WWCP for each phase, plus two layers of insulating tape over the stator support lip itself.
 
Back
Top