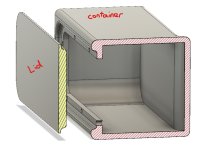
You can mold the lip into the foam, but it's kind of a pain in the ass, and nearly impossible to make the lid and the box match. It's something you can do when building a mold for a part, but not something that you would do on the Lost foam method like you're going to use.
To make a
lip and a
gasket spacer for a lost foam box, you start by making them as separate pieces. Start with a flat, texture free surface. I like to use a sheet of glass, like the smooth side of a glass cutting board. Cover it with wax paper, and then lay out some fiber glass about the size of the side of the box. You might want to make this several layers thick, as it will need to be strong.
Now make a second one the same size, but the thickness of the gasket you plan to use. There are ways to make this precise, but if you plan to use a tube of RTV for the gasket, then make a rough guess, it will be fine. 1 to 2 layers maybe.
So you now have 2 fiberglass sheets. 1 will be the
lip, the other the
gasket spacer.
As I said before, you cut the hatch out of the finished box. a Dremel blade and a straight edge work well. Once you have that done, use the hatch to trace a hole on the
gasket spacer. Now cut that tracing out so that the hatch will fall through, but not by much. cutting on the line of the tracing should be just enough oversized. you want the hatch to be pressing on the gasket, not an edge of this layer. now trim around the outside of panel so it's between 1/2 and 1 in wide. The wider the better, but it needs to fit inside the box.
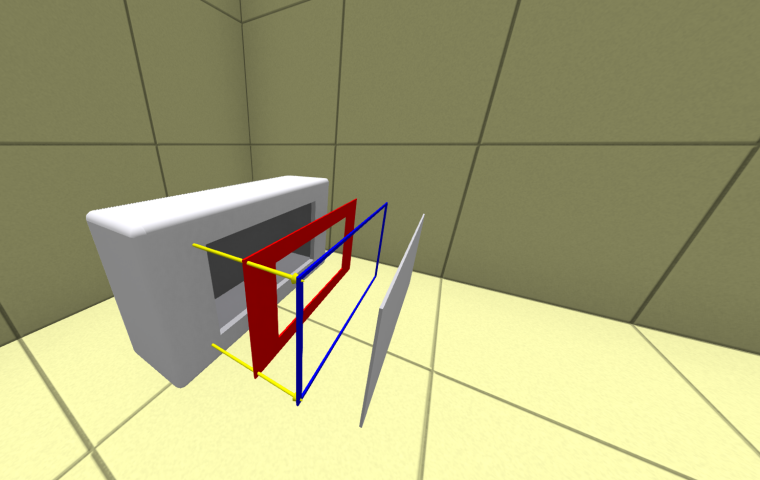
Next, trace out the hatch on the
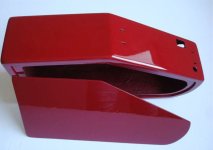
lip panel. but this time, measure in from the edge of the tracing inward, so that you are cutting a smaller hole. this hole needs to be wide enough that you can pass your battery through it. Trim up the outside edge the same way you did the
gasket spacer, and you should have 2 panels that look like the pic below
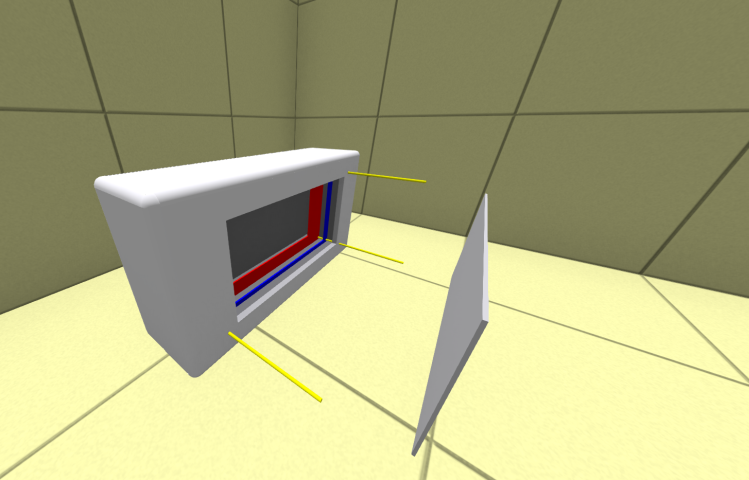
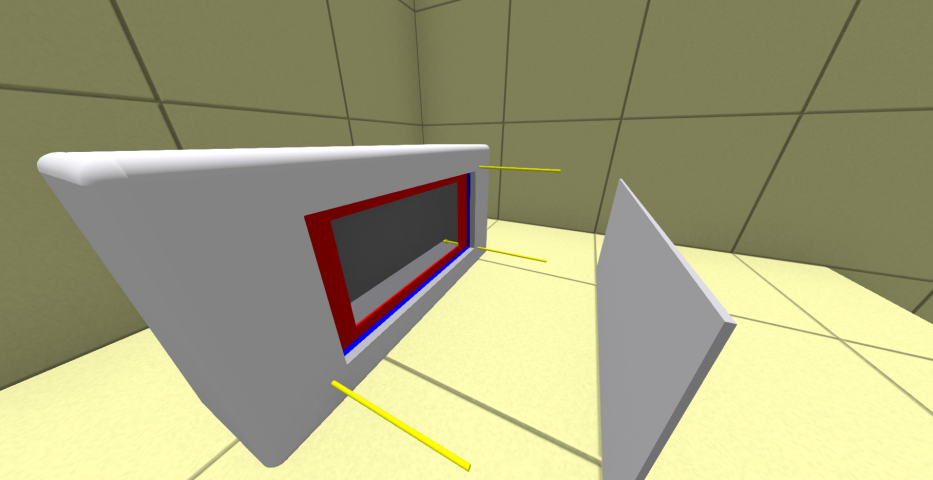
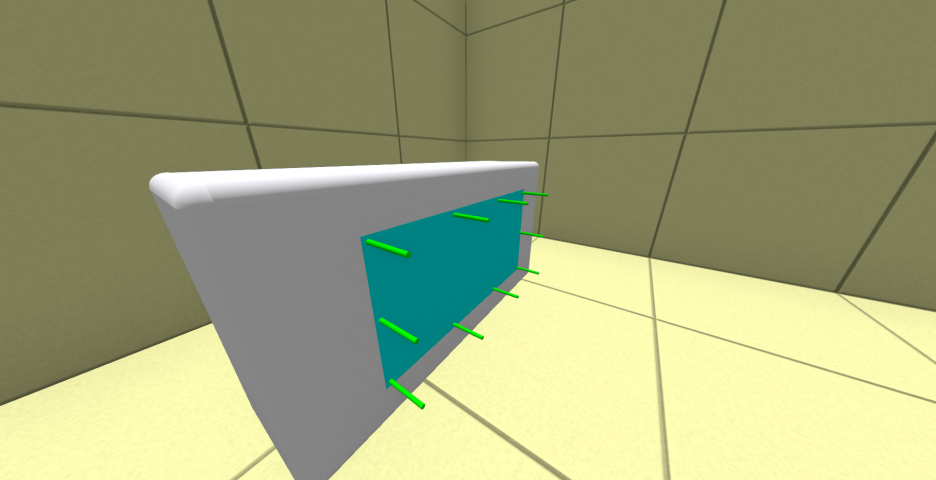
Now it's time to install. First, put them in and make sure they will fit. trim and sand as need, then take out the
lip. You're going to glue in the
gasket spacer first. try not to use any clamps or weights for this part, as they can distort the box and then the hatch won't fit clean any more. Once it's cured, slide in the
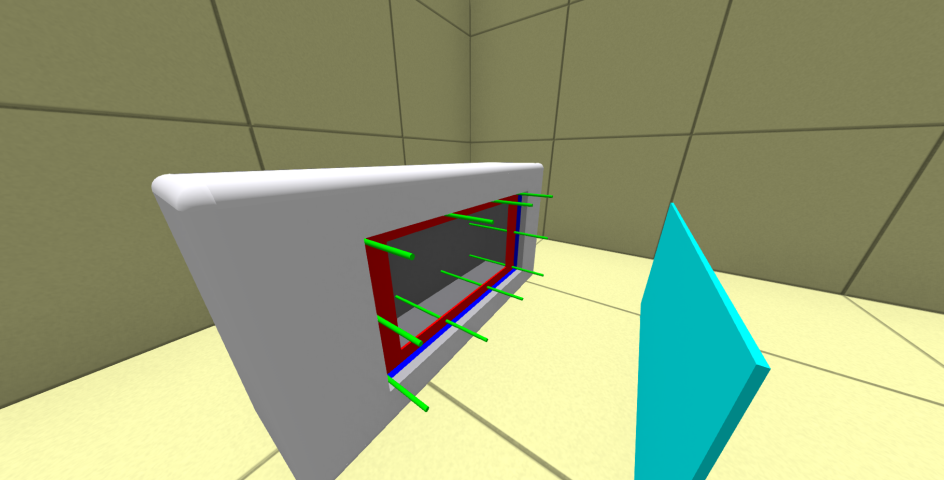
lip panel and bond it in place as well.
Once it's cured, slide in the
lip panel and bond it in place as well. And they should look like the picture below.
Bonus part. (No pics) if you're using RTV, you can get the thickness right by taking the center part you didn't use from the
gasket spacer and cutting 1/4 inch a strip off it. cut that stip into 4 to 8 pieces about twice as long as the
lip is wide, and sticking them on the
lip so an end hangs off the
lip. These are your depth spacers. A dab of RTV will be enough, you'll take them off soon. Next, run a bead of RTV around the
lip taller than these spacer. now lay a sheet of Wax paper over the entire hole, or use some mold release on the hatch, and press the hatch into place. let it cure, and then remove the hatch and the those depth spacers. You'll need a razor to avoid pulling off the gasket. Next, Fill the holes they left behind, and replace the wax paper and put the hatch back on. When it cures, you'll have a fully formed gasket that sits at the right depth to keep the hatch flush with the side of the box. if it doesn't, you can paint on epoxy to the back side of the hatch until it does.
For magnets, I use pushpin Refrigerator magnets. One tap with the hammer, and the plastic shatters, leaving me with a tiny powerful magnet.
To add the magnets, set the hatch in place and make sure the gap is even all the way around. Then
drill your holes all the way through the hatch and the
lip
Once you have the holes, glue your magnets to the hatch first, and let the fully cure. next, use a long cure time epoxy, and glue the magnets into the
lip . put a sheet of wax paper over them, and put the lid back on. be sure to add some weight so the seal is kept tight. Give this a day to cure so it doesn't pull the magnets out. then remove the hatch and give the
lip magnets another coat of epoxy from the back side, just to keep them secure.
And that's all there is to it.

")