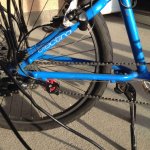
new cyclone 3000 w mid-drive kit?

gman1971 said:
ebike11 said:
Chalo said:
ebike11 said:
is there a particular name for those nut cyclinders and tool?

They're chainring nuts, and a widely available version of the tool is Park CNW-2.

Yes i searched chainnuts but only see short ones. For the cyclone 3 chainring set..the chainribg nuts are quite long

I would contact Paco at Cyclone to get more of those... or where you can find those... if they keep coming lose, use a generous drop of blue loctite on them. I wouldn't use red as red is probably too strong and you might ruin the the keyed side with the screwdriver trying to pry it open

G

Yeah ill make an order soon for a few things.
I also damaged my chain guard..i think i wont put another on coz the chain sometimes got jammed solid tight between the guard and chainring. Then again it was my fault for misalignment.
Where do you put your temperature wire from the Cycle analyst Gman?
 
I run the old CA 2.4, so I don't have a temp sensor.

G.

ebike11 said:
Yeah ill make an order soon for a few things.
I also damaged my chain guard..i think i wont put another on coz the chain sometimes got jammed solid tight between the guard and chainring. Then again it was my fault for misalignment.
Where do you put your temperature wire from the Cycle analyst Gman?
 
if they keep coming lose, use a generous drop of BLUE loctite on them. I wouldn't use red as red is probably too strong and you might ruin the the keyed side with the screwdriver trying to pry it open

I agree! Always start with the next step up. If that works, then you avoid a lot of trouble that comes from using the strongest version. That being said, if blue isn't quite strong enough, you might have to step up to something stronger. With THAT being said, when the time comes to pull out a bolt that is held-in by the strongest bolt-glue...you might have to warm it with a propane torch, and also use an impact driver.

Worst-case scenario, you'd have to drill the bolt out, then chase the threads with a tap...or...drill and tap the hole to a larger size of bolt.
 
I haven't opened it up yet, but its best to get it shoved into the windings as best you can, not too far is my guess.
Then a dab of high heat epoxy just on the outside and just enough to hold it in place.
 
Do you think splicing the cycle analyst temperature wire onto a phase wire close to where the phase wire enters the motor would be ok? Instead of having to disassemble the whole motor etc? But id imagine the temperatures would be different
 
Looking for what available in Canada.
Princess Auto has Weld-On sprockets but their smallest hub is 1/2"
https://www.princessauto.com/en/search?Nrpp=48&Ns=sku.price_listPrices|0&Ntt=weld-on%20hub&No=0

The 1/2 mean the bore?
and the 3/32 means the chain?

The weld-on stuff uses diff chain, but I can use that with a #35 sprocket
https://www.princessauto.com/en/search?Dy=1&Nty=1&Ntt=weld-on+sprocket+%2335

So all in I am $10 for the first test, then each additional test run is $5 for which ever gear I want. Much better setup for me anywayz. Extra weight, which doesnt concern me. I've handled them in store and they got a bit of weight to them.

Time to buy a welder!
 
How many miles are you guys getting from your chains and at what power level? My last 10 speed stretched like crazy in only 60 miles so I replaced it to see how long this next one takes. 6KW / 110 amps phase.
 
flat tire said:
How many miles are you guys getting from your chains and at what power level? My last 10 speed stretched like crazy in only 60 miles so I replaced it to see how long this next one takes. 6KW / 110 amps phase.

My eBike I was running 1.5 kW average, 3kW peaks, the two times I changed chains lasted me about 1400 miles each before they were at the 1.0% stretch mark. On my trike A-1 I switched my first cassette chain at ~4500 miles, it was close to the 0.75% stretch mark then, so while it still had some life left I decided to change it after the winter was over; This was a 10-speed chain, running 1100W average power, with generous bursts of 5-6 kW on a 120 lbs trike.

G.
 
Please forgive me if this is a dumb question but what is the purpose of this threaded sleeve?
It came with the 68mm ISIS BB
Https://postimg.org/image/jk0jundph/

The drive side is tight against the frame and you can see the end of the BB sticking out through the threaded sleeve.

Alfter loosening the lock rings, the threaded sleeve can be turned in to tighten or loosened up.
Should i turn it all the way in to make it tight or does it matter of the position?. In the link the threaded sleeve is lossened and almost out of the BB frame but I can tighten it more if needed.
Thanks
 
The threaded sleeve is to hold that size of the bottom bracket in place. You need to thread it in as far as it will go then tighten the lockring which you can do with a screwdriver and mallet. I got the other bb, also 68mm. In my case I needed to add additional bearings so the BB would hold inside the sleeve. Had to buy them online cuz the kit didn't come with them nor was I shipped any in the 2 after the fact packages I received.
 
flat tire said:
The threaded sleeve is to hold that size of the bottom bracket in place. You need to thread it in as far as it will go then tighten the lockring which you can do with a screwdriver and mallet. I got the other bb, also 68mm. In my case I needed to add additional bearings so the BB would hold inside the sleeve. Had to buy them online cuz the kit didn't come with them nor was I shipped any in the 2 after the fact packages I received.
Oh thx for the helpful info...you mean there ahould be bearings around the non drive side of the BB that go into the sleeve?
Thats why there is a large gap betwwen the bb and threaded sleeve. The BB isnt touching the threaded sleeve at all.
I got my ISIS from cyclone.
 
flat tire said:
The threaded sleeve is to hold that size of the bottom bracket in place. You need to thread it in as far as it will go then tighten the lockring which you can do with a screwdriver and mallet. I got the other bb, also 68mm. In my case I needed to add additional bearings so the BB would hold inside the sleeve. Had to buy them online cuz the kit didn't come with them nor was I shipped any in the 2 after the fact packages I received.

DON'T use a screwdriver and a hammer on the ISIS sleeves, use this tool: https://www.bike24.com/p279225.html otherwise you'll ruin the aluminum sleeve. All my ISIS BBs have stayed solid for thousands of miles without moving a hair using that tool...

G.
 
Does your isis bb have bearings on the left non crank side? Mine doesnt but it works fine for the past 2 years. The motor isnt spinning the BB so I think it would be ok. However it may affect pedaling performance possibly
 
ebike11 said:
Does your isis bb have bearings on the left non crank side? Mine doesnt but it works fine for the past 2 years. The motor isnt spinning the BB so I think it would be ok. However it may affect pedaling performance possibly

Both sides have dual BB.. here is a picture of how it assembles:

21994246_1504284293019103_5800804942741301008_o.jpg

22047809_1504284299685769_5480642507147892788_o.jpg
 
The silver thing on the left is a collar so the chain doesnt wedge when it comes off.
Mine is sitting on the shelf and wondered where it goes, now I know.
 
gman1971 said:
ebike11 said:
Does your isis bb have bearings on the left non crank side? Mine doesnt but it works fine for the past 2 years. The motor isnt spinning the BB so I think it would be ok. However it may affect pedaling performance possibly

Both sides have dual BB.. here is a picture of how it assembles:

21994246_1504284293019103_5800804942741301008_o.jpg

22047809_1504284299685769_5480642507147892788_o.jpg

Are those photos for the drive side or non drive side?
 
in the picture the right side is where the crank attaches.

G.
 
gman1971 said:
in the picture the right side is where the crank attaches.

G.

Mine didnt come like that. The side of the BB with the lock ring already welded on the BB I put on the motor drive side. Then the other side I inserted the sleeve. The lonk ring wasnt attached to the threaded sleeve. Its just the sleeve only. I screwed in the sleeve and then used the seperate lockring when i couldnt tighten the sleeve by hand anymore
 
I got bricks of 36Vnom 42Vmax
So I can safely put two 36V bricks in series and obtain 72Vnom 84Vmax, I charge to 4.15V so its more like 83Vmax right off the charger. I mean I think that is crazy speed, plus I just reduced my Ah in half. But its worth a try to see what kind of speed I get, then I can judge on 60Vnom which is what I want to do.
 
I just did 72V/83V with 6Ah and its good for a grocery run at full throttle at full speed which I'd guess was 55kph and 400lbs. I figure with 54V/62V it will be a good comprise of still having Ah for distance, yet having a good cruising speed.

I am still quite less enthusiastic with the distance I am getting out of my battery compared to direct drive.

With 6Ah I could easily go 9.5km with dd motor, but on this cyclone its less then half that!

The reasoning is; at 36V on the Cyclone I am most of the time using 3/4 to full throttle the majority of the time! With my low turn count dd motor, I did not have to use as much throttle, most of the time I'd be at under half throttle. Plus I could use less battery for desired speed.

The Cyclone should be used at 3/4 to full throttle, because its best for the motor to run high rpm especially when climbing or carrying big loads. When cruising I dont think its necessary, but its also not necessary to burn the motor either like stalling it. Cruising at 1/2 throttle is nice to get more distance. Its all a balancing act.

More voltage = More speed
= less throttle for desired speed
= More Battery, which for a fixed amount of batteries = less Ah = less distance
 
Yeah if you want efficiency looow voltage is best on this thing. I got really low Wh / mile and top speed of around 30 on 10S, of course it was really slow.
 
Hey guys, did some more digging on those PowerVelocity controllers, and found out that those are not particularly good for mid-drives, b/c they are not true VECTOR CONTROL FOC controllers; these are just inexpensive canned-sinusoidal modified China controllers; they use look-up tables instead of true vector control, so when the RPMs go up, the control loop just can't keep up, so the efficiency goes down and you also get stuttering b/c the halls go out of sync etc... so those controllers touted as great don't seem to be any better at high RPM operation than your standard Cyclone square taper controller, if anything, all things point seem to point the efficiency at near top RPM to be lower... so if you are interested in a better sinewave controller for high power application then you should probably look into the Savboton, like evolutiongts did in his build earlier in this thread.

EDIT:
There is also this ASI GrinnTech 72V FOC controller that I've seen, but it currently seems more of an experimental DIY thingie, science project, or something you will have to mess with it after every ride for a couple of months, or more, before you can say its dialed in, and hopefully the thing doesn't catch on fire while at it... then its not bluetooth either... so, while its certainly appealing, I am going to hold off with my "noisy" square taper @90A for now... but square taper and FOC (not canned-sinewave) both have nearly identical efficiencies at voltage-specific max RPM, which is at what I always run my trike at; I never do partial throttle for any extended periods of time, only when accelerating from a dead stop (if that), after that is always full throttle, high speed and low drag... reaching deep into the efficiency groove...

G.
 
Hey are those the eBay bricks from alarmhookup? Look at this on eBay http://www.ebay.com/itm/172704755213


markz said:
I got bricks of 36Vnom 42Vmax
So I can safely put two 36V bricks in series and obtain 72Vnom 84Vmax, I charge to 4.15V so its more like 83Vmax right off the charger. I mean I think that is crazy speed, plus I just reduced my Ah in half. But its worth a try to see what kind of speed I get, then I can judge on 60Vnom which is what I want to do.
 
Makita 18650-V batteries from tool pack.

Today I broke my chain a few times, stitching diff chain together on the sidewalk is unfun!
I need a longer chain then normal because of the feet forward design of the Townie.
I came up with a solution here using two 7/8/9 speed chain, full length off one bike and 4 links off another chain.
solution.jpg

If I used 7/8/9 speed chain trying to only use one gear, she slides (without my RD being used as a tensioner)

The one speed SRAM (PC-1 with 114 links) chain is not long enough, so stitched in 7/8/9 spd links but they have different widths which I knew, but it works for babying it home being light on the takeoffs.

I need 120 link chain.

I've tested it and lots of people can hear me coming up from behind them because of the motor gears. It even scares the dogs a few times. Its a sound they are unused to hearing so I am very divided on that aspect of my Cyclone 4k. Another aspect I dislike is I get to many people asking me questions. I am unsure if I really want it as my daily rider.
 
Back
Top