Dogman review- 2013 E-BikeKit direct drive kit - 170 miles

dogman dan

1 PW
Joined
May 17, 2008
Messages
36,392
Location
Las Cruces New Mexico USA
This is a review of the newest version of the E-BikeKit direct drive rear motor kit. View attachment 3

The kit was sent to me free by the company, but they full well know that I will try my best to destroy it without modifying it, and then tell all. It's a long way from being like they bought a favorable review. Since its free to me, I can do things I would never want to try with a kit I paid for. Muahahha! :twisted:

I did a review of the similar kit some years ago, and failed to kill it. Jason just felt like it was time for me to see his latest improvements to the venerable 28mm rotor direct drive motor kit. So far, I've been very favorably impressed with it.

What motor is it? I don't know who in china manufactures the motor, but it's not the same crude "old design" hubmotor still seen today on ebay for cheap prices. The old design is not disk ready, and in the rear wheel version the hub has a lot of dish in the spokes which makes it a weaker wheel. It's virtually identical to a 9 continent brand motor. There are numerous producers of this "newer design" motor.

The new E-BikeKit design is a direct drive motor, with bolt on disk brake rotor mounts and little or no dishing of the spokes. It has no internal gears or clutch. Only 3 moving parts, the magnet rotor and two axle bearings. Simple and reliable. It has a 28mm width, and the diameter of the rotor is about 9 inches. So think dinner plate or pie pan size. I think of this motor type as a medium size bike motor. The E-BikeKit's standard model is a 7 turn winding motor. They now come with a better than average rim with spoke eyelets, and are built and trued at the shop in the USA.

What controller is it? Though a new design, the controller is still similar in power to the old dd kit controller. 22 amps is what I measure with a wattmeter. It includes brake cutoff and throttle connections. New is the dashboard, with speedo and 5 power level selections.

Ratings by number of stars.

* It's ok, functional
* * Average good
* * * Very good
* * * * As good as it gets, Exceptional

Shipping Time. * * * *

Shipping time was about a week. Normal for things ordered from a shipper in the USA, to my address in the USA. I live across the continent from the shop, so my shipping time is about the max.

The Box. * * * Box packing.jpg
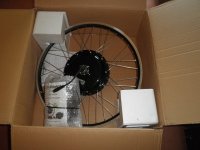
The box arrived with no visible damage, but when I opened it, I saw changes to how it was packed. Less foam, and in particular lacking the foam circles that help protect the axle from poking right through the box. We all prefer to see our stuff shipped with overkill packing, but the fact is, the motor arrived in perfect condition. The excellent rubber bumpers on the axle ends did a great job of protecting the axle threads and wiring. Actually, two kits were sent, and BOTH arrived in perfect condition. What can you say, perfect is as good as it gets eh?

What you get in the Box. * * * * Box contents.jpg
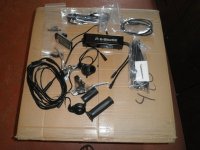
It's a VERY complete kit. I did not get a battery, but in addition to the motor itself, all this comes with the motor kit. Starting at the top left,,,

Wiring harness, one bag is for the dashboard and brakes, the other battery to controller.

Controller dashboard , controller, and bag of zip ties, one torque arm, two C washers, and two allen wrenches.

Bottom row, More wire harness, one thumb throttle, one half twist throttle, brake levers, and grips.

Every kit has both throttles. 8)

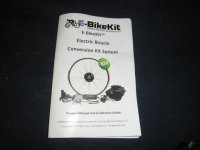
You get a very good, very complete instruction manual. It's a LOT better than running back inside to look again at the computer. It's in your hand, in the garage. You could carry it with you if you like. It's Written in English. Not translated by a machine. 8) Manual.jpg
My box also had a black E-BikeKit tee shirt.

Installation. * * * *

I had no big problems to solve installing this kit. It's complete, and fits a standard seven speed rear shifter bike very well. No major problems getting the disk brake lined up. Just a matter of fiddling a bit with the supplied washers, to get the disk aligned with the caliper. Once the disk lined up the rear wheel also lined up. No need for disk rotor spacers or re dishing the wheel.

I always get a laugh when I see "installs and be riding in 30 min" in some ads. I suppose it's possible, but I tend to be more careful and take at least an hour to get a tire on the motor, get the motor, controller and throttle installed, and all the wires tidied up with the zip ties. And that is after the many times I've done this.

Then, depending on how you will carry your battery, that can be a rather large project. But if the battery is ready to go, you should be riding in less than two hours. It's not that hard to install on most bikes. But if you insist on using a less compatible bike, like one with 27 speeds, then you may have some more time involved changing the chain and shifters. This rear motor kit comes with a 7 speed rear freewheel on it. Front motor kits would of course come without any gears.

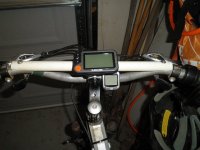
I had a minor problem with the dashboard. My handlebars have more than the usual amount of upsweep, so installing the dashboard was not perfect. The dash board mount is simple, and does not allow adjustment. So it had to be crammed in pretty tight. A very small problem, which I fixed later. More about how I did that later. View attachment 1
 
The Controller * * * *

I'm really impressed with the controller improvements! Quite a list of things to like.

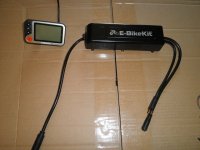
Firstly it's really easy to install. It's long and slim, with two solid brackets designed to bolt it to a round tube, uhh like your whole bike is made of. Incredibly easy to mount this controller anywhere you prefer, top tube, down tube, seatpost tube. Slim, so you never rub a leg on it no matter where you mount it. In the past, the typical bike controller is designed to screw to a flat plate of some kind. And where on your bike do you have that? Nowhere. This leads to people stuffing controllers into rack bags, where they overheat and die.Controller and Dashboard front.jpg

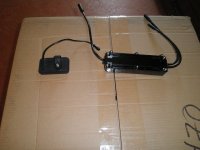
The rear of the controller and the dashboard, showing the mounting hardware. Controller and Dashboard, rear mounting hardware.jpg

The second big thing to like was the controller is very well waterproofed. At first, I thought perhaps the entire unit was potted. Taking a peek inside of course, I found out it was not. But it does have a very good gasket system that seals it up very well. The way it's made, it would be very easy to tape over the crack, or add additional waterproofing caulk. Unless you will ride in pouring rain frequently, the stock gasket will be plenty to keep the controller dry. More on waterproofing later during the testing. :twisted:

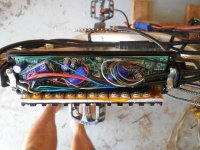
Here is a look inside, 12 fets. It's able to handle 48v current. I get 22 amps max continuous current on my wattmeter. Inside the controller.jpg

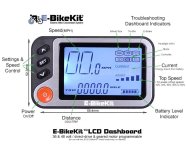
The third big like is the controller comes equipped with a dashboard. It's not a Cycleanalyst, but it's all a typical commuter will ever need. It features a speedometer, odometer, on off switch, 5 selections of power/speed levels, battery level indicator, a power level indicator, and some trouble indicators. And it's also pretty waterproof! Again, more on that in the torture testing section later. 781.jpg

The Wiring. * * * *

The last big like on the controller is the wiring. NO MORE cheap scooter plugs. In a way, I'll miss those plugs. They were easy to troubleshoot, repair etc. That was nice, since they seemed to need that a lot. :roll: These new plugs make the install much easier. It's very simple to match up which plug goes where, and almost all the plugs are completely waterproof. One plug might need one inch of tape on it to get fully waterproof. The others are very good. No more getting out hot glue, tubes of goo, tape, etc and still wondering if water got into your connections. No more having to hide that horrible looking bundle of wires at the controller. The wiring is all very neat, very water proof, and cannot have the problems the cheap scooter plugs had with contacts pushing back out of the housings. There are two plugs to the battery. One is a very waterproof connection. The other connection can go inside the battery box as a plug, or be permanently connected to the battery. My kit had two 35 amps andersons for the plug on the battery end of the harness.

The wires are all generously long. Some people complain about this, but they have no idea. If you have a trike, if you have a longtail, if you have anything besides a normal mtb, you really need that extra foot or so of wire. When installing, it's easy to find a place to stash a few loops of extra wire length. My favorite spot is to coil it up and stuff it under the seat out of sight. Or if you have a handlebar bag, you can tuck extra wire behind that. With just a bit of creativity, you can stash any extra wire where it does not show on the bike.
 
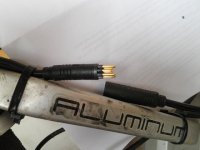
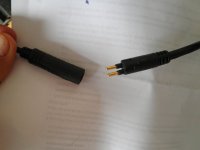
Here is a shot of one of the plug I really like. This connects the motor to the controller, and has all 5 halls and 3 phase wires all in one very compact, very water resistant plug. This plug fits through the washers, nuts, and torque arm holes. No more taking the plug apart to get the right combination of washers on the axle to make your motor fit your particular bike. No more problems with water getting in easy. The plug has a generous overlap of the rubber boot, and if you really get serious about it, a bit of black tape would add yet another layer of protection while retaining the good looks. Water cannot get in from the backside of the plugs, they are molded and sealed.


All the plugs have arrows on them, line up the arrows, and you are plugging it in correctly. Hall and Phases plug to motor..jpg

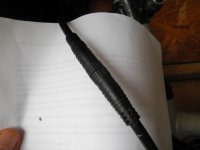
This is the only plug on the bike that leaked in testing. Tape it up in the middle, done. This is the plug to the dashboard. Everything still worked, it just leaked a tiny drop of water. Wait till you see how I did the test. :twisted:Dashboard plug.jpg

This is the battery plug. It, the throttle plug, and the brake cutoff plug are like the motor plug, they have a generously overlapping rubber boot that makes them very waterproof.Battery plug.jpg
 
The Torque Arm. * Or maybe even no star.

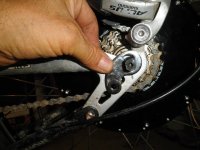
Assembling the wheel onto the bike is straightforward mostly. But the supplied torque arm is cheese whiz. It's poorly sized for the motor axle, and IMO it has way too much play in it for effectively controlling a lot of torque. In addition, this is a rear motor kit, and the torque arm is a design intended to be used on a front dropout. On the plus side, you get two c washers. Also intended for use with front forks, they may still be just what you need if your bike is not the ideal large flat shape near the dropouts.

But, the fact is, this kit is not intended for 3000w, and the supplied torque arm WILL fit on many bikes rear dropouts. It's adequate for use with the stock kit. If your bike has a steel frame, it's debatable whether you need any torque arm, even when you run the kit on 48v. I suspect that future runs of this torque arm will be made so the axle fits the hole tighter.

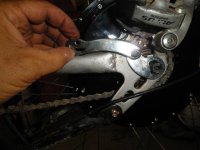
The main issue is only whether the arm will fit on the particular bike you have. If you have a larger flat area around the rear dropout, it's easy to just use half of the torque arm, and drill a hole to bolt it to the frame. If you have a fancy shape frame back there, you may just have to run with no torque arm, or custom make a plate to fit your bike. The lower picture shows how I could have drilled a hole and bolted on half of the arm. This would be the best choice on this bike.

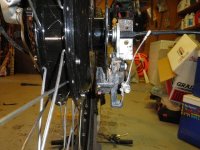
Here is a few shots of how the torque arm could be used on my bike. The bike is upside down in these pictures. The bike I am using was previously running a very high power motor, so I just used my homemade torque device.Front torque arm fit 1.jpgFront torque arm fit 2.jpg

For what it's worth, pinch type torque control works best. I needed it for 3000w when this bike was my hot rod for dirt riding. Here is a shot of the version I have on this steel frame bike. It has a nut on the axle on the other side. The pinching side is held in place by the two bolts that pinch the axle between two angle irons. Ugly but it works. Always install your motor so the wire exits the hub, then loops down to prevent water dripping down the wire into the motor. View attachment 2

The main thing that gets at all tricky about installing a rear motor is getting the right combination of washers on the axle, to get the disk rotor (not part of the kit) aligned with your disk caliper. If you have rim brakes, then just find the combination of washers on the axles to get your rim centered. With caliper brakes or v brakes it should just be the same washers on each side. For my particular bike and caliper, this was the setup that got my rotor lined up best. Two of the fat washers on the disk side of the motor. Aligned like this, my rim was also centered well. Disk alignment, 2 fat washers on inside for this bike..jpg

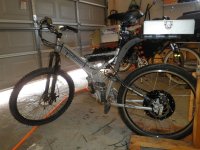
Here is a shot of the kit, fully installed on the bike. I used a full suspension bike, but it still had room to attach the controller to the top bar. The toolbox on the rear rack for the battery is not the ideal way to carry a battery on a rear hub bike. I put the box on this bike just for temporary testing, and carry only 8 pounds of battery. Any more and I would break off that seatpost, and have a poor handling bike. The best place to carry batteries on ebikes is in the front frame triangle. But this bike has no such triangle. Complete bike install..jpg
 
Installing the throttle is easy, as always. Remove old grip, thread on the throttle, tighten one allen screw with the wrench that's included in the kit. I prefer a half twist myself. More variations on how you can hold it on longer rides.

The brake cutoffs are optional. The bike runs fine without them. I tend to opt out, mostly because I have shifters that are part of the brake levers. So I opted out this time.


The last little detail for installing the kit on this bike, was to modify my riser handlebars to make a better place to mount the dashboard. I cut a piece of pvc pipe, and attached it with two screws. Since the bars were steel, I did not hesitate to drill two holes. I could have used hose clamps, and if you have a straighter handlebar, you won't have the problem I had.

I'm tall, so I always need taller handlebars than normal. Also, I'm accustomed to a Cyclanalyst that is mounted front and center, so I wanted to modify my bars to allow this.

But again, I only wanted to do it different, because the steep angle of my riser bars was awkward. Alternate dash mount..jpg

Getting going * * * *

Step one of course, is hook up your battery. I have Anderson powerpoles on my battery plugs, so I was pleasantly surprised to find the battery wire had andersons on it already. If you have something different, you can connect to your battery in any number of ways. Put your own plug on, solder the wire to your battery wires, or even just twist on a few wire nuts. You get a nice long wire to the waterproof plug on your controller. So whatever you connect with on the other end can stay dry inside the battery box. That protects the only water vulnerable plug on the bike.

Once you get the battery connected, it's a little bit different than before. Now that you have a dashboard, you have to do some simple programming. This page of the book walks you through the very simple procedure. It's easy, much easier that programming my cycle speedometers. The print is large and easy to read, unlike those bike speedo instructions too. Dashboard manual.jpg

So I got powered up, set to my wheel size and battery voltage, rolled back the throttle and WTH? I'm barely crawling!

OHHH, when you power up the default power level is one bar. :oops: A few beeps of the up button gets me 5 bars, roll back the throttle, and that's more like it. I'm doing 27 mph. It makes sense. Some kid grabs your bike and powers it on, and off he goes at 5 mph. Perfect. Very quick, you get used to power on, 4 beeps on the up button and off you go full power.
 
General Performance * * * *

Still the same great performance as the old version. Same controller power of 22 amps. It's plenty to get up steep hills, but you don't have to buy a monster battery like you would if you have a 30 or 40 amps controller. The power level at 36v is 800w. That's legal in most of the USA. If you are lucky you live in a place where you can have a bit more. I like to run 48v, because my state allows 30 mph. The kit goes 27 mph on 48v, so I'm legal here in New Mexico.

It's a pretty strong motor, able to climb some very steep hills with no worries about melting the motor. Believe me, I tried very hard to ruin the kit I reviewed 4 years ago, and failed. I've gone up steep roads in the rocky mountains with 10 miles of non stop 8-10% grades with no problems at all. I live in the flaming desert, and part of the test was to ride up long steep hills on the very hottest days. I couldn't overheat the motor with the stock controller.

If you have steeper hills than 10% grade to climb, ask them about the trike kit. They often have a few motors that aren't listed on the website for those with cargo to haul or nasty hills to climb. The trike kit has a slower winding motor able to climb even steeper hills. I have that kit too, and will be reviewing it soon.

But for me, the stock kit running 48v is all I need to climb some long steep hills. If you are legally limited to 36v speed don't worry, the motor gets up that huge mountain pass on 36v just fine.


Performance at the different power levels. * * * *

Very nice to have choices. I did some tests at 36v, for the 5 choices. Now where did I put that paper? I promise, I'll repeat the test again soon and insert the data here.


A year later :roll: I'm finally getting around to some testing at the 5 power levels for 36v.

LEVEL 1. Level one is nearly pointless, very slow and low power. But it will save your ass if you are really limping home on no battery left. Level one will make the cogging go away so you can pedal home just a bit easier.

LEVEL 2. Level two is the serious hypermile level. About 10 mph, and even up and down some fairly steep ( 6-8%) rolling hills, I get 12.2 watthours per mile. This means even with hills, 60 miles is possible on 36v 20 ah.

LEVEL 3. Level three is a very useful one. Still slow at about 13-14 mph, so still a hypermile level 16.3 wh/mi on rolling hills. 45 miles is possible on a 36v 20 ah pack. Not bad performance on the hills, but still very slow on 8% grades.

LEVEL 4. Level 4 is fast, with enough watts for full speed. 23 mph possible with a full battery, about 20 mph towards the end. This is not hypermile, but somehow it's still more efficient than level 5. 23.8 wh/mi. That's not bad for climbing some steep rolling hills. It should be possible to do 32 miles on a 36v 20 ah pack. The bike is now very perky, and I was expecting to see wh/mi close to 30 wh/mi.

Level 4 is a big jump higher in speed and wh/mi. If you don't want to go as slow as level 3, riding 18-20 mph in level 4 will yield a very good range, without being painfully slow. At 20mph, you will still go very close to 30 miles on a 36v 20 ah pack.

LEVEL 5. Level five is full power, exactly the same as the old kit without the power level choices. Full speed riding at this level results in 23 mph, but uses more to get up the hills a bit faster. 33-35 wh/mi is typical, and a 36v 20 ah will take you about 22-23 miles.

At all power levels you get a nice strong pull to get going. At the low power, you just reach top speed sooner, and go no faster. It's really nice to have that lowest power setting in some places. Crowded spots like the beach, a farmers market, a campus, it's great to set the bike to slow. If you must get more range, set your bike slow and make it there. It's easier to hold full throttle on a slow setting than to hold half throttle for 20-30 miles.

48v operation. Here are some wh/mi figures for level 2 and 3 when used on 48v

Level 2 About 16 mph and 15 wh/mi

Level 3 20-23 mph and 26.1 wh/mi

Level 4 not tested.

Level 5 27 mph, and 40 wh/mi.

Battery Meter. *

Sorry, but I hate this kind of battery meter. I want a volts readout. I'm a nerd. However, it definitely tells you what you really need to know after work. Did the battery charger work or not? You need to know that if home is 15 miles away. How much is left? With a bit of experience, your odometer will be all you need. You will soon get a very close idea how many miles your battery goes. The main thing is, you won't ride off thinking you have a full charge, when you don't.

The speedometer and odometer. * *

Mine reads faster than I'm really going by at least 3mph at full speed on 48v. My bike speedo is pretty closely calibrated, and 3mph different from what I see on that speedo is pretty far off.

Edit. later testing at 36v showed a better result. Generally speed was within 1/2 mph of what my finely calibrated speedo showed. It's plenty accurate at 36v.

Does it matter? Not really, you don't exceed any speed limit unless in a school zone. If the odometer is off some, big deal. It still tells you how far you get from your battery each ride, and how far you ever rode. So what if it's off just a bit.
 
Riding In The Rain. * * * *

I thought I'd never get to give this a real world test. We've been in an incredible drought in New Mexico for years. What storms we have move so fast you'd never catch one to get wet. But last week was different, and it finally rained for days. As one storm ended, I went out and rode for 8 miles in a light rain, but while puddles from a very heavy rain still existed. No problems. As I expected the dashboard, controller, and all connections in the wiring are quite waterproof. No signs of water getting into the dashboard. I rode through every puddle I could find, no fenders on the bike, and rode through a quarter mile of some deep water where a street floods every rain. No problem to ride through 6" deep puddles.

As always, you do have to be careful not to let the throttle get soaked. It's the only vulnerable thing on the bike, but it takes a lot of water to short one out. In the rain, ride with your hand covering the crack between the throttle body and the throttle grip. Easy to keep it dry while riding in rain. If you park in the wet, stick a baggie over the throttle handle. If you end up getting a throttle very wet, you can get a bit of current through the water making the motor run. If that should happen, punch the off button to stop it, or grab the ebrakes if you have them installed.

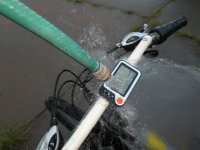
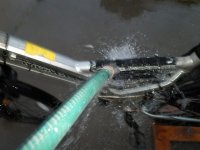
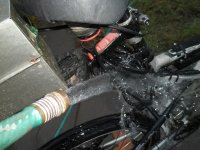
Retruning home from the wet ride with no troubles, I decided to get it wetter. So with the bike still powered up, I started hosing it down. I hosed the dash, the controller, and all the exposed plugs. And it still rode fine. Even the brake cutoff plugs were filled with water, since I did not install the brake handles, and that didn't affect it.


THIS IS AN EXCELLENT KIT FOR THOSE WHO LIVE IN A WET CLIMATE.


Dashboard water.jpgController water.jpgPlugs and wires water.jpg

After all that, it still kept on going. Amazing.

Now that you read this far, perhaps you'd like to know where to get one? Here's the website.

http://www.e-bikekit.com/
 
Justin at ebike.ca/Grin technologies is also moving to a longer slimmer controller. Such a small change, but...very good to see.

Dogman, could you please measure the diameter? the 408 is no longer made, and the 9C is large enough across that it is difficult to make it a mid-drive. Conhis still makes small DD hubs, but...if this one could fit in front of the BB on a DH frame, it might be a candidate for an experiment.
 
This is a 9c type motor, same as 9c or muxus, in the disk ready cover design. So not a replacement for a 400 series crystalyte. Too big to mount as a mid drive unless you have a big space inside the frame, like on cargo bikes. Unbelievable though, that somebody in china doesn't put the same 400 series type motors on ebay. They made about a zillion of em in so many factories. For sure Crystalyte was not the only maker of that motor.

Sorry about that confusion, I was trying to write the review without saying "9 continent clone" which seems to set off some readers. Wouldn't that be cool though, if you could cut a chunk off an old motor put it in an incubator, and grow a new one. 8)
 
There are about a dozen different variations of an aluminum "bicycle handlebar water-bottle mounting clamp" on Google, all under $8. Ebikekit might consider adding one of these for the dashboard computer (even a $2 plastic one).

$T2eC16RHJIEFHR3vOlmSBS!1u3H)+g~~60_35.JPG
 
That controller looks exactly like my MXUS. Upper cover edges are more sharp, but otherwise. 12 fet, 22A, same plugs.
I"m planning to upgrade mine to 13S. Actually batteries are coming allready. I hope those caps can take 54,4V fresh. 13S is enough with this gearing. 12S is good when fresh, but lacks bit of thrust when the battery is more than half empty.
 
Been running mine at 14s Lico, 58v. I see no reason it shouldn't tolerate up to 63v.
 
Real-world "hands-on" data, the dogman is truly the person that should be given products to test. Thank you, sir...the world is a better place because of you being in it.
 
It must be amazing to ride in the rain there.
Great review as usual. Dashboard is cool. Power levels too. And my favorite must be the connectors.. Thanks again..
 
Dashboard is very nice, how accurate is the battery level indicator? Does the motor troubleshooting indicator include temperature sensing? Love the "torrential rain" test you did with the hose. You are becoming the "car and driver" tester for ebikes. Will electric bicycle manufacturers and component makers be advertising being included on "Dogman's" top ten list in the future? There is no testing like over-testing. Thanks for the info.
 
I'll look inside eventually. I'm curious if it has the little board on the hall sensors or not.

The original E-BikeKit just had the old school halls without the little board. Honestly, I am clueless what the halls board I have seen on genuine 9 continent motors does. I do know that when you go running the motors with the halls board at 4x the rated wattage and overheat the motors, the resistors in those boards melt first. All my slow winding 9c motors by now have lost the board and have bare halls.

Otherwise, I don't expect to see any visible difference between this motor and other 28mm wide motors. It's too good a design to change it much now that they make them disk ready and no offset in the spokes.
 
Ebikes.ca says this about their Stolen Torque arm V1 design:
http://ebikes.ca/torque_arms/
I see many sites still selling the original Universal torque arm, what's up with that?

Unfortunately somebody sent a sample of our first universal torque arm design to China in order to have it made cheaply. This happened shortly before we discontinued this model in lieu of the improved Rev2 and Rev3 arm designs. We've since seen this cloned copy proliferate among many China kit suppliers and traders, in ever declining quality, and have with some bemusement had those companies try to sell it right back to us.

If you like our current torque arm designs and want carry them as part of your business, then please contact us. We offer good wholesale volume pricing, and you will be getting a quality-ensured part designed and made in North America by folks who know what they are doing.
 
Yup, and what's worse, unfortunately the latest version torque arm supplied in this kit is noticeably poorer quality than the old one.

It's not stamped ebikes.ca. Like the genuine Grin cycles TA. It's a poor quality copy.
 
Thanks for the review Dogman. Thanks to all for feedback as always.

Just to make things more clear, this is of course Justin's design. I spoke with Justin personally a few years ago and to this day we still give credit for the design to ebikes.ca (one the t-arm page on our site). This is what Justin and I agreed to. 9C copied the design from Justin and they proactively sold and marketed the t-arms themselves to customers and any prospects they had (without Justin's permission). In addition to this, just to give you guys an example of the lack of loyalty from certain manufacturers... A few years ago the manufacturer of the CA circuit boards also reached out to us to sell us the CA guts (claimed the same programming as well) and of course we told them it wasn't cool, and then we sent their prospecting email to Justin to make him aware. Stealing ideas isn't how we do it and we have a lot of respect for Justin (and for any other competitors doing great work).

All of that said, we know it's not a great design and it's certainly the most outdated part in the current kit, but it is sufficient for the typical E-BikeKit application.

Going forward we definitely want to offer a better design. We're kicking around the idea of running a design contest. Hopefully we can start offering something much better by next season.

Thanks again for the review.
 
Any plans to at least return to the laser cut TA? That stamped one, though adequate for the kit's design power levels, is pretty loose compared to the laser cut ones I have from previous kits.

The trike kit, review coming soon, did have the tighter fitting TA.
 
dogman said:
Any plans to at least return to the laser cut TA? That stamped one, though adequate for the kit's design power levels, is pretty loose compared to the laser cut ones I have from previous kits.

We've been working with local CNC shops on a few parts so once we have a new design it will be done here and done right.
 
That's an excellent review!

I'm also glad to see that they are continually improving their offerings. That display with the 5 power levels is pretty slick.
 
I need to get off my butt, and do more testing of the 5 levels, on both 48v and 36v batteries. It's really nice to have lower levels of power when you need to stretch range. I just never seem able to hold half throttle for long, I just keep creeping it up towards 3/4 or more.

I had a feeling that stamped TA was not a permanent thing you'd use for long. But again, it WILL be good enough for the stock controller. I've seen much worse TA's. In fact, I have a pair of very poor ones holding a huge motor running double the power.

When installing it, think about the direction the motor will push on it, and lean the TA so the arm holds the axle. Rotate the TA the opposite direction the wheel turns, then tighten it up. Viola, no slack.

The kit does come with the very important C washers. Another of Justins innovations.
 
Back
Top