beetlejuice Builds

methods

1 GW
Joined
Aug 8, 2008
Messages
5,555
Location
Santa Cruz CA
TrikeRebuild_003.jpg

Although I tried my best to give away all of my bike parts some years back when we were living in the 350sqft cottage by the beach, I was not completely successful. I managed only to give away my most useful tools and parts:

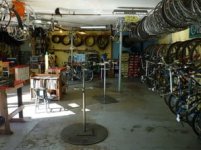
To the Santa Cruz Bike Church
- all of my Park tools
- spokes, spoke wrenches, spoke cutter
5874919.jpg

To some random guy doing a build
- rims
- shocks
- gears and derailleurs

My rational for the bike church (community bike center) was that I was not using the tools, and many others could. My rational for all the performance parts was that I had not touched them in 3 years, and my rule is... at that point it MUST GO to a more avid enthusiast.

Usually works out in a Karmic way.
TrikeRebuild_010.jpg

So... now my kid is into riding bikes... and he is smart enough to know I am a "cheater" with my ebike, so I have had to put on my "bike mechanic" hat again.

[youtube]vxc1UzredHM[/youtube]
(editing dont by Android after taking the video @ 1/8th speed. Pure luck)

... so first order of business

- tore all of the electronics off of Kim's Specialized
- tore all of the electronics off of my Trike
- starting picking up free stuff and buying super cheap stuff

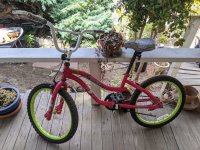
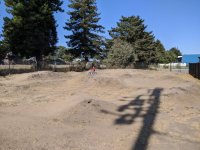
As it stands I have 4 fully operational bikes, including a sweet pink bike that we found by the dumpster at the Harbor. That one was FOUL... front brake was shredded (so bashed my nads in the skate park grabbing brake that was not there), front bars were loose (so bashed my nads in the skate park falling forward), seat was chewed to hell (so bashed my nads), pedal was broken in half (so bashed my nads), tires were flat so...

yea, you get the point. We have all picked up a dumpster bike and started riding it (right?) :bigthumb:

anyhow

Got that bike DIALED by picking apart another kids bike that we had bought at the Grey Bears (used store) for $20. Stole the front brake, pedals, and the odd fastener.

I then proceeded to strip down Justin's bike for good parts (after the mid-gear shattered). I stole his rear Nuvinci (hope he does not come back for it! :confused: ) as well as his waffle pedals and rear mechanical disk brake. The Specialized was a $200 special that we bought off the back of a camper near HW1. I swear to Christ somebody found a frame in the woods and then went to a junk bin behind a bike shop and outfitted the damn thing with 100% broken parts :mrgreen:

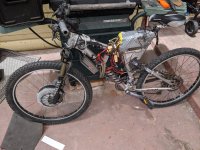
... well, since... I have tossed 2 pair of Juicy 7 brakes and made due with the derailleur setup. Sorry I dont have any pics (lazy) but... yea. So... as it stands (and rides today) it has no front brake (because my front wheel came off yet ANOTHER roached and free bike and it has no disk) and the rear brake is a pull-down. ... this is what it looked like before I stripped off my fine handy work.
TrikeRebuild_045.jpg

You may recall that Kim did the original build using nothing but zip-ties and it was BOSS. Later, for whatever reason, I had to steal the batteries (which were pull-down from a Drone company) for another task... then ... on a tear... in the dark in 15 minutes... I built the bike you see above.

Worked
Got me there

Rear brake dragged at 30% and front brake did not work, but got me there.
(That is what is important, not how cool something looks.. only how reliable it is*)

yea - so that bike is stripped down and a runner (for the most part) again. Pedals only.
TrikeRebuild_002.jpg

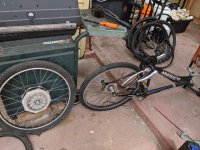
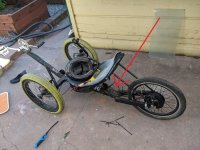
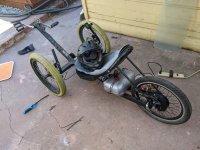
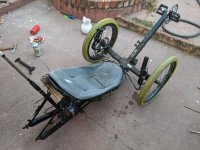
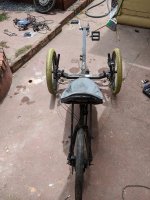
Same thing happened with the trike. I now have that completely torn down and built back up to pedal status. I found 3 rusty, worn out, old chains in a bag of shit and linked them together with used chain-links from the best bike shop in Santa Cruz

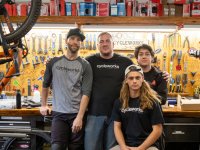
FYI - Cycle Works is an AWESOME shop. They organize street rides (critical mass style) as well as mountain rides. They have a fully stocked shop and they are not dicks. Super cool - they even helped me out a little when I had my head in my ass. Love those guys.
MSH_FY6A307456.jpg

Yea - so if you are in Santa Cruz, they are up on Mission. Stop by and spend your money there if you can. They have reasonable prices and lots in stock. They are serious about bikes and they know what they are talking about.

So anyway -
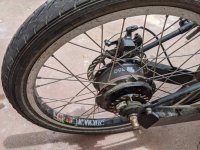
I built up this chain of 3 different size chains. Some 10spd, 9spd, and single speed. I had a few links and got a few more links, pulled the chain "sorta tight", broke it, then linked it back up. I did not even use a derailleur because the bracket on the KMX was broken - so - just ran "straight chain"
TrikeRebuild_025.jpg
TrikeRebuild_024.jpg

Of course, I the chain stretched in a bit and started throwing, but IT WORKED. Right off the first build we took it down to the harbor for dinner, then the next day my son and I crossed town with it. If you pedal backwards it throws both the front and the rear instantly, but... if you focus... it WORKS.

:mrgreen:

I am thinking today I am going to drill/tap a hole and mount a derailleur near the back (tension only) to see if I can get the setup a bit more reliable.

MID DRIVE

Is what I would like to try with this continuous transmission. . . but. .. Eh - no idea what I did with that Cyclone setup and I am working on Zero-Budget so we will see. Most likely I will end up with another rear hub, which will be great. I always run a fixed gear (tallest) on those anyway.

PAUSE -> Boss is calling

-methods
 
Meh - boss said his hands are tied around hiring me on (contract or otherwise), so... sweet. More vacation.

Here is what the current non-electric dumpster-fleet looks like.

TrikeRebuild_001.jpg

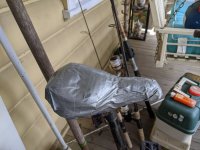
This is the PDB (Pink Dumpster Bike). Kim rides that. Notice the fine work she did with the seat. Under that imitation duct tape is a hand towel folded over a couple times and protected with blue tape.

TrikeRebuild_003.jpg

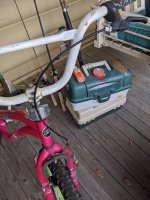
Below is the front brake retrofit from the even rustier bike. Works perfectly well (until the handles break) but it has redundant rear chain brake.

TrikeRebuild_004.jpg

Speaking of redundancy (reliability) I saw a kid last week on a cruiser bike. It had nothing but a foot brake and he was riding in a wetsuit, bare foot. The damn chain was falling off... and I stopped to talk with him... I was like "dooood, you understand that if that chain comes off while you are going downhill, barefoot, that you are D O N E - right?"

I dont think he fully grasped the gravity, but whatever. Not my kid, and I tried.**

TrikeRebuild_005.jpg

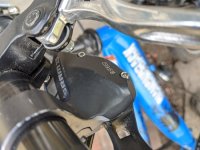
Above is the sick "clicker" that we modified Tylers bike with. Stock, the bike had a rotten twist gear shift that not even a body builder could operate. It was PURE GARBAGE (from REI) and was well documented as a flub online. So - since my kid can actually bang gears, I got him a clicker. Found it at the bottom of a box of crap from the fleamarket. Good shifter, took it apart and inspected how it worked. Ran a new cable (thru the old tubes) and he is super happy with it.

Bike weighs like 700lbs, but whatever. He is stoked on it and that is what we have at the moment. I am trying to teach him not to be too proud to ride a pink bike. ***

You ride what you can get.
You build what you can afford.
Never miss out on an adventure because you want to look cool. ****

TrikeRebuild_007.jpg

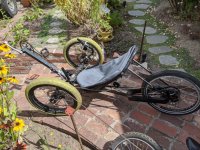
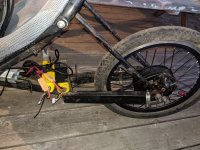
Of course my ride is the sickest. Weighs a ton, chain drags, pedals like hell, transmission drags... huff and puff just to get that thing going on the flat, let along up hill. I can climb it tho.

TrikeRebuild_008.jpg

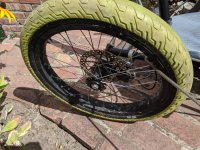
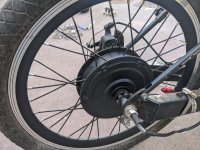
On the left I have something like the wheel off of a 2008 Zero Motorcycle. It is rad and wish I had another.

TrikeRebuild_009.jpg

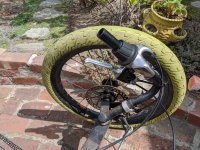
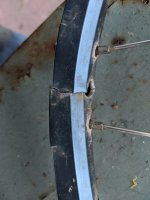
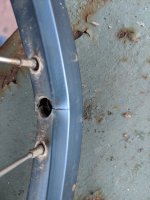
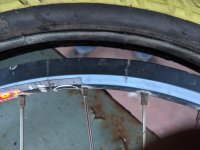
On the right I laced into the worst POS rim ever. It is cracked in two places and the "other one" already taco'ed on me while doing 2-wheel motion. Total hazard, and any day now it is going to come apart. Wheel wags, spokes are loose... gotta get a better wheel over there but dont want to spend the money on a rim, spokes, cutting and threading, ... gotta wait until the bike church opens again and get it done over there. The spoke threader I had sucked anyway, and I will cutting by hand... which makes for hell lacing wheels.

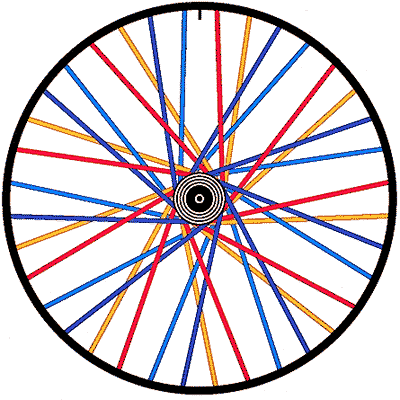
Reminder: Sheldon Brown taught me how to lace wheels, years after his death

https://www.sheldonbrown.com/wheelbuild.html

Everything you need to know is on that page. I build wheels to this day based on that.

wheel36.gif


yea man... RIP Sheldon Brown. Guy was awesome. One of my inspirations in the early days. He taught me about "Well Meaning Alarmists" and how to sort the BULL from the BULLSHIT.

Dont let anybody tell you what is and is not. Find out for yourself using Logic, Reason, Experimentation, and build Experience.

-methods
 
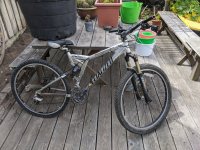
Then there is Kimberly's bike. . .

TrikeRebuild_010.jpg
.
It is pretty clean now. Surprisingly light after removing the hub and batteries.
.
TrikeRebuild_011.jpg
.
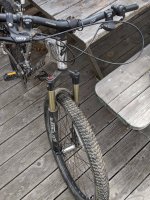
Note the glaring absence of a front disk or any attachment points for other means. On the lookout for a wheel with front disk in 26". That wheel is straight K-Mart off of the bike a couple pics down.
.
TrikeRebuild_012.jpg
.
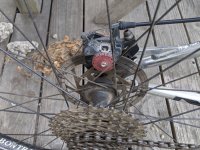
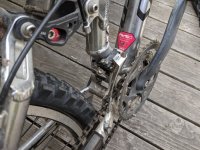
These mechanical disk brakes are actually sorta ok. NOTHING like the touch you get from a really good hydraulic setup, but leaps and bounds better than V or U brakes on the rim. On these older setups you can adjust the pads in and out to deal with rubbing. Wish the same was tru on the Juicy 7's, but for the life of me, I think they are just roached.
.
TrikeRebuild_013.jpg

Finally, at the bottom of the stack, is a donor bike that we got for free on a CL trip. When I have enough parts collected we will build it up and give it to a bum down by the rail road tracks. He (I dont like she-bums) will be no doubt stoked, and I am sure we will find it in tatters in the bushes later anyway.
.
TrikeRebuild_014.jpg

yea...
So... I make a lot of money and I could buy fancy shit if I wanted to. Instead I choose to spend my time picking thru dumpsters and working with old rusty parts. In no small way. . . it is because I want you (poor kid who wants to build an ebike) to feel OK about building whatever you can afford. Forget all those fancy $5k and $15k builds. YOU DONT NEED THAT

To have FUN

What you need is a bike that is fundamentally sound
- has good front brake
- has good rear brake
- has suspension if you can help it
- has some miles and hard stops on it
- has reliable tires that wont blow out
- has front and rear lights

... just get the basics for safety and reliability going... then ... build up an ebike out of ANYTHING you can knock together. Really, ANYTHING. Even a 36V 20A controller on the smallest hub with the most jenk of hodged together RC packs will bring you and your family much joy.

... if you wreck, you will bring much sorrow

But if you build something reasonably safe, you will experience an improvement to your life and maybe for a moment you will feel free.

-methods
 
Phase 0 - Get the bicycles to functional
Phase 1 - Get the bicycles to non-human power
Phase 2 - Get the bicycles to RIPPING HARD

...

Phase 0 passed above, phase 1 below

- 12S 4Ah
- Geared Motor
- Biddy' controller

Backlog_009.jpg

Super light, worked great, went 20MPH, totally worked.

Moving along to phase 2...

Backlog_004.jpg

I, really, really, really liked how light weight this setup was. . . but experience tells me that wont last long. What I need as a nerd is a distinct LACK of range anxiety. :confused:

Enter "Lucky 13, the Big Fail"

MovingOn_008.jpg

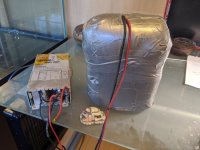
That big bag of nasty. . . is looking at this big hole... and you know what it is thinking

MovingOn_009.jpg

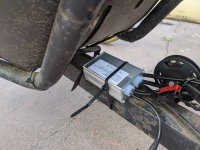
Plenty of room in there with the biddy' controller. That thing is so small.. perfect for my sons bike. It even has an input for pedal sense, so... pretty sure it may work for his first "helper"

MovingOn_010.jpg

BAM!
Whole buncha battery in there. This time holding the rear wheel down so I dont have all those "tip-forward and lose traction" issues I had before.

MovingOn_012.jpg

yea. . . range.
I have some video to edit from yesterday on that rig. Ran great.

MovingOn_011.jpg

For torque arms I have an EbikeKit knock-off (lacking texture*) of the ebikes.ca torque arm on one side. That one is definitely not set up with a good orientation. You dont want the lever arm pushing on the slide motion of the hose clam, but, for this setup it will be fine.

On the other side I have a custom extra long torque arm made up of a wrench and some COTS torque arm parts. On that one I had ground notches for the hose clamps, but of course, in this orientation, with the 20 minutes I budgeted for this - would not go on right.

... Does not matter.

For a little setup like this, running probably under 20A, with tight nuts... a pair of torque arms will get it done for sure. I REALLY prefer some sort of positive clamping. LIKE- REALLY PREFER... and when we step back up to a big motor we WILL set up a positive clamp... but for this, more than enough.

>.....

-methods
 
First of the failures - Rim Taco

Reef_005.jpg

Believe it or not, I rode home on that. I use BMX tires that hold tight, double-thick tubes, and heavy duty rim tape.

Reef_008.jpg

I probably put 10 miles on it after the initial crack. The spokes of course became more and more loose. I tightened them up on one occasion, then let the failure run away.

Reef_006.jpg

Only one spoke broke - sheered at the fastener. Dont try this at home, you can get impaled. On this vehicle your knuckles kiss the tires.

Reef_007.jpg

To the Credit of the rim manufacturer, I *think* it was originally Presta, I drilled it out to accommodate Schrader, and that was the root cause of the failure. (Note, this is the second failure)

Further credit to the manufacturer of the rim, I was side-loading the rim to the extreme and it was way over-tightened. I basically performed a "Destructive Test" on the equipment (as I do with ALL EQUIPMENT . . . hint hint)

- Compromised structural integrity (over-drill)
- Left stress risers (did not soften the ragged hole I drilled, makes a big difference)
- Applied insane side loading (about 200lbs @ 45 degrees)

-methods
 
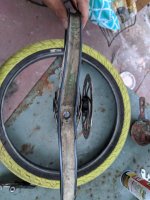
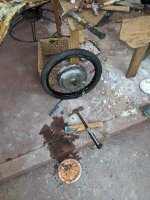
Ended up breaking down the 24h x 20" rear wheel to build up a front replacement. Of course it was dished, so I ran the long spokes inside.

Used no special tools -
* No cassette removal tool
* No spoke wrench
* No notched flat head
* No truing stand

I used nothing but a Ryobi drill, a DeWalt bit, some PB Blaster penetrating fluid, and the Sheldon Brown guide.

RobotMechanicForHire_010.jpg


I did not mention it in the blog, but I had to build the wheel twice. At some point I mixed up the Long and Short spoke batches, resulting in 25% of the spokes being very loose and 25% being very tight.

RobotMechanicForHire_018-1.jpg


Very happy overall with how the build came out. Beware that the build pics are *not* from the final and successful build. Final build took about 15 minutes to lace (starting from hub, rim, and 2 piles of spokes). It did not really need to be trued, but I spent another 15 minutes working on that.

RobotMechanicForHire_034.jpg


I did not really write it up well, but you can look thru it if you want.

RobotMechanicForHire_043.jpg


public/2020/08/08/accelerated-aging-destructive-testing/
public/2020/08/08/level-6-robot-mechanic/
public/2020/08/08/task-complete/
public/2020/08/08/wheel-building-in-fast-forward/

-methods
 
Lessons Learned

* KMX Uses low grade components, at least on the Typhoon model. Proof to this is rust on everything, even the spokes.*

* a spin-on freewheel can be hell to remove without the tool. Cassette type comes away very easily with just a screwdriver and a hammer. Note to self, remove the freewheels BEFORE removing the rim for best results.*

* Rusty old spokes are better than no spokes, a missing spoke, waiting for spokes, or spending an hour measuring and paying to have spokes cut local. . . Practice building with what you have. Make it work*

* Running spokes a touch short as opposed to a touch long makes for an easier tear down and build, as the spoke does not extend up and out of the nipple. This allows you to use a standard instead of notched blade, and you get less of the bit skipping and binding in the rim.*

* Lacing a rim is like riding a bike. If you don't do it for a few years the first go may be choppy, but the second go is like the time never passed. Keep your skills in order. Skills are like mussels. The first time you build them it can take months or even years. . . but once built. . . it takes only a few minutes/hours/days/weeks to pick up where you left off (assuming a long time off) *

* Mechanical disks offer a lot more in the way of adjustment. . . and. . . they pass the test of time.*

* Thicker tubes pop less, I like them. If you forget to apply rim tape, they are more likely to survive*

* Higher quality, higher pressure tires. . . are indeed worth the money*

* Avoid drilling out a Presta to Schrader on a skinny rim. It will probably work for a regular ride, but not for a big side load situation*

* The lessons of electric bikes and Automobiles in general are still relevant today and will be even more relevant tomorrow. . . . as we robotize the workforce. Electric Bicycle forums are excellent recruiting portals*

- Your build does not have to be high end.
- More points for learning something than buying something.

So. . . nobody expects you to come out of the gate welding drops, laying up fiberglass battery cases, or performing extreme modifications on COTS equipment. What we do expect is for you to jump in, share both your failures and your success, and to have some measure of fun doing so.

... Youtube is heavy on content that is focused on making the presenter look good/smart. They do this by failing 23 times off camera and then showing you the final "masters cut". When you try to copy them, you fail - of course. ....... A true master works right in front of you. . . as the art of being a master is not doing something perfect, but recovering from mistakes while learning on the fly.

If you want to work with us, show us that you have nothing to hide and no one to impress. Find something new, do your research, procure your materials, document your build, share your lessons learned. Most others award points on fit and finish. I award points on ingenuity. What is important is how reliable of a rig were you able to cobble together within a given timeline and budget.

-methods
 
Back
Top