Tidalforce S-750 (Bafang SWXH) by Tritonwow

tritonwow

100 W
Joined
Jun 7, 2009
Messages
104
Ok,
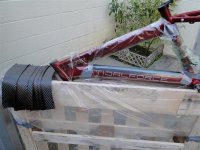
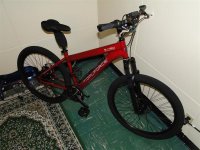
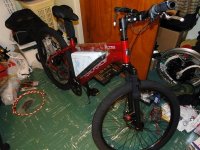
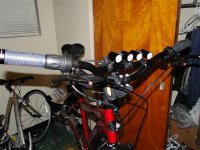
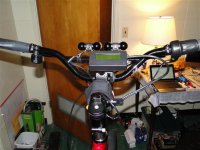
Parts are rolling in and I'll use this as my build thread.

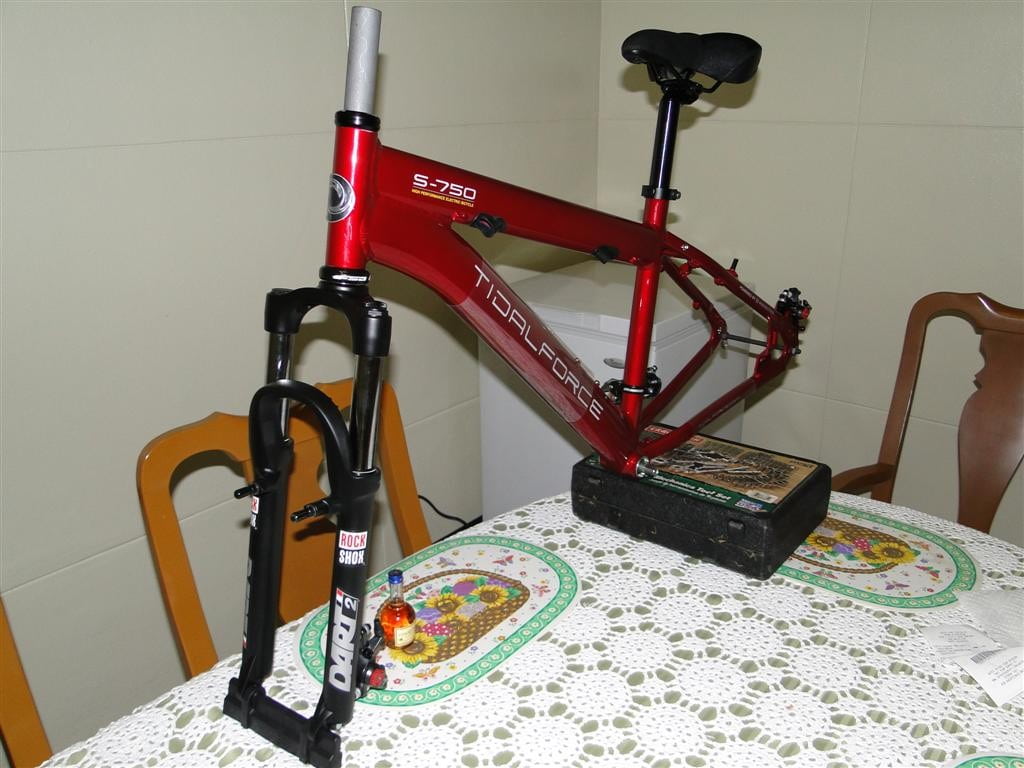
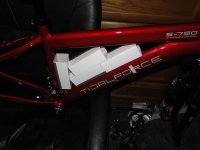
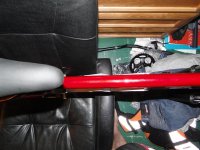
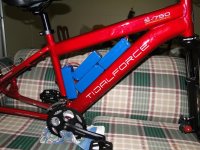
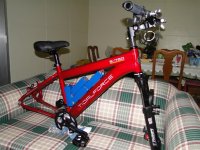
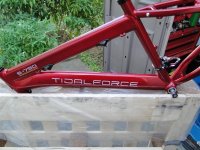
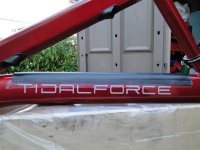
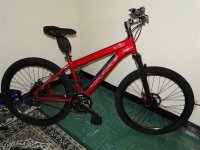
Tidalforce red S-750 frame
JRH 26" wheelset (all black with alternating red nipples and Bafang SWXH rear hub motor; matching front wheel)*
Rock Shoxx Dart2 forks (using disc only Dart3 lowers)
FSA PIG PRO headset
Avid BB7 mechanical 160mm disc brakes
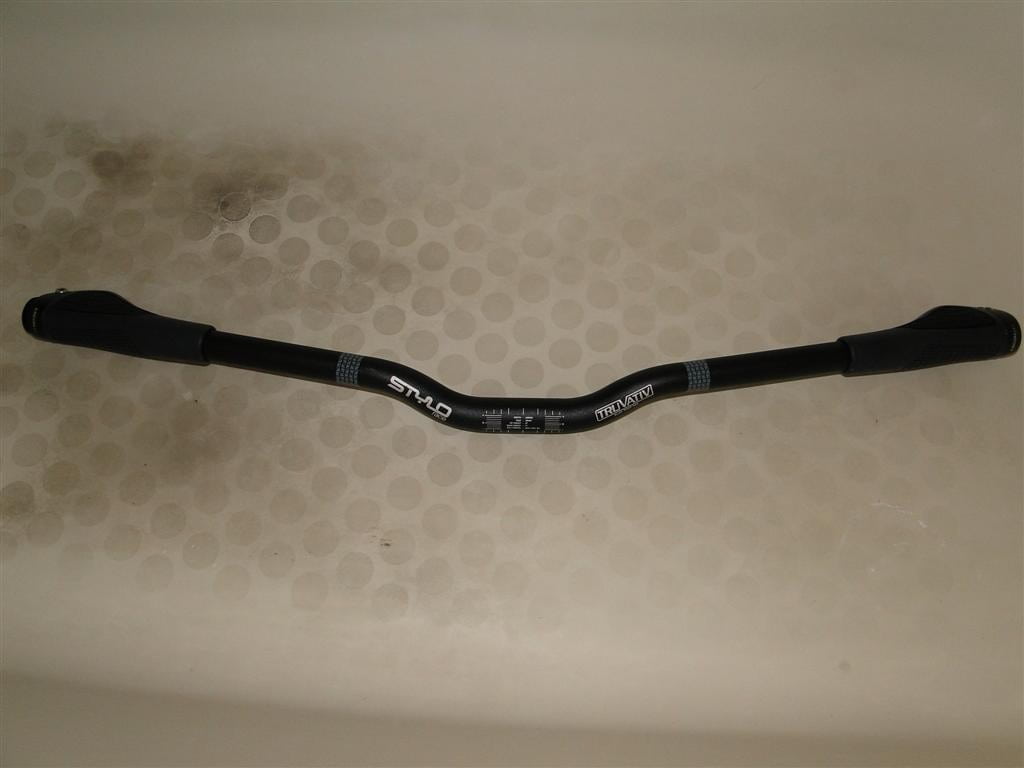
DMR Wingbar cromo lowriser bar Old: Truvativ bars (might change to a lowrise BMX style)
Ergon grips
Thudbuster LT seatpost
n'lock security stem
OEM crankset
Cycle Analyst (CA)
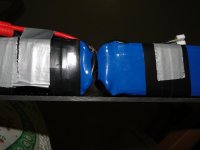
ZIPPY Flightmax 5000mAh 6S1P 15C (for 44.4v10Ah)
Infineon 25A brushless controller with 6xIRLB4030 mosfets,ON/OFF button, Fwd/Rev, ebrake, and CA connectors
Andersen Powerpole 30 and 45a connectors

file.php

file.php


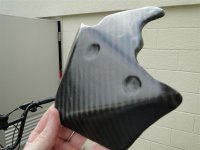
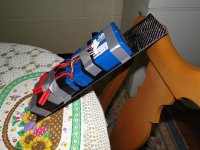
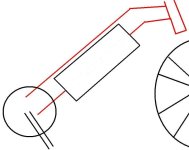
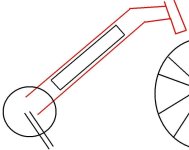
I'll make a battery/controller/tire pump/small stuff compartment box out of carbon fiber or CF/kevlar in the triangle. I also plan to make CF fenders using the V brake mounts as mounting points for the fenders. I ride in all weather so we'll see if this lasts in the tropical rainstorms!
I plan to use an RC controller (CC ICE HV).
I plan to use a single sprocket in the rear and either the 48/38/28 front sprokets (but I've been thinking about this: http://www.kinetics.org.uk/html/mountain_drive.shtml
Oatnet sells a wonderful centerstand but it's too heavy IMHO so I'll fab a CF one using it as a model; it only needs to keep the bike upright without a passenger!)

Anyhow, more to come as the parts arrive

Triton
 

Attachments

  • s750 frame forks (Large).JPG
    s750 frame forks (Large).JPG
    107.6 KB · Views: 2,483
  • s750 truvativ bars (Large).JPG
    s750 truvativ bars (Large).JPG
    37.4 KB · Views: 2,479
Battery mockup of the flightmax packs will be tight (6S1P x 4 = 44.4v10Ah) but width-wise would work nice. I'm having to rethink how I'll design the battery box but this all depends on how accurate are the posted dimensions. Hopefully I won't have to stack them side-by-side.

file.php


file.php


The next pic is something I'm working up for my ICE motorcycle but it shows the carbon fiber weave I'll use.

file.php
 

Attachments

  • battery mockup a (Large).JPG
    battery mockup a (Large).JPG
    63.1 KB · Views: 2,390
  • battery mockup b (Large).JPG
    battery mockup b (Large).JPG
    127.8 KB · Views: 2,388
  • d12 inserts2 (Large).JPG
    d12 inserts2 (Large).JPG
    87.5 KB · Views: 2,387
I look forward to your build and your CF battery box!

- JD
 
Well, parts are rolling in. I was going back n forth about the battery box configuration using the cardboard mockups and it turns out for nothing. The real batteries fit rather well so I'll keep them single stacked and thin (I was thinking double wide at one point). It also looks like I may just have enough room up top to squeeze in the controller (planning on a castle creations HV-160).

file.php


The front end is coming together nicely with the n'lock security stem, Truvativ Stylo bars, thumb throttle, Shimano Revoshift (for front sprockets), and Ergon grips. I've been contemplating a carbon fiber housing to tidy up the cabling in front (but it's still just a thought in my head).

file.php
 

Attachments

  • batt pron (Large).JPG
    batt pron (Large).JPG
    135.7 KB · Views: 2,295
  • bat pron and more components (Large).JPG
    bat pron and more components (Large).JPG
    132.9 KB · Views: 2,298
Worked on the box 2day but not much... I'm sick and hazy from cold medicine.
I did find a pic of the paint scheme I'm leaning towards I think I'll call the bike "'Von Bomber"'
 
I settled on my battery box (for now) as I've started to build it. The batteries will sit 2 wide by 2 long atop the downtube (inside the triangle): The plate the batteries are on now is 3mm thick carbon fiber.

file.php

file.php


I still have to shape the front and rear portion, then add weather striping along the edge. A carbon fiber cover will be built which slides over the base from the front and secures in the rear. The base will be removable from the downtube so the whole unit can come off the bike. So, I started to work up the rest of the base. I added a strip of rubber between the base and the frame.

file.php


file.php


file.php


I might have to sneak it in the house as the temp around here has been dropping to a chilly 60 F :D

I still have quite a few steps before this box is comlete.

Triton
 

Attachments

  • batterybox (Large).JPG
    batterybox (Large).JPG
    52.8 KB · Views: 2,170
  • batterybox a (Large).JPG
    batterybox a (Large).JPG
    120.2 KB · Views: 2,168
  • batterybox b (Large).JPG
    batterybox b (Large).JPG
    141.5 KB · Views: 2,162
  • batterybox c (Large).JPG
    batterybox c (Large).JPG
    86.6 KB · Views: 2,164
  • batterybox d (Large).JPG
    batterybox d (Large).JPG
    127.8 KB · Views: 2,169
Continuing the battery box. Foam inserts cut and now time for the next step of attaching the two bottom bracket pieces.

file.php


Still to go:
-resin up the two pieces
-Work up the "c" clamps which will secure the bottom bracket to the downtube
-Shape the bottom bracket
-Work up the cover
 

Attachments

  • batterybox e (Large).JPG
    batterybox e (Large).JPG
    34.1 KB · Views: 6,120
  • batterybox f (Large).JPG
    batterybox f (Large).JPG
    110.3 KB · Views: 2,135
I was in Thailand on holiday but returned to some pleasant mail. In the process of getting everything sorted.
 

Attachments

  • DSC00982 (Medium).JPG
    DSC00982 (Medium).JPG
    70.3 KB · Views: 5,861
  • DSC00984 (Medium).JPG
    DSC00984 (Medium).JPG
    72.8 KB · Views: 5,858
Shaping up nicely!

I recently did the same thing with my thudbuster cover - put it on inside out to hide the adverts, conceal it a bit. :D

I'm enjoying watching your progress with the battery cover - if you decide to make a spare or so, I'd be happy to buy one from you. :D

-JD
 
Tritonwow,

Progressing nicely. I know what you mean about the epoxy curing and temps. Last year we had to crank up the gas grill in our partially sealed garage to get a standup paddleboard to cure.

I like to hack things up, and since I was already working in carbon fiber, I'd cut away half of that downtube right through the length of the TidalForce decal. That would surely allow double the batteries, and a nice flat platform built right on the frame.

John
 
Thanks guys. Work seems to get in the way of doing the fun things so this is going slower than I'd like.

oatnet said:
I recently did the same thing with my thudbuster cover - put it on inside out to hide the adverts, conceal it a bit. :D

I'm enjoying watching your progress with the battery cover - if you decide to make a spare or so, I'd be happy to buy one from you. :D

-JD

JD, I actually went crazy with the large and small black Sharpies. The Thudb prob would look better turned inside out. Read on about the batterybox...


John in CR said:
Tritonwow,

I like to hack things up, and since I was already working in carbon fiber, I'd cut away half of that downtube right through the length of the TidalForce decal. That would surely allow double the batteries, and a nice flat platform built right on the frame.

John

John,
I was eyeballing my battery box after I got the bike to a rolling chassis and it just doesn't do it for me:

file.php


I was thinking the same thing about cutting the frame but was looking at two options;
Option 1 keeps the overall width of the downtube almost the same but extends its height one battery towards the ground (approximately 2"):

file.php


Option 2 would remove the word Tidalforce completely and replace it with a battery box (approximately 4" wide):

file.php


Either option will be difficult to hide the controller; the goal with those options is to keep the triangle fairly open to maintain a bicycle look and stealthiness. I would create an outer box (or sleeve with one side open) permanantly attached to the frame and the "battery box" would be another carbon fiber box around the batteries to side into the sleeve. With a tight fit and proper thickness of both boxes it should be fairly rigid.

That said, I will most likely finish the triangle box I started because I want to ride the ebike! Maybe in the future I'd have the trangle box up for grabs.

I have an idea using switches so I can charge all four batteries individually and then throw the switches to put them back series/parallel but I need to find switches which are small and handle +/- 50v and 100a.

Triton
 

Attachments

  • batterybox 10feb.JPG
    batterybox 10feb.JPG
    91.3 KB · Views: 5,706
  • TF base pic option 1.JPG
    TF base pic option 1.JPG
    34.8 KB · Views: 1,908
  • TF base pic option 2.JPG
    TF base pic option 2.JPG
    36.8 KB · Views: 1,905
Well, after many delays; waiting for wheel to arrive, several short and one long, long trip away from home, crashing my bike/breaking clavicle and scapula, surgery to pin/plate the clavicle, I'm going back at my build.
The Bafang hasn't mechanically functioned properly since I pulled it out of the shipping box. I finally got a freewheel removal tool and drilled the center out with a 1/2" bit:
View attachment 1
Freewheel off and now to make the cover removal tool. I could just go at it with all kinds of stuff but I paid a bit to get the Bafang powdercoated and want to preserve it as much as possible (removal tool idea taken from another thread on ES):
bafang cover tool (Small).JPG
Unfortunately I live in a duplex and it's 1 am so I'll have to do the drilling on the wood tomorrow. We'll see as it's only been two weeks since surgery and most activity agrivates the site. Hopefully I'll get the cover off and gain some insight to WHY the wheel just doesn't function right.
I've wanted to get back at the battery box too but it's been virtually non-stop rain for the last couple of weeks.

Triton
 
No dice with my improvised cover remover. I tried to use a pipe wrench on the freewheel threads, padded with tape and rubber, but I couldn't get it to bite. Looks like I'll have to !@#$ up the powdercoating using channel locks before I even get to ride the bike. PITA.
 
Alright,
A very noob mistake on my part. Basically all the time lags (my job, shipping, honey do lists, etc) and my failing short term memory caught up to me. I could have avoided pulling the cover if I just had taken the brake disc off. Apparently, the first thing I did after inspecting the shipping carton and removing the wheel from it was NOT to inspect the functioning of the wheel. I must have mounted the Avid BB7 disc first, then tried to spin the wheel.
I finally got the cover off with the help of a good friend (I only have one fully funtional arm right now) using a brass punch and light hammer with minimal damage:
Bafang punch on cover (Small).JPG

The only wear mark I could find (circular pattern on-line with the button heads). It was much more pronounced but I didn't have the camera at my friend's shop:
Bafang wear mark (Small).JPG

And the culprit(s)... The Avid BB7 supplied disc mounting bolts are 3mm too long and hit once installed. I'll try to source some different ones tomorrow since the OEM are star drive and I might as well change out to hex drive since these don't work. Alternately, I can just grind off 3mm or use washers:
bafang BB7 bolts (Small).JPG

Well, It should at least be a roller tomorrow as I wait for compatable connectors to arrive. Riding will be another story as I wait for my shoulder to heal.

Triton
 
I've switched to a DMR cromo lowrise BMX style bar and have the AyUp lights, CA, and cheapie bell mounted. Light battery is temporarily on the stem and will most likely go into my battery box.
i also switched out the brake levers to all black Avid Speed Dial 7/SL levers.
 

Attachments

  • DMR wingbar 1 (Small).JPG
    DMR wingbar 1 (Small).JPG
    57.8 KB · Views: 4,880
  • DMR wingbar 2 (Small).JPG
    DMR wingbar 2 (Small).JPG
    54.2 KB · Views: 4,880
Very nice. Now I'm kinda wishing I would have gone with a Tidalforce frame again. lol

Where did you get the handlebars? I've been looking at bmx cruiser bars but most of them are crazy expensive.

Btw... Is that a Lustron house? I noticed the interior panels and it kind of looks like one (sorry to get off subject).
 
EVTodd said:
Very nice. Now I'm kinda wishing I would have gone with a Tidalforce frame again.

JD still has some left last time I checked. I just sold the gray one I had (bought the two for $100 deal). I didn't want to sell but SWMBO said I had too many bikes.
I'm also reworking the battery box. I wanted to mount the batteries/controller in the frame but its really tight and i think it detracts from the bicycle look. Now, looking at JD's recent mounting of the batteries up on the fork:
http://endless-sphere.com/forums/viewtopic.php?f=6&t=12461&start=0 I think I could easily make a U-shaped housing for the batteries/controller in front and on the sides of the headtube which wouldn't look half bad. Unfortunately, the bike as it sits right now is already front heavy so I'm now leaning towards an under the down tube mount/battery box with an incorporated crud catcher.

EVTodd said:
Where did you get the handlebars? I've been looking at bmx cruiser bars but most of them are crazy expensive.

After alot of searching for BMX style handlebars to fit the MTB neck I found the DMRs. After some googling I found them in black at wiggle. I've been ordering parts from wiggle for awhile now and must say I'm impressed. The initial shipment had a small hole in the bag and the bars were missing (to me it was too small a hole for the bars to fall out; like someone took them out) but wiggle shipped out a replacement as soon as I emailed them (more than I can say about the USPS; gave me a bunch of forms then grief so I called wiggle instead). I think I got them at a lower sale price than what they're at now but they are still much cheaper than a bolt on cross bar. Anyhow, I wanted the crossbar for mounting stuff (more tidy) plus it reminds me of my youth.
I can't find them on wiggle right now but chain reaction cycles has quite a few different makes available (to include the DMR) http://www.chainreactioncycles.com/Categories.aspx?CategoryID=202

EVTodd said:
Btw... Is that a Lustron house? I noticed the interior panels and it kind of looks like one (sorry to get off subject).
I had to google this. I remember seeing those style houses growing up in Kenosha but I don't think this house is a Lustron. It might be some sort of copy as it's primarily cinderblock (to withstand typhoons), is on a USMC base, and was most likely built in the late 60s early 70s but its a multiplex.

Triton
 
I've been mentally chewing on a battery box redesign (mid-redesign as I haven't really finished a battery box yet!) for some time now. A few points in the pondering:
- aesthetically fits the bike
- plug and play
- usable across mulitple eBike builds
My current plans were to have a longtail for hauling crap and a daily commuter. This build was going to be my commuter and the bike I was using to work up a friction drive here was going to be the long tail. (I'm thinking I may just be swapping these around.) Neither was going to be built for great speed but with reliability and distance as my goal. Distance based on my current commute (12 miles daily).
Anyhow, I've decided to make my battery boxes so they hold two 22.2v5Ah Zippys at a time and this will be my pack standard for all builds. When off the bike I can charge each of the two batteries separately.
battery box standard (Small).JPG

I'll craft the cover of the box (the box side which will be on the end where the wires exit the battery) so the Anderson powerpoles (APPs) are part of the cover and esentially a plug for the box (no pics yet.) I've been monkeying with carbon fiber as a medium but after reading a bit more I'm going to go with a composite core versus all carbon fiber. I got some 3mm thick wood at the local hardware store:
battery box wood (Small).JPG
Once ready it will get two or three layers of carbon fiber inside and out. Then, each bike will get a skeleton mount which once the battery box is attach will become one structural unit. In the instance of this build I'm looking at mounting one battery box on the right side of the headtube and the controller/excess wire/headlight battery on the left inspired by JDs build here. I'll use a simple Y connector to operate at 44v5Ah and carry a spare battery in a bag in the triangle or backpack (when necessary.)

Triton
 
Triton I look forward to seeing your head tube mounts - you will pleased when you find out how well putting the battery weight on the fork handles!

-JD
 
After finding the right combination for the power and hall sensor wires I couldn't wait to finish building a battery box to go for a quick spin. So, I used the carbon fiber platform I built months ago. I put two screws through it into the water bottle mounts:
View attachment 4

It's on there pretty tight and I think it would serve it's function for my current setup without any other clamps BUT a water bottle is about a pound and this setup is about three times that weight:
View attachment 3

If I stay with this I'll need to still build a waterproof cover, clean up the existing tray (I go a few globs of resin atop it when monkeying with the mold for the cover), and possibly a reinforcment strap around the screw holes.

I used two, 1 meter long velcro straps to secure the battery/controller to the tray and took it for a spin:
View attachment S750 with power (Small).JPG
View attachment S750 with power 1 (Small).JPG


It handles quite well from what I can tell. Unfortunately, I can't get much speed going as I'm still recovering from my broken clavicle and scapula. I can just now hold the bars in their current setup. Once my range of motion comes back I'll most likely cut down the fork tube and lower the stem.

Total weight of bike at this point is 49 pounds.

Last, a quick video clip. It sucks but I was just holding my camera while driving.
[youtube]pQiAUVLLMmI[/youtube]

Triton
 
Nice Vid, Triton!

I like your key switch, but I'd probably snap it off - I periodically take out a CycleAnalyst by doing something spastic near the handlebars.

-JD
 
oatnet said:
Nice Vid, Triton!

I like your key switch, but I'd probably snap it off - I periodically take out a CycleAnalyst by doing something spastic near the handlebars.

-JD

JD,
It's actually the key to the built in lock in the stem. When engaged it makes the handlebars "free wheel" so one can't drive it. there is also a cable to loop through the front wheel and lock up into the stem but it's not in the pics/vid.
See the n'lock security stem http://www.elationebikes.com.au/n'lock1.htm
Triton
 
Back
Top