My first e-build: Electra Townie with MAC 8T hub and QR LiPo

ions82

100 W
Joined
Aug 15, 2011
Messages
147
Location
Albuquerque, NM (USA)
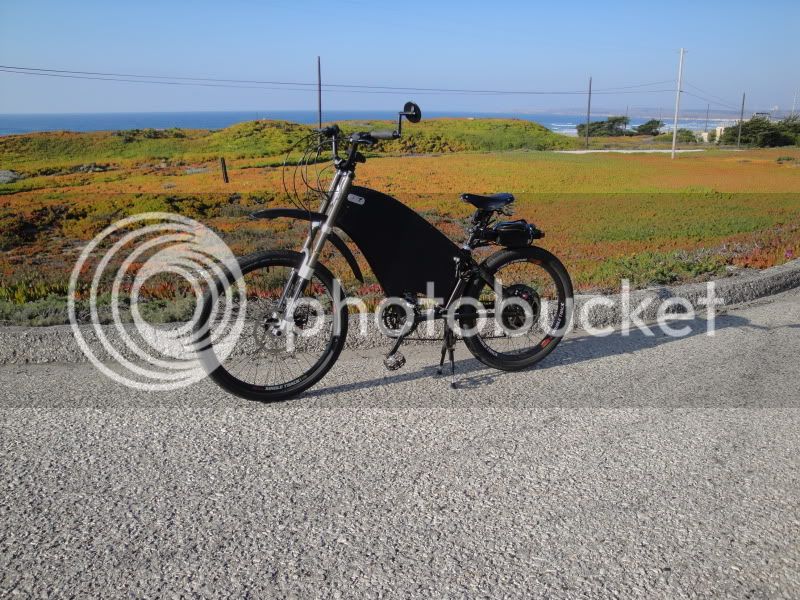
I've recently finished my first e-bike build. It took me a while as I had to keep ordering various connectors, more batteries, new charger, power supplies, etc... I didn't really know what I was getting myself into, and I became a bit frustrated at times. However, I am MORE than happy with the finished product. It came out fantastic and performs far better than I had imagined it would.

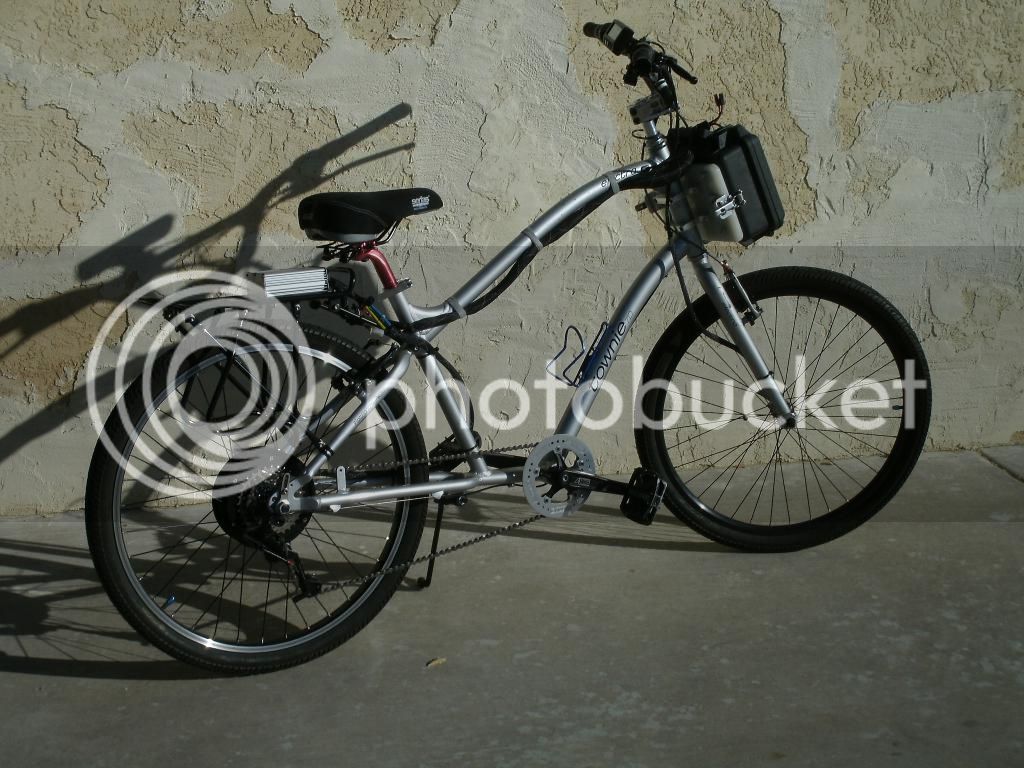
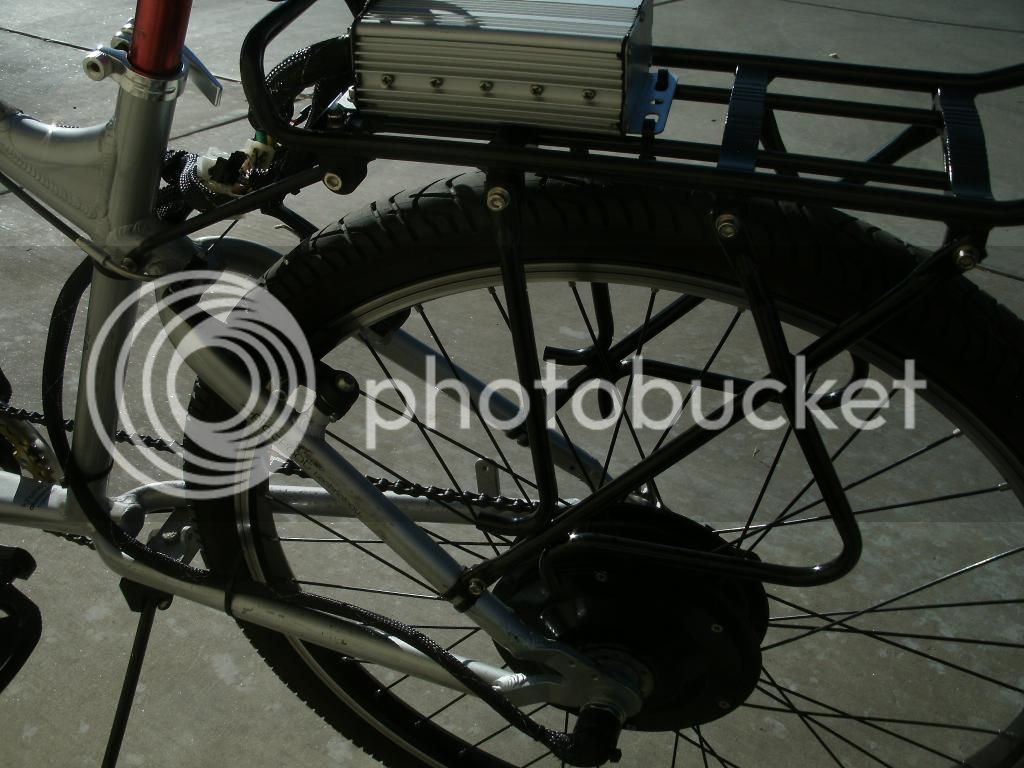
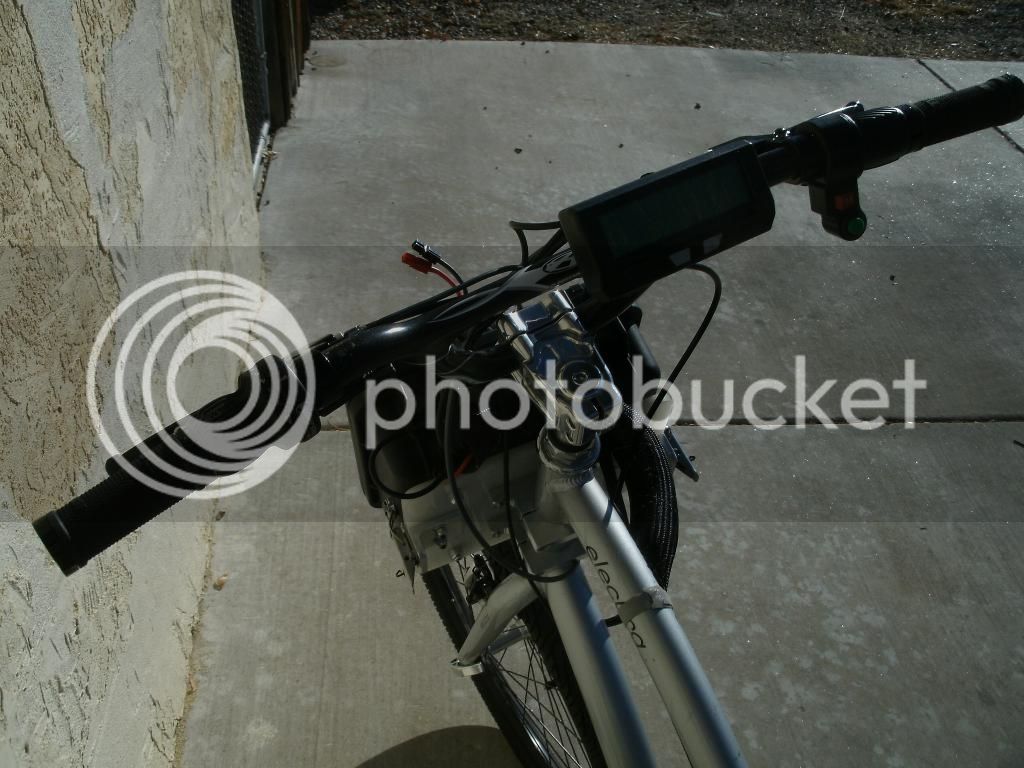
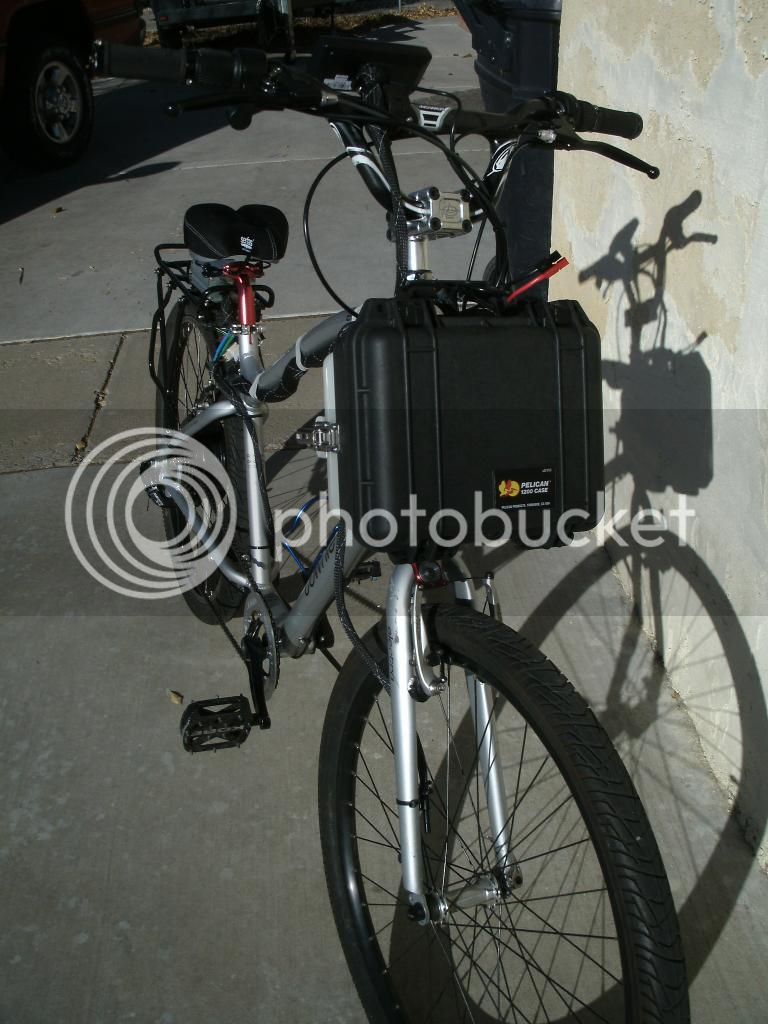
Anyway, as you can see, it is an Electra Townie that has a MAC 8T geared hub on the back. I purchased the hub/controller setup (along with a bunch of parts and accessories) from Paul (Cell_Man) at EM3EV.com. He was incredibly helpful during the order process. The controller has 9 3077 FETs and is limited to somewhere between 25 and 30 amps (can't remember off the top of my head.) There is an 8-speed freewheel mounted, but I didn't put a spacer behind it. So, I have the derailleur limits set to the other seven cogs. With the small chainring up front, I don't really need that last gear, anyway. I might use a spacer on down the road (if I take the back wheel off at some point.)

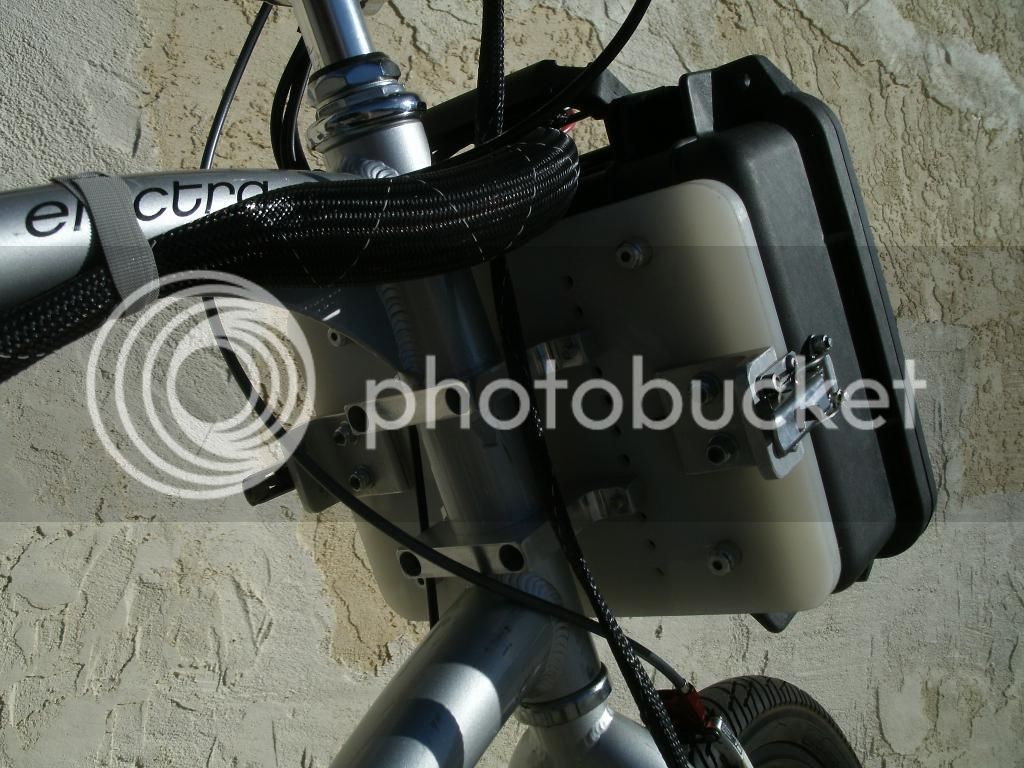
The battery pack is comprised of 6S 5.8 Ah "compact" Zippy packs. I used six batteries and have them set up in a 12s3p configuration. I bought the packs from HobbyKing. From the start of the project, I knew I wanted to have a "modular" battery pack that was very secure yet could easily be removed from the bike. Part of the reason is for charging, and the other is so that I can take the battery with me if I go into a store or have to leave my bike locked up outside somewhere. The Pelican case has some foam inside and keeps the batteries held very securely in place. The mounting interface is a plate of nylon that is held to the long headtube by some clamps that I machined. I also machined some "pins" that mount on the feet of the Pelican case. Those precisely locate to holes machined in the nylon plate. Once the pins are inserted into the holes, a pair of stainless safety latches ensure that they won't work their way out. Everything has a very clean fit, so there is no rattling whatsoever.

In terms of performance, this bike cruises and handles far better than I anticipated that it would. The top speed (on level ground) is around 31.5 mph (50.7 kph). Having the battery on the front of the bike really makes it corner well. Also, since the battery is attached to the frame, the extra weight isn't felt in the steering. It uses around 500 MAh per mile. I do a little pedaling when first taking off. However, I run out of gears by the time I reach 20 miles per hour, and the motor doesn't feel as though it wants to go any slower than that. The hub is virtually silent unless you're accelerating. Some have said that the MAC hub is noisy, but this one is quieter than any of the DD hubs that I've heard. The ride is also very smooth and solid. Even though there is no suspension, I don't feel uncomfortable on bumps. The gel seat has a couple springs beneath that help soak things up.

All in all, I am very excited to have this bike on the road. I keep trying to think of places that I need to go just so I can ride it. I'm about to make a trip to the store for some bananas! I've been a bike rider my whole life, but it's been over ten years since I had this much fun on a new bike.

GEDC0677_zps50d08eb0.jpg

GEDC0678_zpsd051c551.jpg

GEDC0679_zpsc0a2ded2.jpg

GEDC0680_zps4ce9c564.jpg

GEDC0681_zpsf4cd0ec9.jpg
 
Awesome build. Since you are using a non-suspension, I would highly recommend you consider trying a Thudbuster seat-post (I have one). They are pricey ($120-ish) but nothing else works quite as well.

The Townie has a slightly "feet forward" posture, which I like, but it makes popping up onto your feet to allow your legs to absorb an unexpected pothole somewhat awkward. Several Townie owners have added a suspension fork, but with your body weight slightly back, and the upright posture, there is less shock to your wrists (as there would be on a conventional "leaning forward" posture) and most of the shock of a bump would go to your spine...just a thought...

images
 
I thought about getting a Thudbuster post as I have read fantastic reviews about them. However, I am not a very tall guy (5' 7"), and I have to run the seatpost pretty low in order to be able to put my feet flat on the ground. The minimum space needed for the Thudbuster (even the short-travel model) would require me to have the post a little too high. Fortunately, the roads around here aren't too bad (for e-bike speeds.) There are plenty of cracks and bumps, but there aren't all that many deep potholes. When it comes to bumps, I worry more about a pannier hopping off or the contents getting beat up. If I see a big bump coming up, I can still unload myself from the seat a little bit. Standing all the way up is a little awkward because, as noted, the cranks are more forward than on a normal bike. To me, it seems that the upright seating position makes for a smoother ride all around.
 
Very nice build ! is this your first ? It proabbly wont be the last. once you get the bug :D I started 1 year ago and now have 4 complete bikes with parts on the way for more. I like the townie style I bet she is a blast to ride. enjoy the grin :D
 
Indeed, I'm already hooked. This one will make a good utility/all-around/grocery/errand bike. That is what I had originally intended it to be. Eventually, I'd like to build a mid-drive electric "dirt bike." Considering that this one does over 30 mph, I don't know if I would want to build a much faster road bike. Beyond that, things can get a little dicey. Of course, that is only in reference to law enforcement and safety. I'm fairly certain that my fun meter goes up into the 50+ mph club. However, it's not cheap to join.

The original idea behind this bike was to make it a viable form of alternative transportation for me. Between now and my next build, I will have to invest my limited resources into other things that need attention. I estimate that my next project will cost four times what this one did. More batteries, more power, and more money add up to more speed and more fun!
 
NIfty build!

The front mount battery box looks pretty neat - oatnet would be proud :D. There's a growing interest in this type of mounting solution - maybe you could get a couple of extra shots of the plate face and box when dismounted to show more details.
 
ions82
Great build, love the front mounted battery latching system. This is the first time I have seen something like this.
oatnet would be proud .
 
Nice build. I really like the fact that you used a basic bike and left it mechanically straightforward.
 
Nice job! I especially like the machining that you did. I also like your choice of plastic for the mounting plate for the case.

I had the same problem with the ST Thudbuster but was able to cut a bit over an inch from the seat post tube. Looks like you might be able to do the same.

DSC01942.jpg
 
Wow! My Townie + steroids = Nicobie's bike. Looks like you put a lot of work into it. I considered using a suspension fork for the front, but there isn't much weight on the front end to begin with. So, I figured I would keep it simple and retain the rigid fork. Although, it would be nice to have a disc brake on the front. Eventually, I might take an older Marzocchi Z2 fork and put a longer steerer tube on it (since those have a removeable steerer.) My only concern would be the amount of trail due to the already-slack rake angle. Mine already feels like it has a bit much, and a suspension fork would give it even more trail. Then again, I've also considered machining a new crown that would reduce the trail a little. How does that long-travel fork affect low-speed handling?

I checked out the build thread. Looks like a LOT of work was put into it. Lots of batteries powering that thing, too. I like the idea of having batteries in the spacious frame, but I wanted to be able to easily remove the battery. Thus far, it's working very well. Although, I must admit, mine doesn't look nearly as cool as yours.
 
teklektik, thanks for pointing those links out. What I meant was that this is an awesome solution for quick release so you remove pack and recharge easily.

love the front mounted battery latching system.
latching.jpg
 
Racer_X said:
teklektik, thanks for pointing those links out. What I meant was that this is an awesome solution for quick release so you remove pack and recharge easily.
Gotcha - me too. Using them in concert with the guide pins as a two part solution seems an effective approach.
 
I like your improvements to the front pack - mounting straight to the frame eliminates a lot of obstacles, and yours is the best frame mount I have seen so far. I liked Gensem's epoxy version, but IIRC the epoxy eventually failed. A removable pack makes LiPo easier to manage, Mattycii sorted out a great methodology for a larger pack, but yours is nice and streamlined and I think better for a mid-size pack. Nice vision and implementation, thanks for sharing! :D

-JD
 
Well done! Maybe some fatter tires? CST Cyclop's a good choice IMO.

I know how people are fascinated with 50MPH eBikes but try to remember these are supposed to be BICYCLES. 20-30MPH top speed is really the sensible limit and that's even too fast for heavy setups and road conditions.

If you're not used to riding in traffic, study up on bicycle/motorcycle safety.

While you're at it learn about tire/tube repairs, wheel truing and spoke tensioning. Skills no modern electric wheelman should be without!
 
Hello Ions82.
I got the charger I bought from you today and brother that is a great deal I cant wait to use it , WOW what a package with all the connectors and everything. It looks like it has never been used! Let me know when you have anything to sell!! :D
 
Ykick said:
Well done! Maybe some fatter tires? CST Cyclop's a good choice IMO.

I know how people are fascinated with 50MPH eBikes but try to remember these are supposed to be BICYCLES. 20-30MPH top speed is really the sensible limit and that's even too fast for heavy setups and road conditions.

If you're not used to riding in traffic, study up on bicycle/motorcycle safety.

While you're at it learn about tire/tube repairs, wheel truing and spoke tensioning. Skills no modern electric wheelman should be without!


30+ MPH is plenty fast for commuting on an e-bike. However, this thing feels completely stable at that speed. It's hard not to want to push things to the limit when all it takes is a simple twist of the wrist. I've been a bike rider my whole life. Although, I've spent far more time riding pedal bikes than those powered by gasoline. Still, I've logged thousands of hours riding through traffic and have no trouble understanding safety amidst cars. I've also worked in bike shops and turned plenty of wrenches over the years. So, it was a piece of cake getting this bike set up and dialed in.

As for the tire choice... I decided to stick with the stock tires that came with the bike. Bigger tires might provide a little bit softer ride, but I haven't noticed any discomfort in the ride. The seat is pretty cushy (having both gel and springs). Part of my plan was to squeeze as much efficiency out of this bike as possible. So, I figured the stock tires might do a little better than big/fat tires. Here in New Mexico, there are thorns all over the place ("goatheads.") It's not uncommon for bike riders to suffer multiple flats in one ride. To avoid flats with this e-bike (especially the rear), I added what locals call "the system." Essentially, it involves taking a tire that is a little smaller than the one you're running, cutting off the bead, and putting it inside of the other. I think the tire I used was around a 1.75 or so. A tire-in-a-tire setup stays in place and is much easier to install than a regular liner. It also doesn't dry out or clog valves like sealants sometimes do. All in all, it offers about the best flat protection that you can get.
 
ions82 said:
To avoid flats with this e-bike (especially the rear), I added what locals call "the system." Essentially, it involves taking a tire that is a little smaller than the one you're running, cutting off the bead, and putting it inside of the other. I think the tire I used was around a 1.75 or so. A tire-in-a-tire setup stays in place and is much easier to install than a regular liner. It also doesn't dry out or clog valves like sealants sometimes do. All in all, it offers about the best flat protection that you can get.

What are the sizes of the two tires in your tire-in-tire system?
 
Thats a great ideal tire in a tire I might try that!!
 
I tried out ions82's solution recently on a front-loading people carrier whose front wheels are very tedious to remove. It seemed to work well. Here are some of my observations:

Once you cut the beads from a tire, it is free to stretch. Therefore the inner tire does not have to be a very close fit to the outer tire. I used 20x1.75" CST Operative tires inside 20x2.25" tires of the same kind.

It seems rather important to use smooth-treaded tires inside, because unsupported voids would cause major friction losses and perhaps even noise.

In essence, what this method creates is a seamless, wrap-around liner. Thus it eliminates the two most noteworthy drawbacks of tire liners like Mr. Tuffy: difficulty in placing them consistently, and tube chafing at the edges and ends.

I would not use this method where speed and ride quality are highly important, but only where puncture resistance is of utmost concern. However, I did not find the effects on rolling resistance or ride comfort to be significant or unpleasant for the vehicle in question.
 
Chalo: Appreciate the methodology validation of ION82's suggestion, the observation that smaller width donor liner tire is not problematic, and the recommendation that donor liner tire should be as close to a slick as possible.
 
Back
Top