After sampling the sheer joy of my 24s GM 901 hub motor build, my wife decided she needed one. Okay, I actually decided she needed one. Due to medical concerns, it is a chore for her to pedal so her bike was sitting unused in the garage. I really wanted to use a better quality frame, but she insisted that if I were going to build her a bike that I had to use her Huffy Panama Jack beach cruiser since "it is so cute". AND, the build had to be clean. As opposed to my build, all Mad Max and exposed wires.
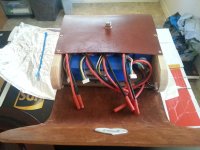
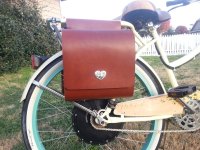
So, that got the wheels turning... Since it is a step-through frame I knew that the batteries and controller were going to have to go into saddlebags. And to keep them as small and clean as possible, I was going to have to build them myself. Paul's posts on his leatherwork inspired me to try it out myself. I found an example online of a fellow building panniers using wood sides which seemed perfect since I would not have to sew the leather!
The equipment list:
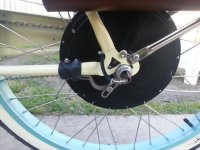
- Huffy Panama Jack beach cruiser (spread the chainstays to make the motor fit)
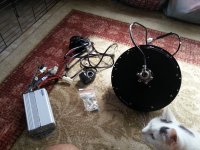
- 9C 2807 hub motor
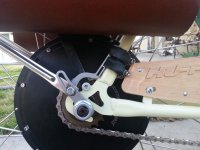
- 20T Shimano freewheel
- 2x Grintech torque arms
- Lyen 12fet 3077 controller
- 15s2p Turnigy Lipo
- CycleAnalyst v2.3
- Front cantilever brake forks from my 1999 Schwinn
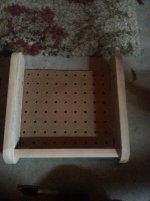
- Handmade saddlebags from 9 oz leather and cedar, with sliding/removable drawers
Todo:
- Install rear side-pull brake caliper (Tektro C326, on order)
- Upgrade front brake to 90mm Sturmey-Archer drum
- Add headlight and modify rear reflector as a tail light
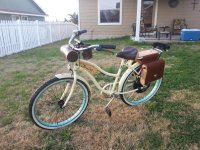
First, the latest shots. I just got the bike running last night. There is still a little cleanup to do and the rear brake caliper (Tektro C326) should be delivered soon, but for now:
View attachment 3
In this picture you can see the on/off switch on the left saddlebag. This way she can easily turn the bike on and off without opening the bag.
View attachment 1
In this picture you can barely see the rear supports I made, attached the the rear end of the rack. Just aluminum L bar stock painted black. Its only purpose is to keep the bottom rear edge of the bags from hitting the tire.
So, that got the wheels turning... Since it is a step-through frame I knew that the batteries and controller were going to have to go into saddlebags. And to keep them as small and clean as possible, I was going to have to build them myself. Paul's posts on his leatherwork inspired me to try it out myself. I found an example online of a fellow building panniers using wood sides which seemed perfect since I would not have to sew the leather!
The equipment list:
- Huffy Panama Jack beach cruiser (spread the chainstays to make the motor fit)
- 9C 2807 hub motor
- 20T Shimano freewheel
- 2x Grintech torque arms
- Lyen 12fet 3077 controller
- 15s2p Turnigy Lipo
- CycleAnalyst v2.3
- Front cantilever brake forks from my 1999 Schwinn
- Handmade saddlebags from 9 oz leather and cedar, with sliding/removable drawers
Todo:
- Install rear side-pull brake caliper (Tektro C326, on order)
- Upgrade front brake to 90mm Sturmey-Archer drum
- Add headlight and modify rear reflector as a tail light
First, the latest shots. I just got the bike running last night. There is still a little cleanup to do and the rear brake caliper (Tektro C326) should be delivered soon, but for now:
View attachment 3
In this picture you can see the on/off switch on the left saddlebag. This way she can easily turn the bike on and off without opening the bag.

View attachment 1
In this picture you can barely see the rear supports I made, attached the the rear end of the rack. Just aluminum L bar stock painted black. Its only purpose is to keep the bottom rear edge of the bags from hitting the tire.


