"xm-blue" build, testing bmsbattery service and gear

xmasta

10 W
Joined
Apr 4, 2011
Messages
91
Location
Tallinn, Estonia
Since my "xm-t1" tank build went up in flames, then i'm taking a little break from big complex build and try one geared common build before i'm going to restore the tank.
Let us see if i need to regret a lot from buying from bmsbattery.com or not. Also I will get some more details up about the stuff I bought because they themselves are failing quite a lot with the details about their stuff.
Not so good for business but what can you do. Online support also struggles if you ask something a bit more than basic.

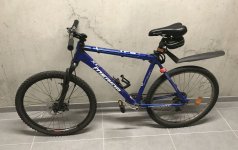
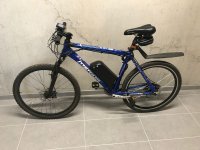
Here's the currently pretty crappy donor bike that also has some scars from the tank burn. So, a "before" picture for now :)

file.php

Photo 03.07.17 1 34.391.jpg

View attachment 1


So what and why did I pick for the build.

Motor:
First, this time I wanted something relatively light. That frame there, it is nice alu frame that weights only 2kg. (same as front fork alone heh).
So I wanted some good geared motor for the price and weight. After reading around a bit I've decided to try the Q100H - that seems to promise a good performance for it's really small size.
It probably isnt even visible a lot from behind the disk break and gears after installation, i hope :)
https://bmsbattery.com/ebike-kit/631-q100h-36v350w-rear-driving-ebike-hub-motor-ebike-kit.html
The speedier version, i'm not much of a mountain climber, driving around the city mostly.
(shortcomings on info on the page for me were: diagram doesnt tell me distance for spoke holes, diagram doesnt tell me size of the axel)

Battery:
1. for more speed, 48v pack,
2. for budget, 10Ah of "crappy" cells,
3. for better (hopefully) handsfree driving, the one with Torque sensor (some are saying pedal assist (PAS) is too twitchy),
4. for space saving and more descreet build - the one with built in 20A controller. I will configure it even down a little, to like ~16A probably. Never a good idea to run cheap chinese stuff at rated limits a lot.
https://bmsbattery.com/ebike-battery/702-48v10ah-bottle-09-e-bike-battery-torque-sensor-battery.html

The idea here is, that since i'm pretty DIY guy, i could spotweld a battery together myself but when I checked the prices of buying empty case + bms + charger etc and then decent panasonic cells from good price, It wasnt still making much sense.
So i'll take their combined item that has a lot less premium on the price and it's a working combo that i'll probably run for around two years. By then the fast declining battery market has probably a lot more to offer and I will just switch the cells in the pack myself. And since i'm recovering from the burn, then i just wanted something that works and gets going right away.

Additional stuff.
Spokes..
oh the spokes, so much dicking around to figure out whats the spoke hole distance on the Q100H and then what are the rims available locally and ofcourse they totally do not list the ERD distance needed to calculate the spokes that would work.
And then when i figured all that crap out, bmsbattery.com has no 220mm spokes in stock -.-
After little more running around I found that local guys have one rim with really high profile that I kinda like, and spokes for that seem to be 205mm - that bmsbattery had in stock, yay!

Torgue arms.
BMSbattery sells a pair for 15$, two different versions, M12 and M14. But they ofcourse do not list whats the axel diameter on the Q100H :D sigh. From some more reading around and measuring things I gather, that it should be M12 so I went with that.
I ofcourse do not like that they are flexible (from that moving joint with a bolt) on an alu frame, so after findint out their position i'm going to weld the moving joint shut on those.

Questions and comments? :)
 
Ok, it is time for update how things are going.
July:
02 - order was placed and went right into "testing" - after three days i contacted support to find out, that testing means they are building the battery.
06 - order went through "take out of storage" to "QC"
07 - order changed to "Package" - after four days i contacted support to find out whats taking so long again, was told it's actually shipped but will not change status until shipping company gives tracking info.
12 - order changed to "shipped" - I got partial tracking number with "url: dpd" - confusion, I picked more expensive DHL when making order. Contacted support.

Found out that DHL does not ship batteries and it was changed to DPD because of order including battery, customer was not informed.
Employee had made a mistake with tracking code and I received the rest of the tracking code (well, a lot of the beginning of it was missing)
DPD expected delivery time was told to be 10-15days (DHL I payed for displayed 4-7 work days) - suggested they rework the webpage not to allow picking DHL if the order includes battery..
Bonus being, they told me DPD shipping covers import taxes, that DHL does not. We will see, it's not small amount, 20% extra.
 
25th of july, the order arrived with DPT and indeed, nothing of customs or taxes were asked in addition.

Here's the raw footage, will write more after i've messed around with it a bit.

[youtube]ixoCQbpLi8M[/youtube]

wtfspokeslol.

it goes up to 4k after youtube processes it.
 
file.php


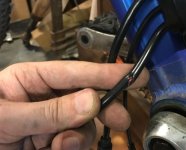
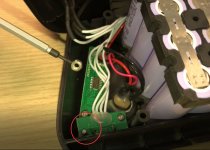
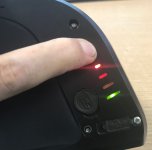
Talked with the support and they agreed that I take it apart and find whats loose. It was a screw that had come loose after the first drive to work. From USB door holder.. will place hot glue on it later. Not sure if it damaged the charge indicator now or not.. it was showing kinda funny now.
 

Attachments

  • 97CCF683@52AA844A.DE4C7859.jpg
    97CCF683@52AA844A.DE4C7859.jpg
    69.3 KB · Views: 2,999
The nut managed to screw up the indicator board it was running over, glad that nothing more important didnt get damaged. I hope.
battery-indicator-boo.jpg
showing both empty and full when button is pressed, full charge battery. Will put the nut under some hot-glue to be safe.

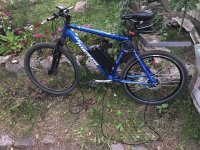
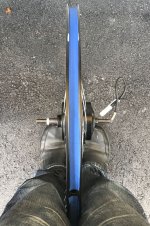
And here's how the bike looks right now, after the fist test drive. managed to hide the wire lassos behind seatpost, until the lengthy process to make them shorter - is done.
File 26.07.17 17 12.55.jpg

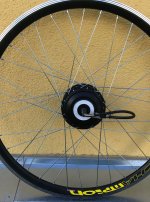
Oh and in case anyone wonders how many spokes there were - the correct answer is 163 spokes.. and I have no use for them. All the calculations I did ended up being wrong and one cross wheel was told to me to be pretty weak. So the guy in shop measured a bit and found out that he can manage to make 3 cross wheel for me with the common spokes he had and set it nicely offset a little like necessary.

All that job was done in an hour by him, for $20. Can not complain.
File 26.07.17 17 43.12.jpg
File 26.07.17 17 44.47.jpg
Since i was inpatient and didnt know for sure if he can make the wheel with what he had, i didnt want to ask them for painting first. Maybe will order 1 step thicker spokes with the same lenght now.
For anyone interested, this Q100H motor on this ERD 515 rim was laced with 18x 236mm and 18x 240mm spokes.

Now, i'm missing torque sensor, after lenghty explaining to bmsbattery what they messed up, i finally managed to explain that they have a battery set with torque system too and whoever put stuff in the box - messed up. They promised to send me the torque system too now. Also they agreed that i open the battery and will send new sensor board that got screwed, or, well, nutted.
 
The display on those Dolphin batteries always shows red and green. The greens gradually move down as the battery drains until only the red is left.
 
d8veh said:
The display on those Dolphin batteries always shows red and green. The greens gradually move down as the battery drains until only the red is left.

Oh really? Strange that they themselves didnt know about it and concluded, that it had been damaged :) I should let them know.

What i'm really missing is an energy meter. The lcd3 does know my wattage used so there is actually a shunt and hw ability to read what has been used, really shame that it isnt displayed.
That would be a lot more helpful than some damn voltage based "fuelgage". Just a simple Ah meter thats easily resettable like trip meter, is that really so much to ask, would increase the value greatly. Anyone reading this know good solutions for amp reading with this kind of integrated controller setup?
 
xmasta said:
Maybe will order 1 step thicker spokes with the same lenght now.
Don't use thicker spokes; it'll make a weaker wheel, assuming he used regular bicycle spokes, rather than the 12g too-thick spokes that come on many hubmotor wheels.

Thinner spokes tensioned correctly are stronger than thicker ones that can't be tensioned correctly without damaging the rim.

For an accurate fuel gauge, the Cycle Analyst v2.4 would work fine and can be used with a remote shunt so you can mount the CA anywhere on the bike (like on the bars to read it).

If you don't need to know Wh/mile on the display and just wanna calculate it, you can use any cheap RC hobby type wattmeter that is compatible with your voltage and current requirements--but I don't know of any of those that have remote shunts, so they all have to be directly wired into the battery-to-controller harness, which means you wouldn't want to have it up on the handlebars, as you'd need to add several feet of that thicker-gauge wire between teh battery and controller to get it up there. (more voltage drop under load, more power wasted as heat, unless you use thick enough wire to eliminate it's resistance).
 
amberwolf said:
xmasta said:
Maybe will order 1 step thicker spokes with the same lenght now.
Don't use thicker spokes; it'll make a weaker wheel, assuming he used regular bicycle spokes, rather than the 12g too-thick spokes that come on many hubmotor wheels.

Thinner spokes tensioned correctly are stronger than thicker ones that can't be tensioned correctly without damaging the rim.

For an accurate fuel gauge, the Cycle Analyst v2.4 would work fine and can be used with a remote shunt so you can mount the CA anywhere on the bike (like on the bars to read it).

If you don't need to know Wh/mile on the display and just wanna calculate it, you can use any cheap RC hobby type wattmeter that is compatible with your voltage and current requirements--but I don't know of any of those that have remote shunts, so they all have to be directly wired into the battery-to-controller harness, which means you wouldn't want to have it up on the handlebars, as you'd need to add several feet of that thicker-gauge wire between teh battery and controller to get it up there. (more voltage drop under load, more power wasted as heat, unless you use thick enough wire to eliminate it's resistance).

Yeah he used regular spokes and thanks for the input, i'll see if any problems arise that can be put on think spokes and I hope you are right :) My first wheel years ago came pre-assembled and worked for like two years with no problems until the accident. After that I had to rebuild the wheel and did it with thicker spokes and yea.. those started breaking often and my wheel was not in a great shape.

But about fuel gauge - you threw me with standard information there man! :D Thanks, but i'll let you know that this is my 4th build ;)
Cycle analyst continues to be really expensive solution. I'm using a complete package this time and there are no easy access wires running around anywhere to jump between. It is just 2 plugs, one goes to motor, one to LCD :)
Wonder if anyone has access to the LCD3 firmware to made code changes and make different stats shown/saved. Point being - this setup does have access to all the necessary information and hardware - it is just not displayed and workable for user.
Wonder if chinese have come up with any of those cheapo wattmeters with a memory and reset button tho, should check.

edit: 1st search result showing 60eur bluetooth thingy, looks neat, http://www.cobox-ebikes.com/290/wireless-bluetooth-cobox-watt-meter-36v-48v.html
edit2: a little more looking around and found this too: http://www.ebay.com/itm/80V-50A-Coulomb-gauge-battery-power-capacity-indicator-TF01N-/181894753384
The TF01N seems to be pretty nice and easy to use. Can set your capacity and it counts down from it. With external shunt. around $25 on various sites, while posting.
 
Photo 05.08.17 13 48.20.jpg
Aug:
04 - got the torque sensor middrive thingy along with another controller.

So due to their mixup this is the end date when i got all the things i originally ordered.
July 02 was the date I made the order and payed for the all the things.
Also due to their mixup I now have an extra controller tho. I guess those really differ so much that the torque one and PAS one cant be just configured to work with one another by the LCD controls.
Or they just cant ask customer to start wiring in a new lead, because PAS is one of the 3 wires coming out of the controller and it doesnt have same pinout in the plug.

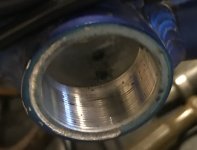
Havent had a chance to install/try installing it on the bike yet. Why try? Because I'm not sure about it's size and does my frames midsection even fit it. I remember I had to find some non-standard bottom bracket cassete.. or whatever it's called.

This extra backup controller offsets a bit those useless 163 spokes i got.. :p


Here's the latest look, fixed myself some more proper mudguards. Stuff got too messy with just the silly rear guard on days with wet road. It was pretty tricky to get those supports on there with all the diskbreak and other things in the way. And front doesnt even have mounting for mudguards so that had to be improvised.

Next up, checking the torque sensor and reworking the cable lenghts, that currently are just zipped together loops..
 
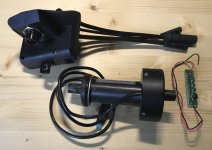
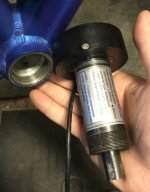
Well fux that torque sensor I say.. angrily!
It is so badly documented, it is so badly attachable, it didnt work for many reasons and I threw that garbage out and put my mis-ordered PAS back on - that works great!

1.
Photo 15.08.17 19 36.37.jpg
2.
Photo 15.08.17 19 36.50.jpg
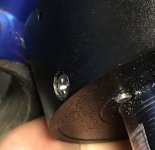
3.
Photo 15.08.17 19 39.15.jpg

on the other side it just attatches with a screw on and is supposed to stay in place and alignement purely by being pulled from two sides onto the midsection.
I replaced the controller for the one they sent - with torque sensor connector.
They did not guide me to program the LCD (that retained it settings and history) to anything different.
The only reference to "torque" in the manual is also covered here and I saw no difference in it being in 1 or 0 position for torque sensor thingys behavior.
How did it behave? Well, when i pedaled, it kinda turned the acceleration on and then it was on for some random n time. Sometimes it turned off few seconds after i stopped pedaling, other times it went on until i breaked. Did not see a difference on how fast or hard i pedaled.. I'm not sure how it is supposed to behave but this was just bs.
PAS works very well, pedal half a turn and it kicks in on given assist setting and turns right off when i dont pedal - great.
The hell is this torque sensor supposed to do or whats the settings that need to be changed for it to do it's thing .. no idea :/
 
Back
Top