I thought i would start a build log for my bike because i like it, and want to talk about it 
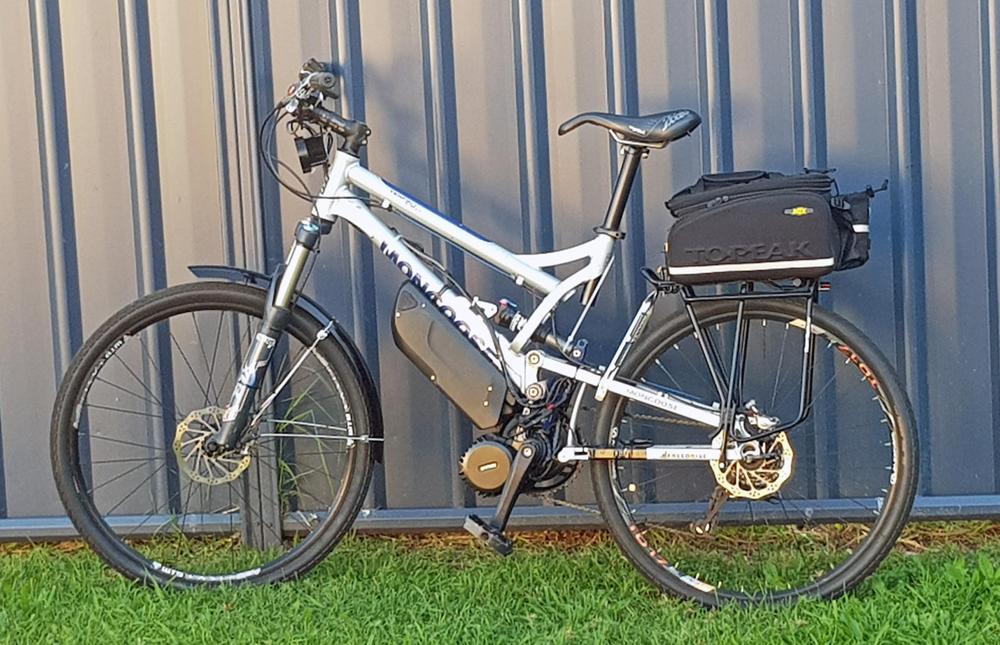
Here is (a terriable photo of) the beast in question. A 2004 Mongoose Teocali Super.
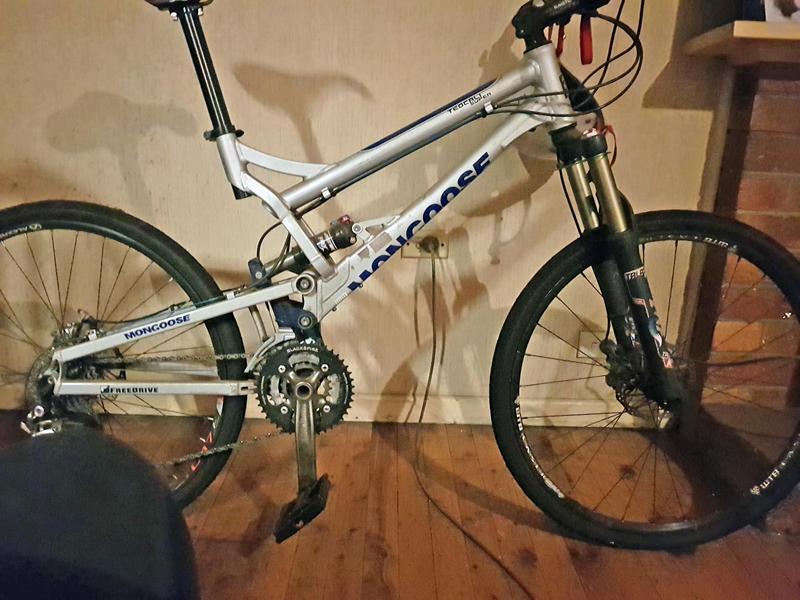
I brought this second hand on e-bay many years ago in a fairly sad state. Replaced the handlebars, chainrings, cables, seat and seatpost, and fully rebuilt all the linkages and bushings in the suspension.
I put the city tires on when i got sick of putting so much effort into peddling, but it really made no difference and i got sick of getting puffed, and it gathered dust for many years.
I had considered converting it to electric around 18 months ago, and was considering the BBS02, but wasn't fully sold. I brought a falcon ute instead. after a broken axle and replacement motor in 6 months all the suspension needed replacing, so i brought another falcon ute... (sucker for punishment) which immediately needed $600 spent on the gearbox, and then promptly stopped 6 months later, at about the same time it was due for rego...
Being well ant truly over falcon utes by this point, i was considering my options, when a work friend mentioned ebikes.
I decided the time was right, and started looking around.
I soon saw that the BBSHD had been released, and seemed pretty overbuilt and problem free. After seeing a few videos of the kit in action i ordered one from Emax Electrics here in Australia. The price was better than getting one straight from China for the BBSHD, and a Lekkie Bling Ring was included. I was also confident i would get what i paid for regarding the battery pack.
I was worried that since the pack would have to be mounted under the downtube that the tire may hit it when the fork was fully compressed but decided i would just get a pack and rebuild it if it became necessary.
I got a 13S4P 48v pack with Samsung 30Q cells which Emax recommended due to their high discharge rate so there was no chance of reduced pack life due to the 30a drain.
A few days later, my big box of goodies arrived, and 2.5 hours and many zip ties later i was riding around.
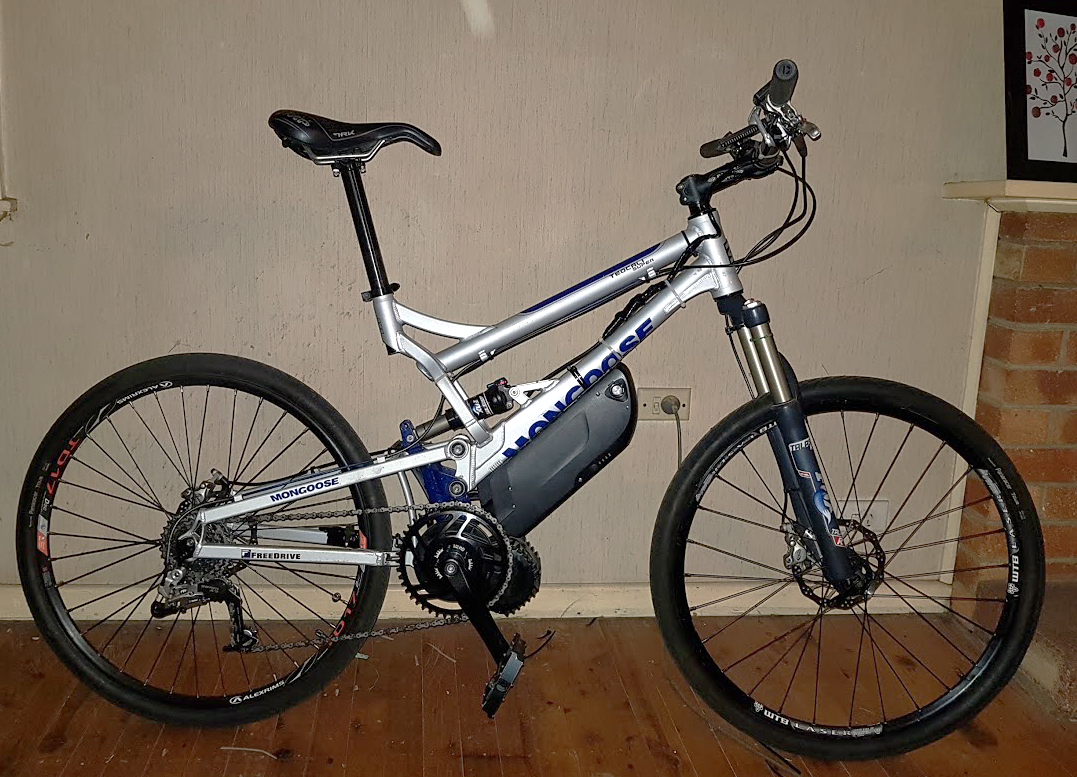
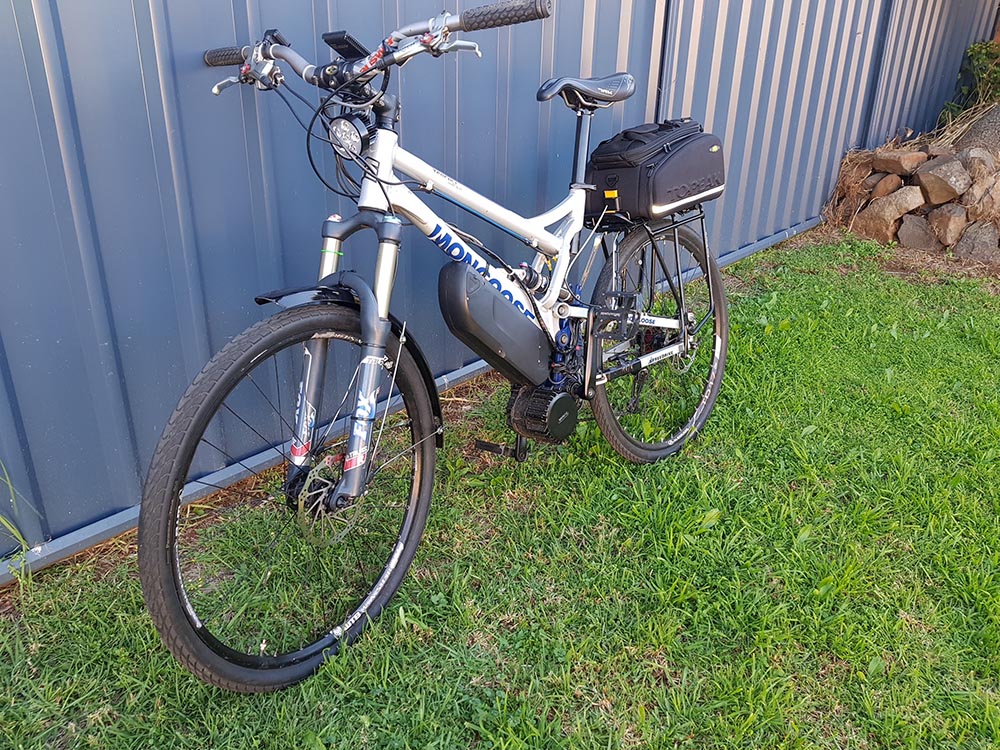
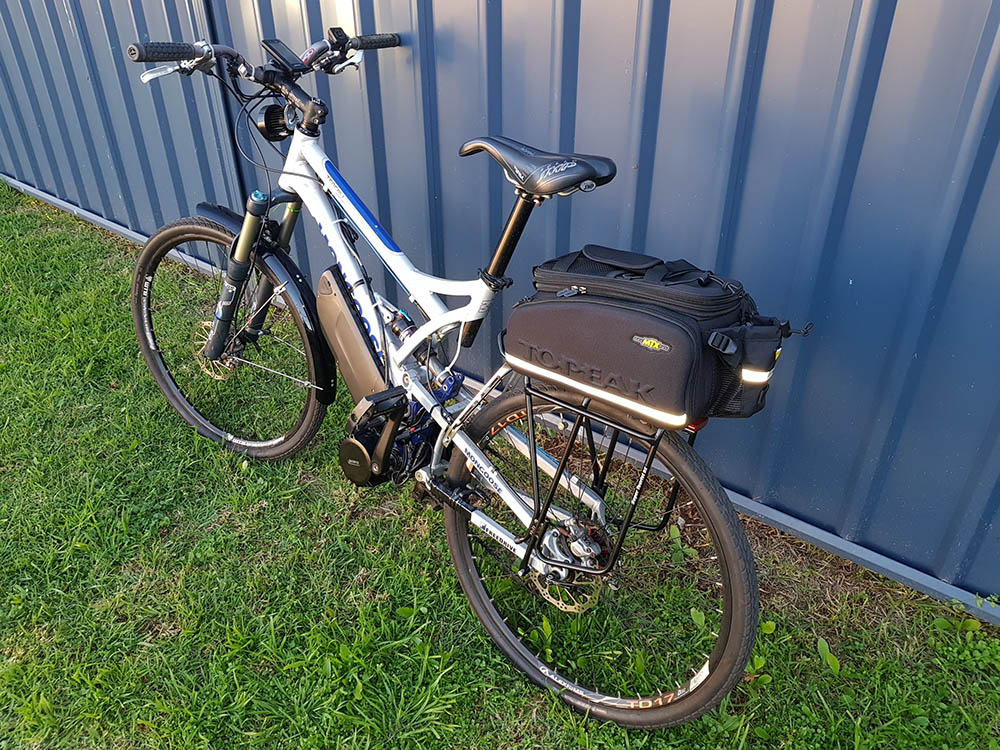
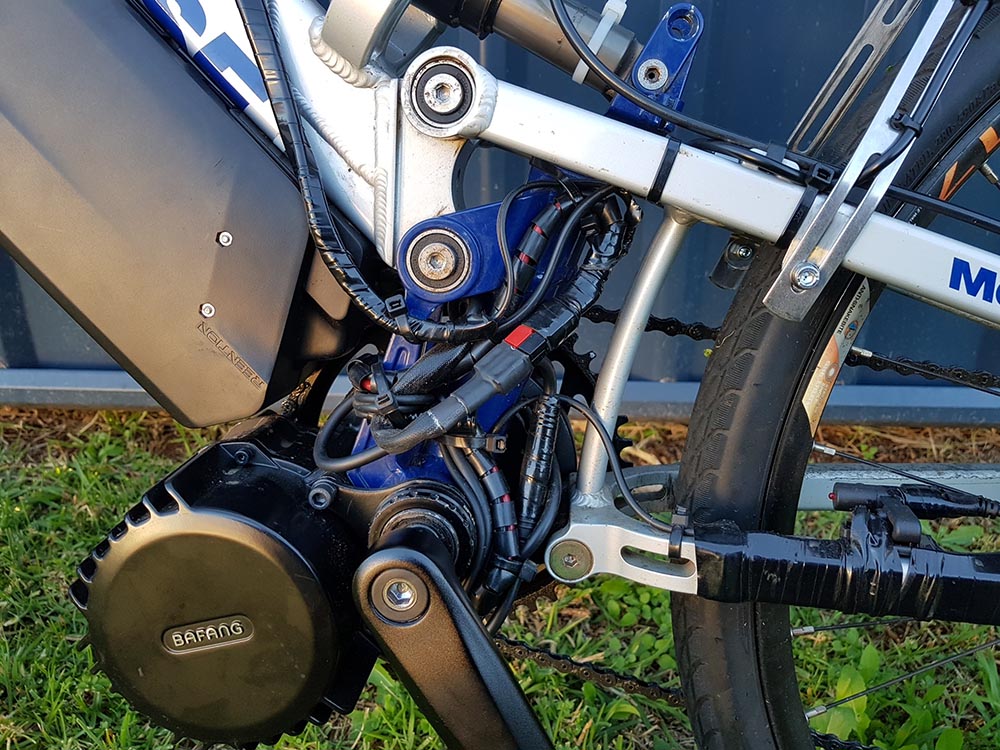
Initially i was thinking of modifying the frame so i could rotate the motor further up, but decided to just get it together and worry about it later. I was glad i did, because with the motor sitting fairly low i was able to mount the battery right back and there was no issues with tire clearance, and i was even able to use one of the drink bottle mounting holes... The front of the battery tray i just cut some slots in to accept zip-ties, its very secure.
I was really pleased with the neat look of the installation, its like it was meant for it!
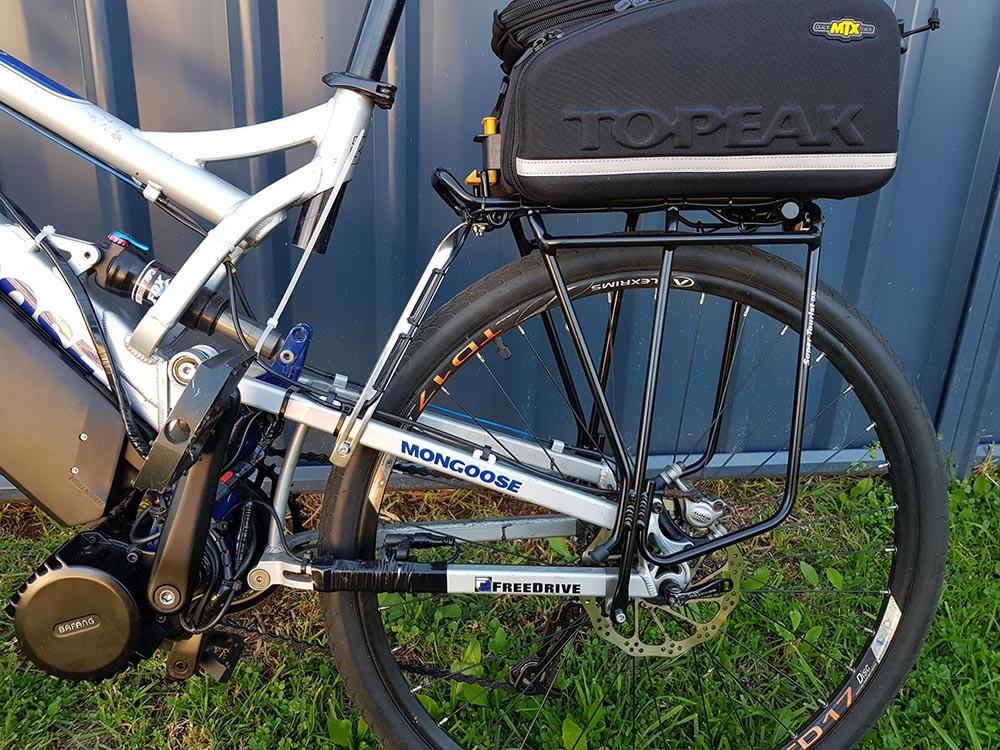
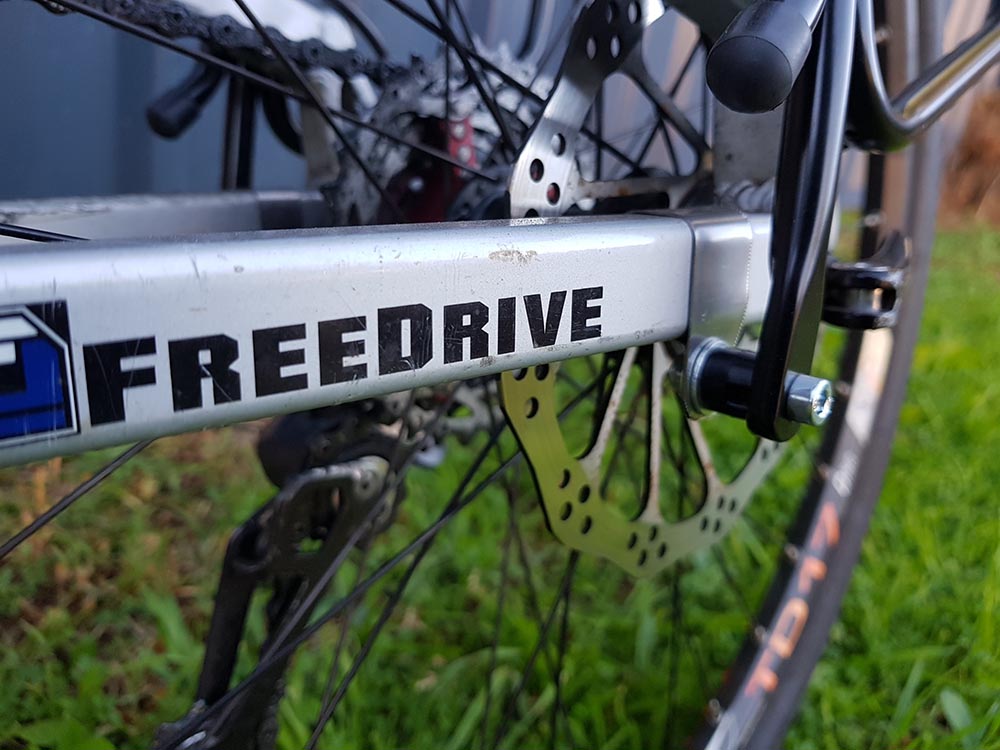
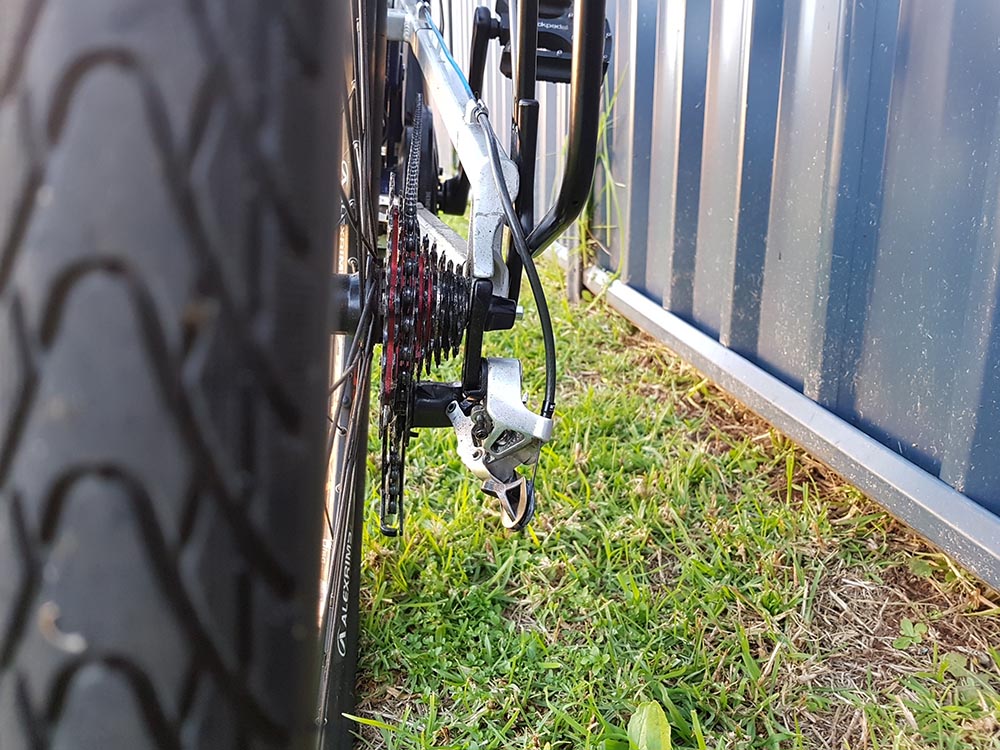
The bling ring, really didn't want to let the chain go, and for the first 30km it would constantly wrap the chain up around the chainring past the frame, this scratched the hell out of the frame, luckily its painted silver, so you cant notice... after running in its now quiet and all good, the chainline is quite acceptable, lined up with the 15t sprocket, and i have had no issues with chain drop. It is a little noisy in the 34t sprocket...
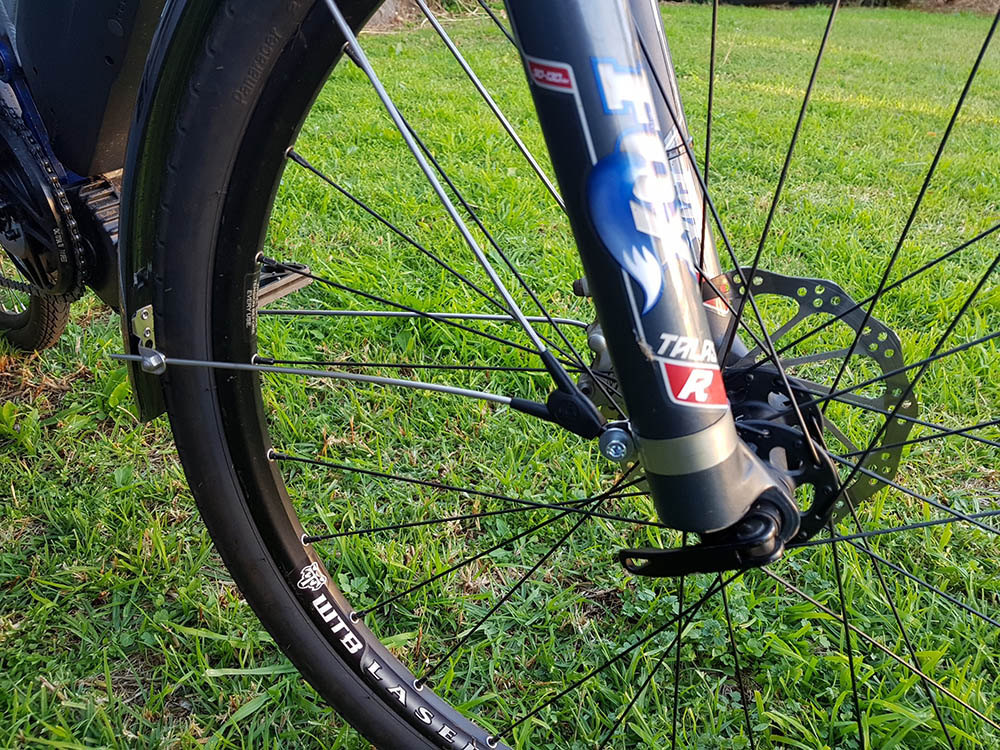
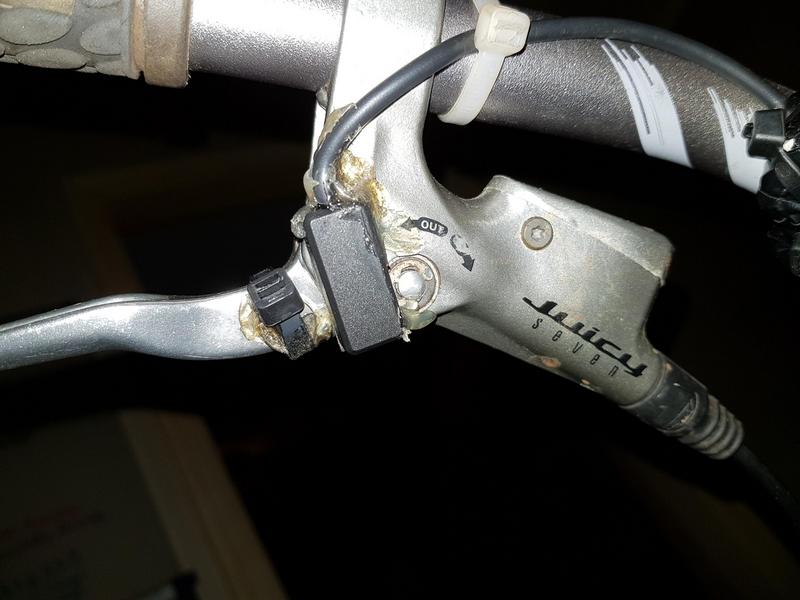
I ordered the kit with (reed/hall?) sensors for the brake levers as the bike has hydraulic disks. I didn't get these fitted up straight away, and the bike was a bit of a handful to ride without them, as the motor would keep driving for 1 or 2 seconds after you stopped peddling, which made for some pretty sketchy tight turns, lol.
I did get the switches mounted, and although its pretty ugly, it seems to work fine. I had to mount the right hand switch 'upside down' (ie. i put the double sided tape on the opposite side) to get it to work with the magnet mounted to its side.
The photos make it look even uglier... thankfully its not visible from the top, lol
Here is (a terriable photo of) the beast in question. A 2004 Mongoose Teocali Super.
I brought this second hand on e-bay many years ago in a fairly sad state. Replaced the handlebars, chainrings, cables, seat and seatpost, and fully rebuilt all the linkages and bushings in the suspension.
I put the city tires on when i got sick of putting so much effort into peddling, but it really made no difference and i got sick of getting puffed, and it gathered dust for many years.
I had considered converting it to electric around 18 months ago, and was considering the BBS02, but wasn't fully sold. I brought a falcon ute instead. after a broken axle and replacement motor in 6 months all the suspension needed replacing, so i brought another falcon ute... (sucker for punishment) which immediately needed $600 spent on the gearbox, and then promptly stopped 6 months later, at about the same time it was due for rego...
Being well ant truly over falcon utes by this point, i was considering my options, when a work friend mentioned ebikes.
I decided the time was right, and started looking around.
I soon saw that the BBSHD had been released, and seemed pretty overbuilt and problem free. After seeing a few videos of the kit in action i ordered one from Emax Electrics here in Australia. The price was better than getting one straight from China for the BBSHD, and a Lekkie Bling Ring was included. I was also confident i would get what i paid for regarding the battery pack.
I was worried that since the pack would have to be mounted under the downtube that the tire may hit it when the fork was fully compressed but decided i would just get a pack and rebuild it if it became necessary.
I got a 13S4P 48v pack with Samsung 30Q cells which Emax recommended due to their high discharge rate so there was no chance of reduced pack life due to the 30a drain.
A few days later, my big box of goodies arrived, and 2.5 hours and many zip ties later i was riding around.
Initially i was thinking of modifying the frame so i could rotate the motor further up, but decided to just get it together and worry about it later. I was glad i did, because with the motor sitting fairly low i was able to mount the battery right back and there was no issues with tire clearance, and i was even able to use one of the drink bottle mounting holes... The front of the battery tray i just cut some slots in to accept zip-ties, its very secure.
I was really pleased with the neat look of the installation, its like it was meant for it!
The bling ring, really didn't want to let the chain go, and for the first 30km it would constantly wrap the chain up around the chainring past the frame, this scratched the hell out of the frame, luckily its painted silver, so you cant notice... after running in its now quiet and all good, the chainline is quite acceptable, lined up with the 15t sprocket, and i have had no issues with chain drop. It is a little noisy in the 34t sprocket...
I ordered the kit with (reed/hall?) sensors for the brake levers as the bike has hydraulic disks. I didn't get these fitted up straight away, and the bike was a bit of a handful to ride without them, as the motor would keep driving for 1 or 2 seconds after you stopped peddling, which made for some pretty sketchy tight turns, lol.
I did get the switches mounted, and although its pretty ugly, it seems to work fine. I had to mount the right hand switch 'upside down' (ie. i put the double sided tape on the opposite side) to get it to work with the magnet mounted to its side.
The photos make it look even uglier... thankfully its not visible from the top, lol