eTrike Build Log - Custom Frame / 78v Lipo / MXUS 3000w

dzilar

10 µW
Joined
Oct 5, 2015
Messages
5
Hello all, long time lurker and first time poster here.

This thread will detail my journey designing and constructing an electric recumbent trike. I started the design process in June, with the intent to replace my car by the end of summer.


Design Goals

40 mile range at 40mph
Full suspension with anti-roll bar, for maximum ride comfort
Security features
Storage space
Safety

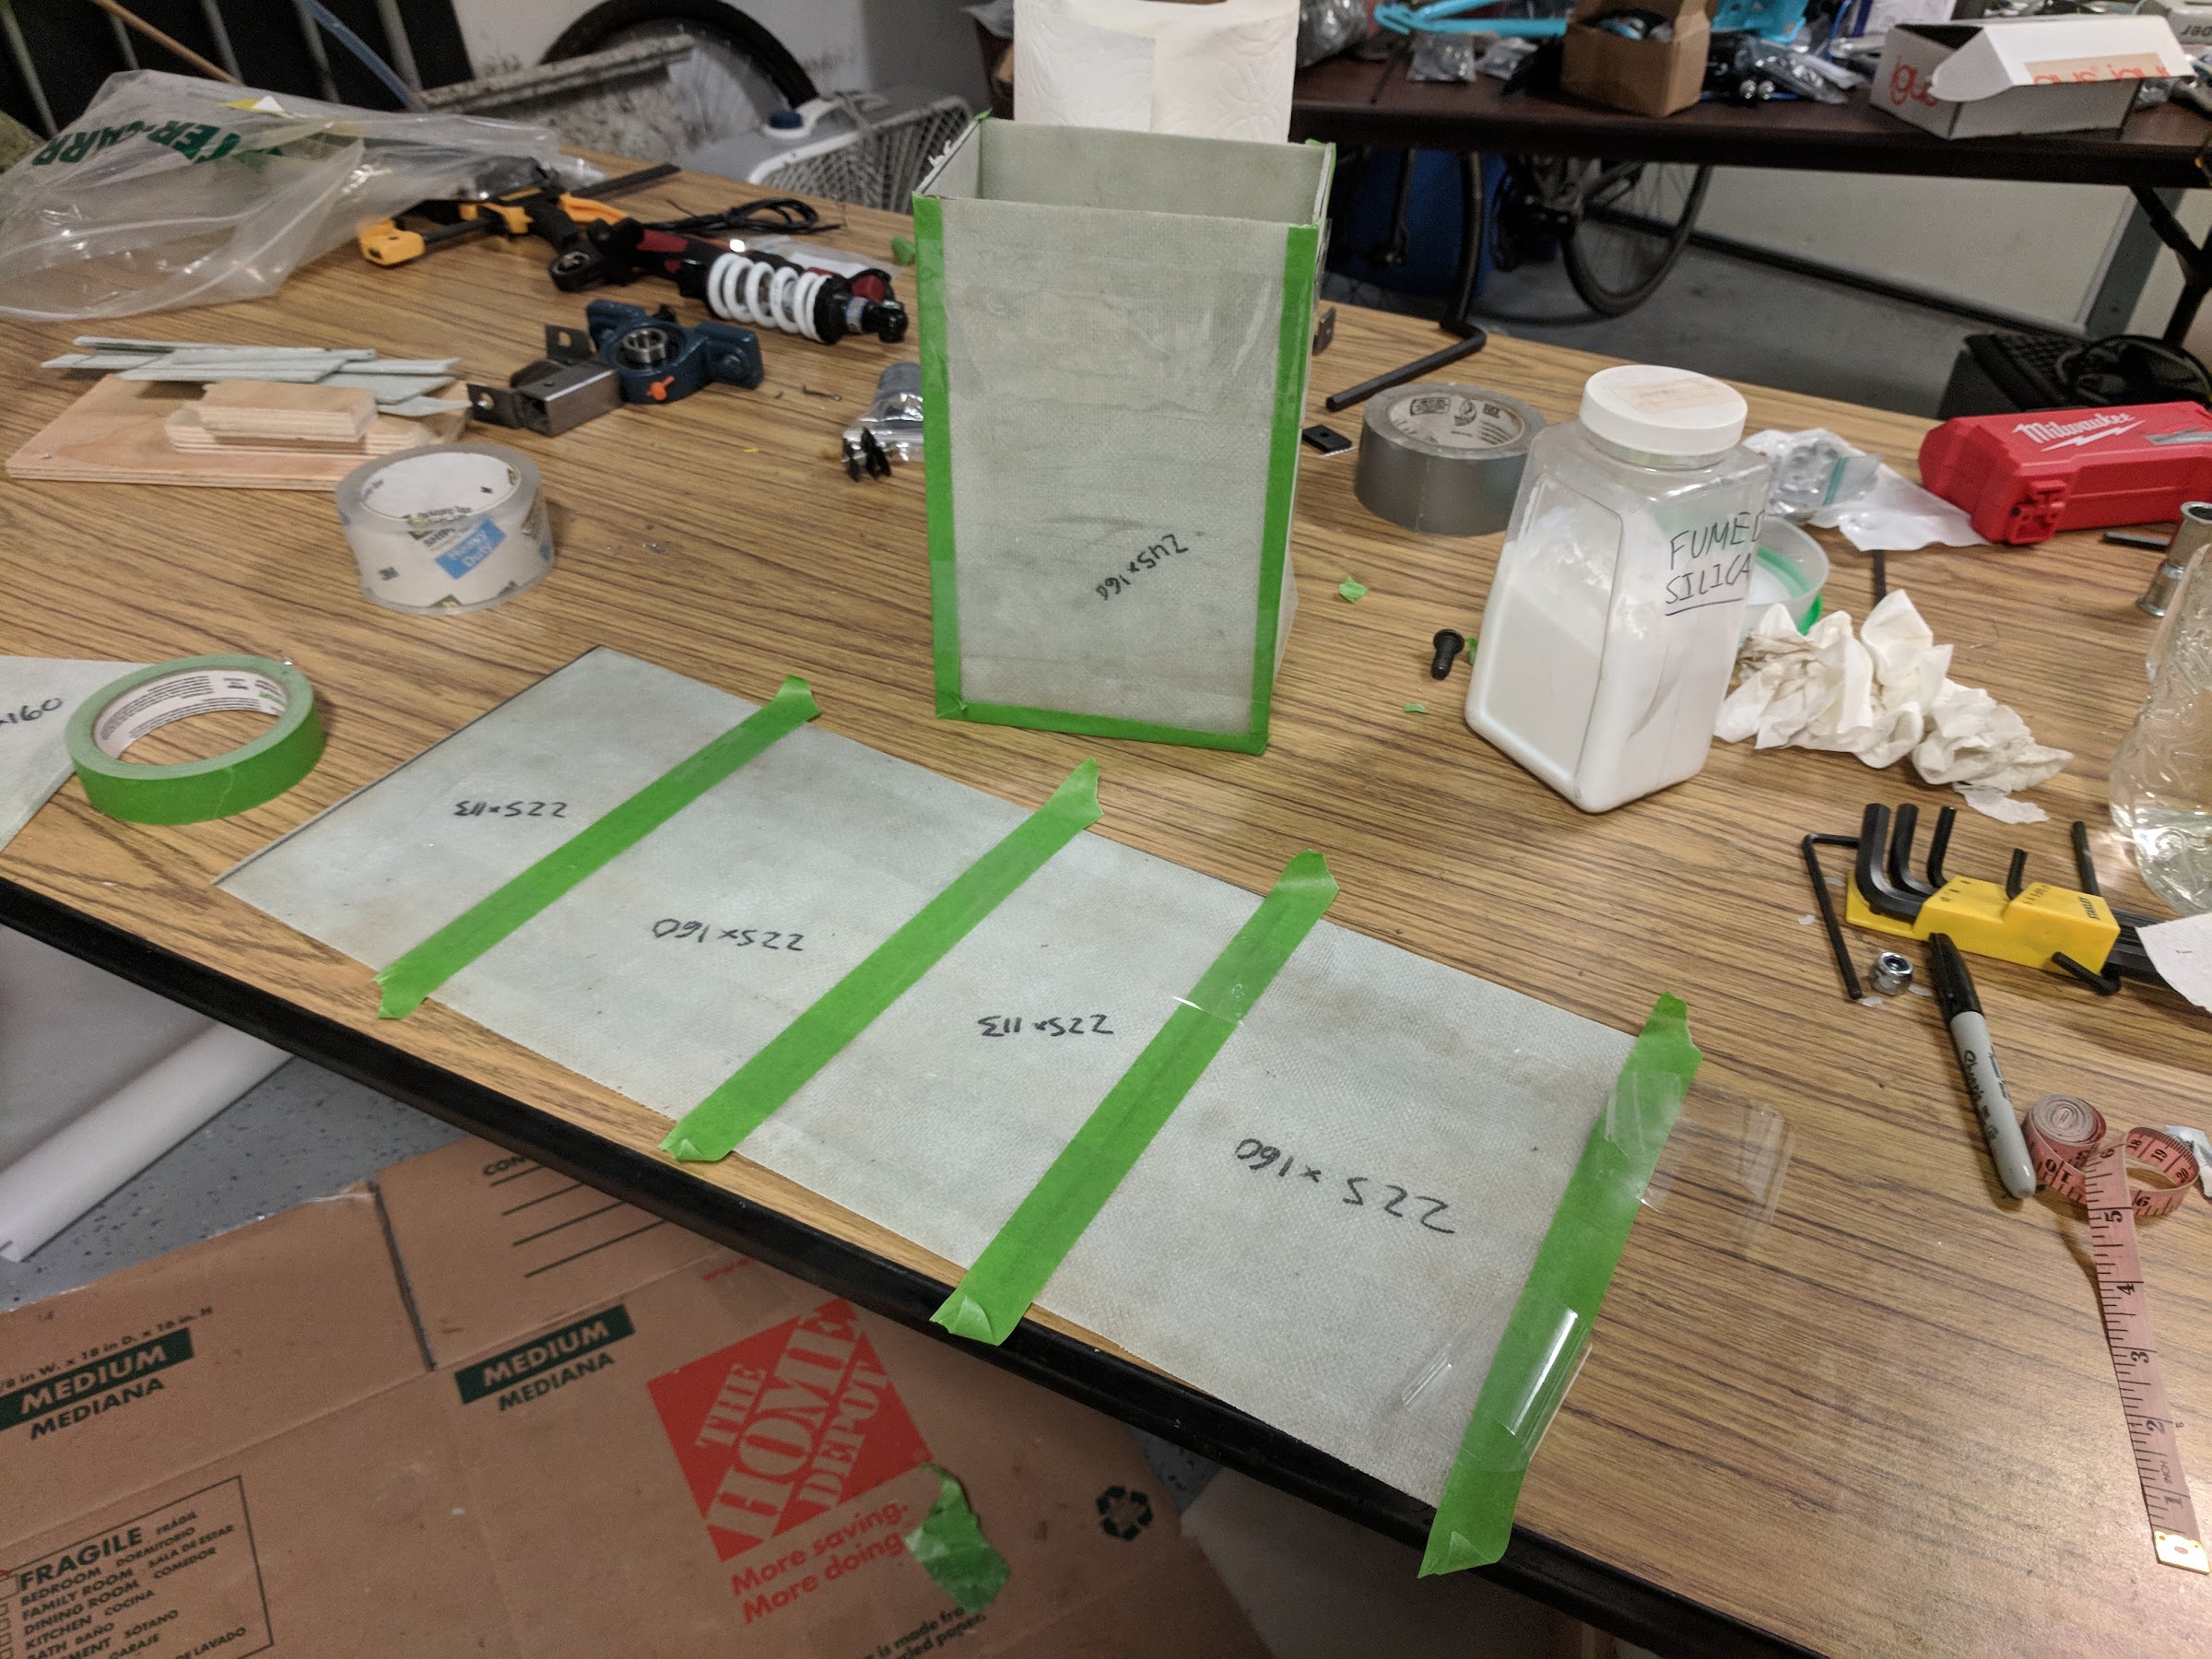
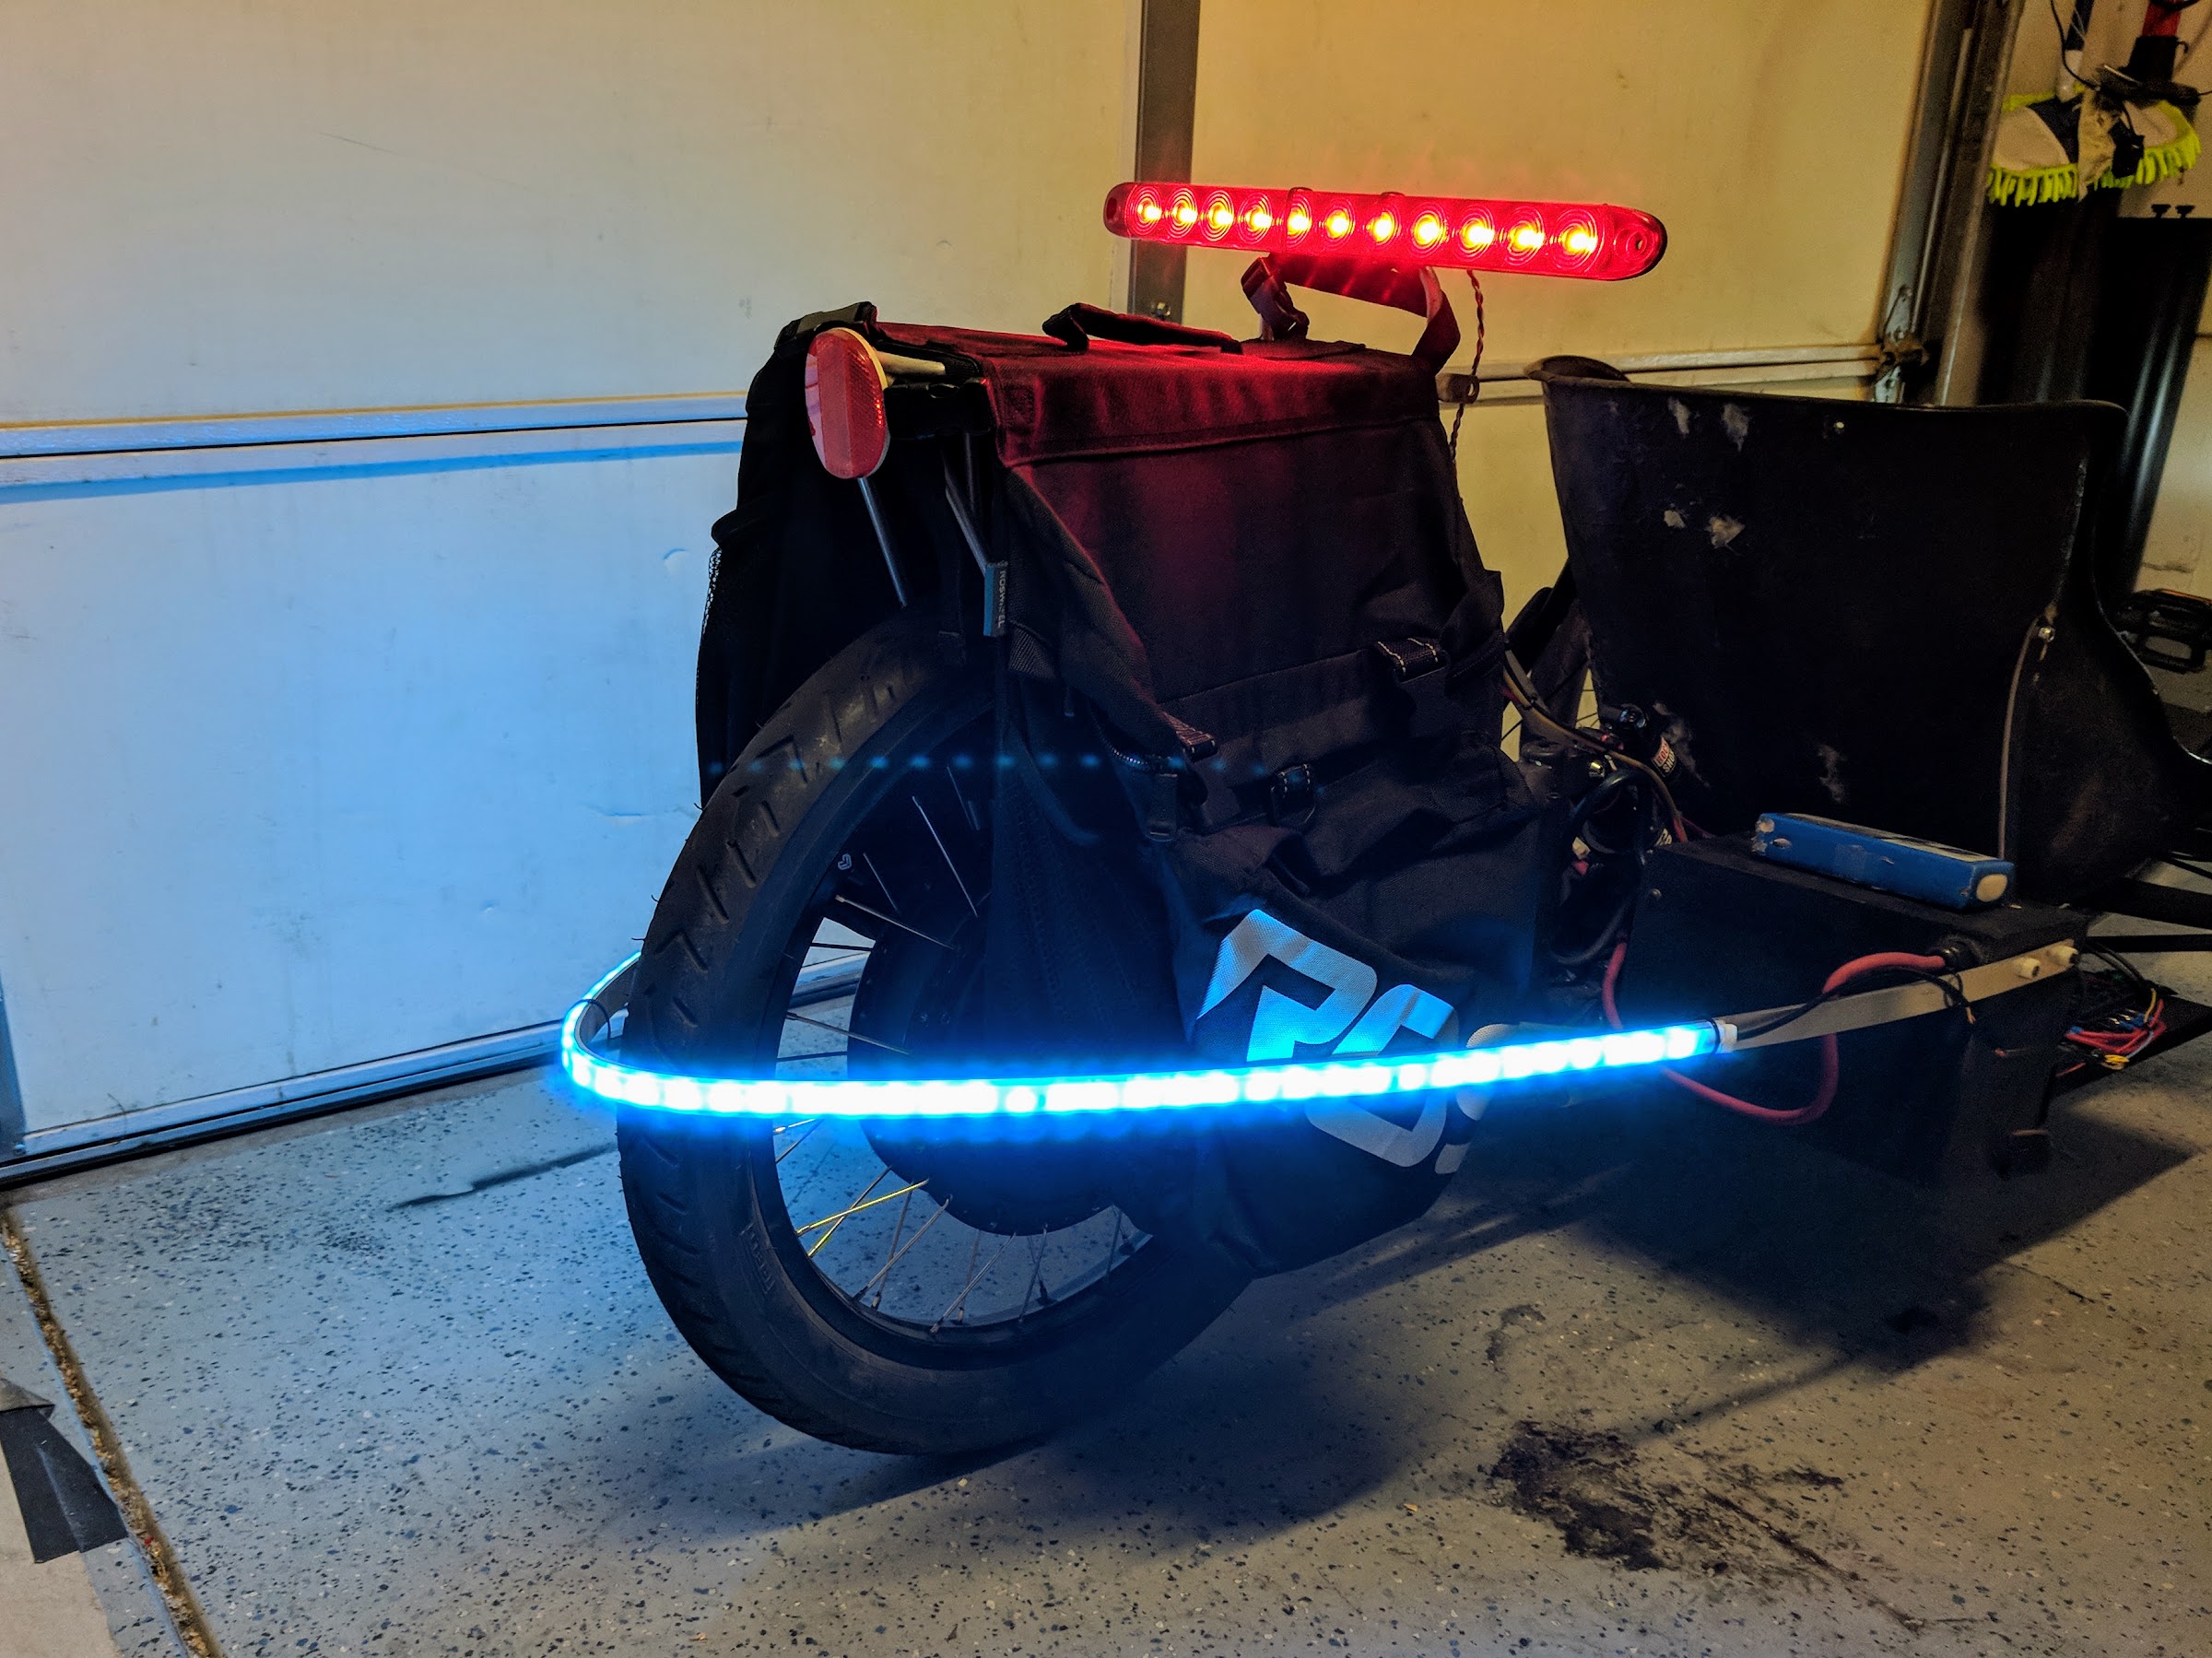
Security features will include keyed ignition and gps tracking. Rear panniers will be used for storage, and later replaced with a locking trunk integrated into the fairing. Safety features include brake lights and turn signals, horn, and a (now crash-tested) battery box design that should minimize the risk of a battery fire in the case of a collision.


Specs:

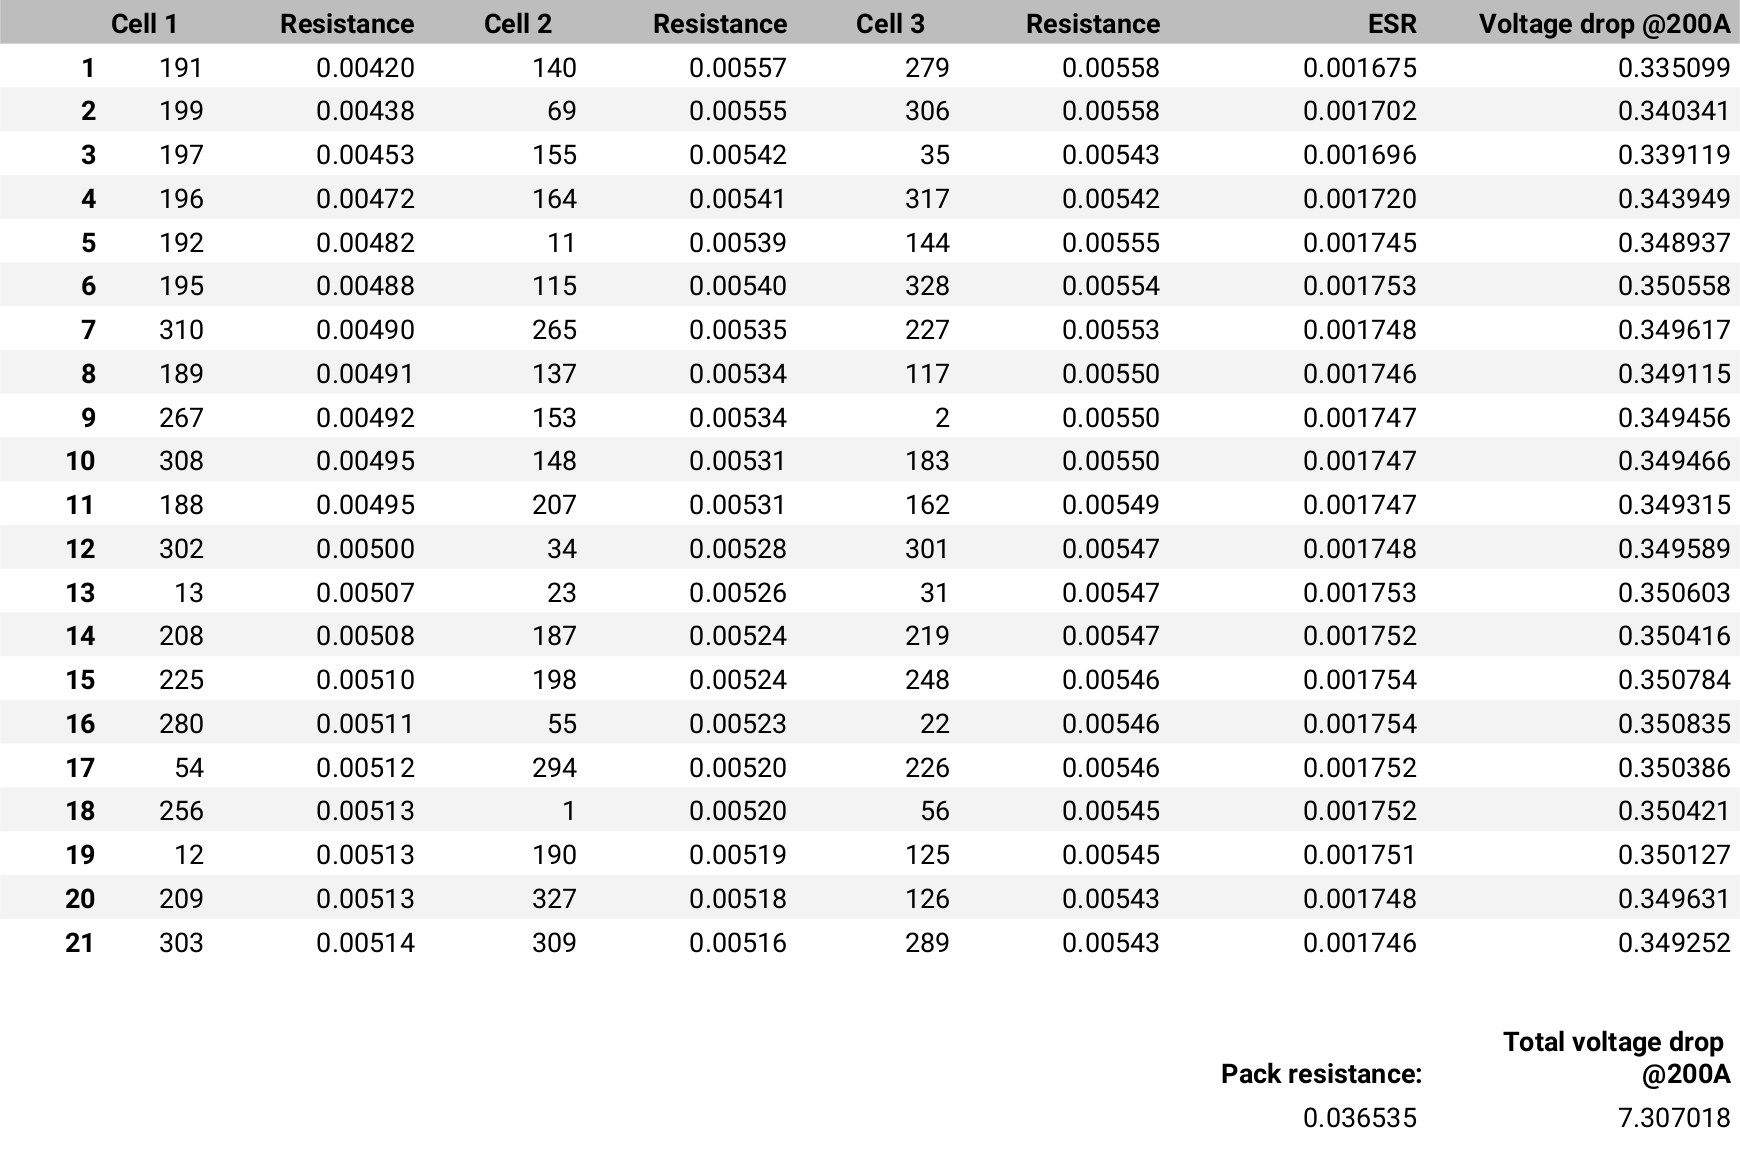
78v nominal 12ish Ah Battery (21s3p Haiyin 6ah 50c cells; actual remaining capacity closer to 4-4.5ah each)
300a bluetooth BMS
48 inch wheelbase
MXUS 3k Turbo 4t motor
Sabvoton SSC72150 150a motor controller


Future plans:
Full fairing, android dashboard, etc.


bkK0L6-wvfWz7lUixOe_A7B1T0iKrQ3jU3yFIaNEjEtSQZfumC33h2mejPs13NzIb4_AQ1v_5ZZN60FxDQlLzyYWg8OoFBNl4IiGpn2iA7T2Tb_IrKkYfvubce90FZG4VCSg3qgGCKM=w2400


60OeyBNZ-LAJYrlRmN4HoJZPBf77cQHwPUsGpXix1_krGLli8GBCNsN8CDsyH6LiwvkT6VnuuhynpfUAlhqRWw7tU2_BH-fiJHyfaYeBFgm0vncV1L71iYs50PhlOEHRACPlaNPjIL4=w2400


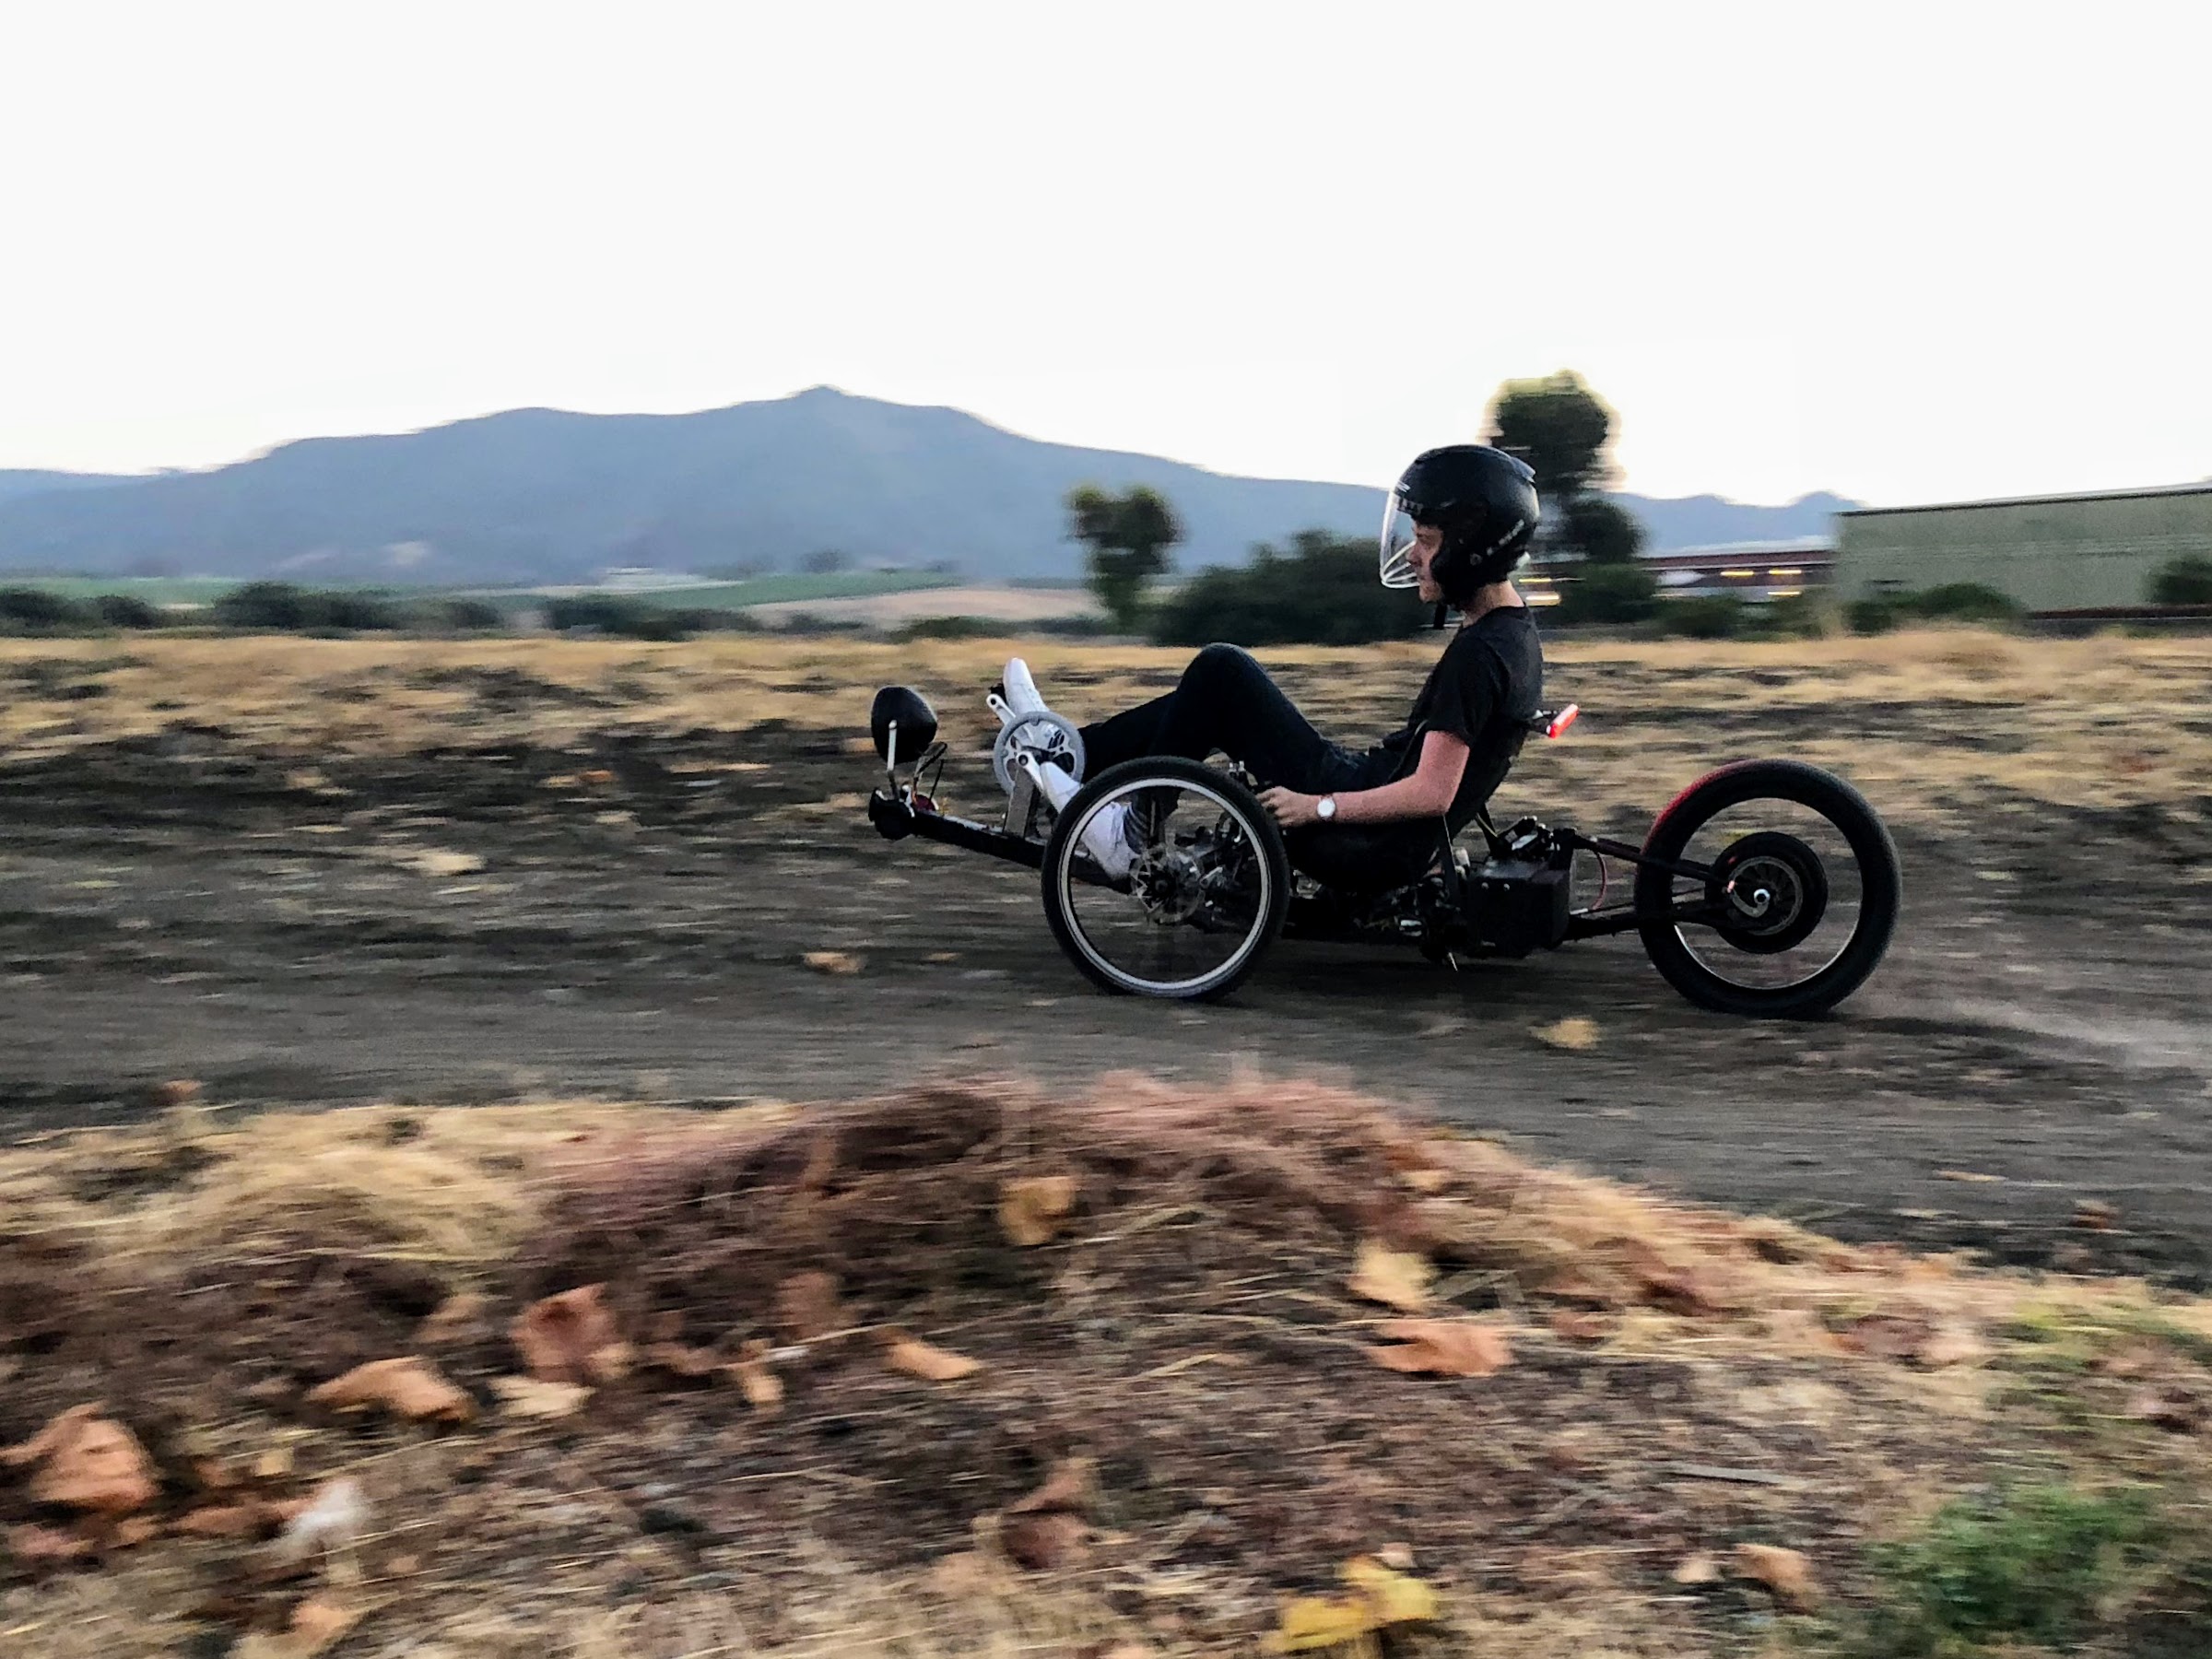
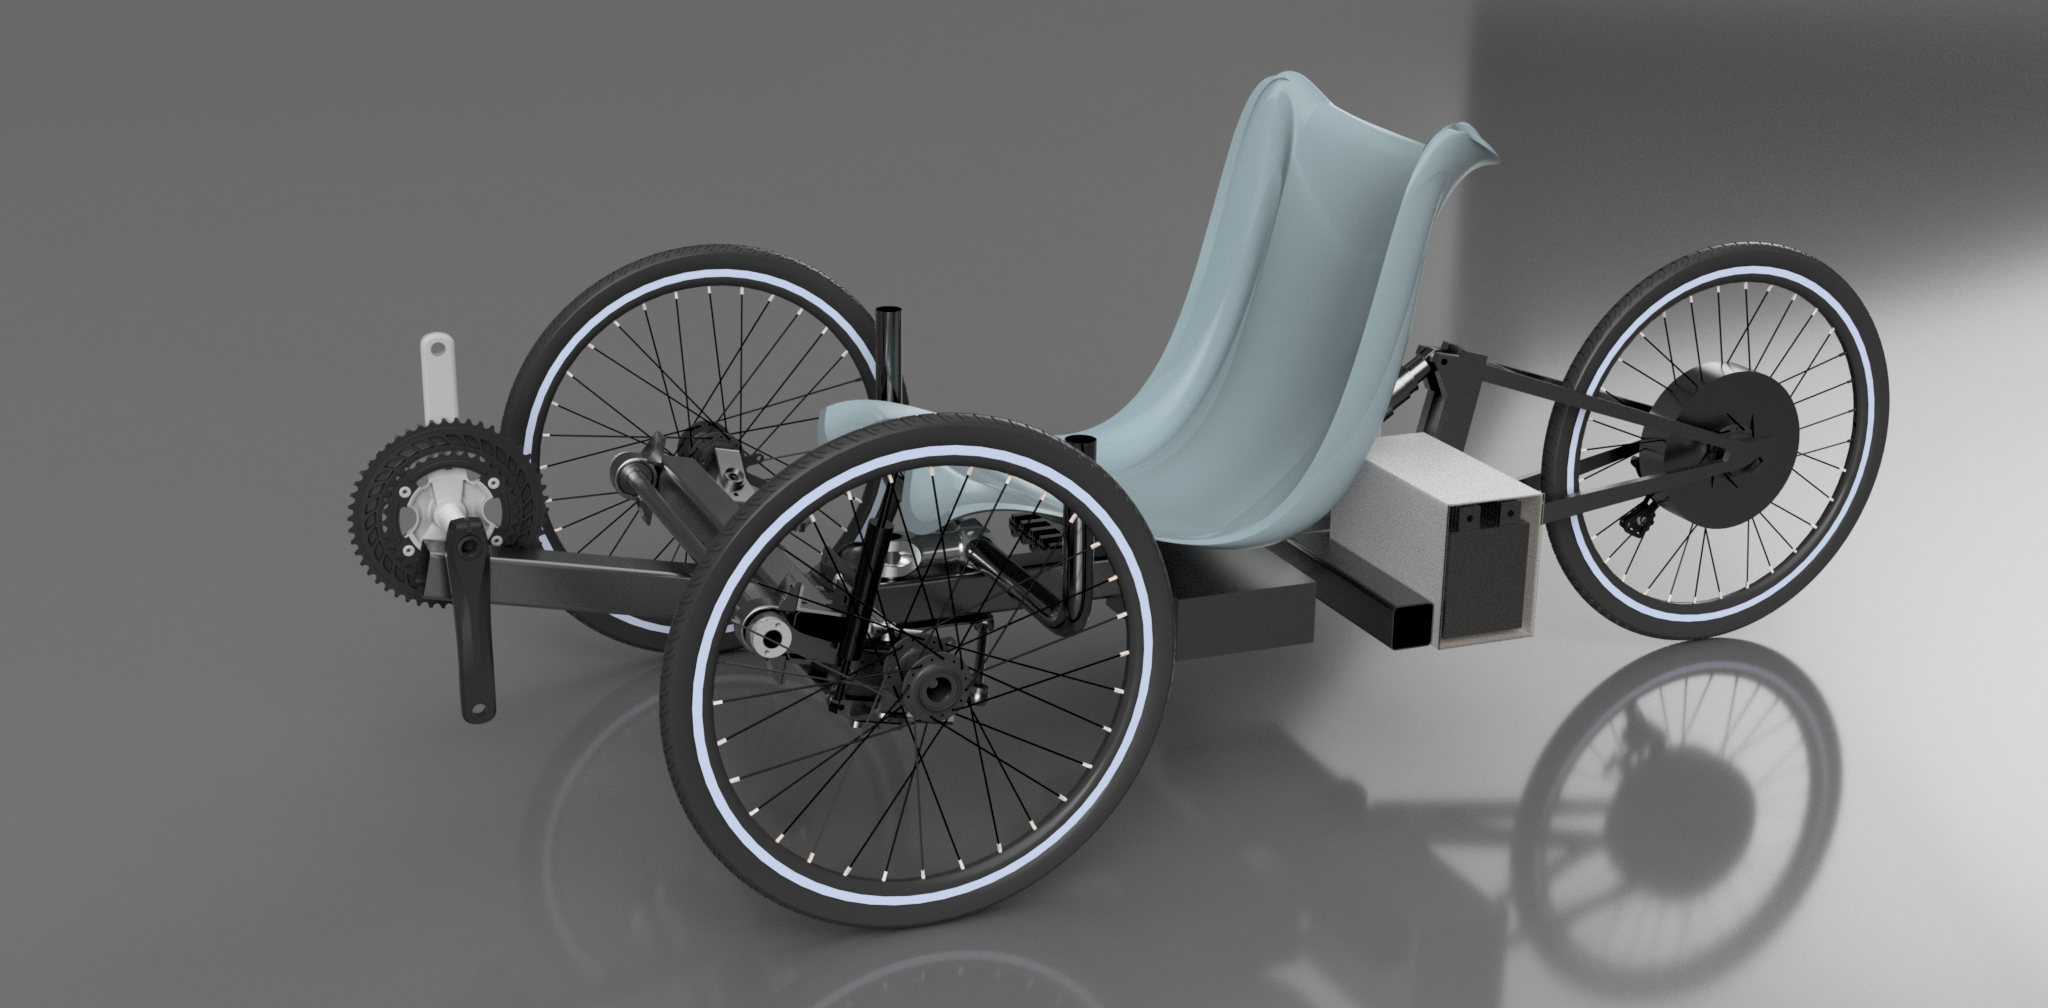
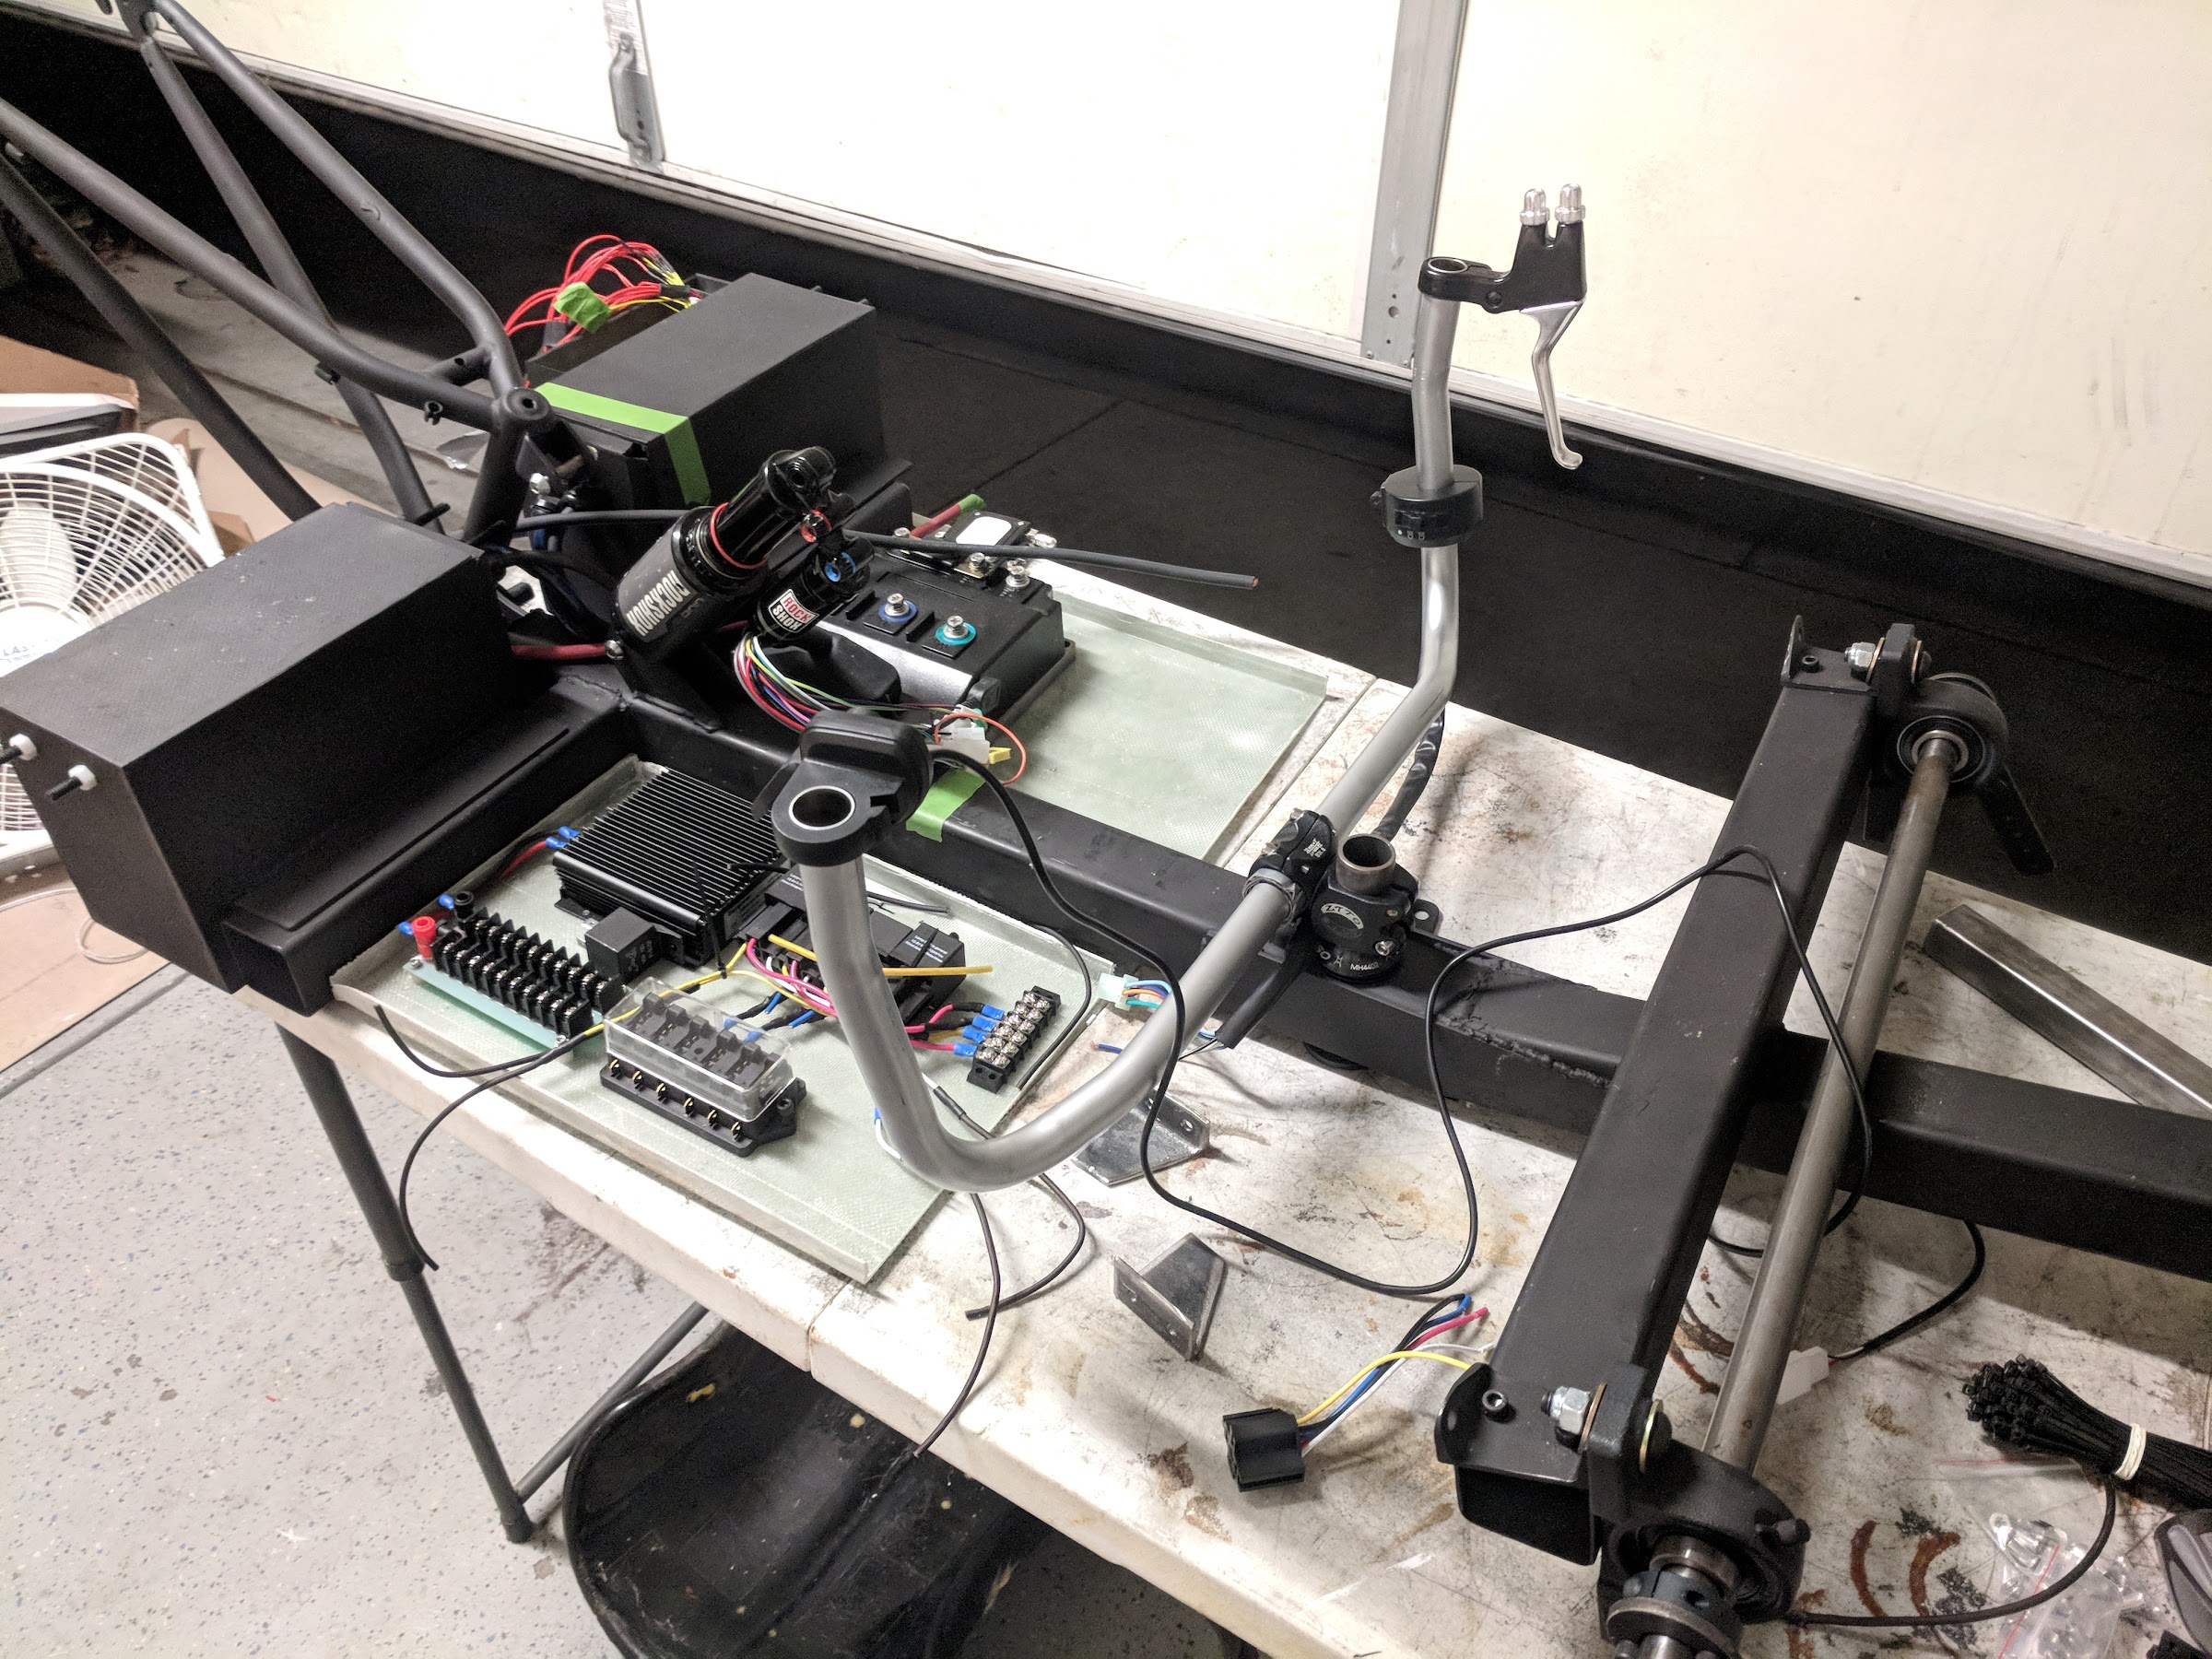
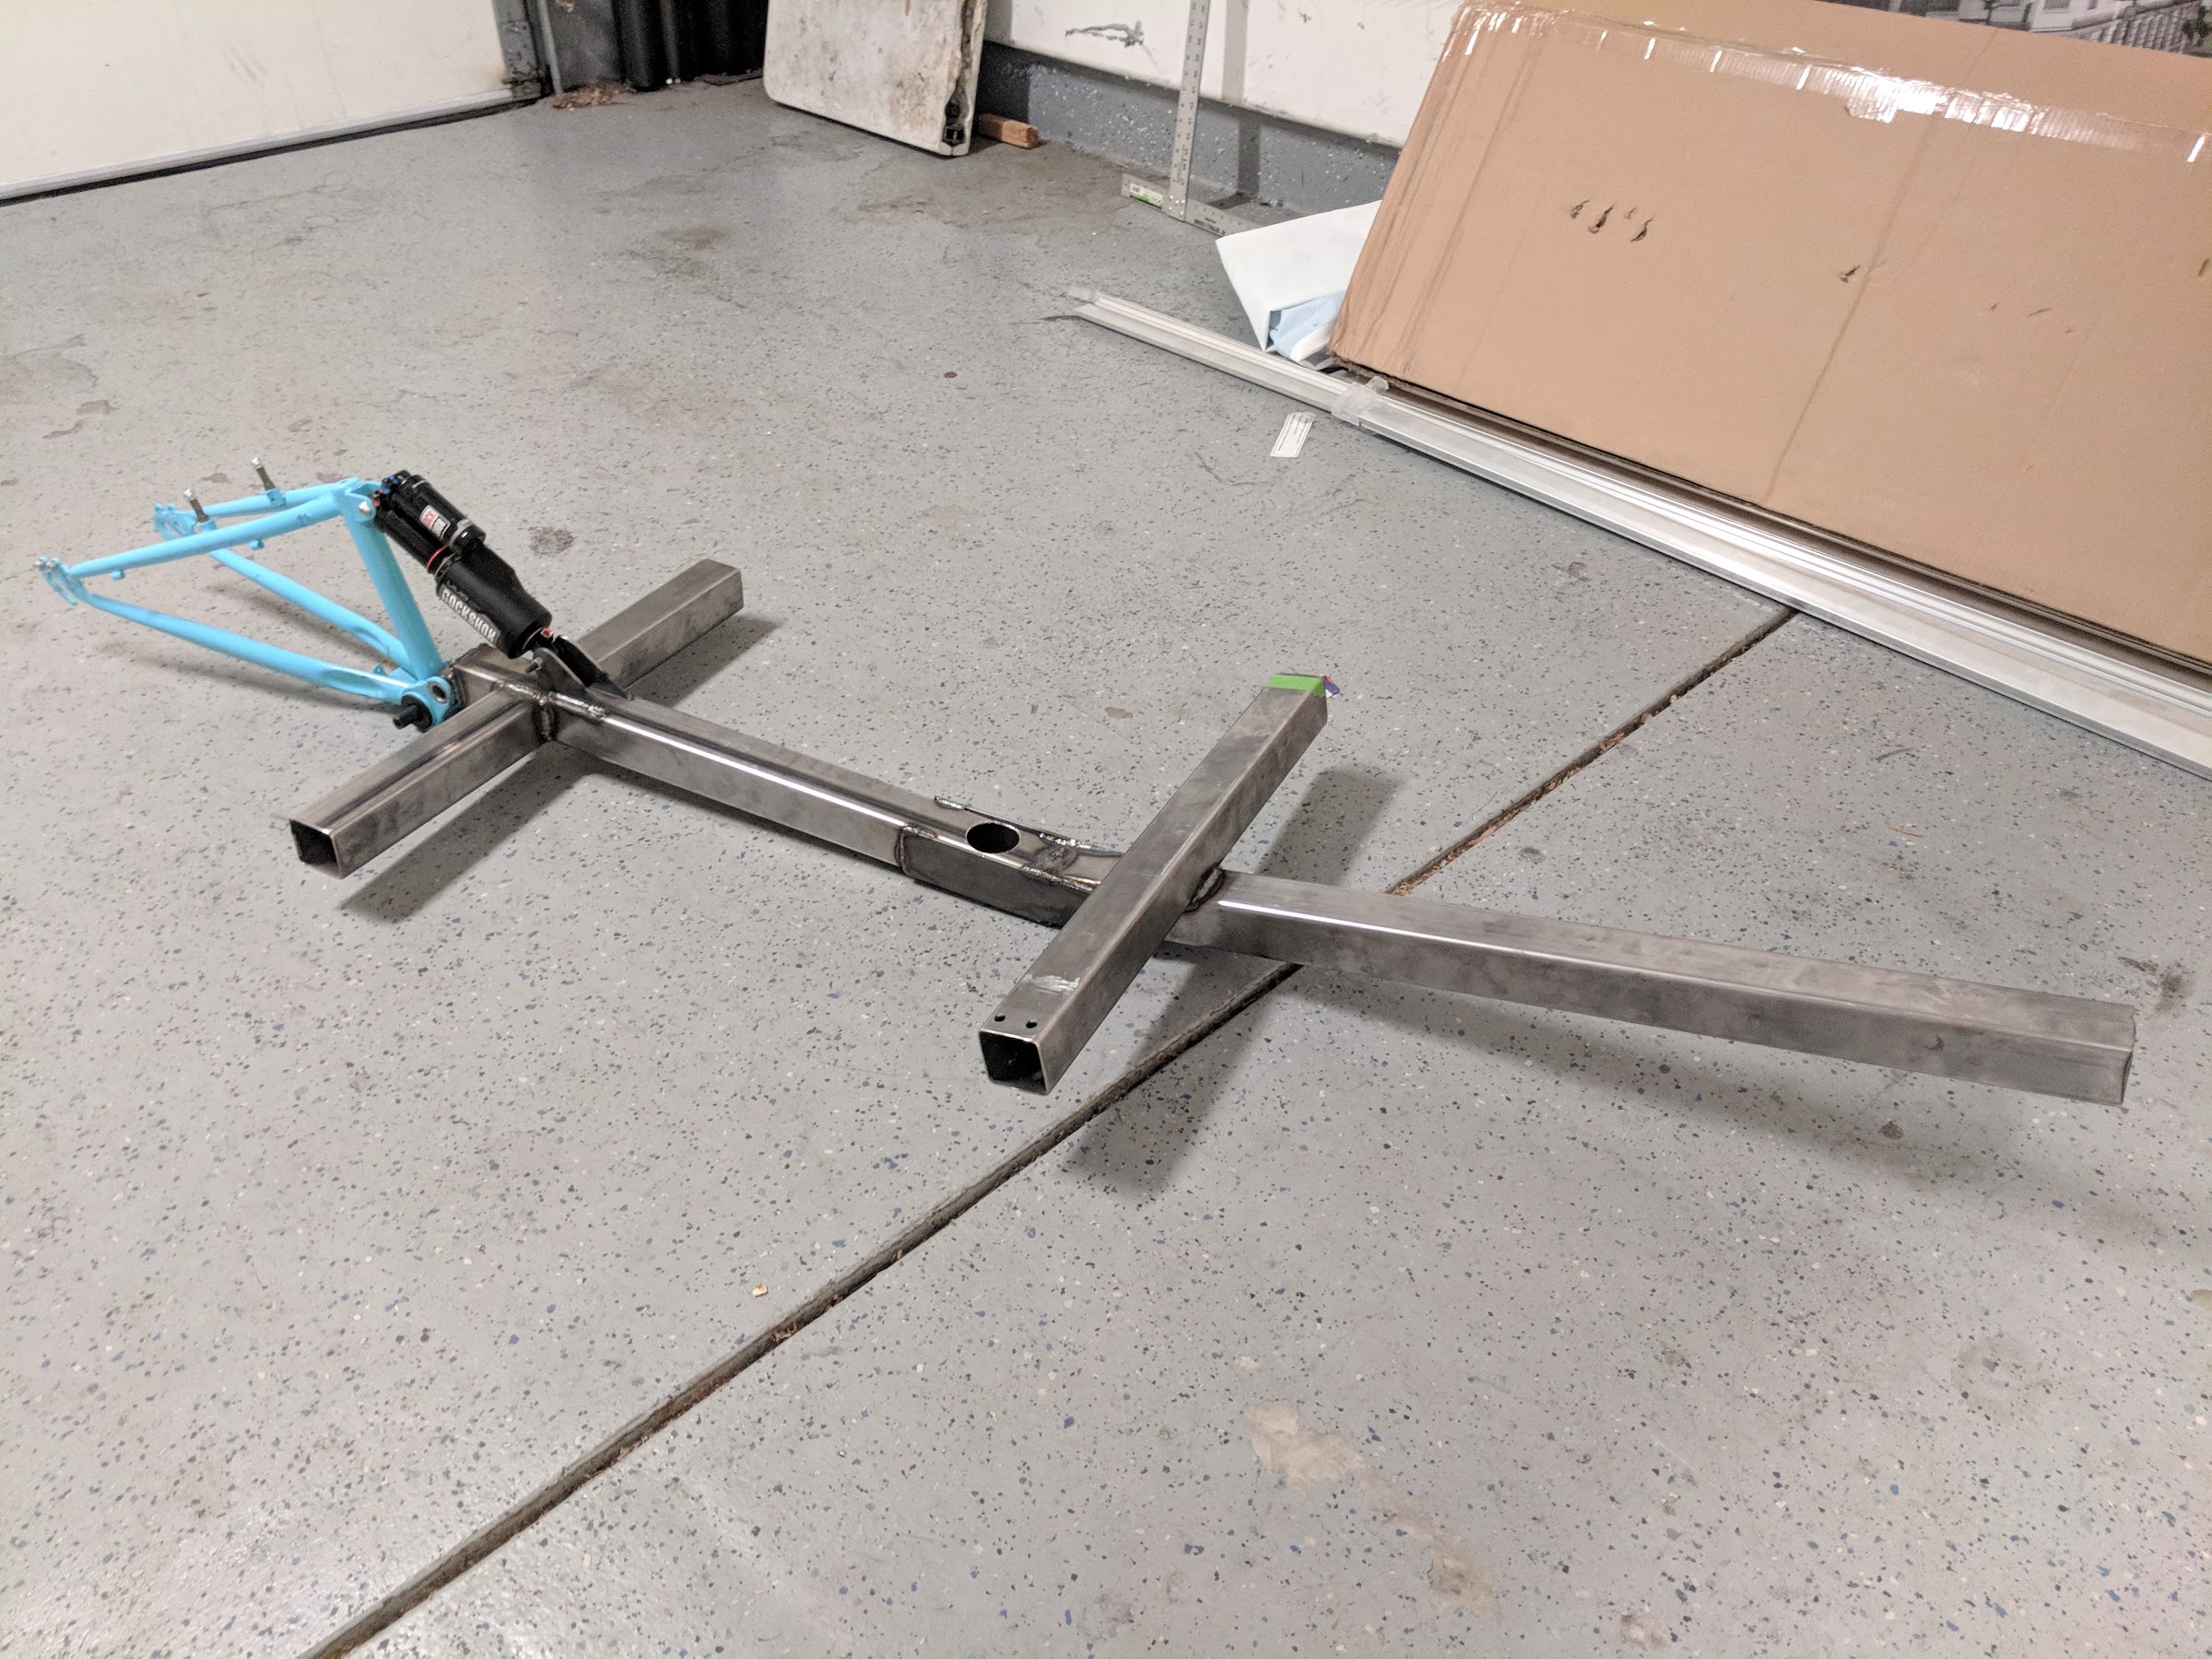
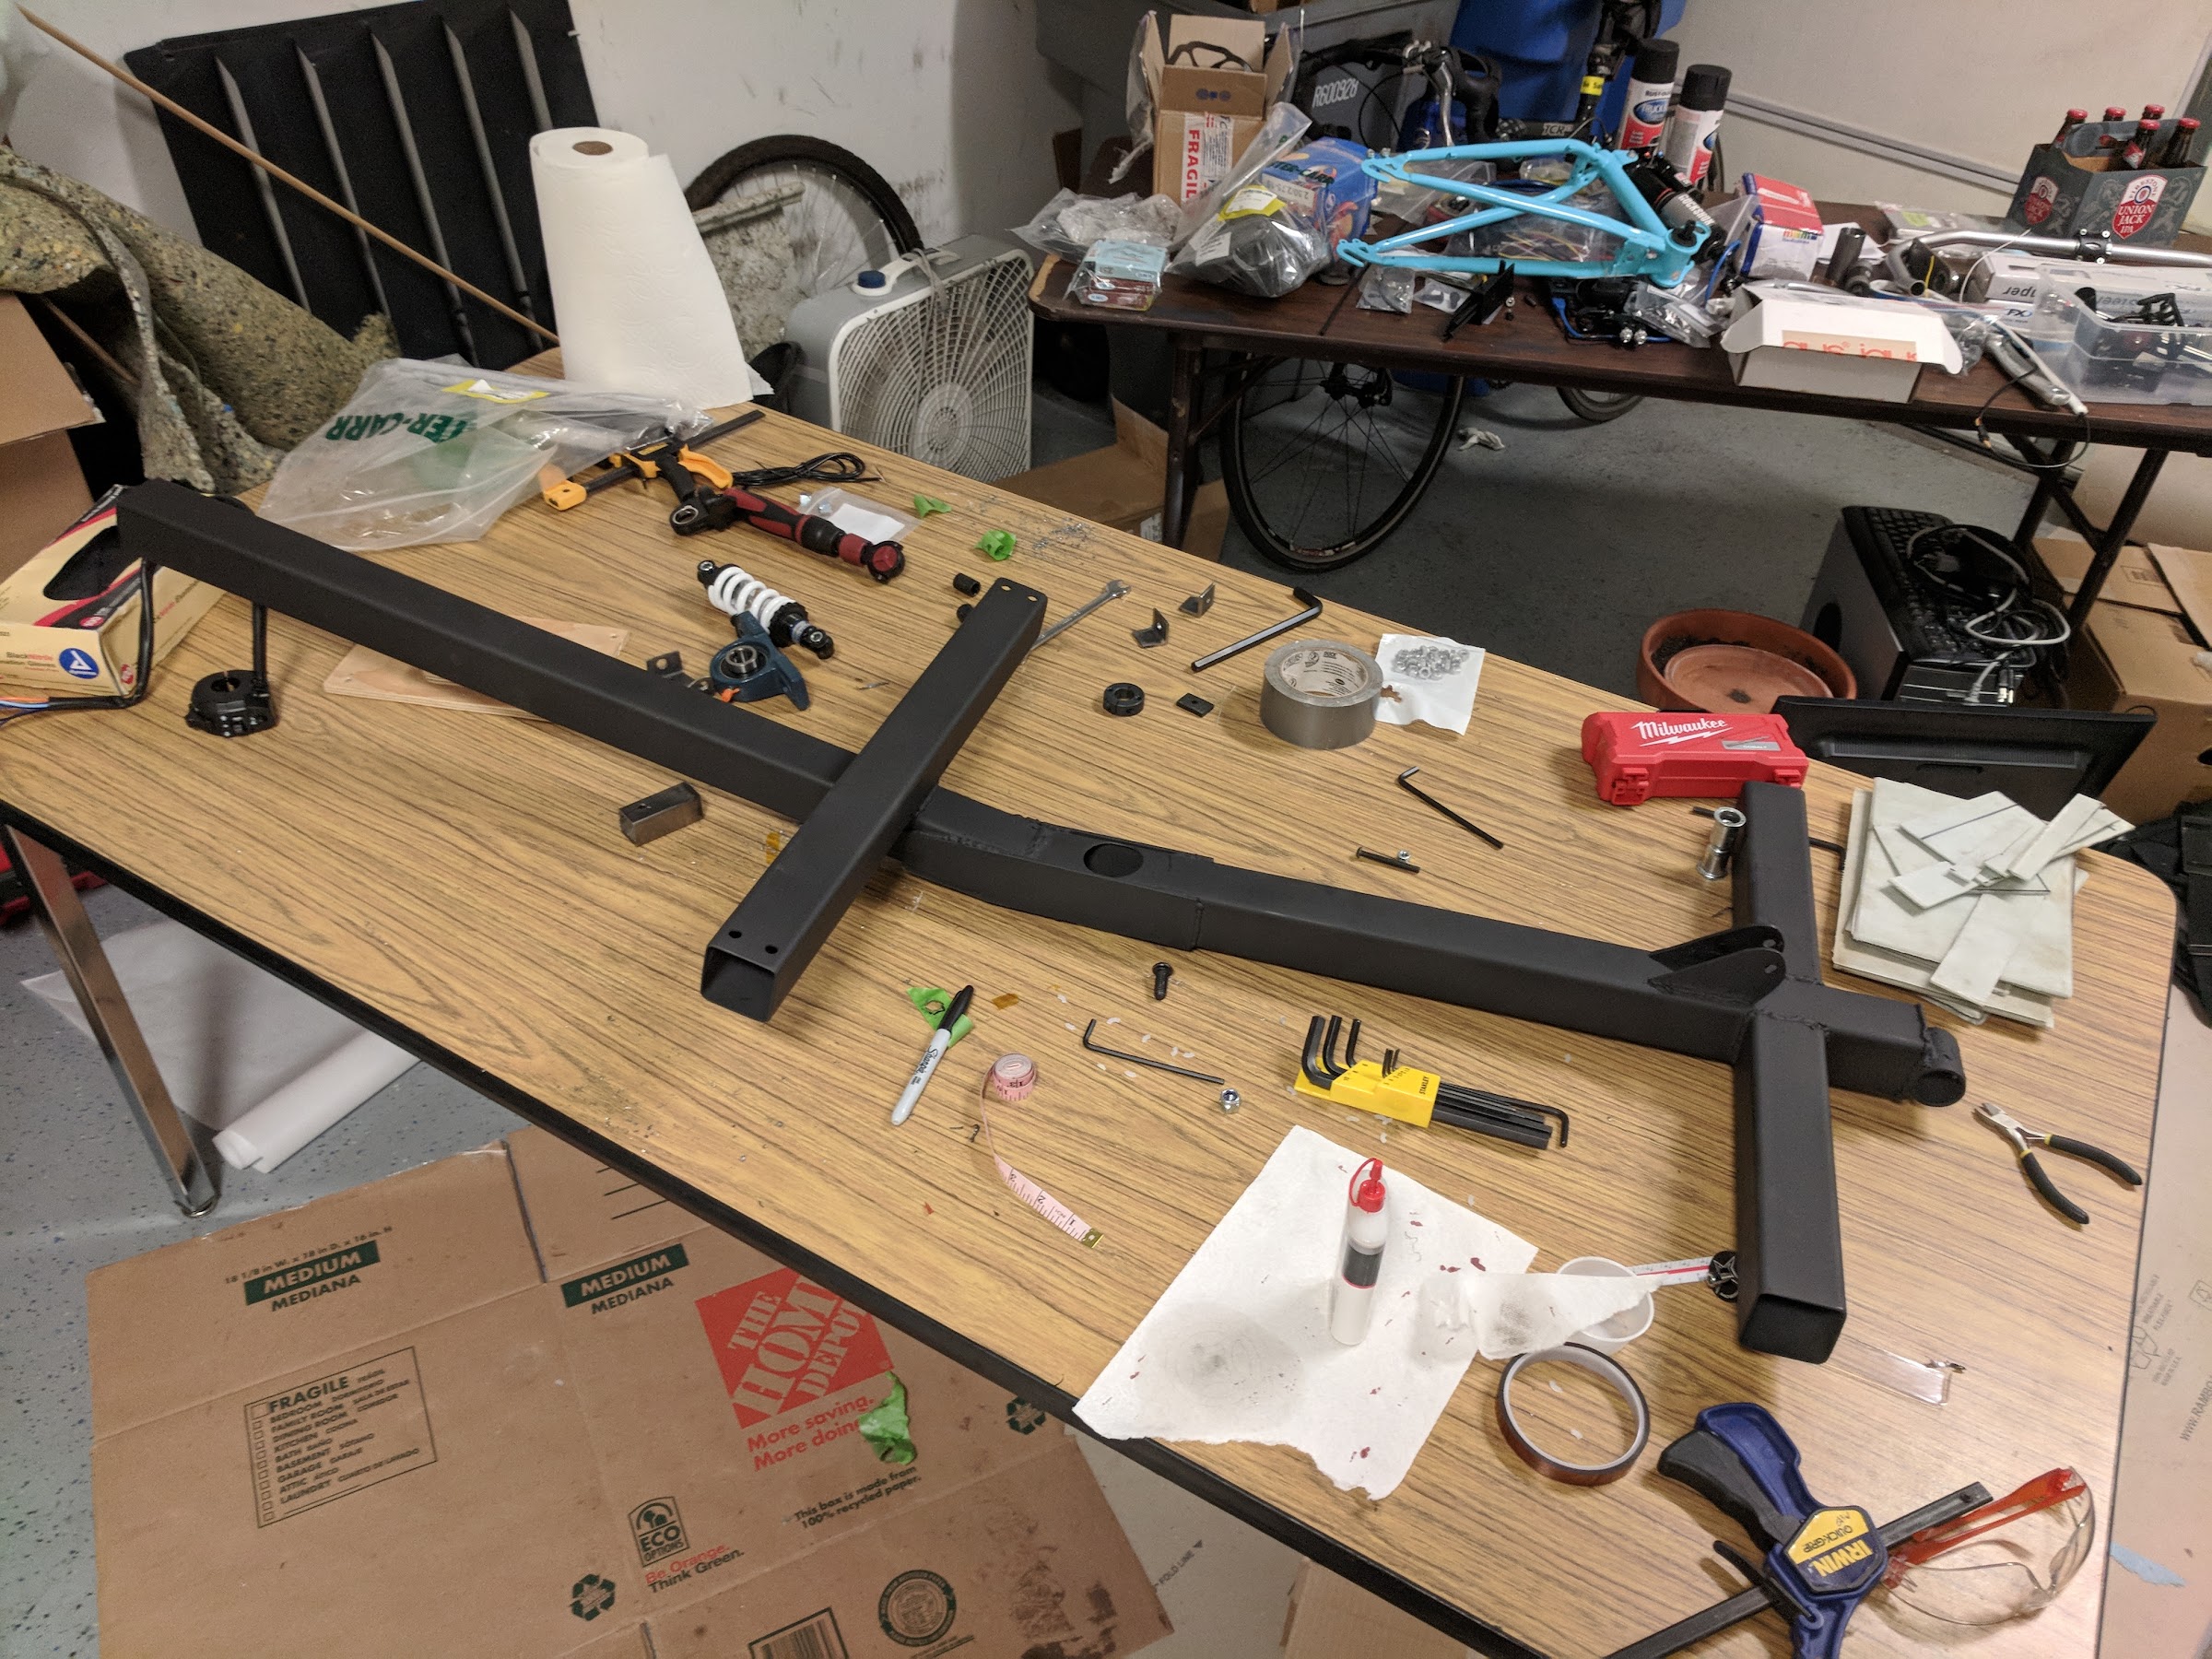
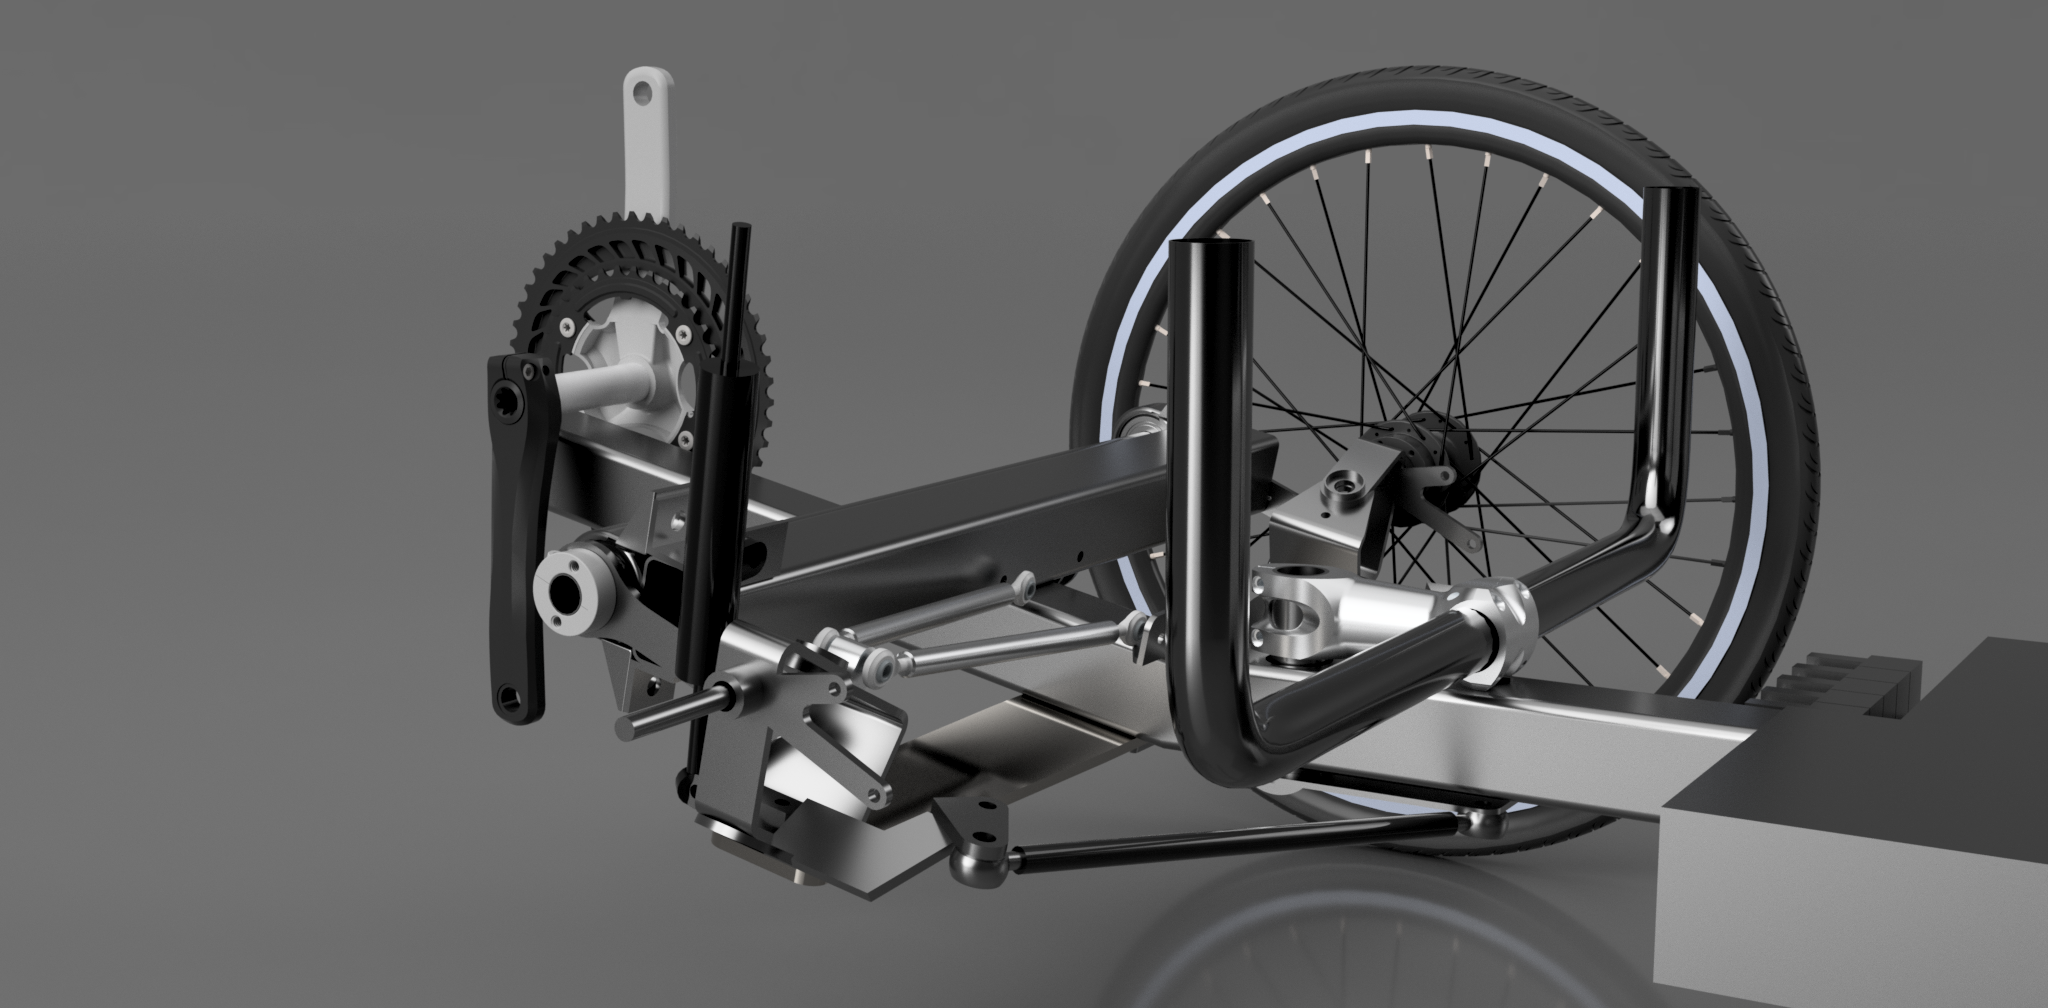
The frame is mostly welded .065" thick 2" steel square tube. The rear wheel is attached to the back end of a cheap craigslist bike frame, and suspended by a RockShox Debonair mtb shock. The front suspension incorporates fiberglass leaf springs, separate adjustable dampers, and an anti-roll bar (not yet mounted). The battery pack is attached behind the (go-kart) seat, in a fiberglass box. A pair of fiberglass electronics trays attach under the seat (not shown in rendering), with the HV side (motor controller, power supply, circuit breaker) on the left, and LV side (dc-dc converter, fuse box, relays, etc.) on the right.


Frame

The basic frame design came together pretty quickly:

qmhzGIcz-S6egkjUhVbDblC7EJ_nVOsebXslHDJoYxOKHZRKYJbR1e2Ky3CiKK8emJcDChOrckuWsxkRwSAOLXZbrprKvs3h2uKUa_no8tuUnGGBDij2OcePFFZCFCWZIrIUdXn55U8=w2400


Pc2-bg9wIL0eNPXHJw6JxuvfxkERpplwXwGL0dsp48nv0QJpgzg_DRVDHAURs-QyENmIQNjpvYxk7HI0aFTdrOzz8o_PRpqd2e-JZ0-yhSwGH9cG3juYXeaKmiCxdv-BrDnD5VV6nSE=w2400


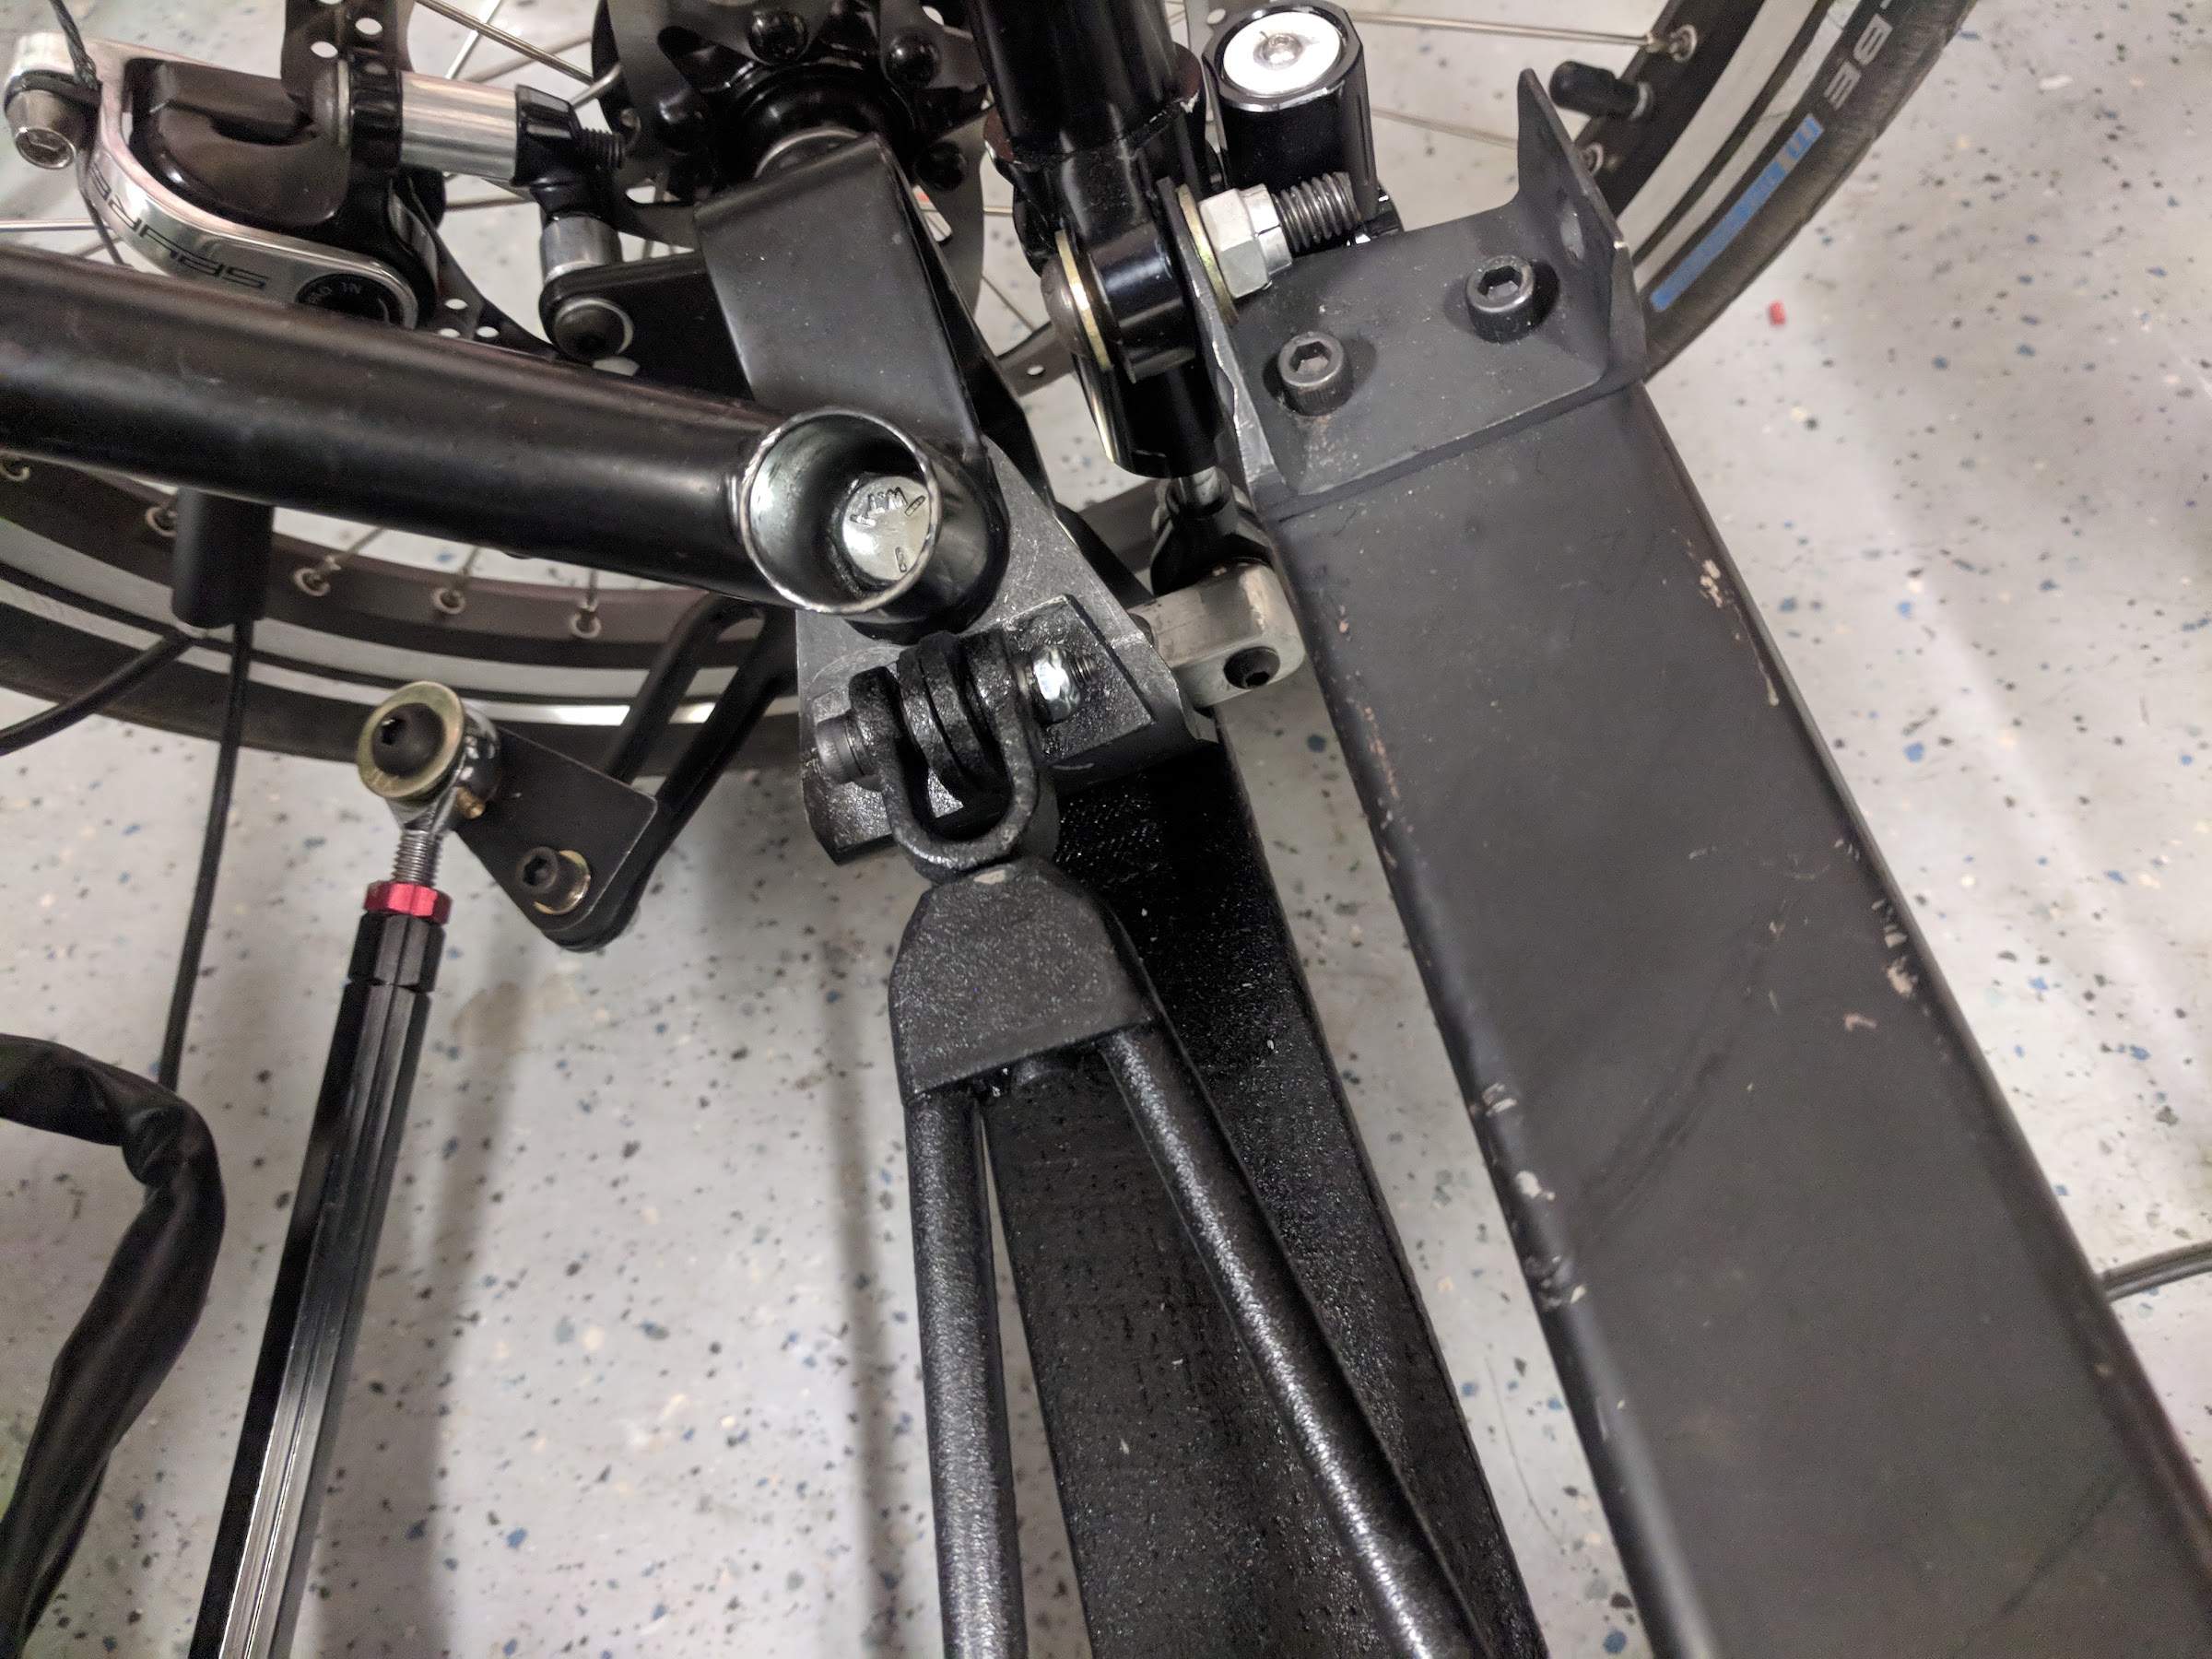
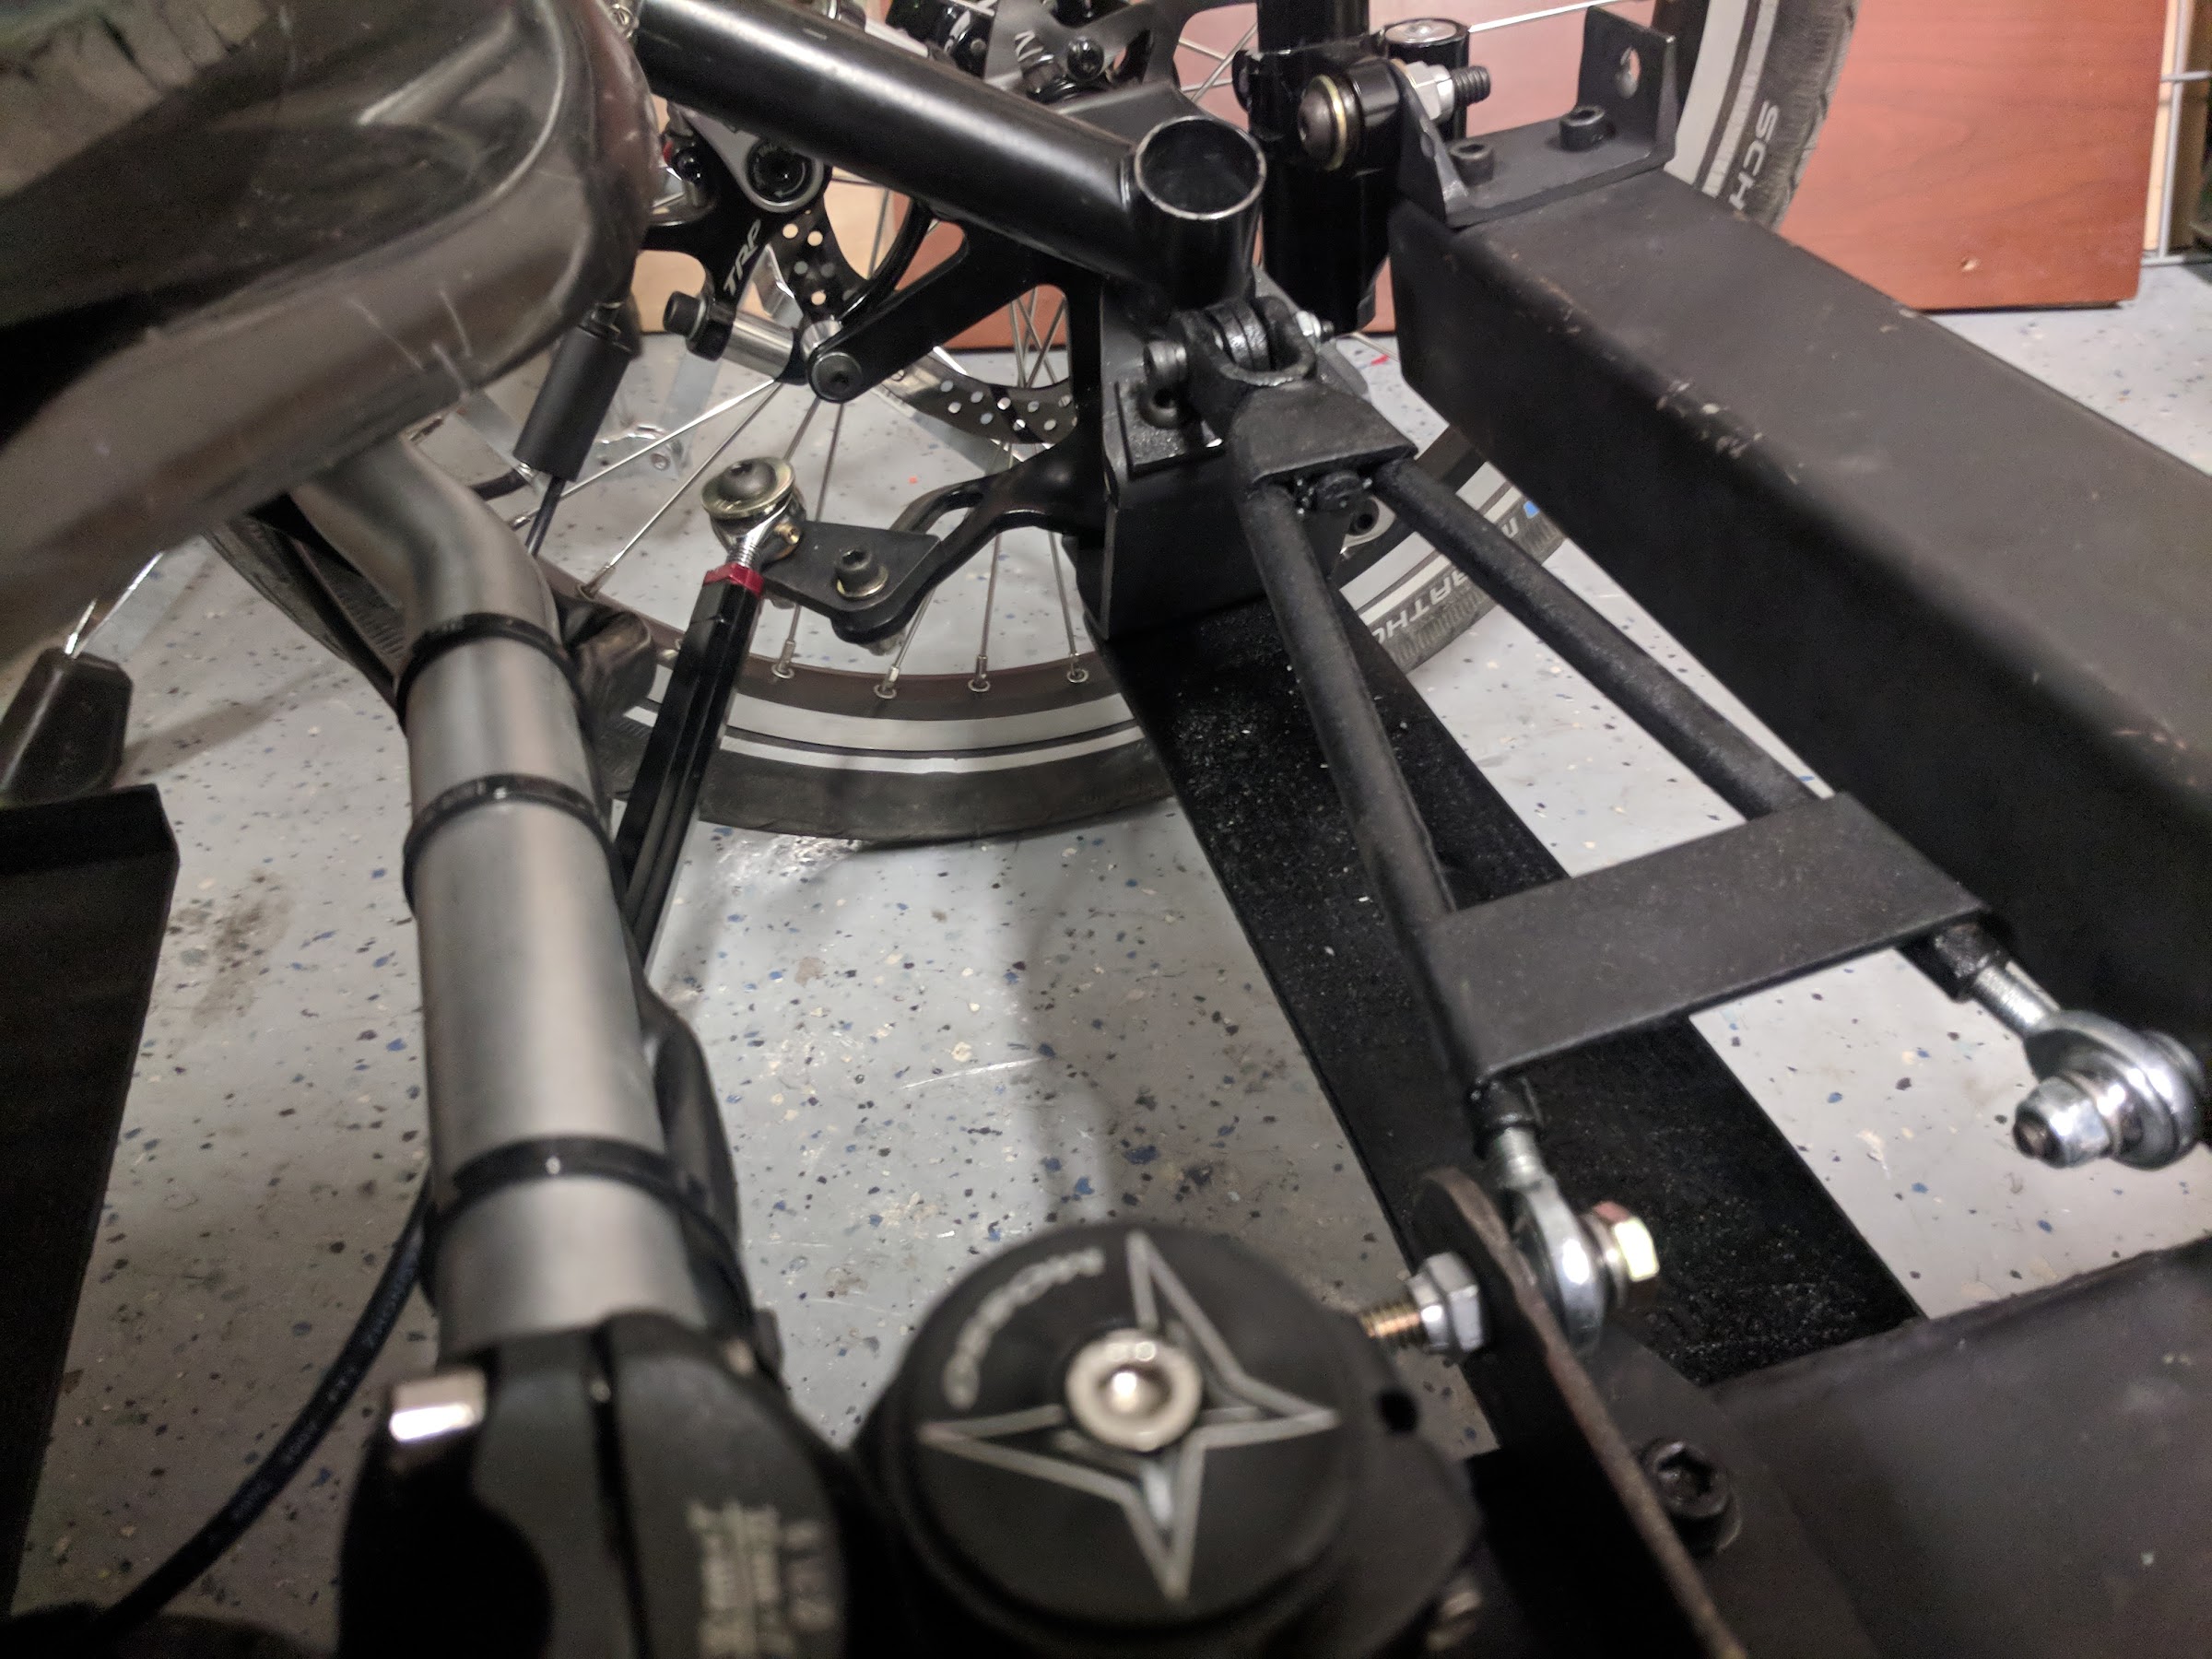
The uprights are made by KMX for their line of recumbent trikes, with the steering link mounting points adjusted with steel plates for correct steering geometry in my design. The upper a-arms are welded steel, with rod ends from mcmaster.

c1t_Jm2Pxxma5eDhZmugClHzUa-M8kOOTq6ylNj3mQvpYkdj4kYaXcvLffhZSjFJ615mmnU81cW91DHbJn77qqv5VjiE-vDEgpFvy6cdxiiMEZVnc2bmJYw_LaSRCAbgsUl2DwS09Tc=w2400


nco-GQPFrsbvIeHu7EtScbyNd0ZR5fXX1q4y_iCJBpiWe2zQhQG7bsIERhNcIoyPKl25k_6LpAmhZlLOmSAkIcjQNUd6YbP4goPkNDYefS3EkmIJkX1H3Q9pN_0YesbJGp_n8ekwzq4=w2400


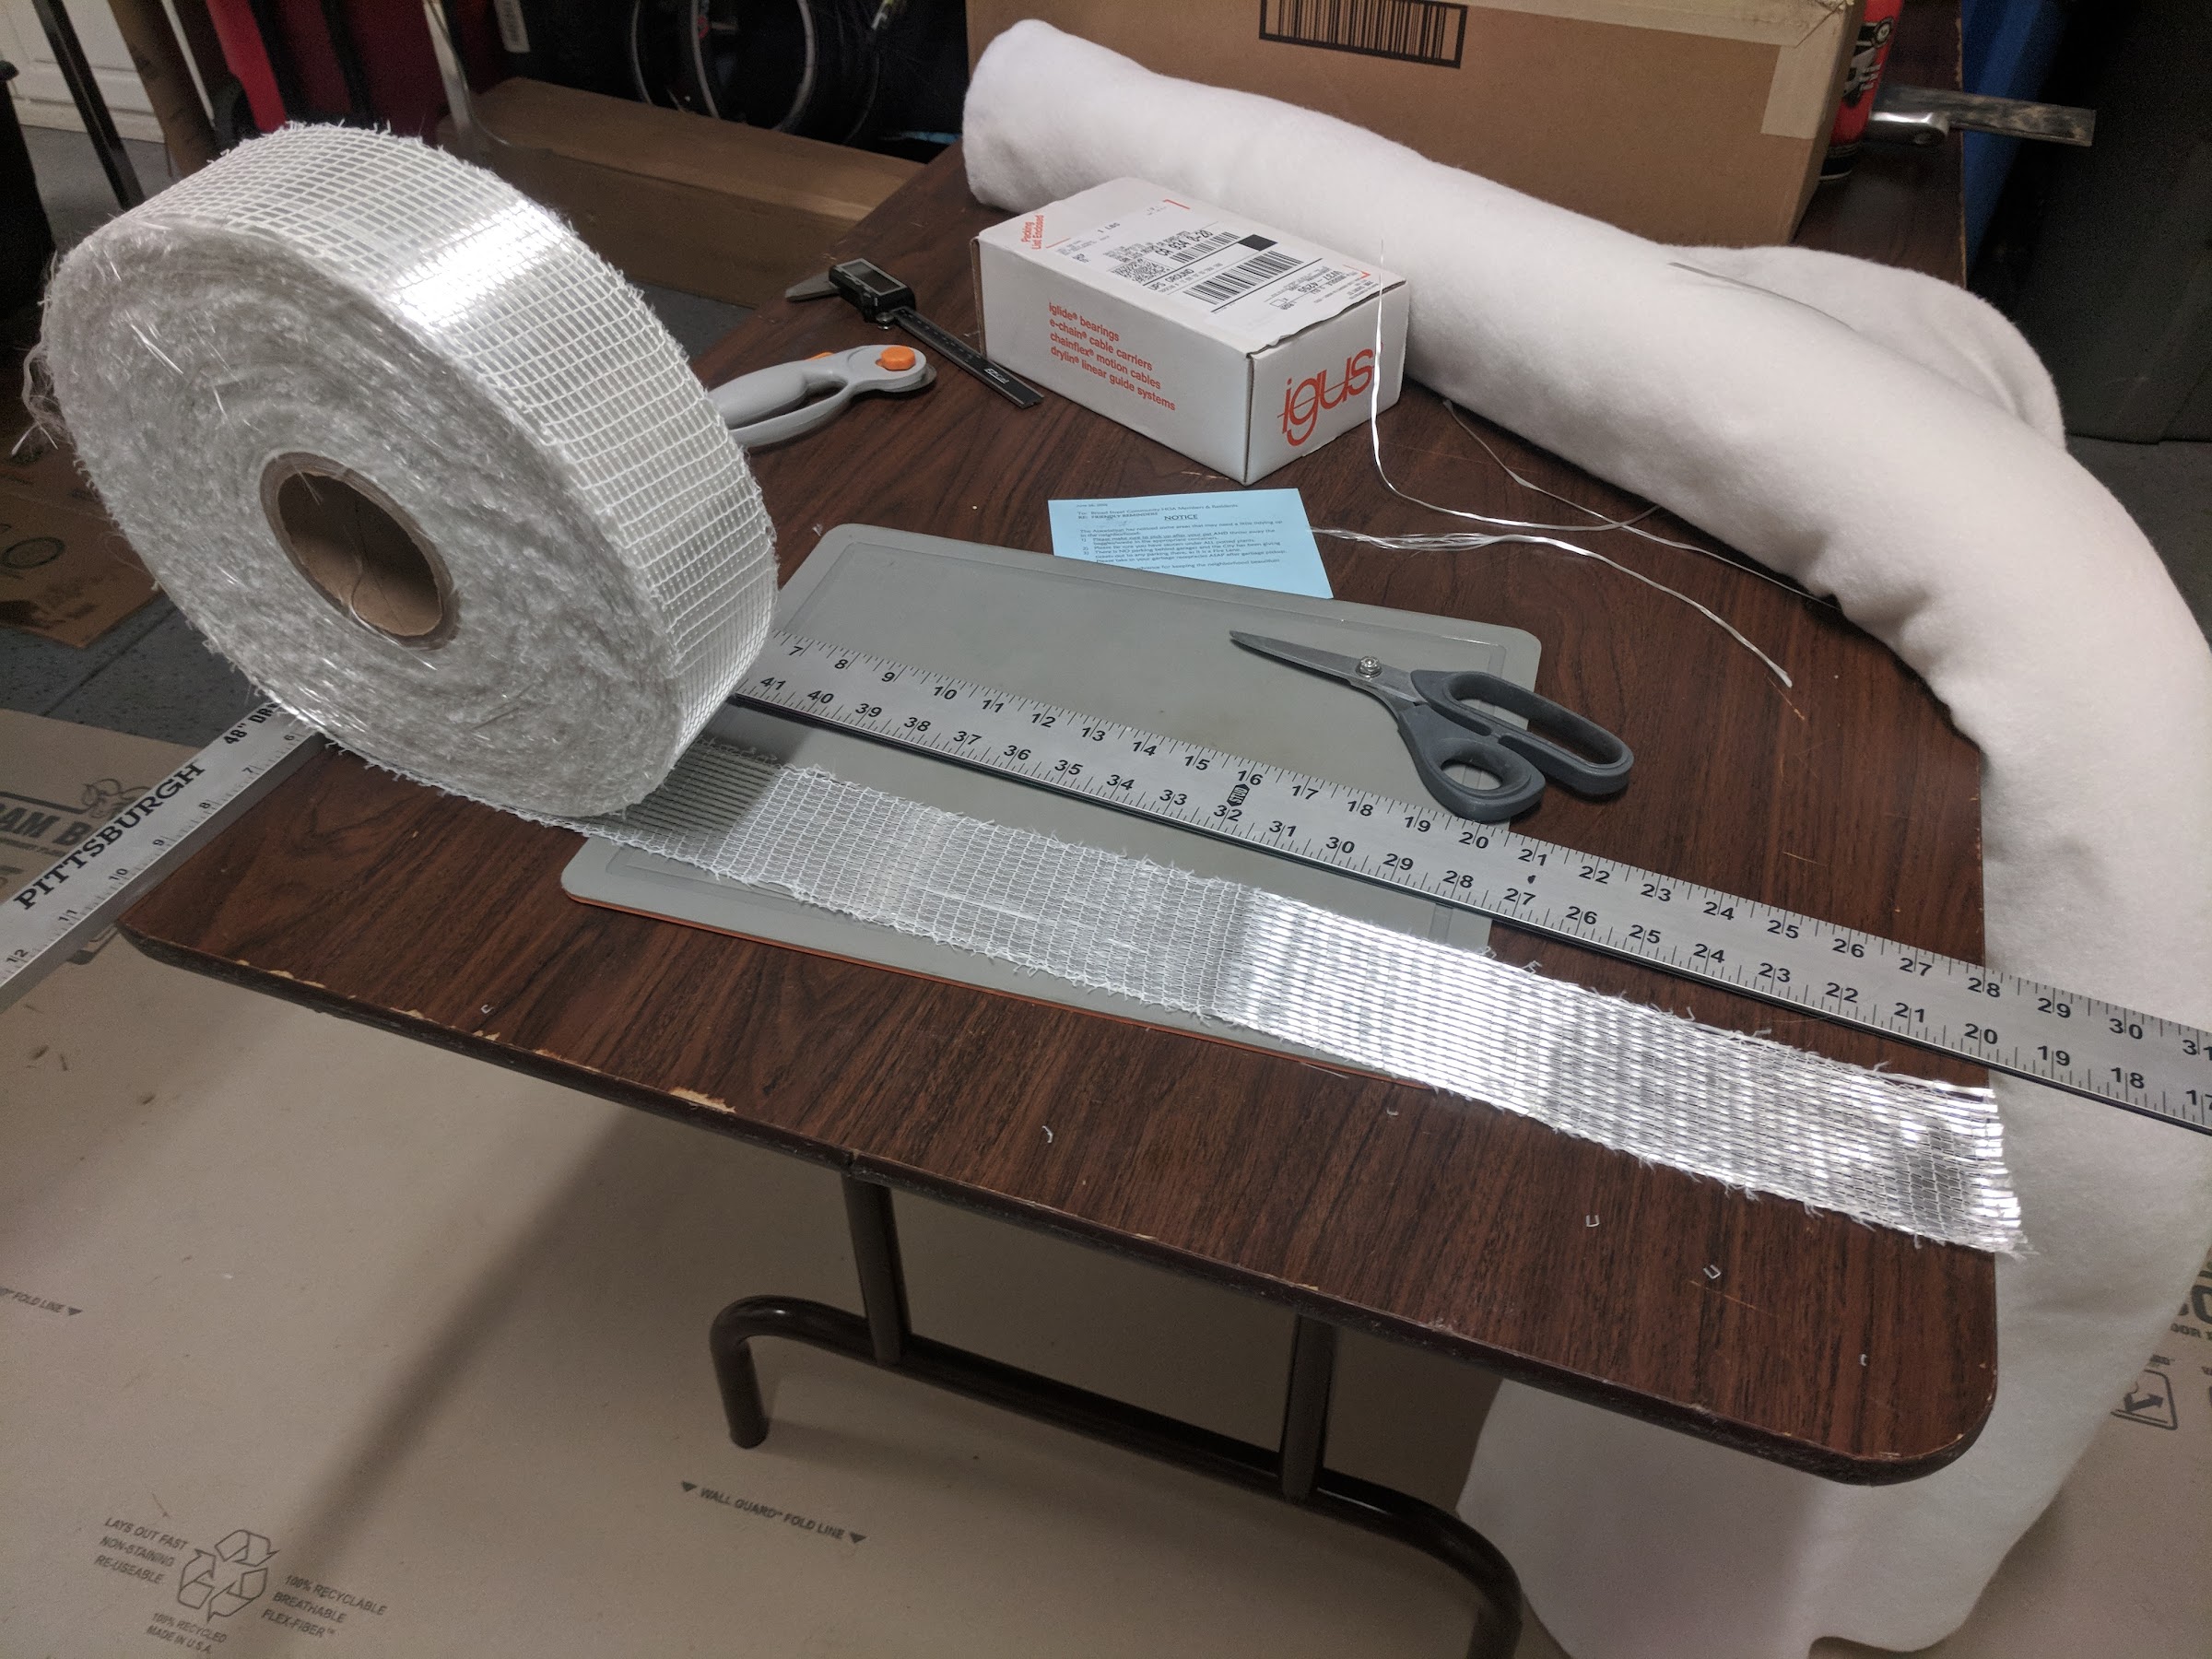
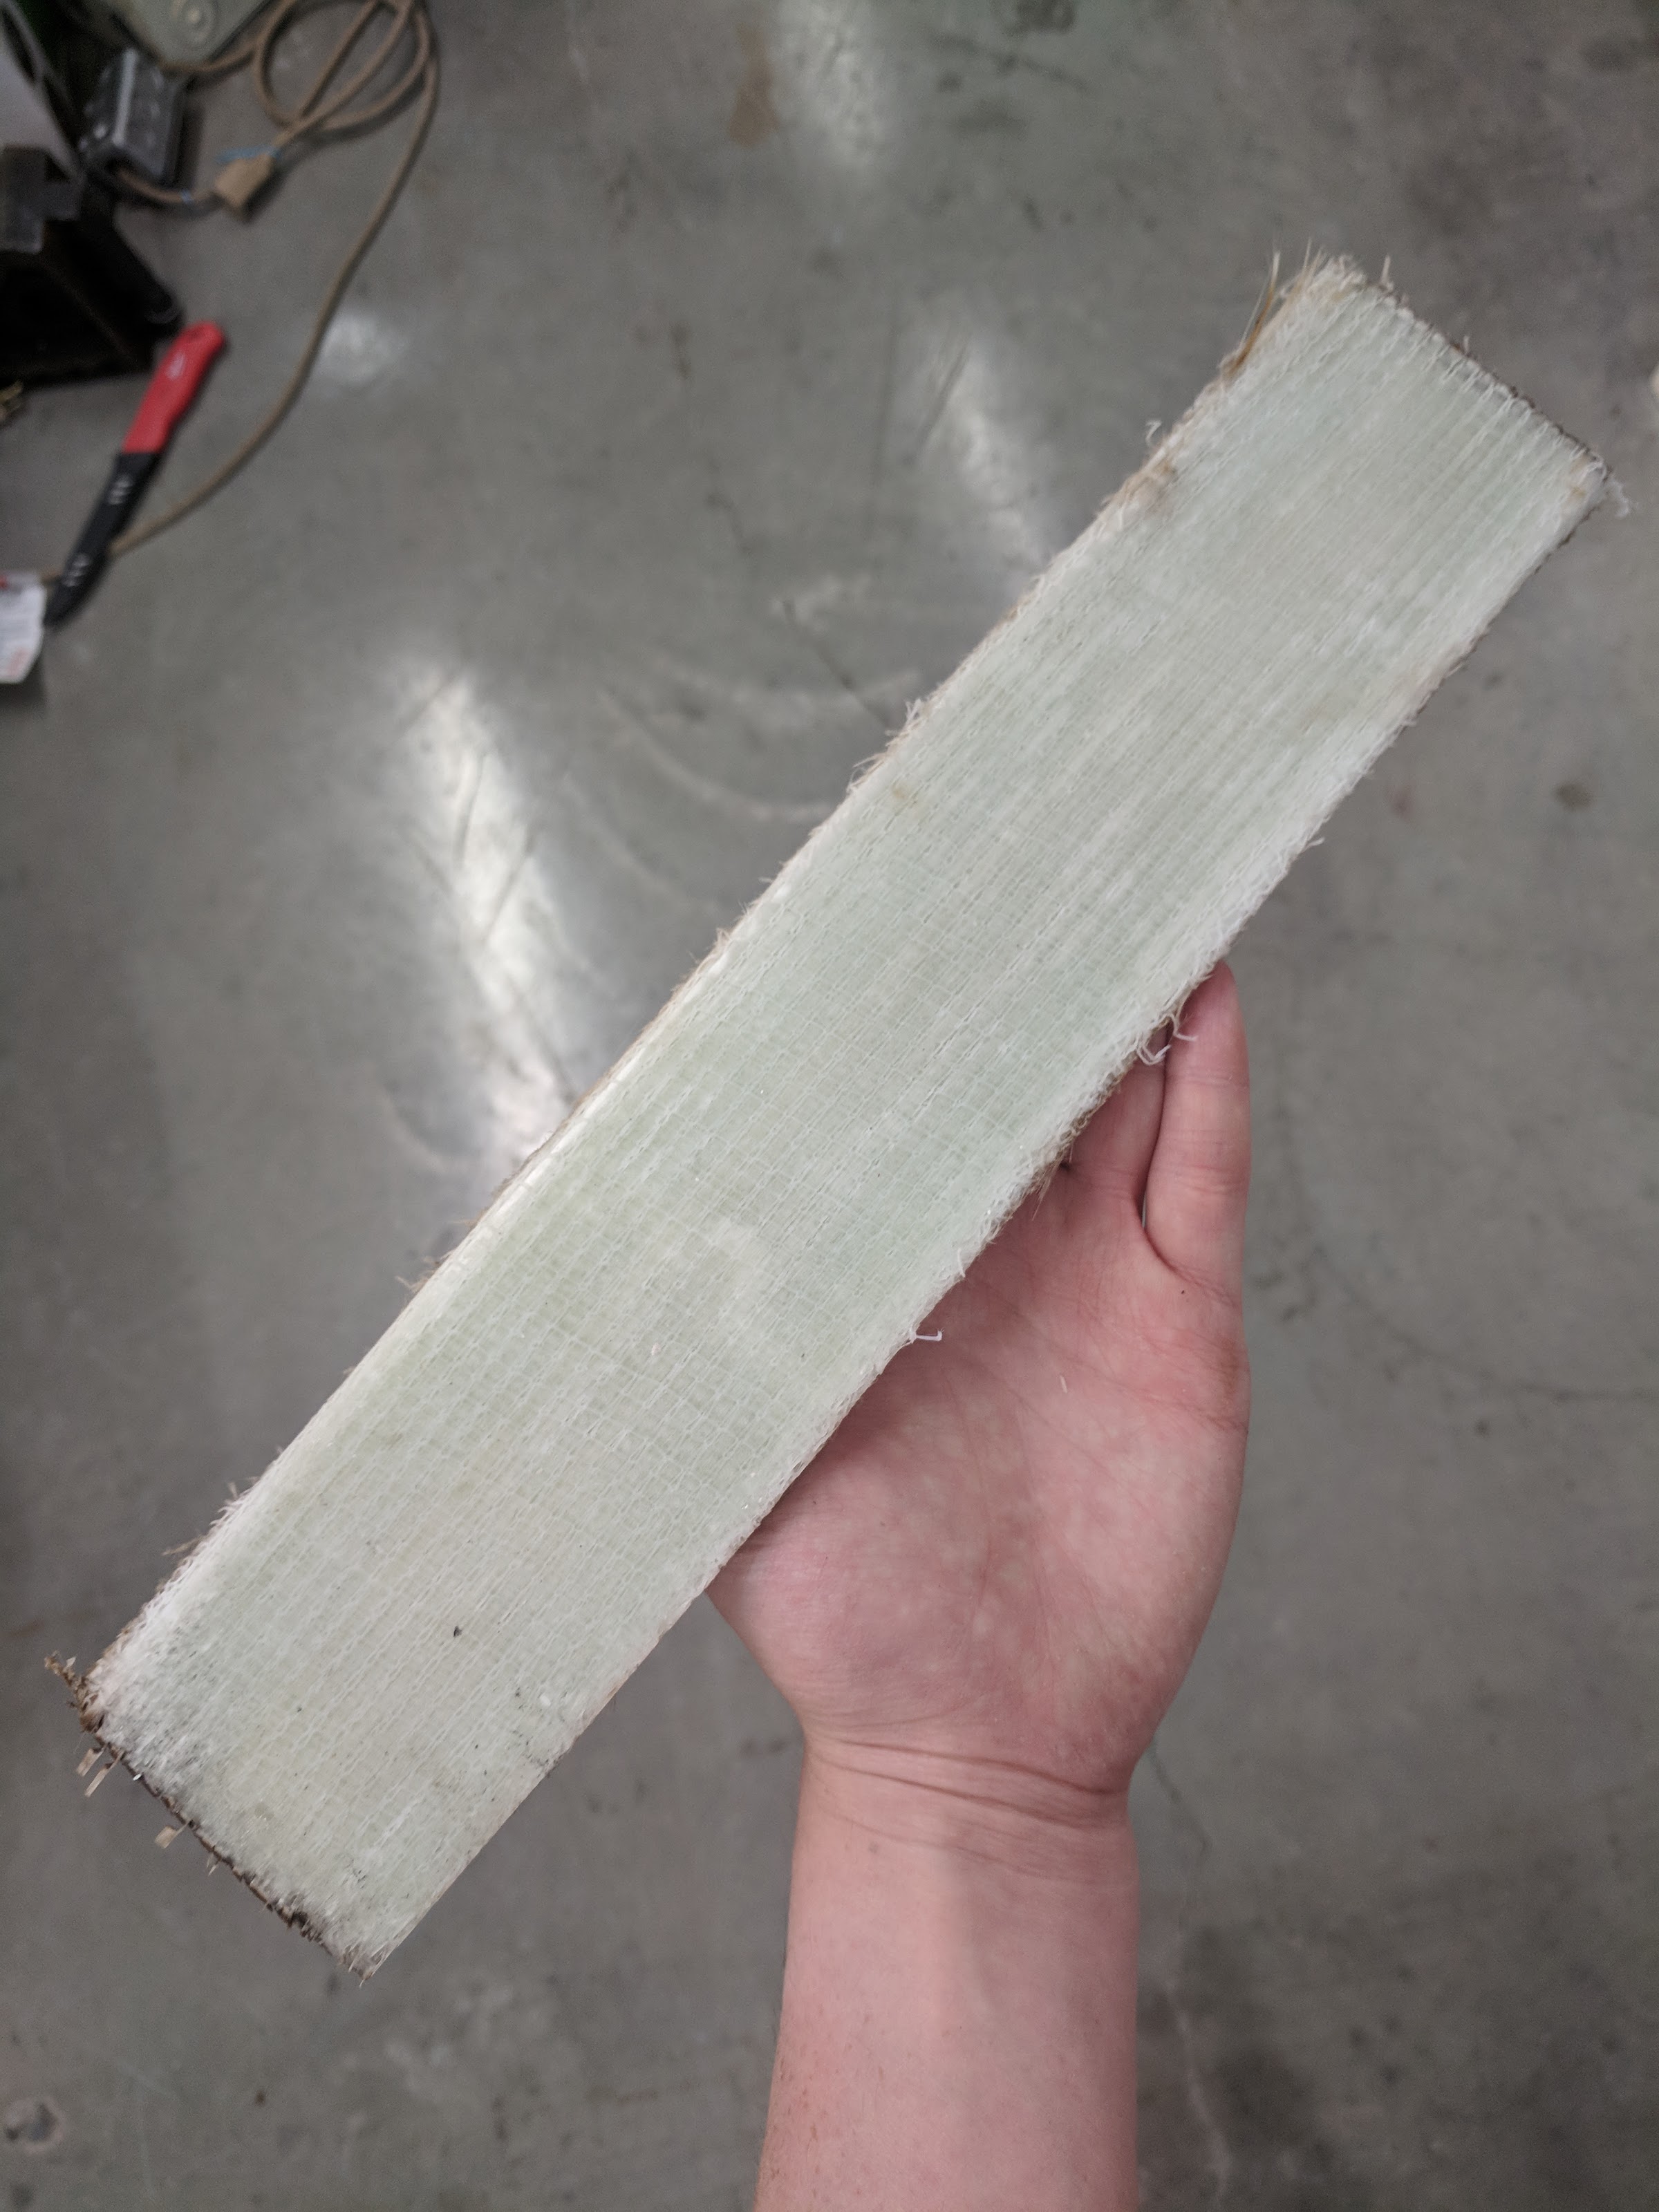
Front leaf springs are 22 layers of 10.35oz/sq-yd unidirectional fiberglass from US Composites, for a total thickness of just over 1/4".

GvJMnEXDTSDFjklsBOkCw9LfodJW900K9-4x7wI0U4vrClCq07WhA8_xT5KIq7V0lCsxAj4uzEbeZvkJOKBkW4zANfULKEI9grfuMr3wsQ1mgVX0qAnXqI6Mz7Z1RQ1b8Zx81seft30=w2400


6ALiPNGiKAjg5Uxz3QEJV45wXXxXBnvJc6iD9-hwGqM_gKIL1Y4tk4epixlgj21lTmFBFO3kMhvC6xvZxloDSc6CtDH45fSwZVsQB0H9c_WjxWKCoE27vXgDYTwGhN0sGgNNzNP5_ks=w2400


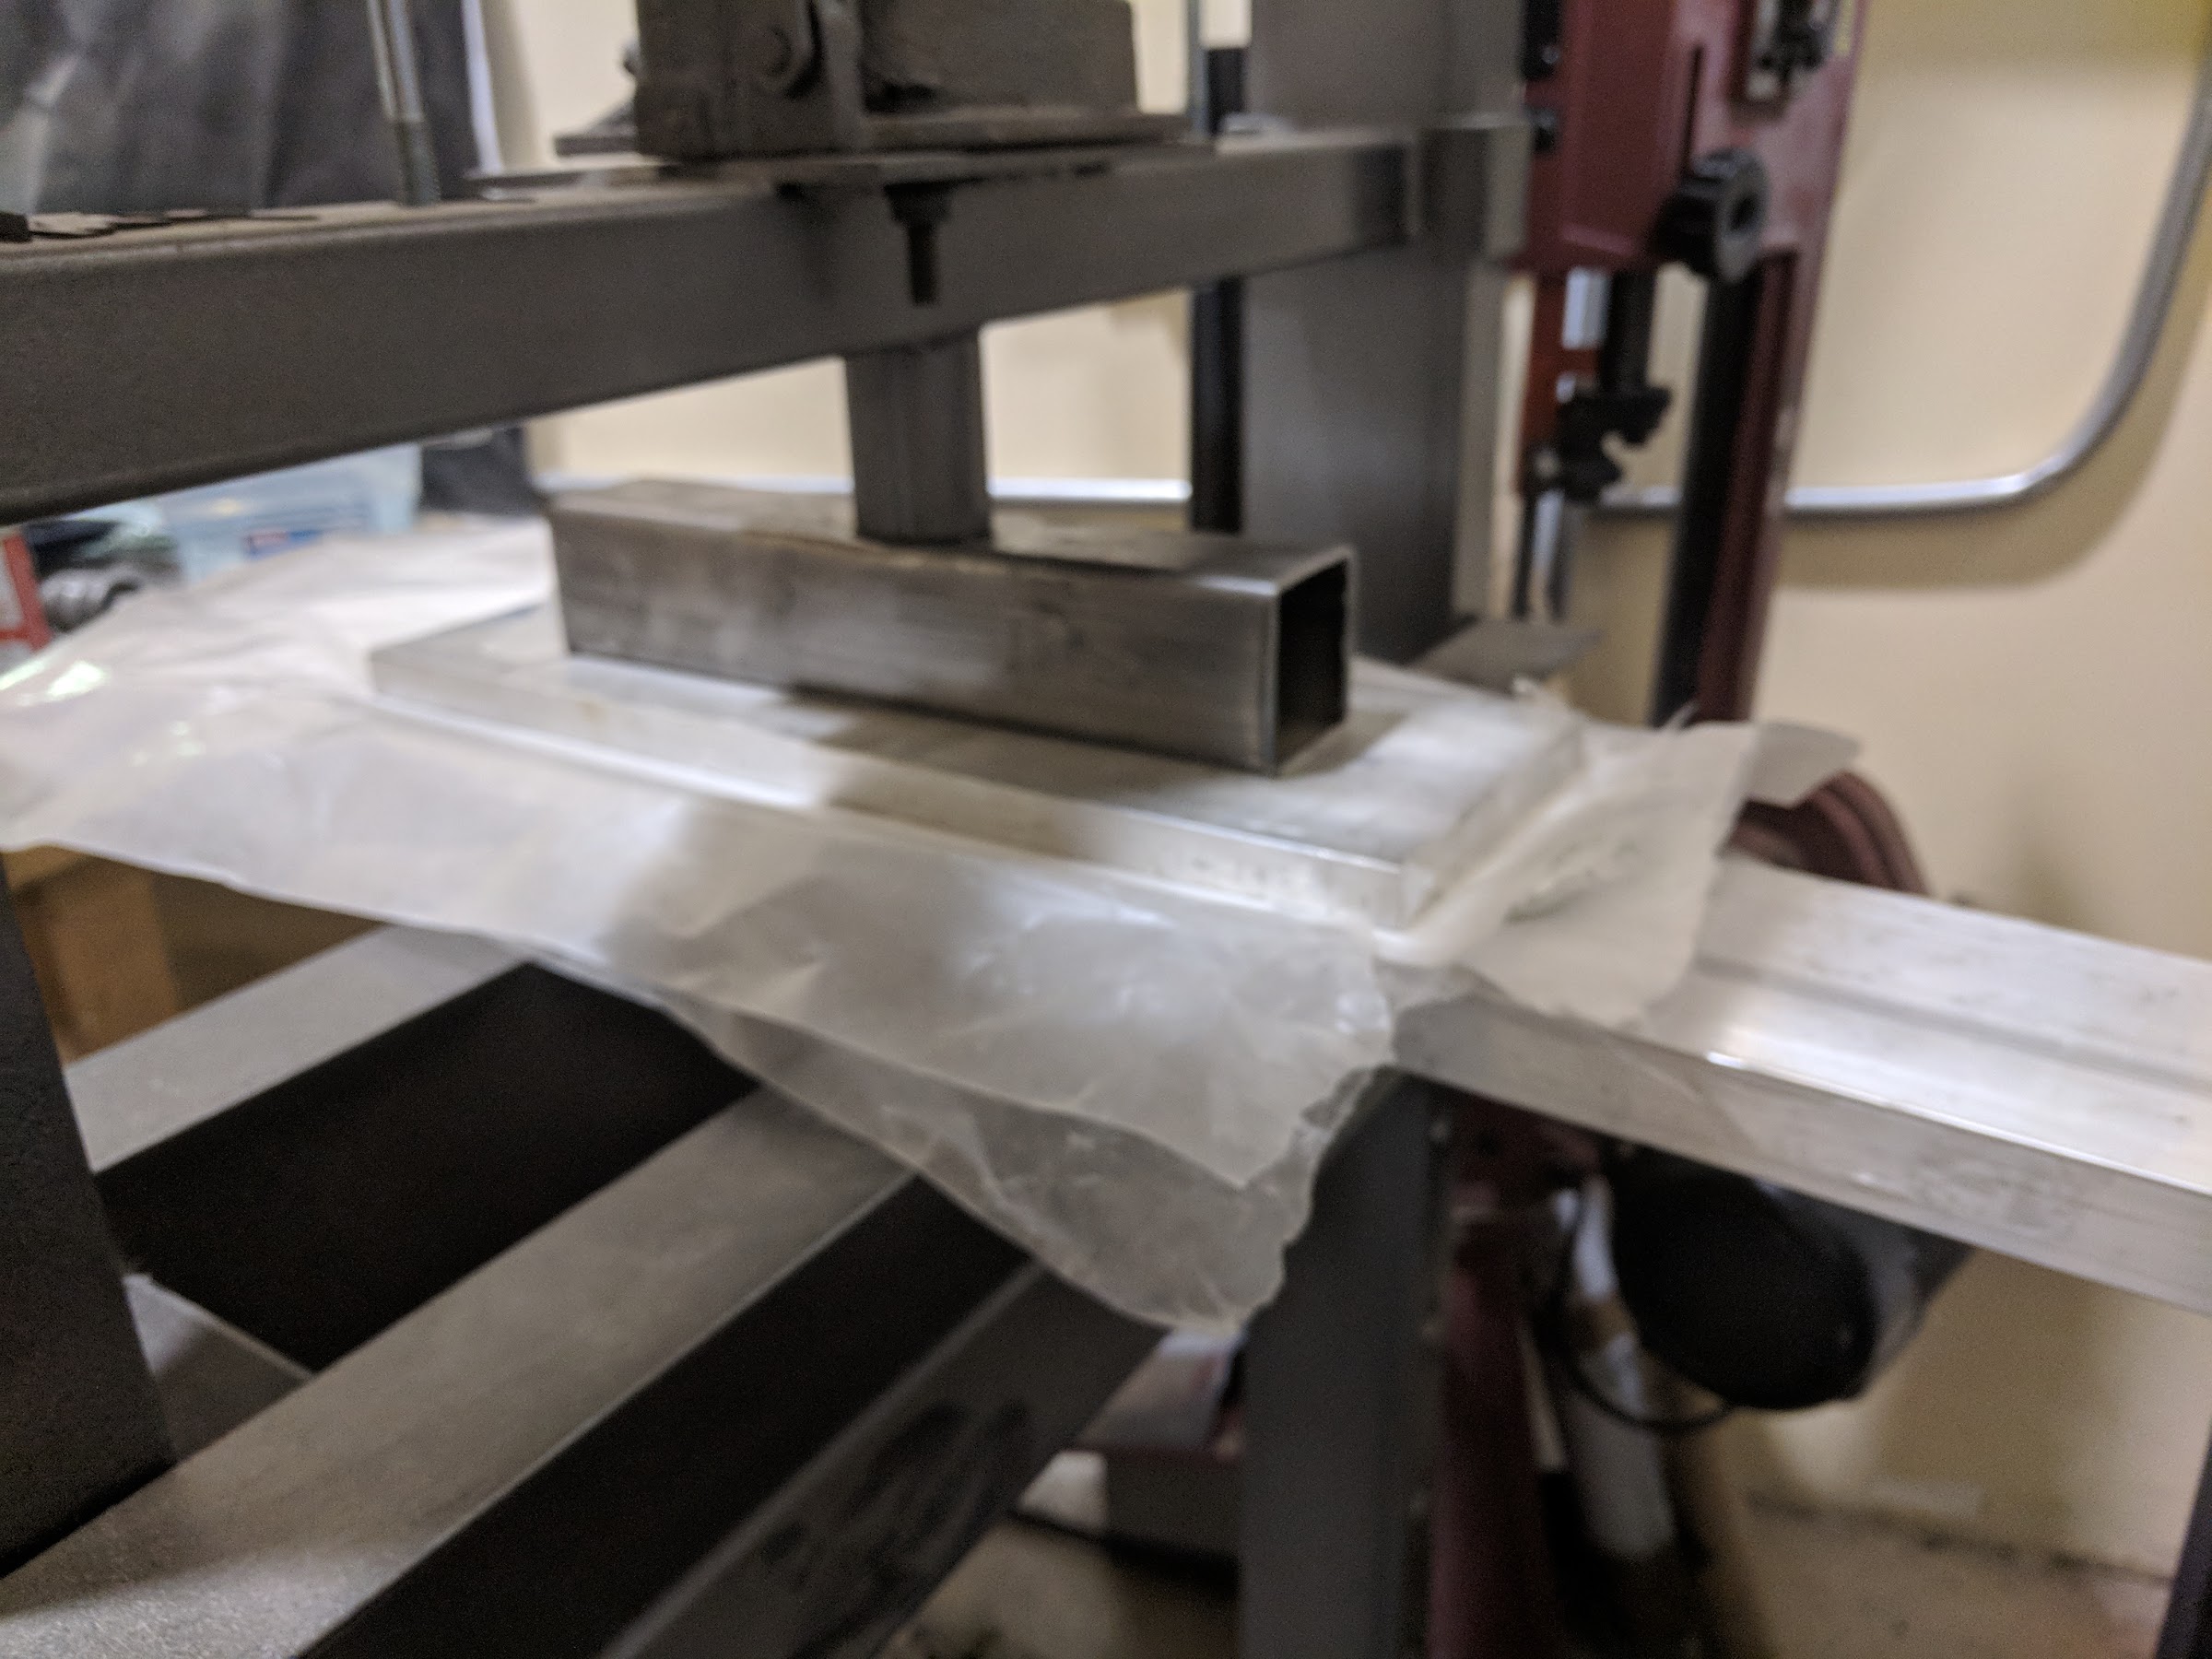
Here it is straight out of the press- it will look much better after some sanding!

ew85AicYmF1hGqHhakLF1OkNgvHbgjktOWAniA5VKeo0SGQCZfknh1OGnX7LBJEoNWNL39tz5bw9Q8_kEg4-U_4ViQaE_lMFEm4fWRGq4UGPx6DEdWZw7xVxmXBPQSHnhFRAX6eHl1g=w2400


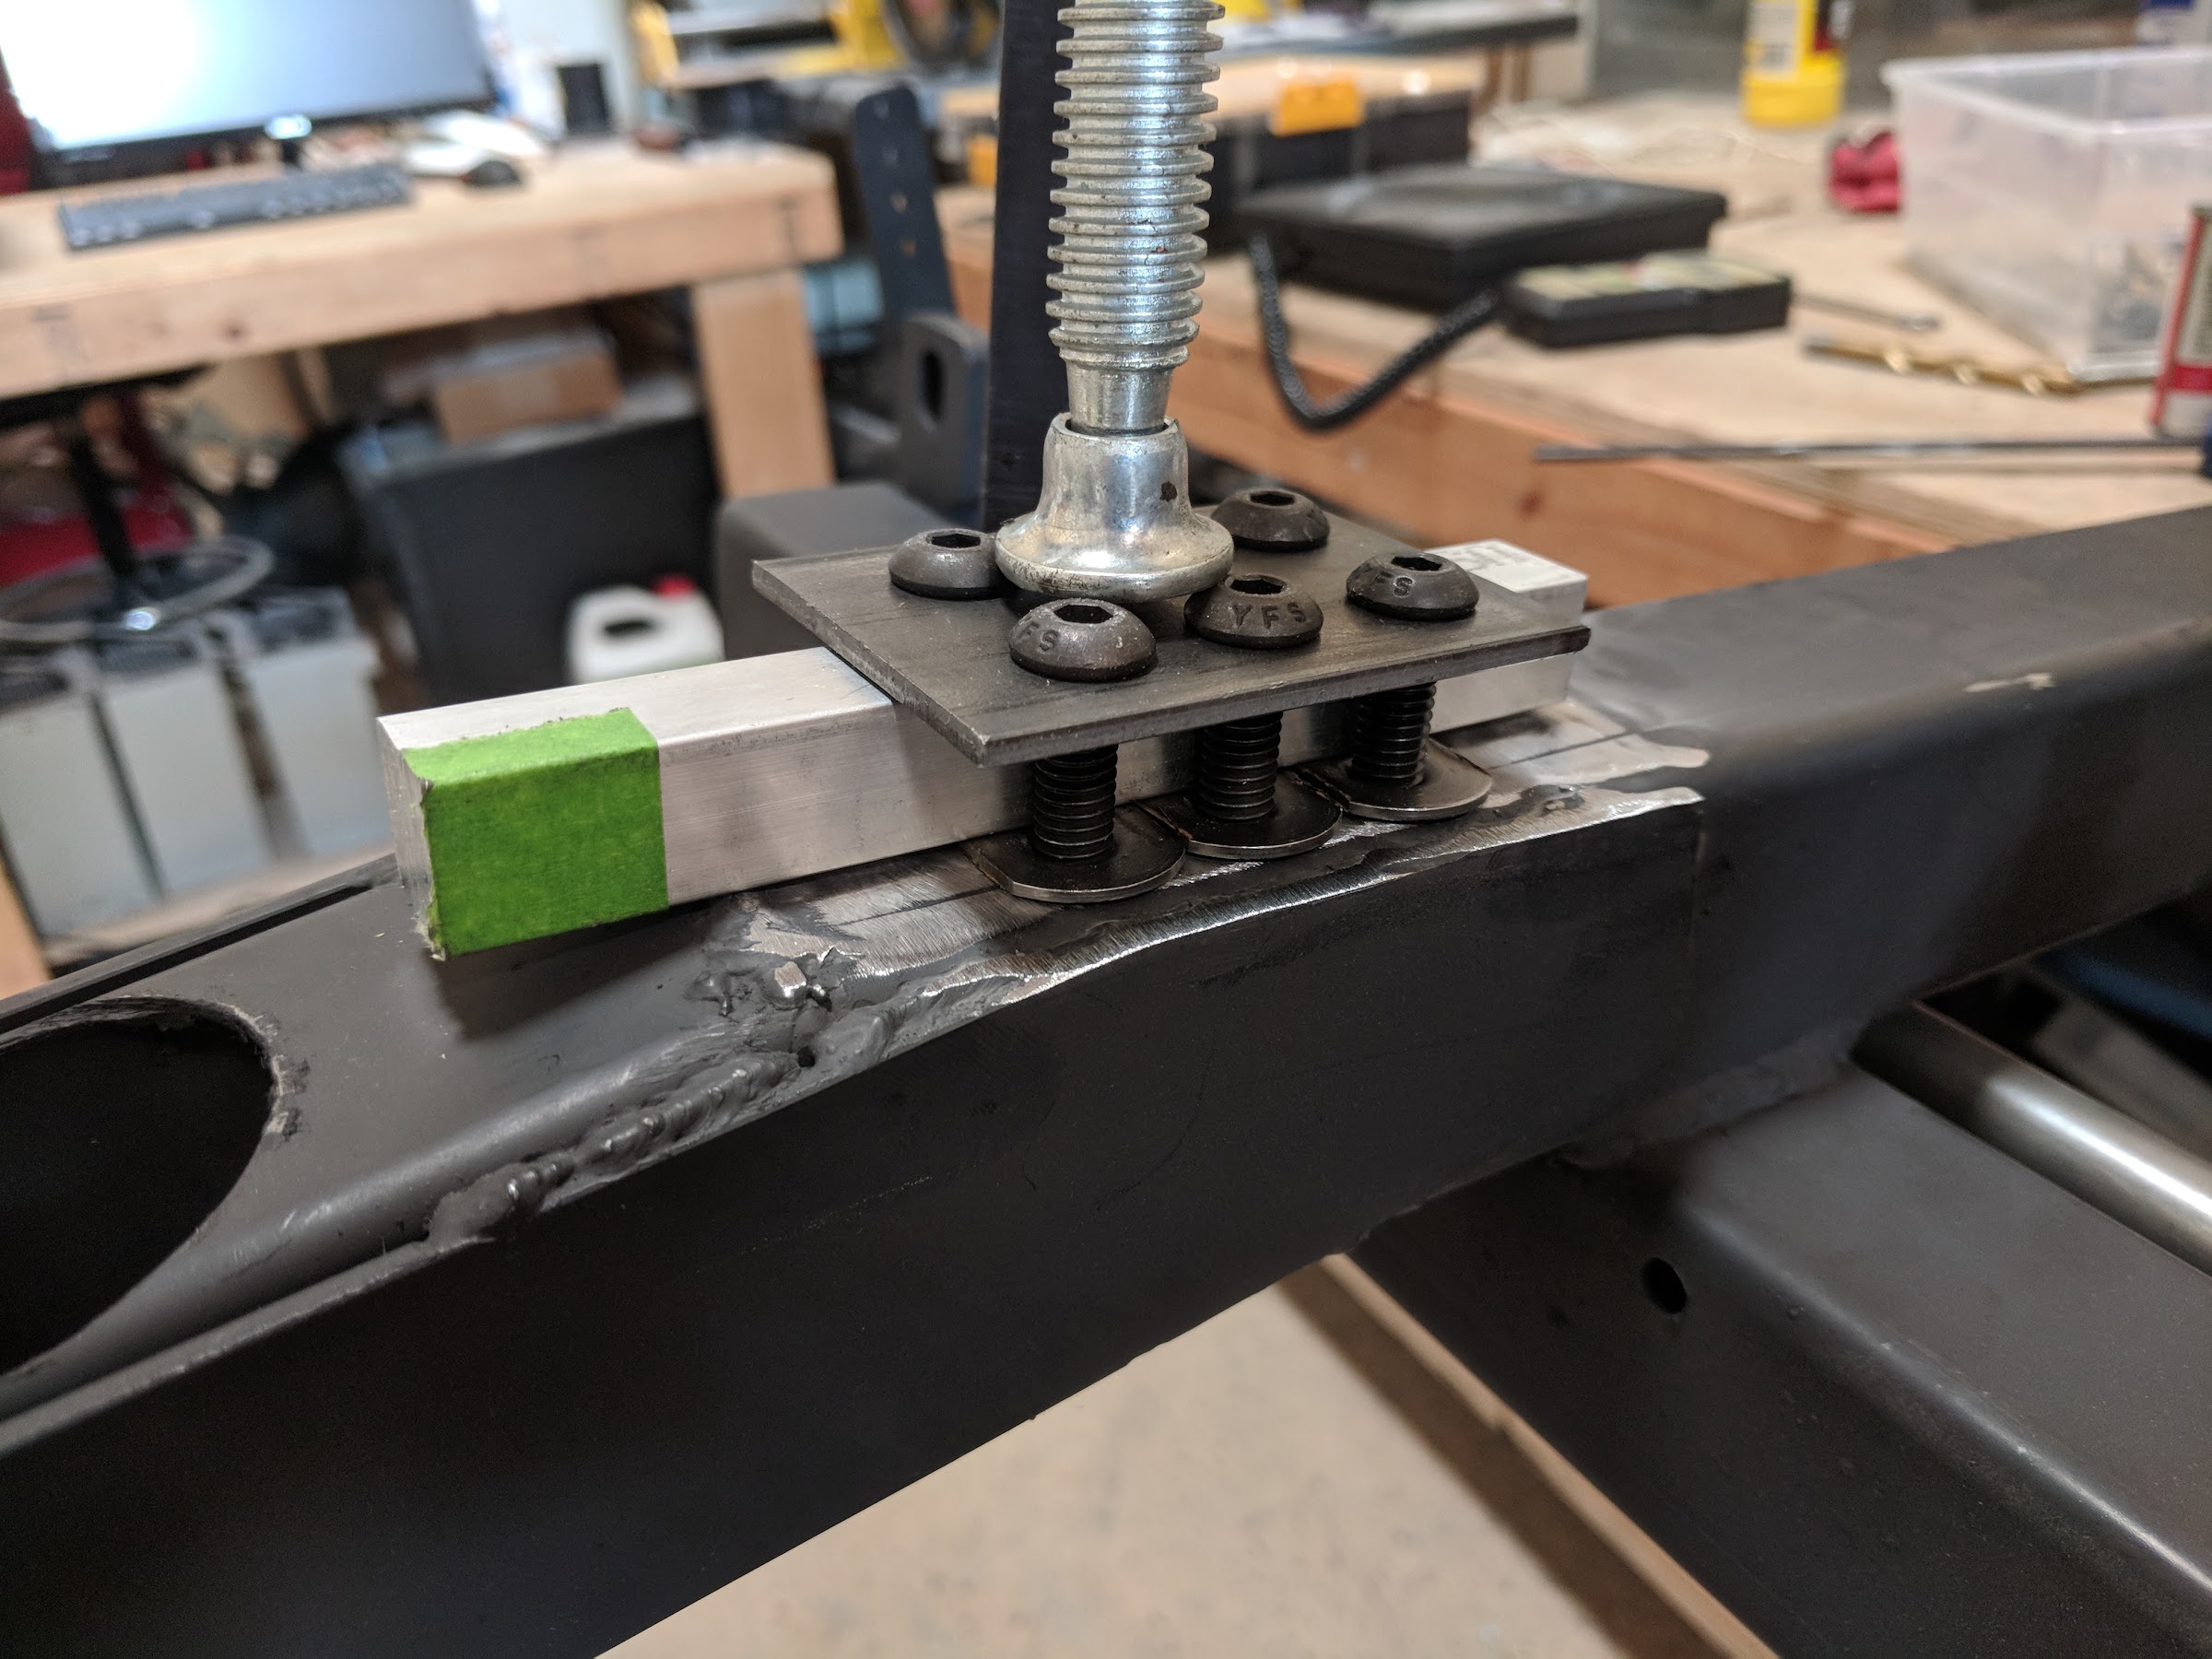
The leaf springs were bolted into weld nuts, which were leveled off with some JB weld. (not shown)

-vfMFKSRTw0k3PFMMpXkD53OjE1ekB5XsWNBGlkcL2RVzoqXR0ZrAVV7Xb7nRZah9C9H-B5PKp2Pyq9s-HupUiMvU_SJmCPe9AKV1-_NiHbMIB1VRPDZjRkl2QOn_dXWzuEiK9ZFiY4=w2400


YFb0AFz6xSpMya8W2mPBo5zdkkfkGkHyHtRtQ5CKpFC2WA5oJGDDp_2-ZOCr84ltaCM3BjUfC_-2ygp1IJ7ZbJ1U1uuv3IbhlgMVfncSOEt72TfqDiubNAqJ1C2u5ajz-SWK1EHjEGQ=w2400


yokETxq3sQbhNRPEjFSb7ltSbpicVQm8Z-0DZ7289kegFK6AxXqHLIqz7nXV7ldWG0jRwKgA8NCl6ojNDPMvluRWC6xxWB_T5Lm6iiVzYl2qf0aITtQIk4b8eZQLL6D0NyUULOMUBQg=w2400


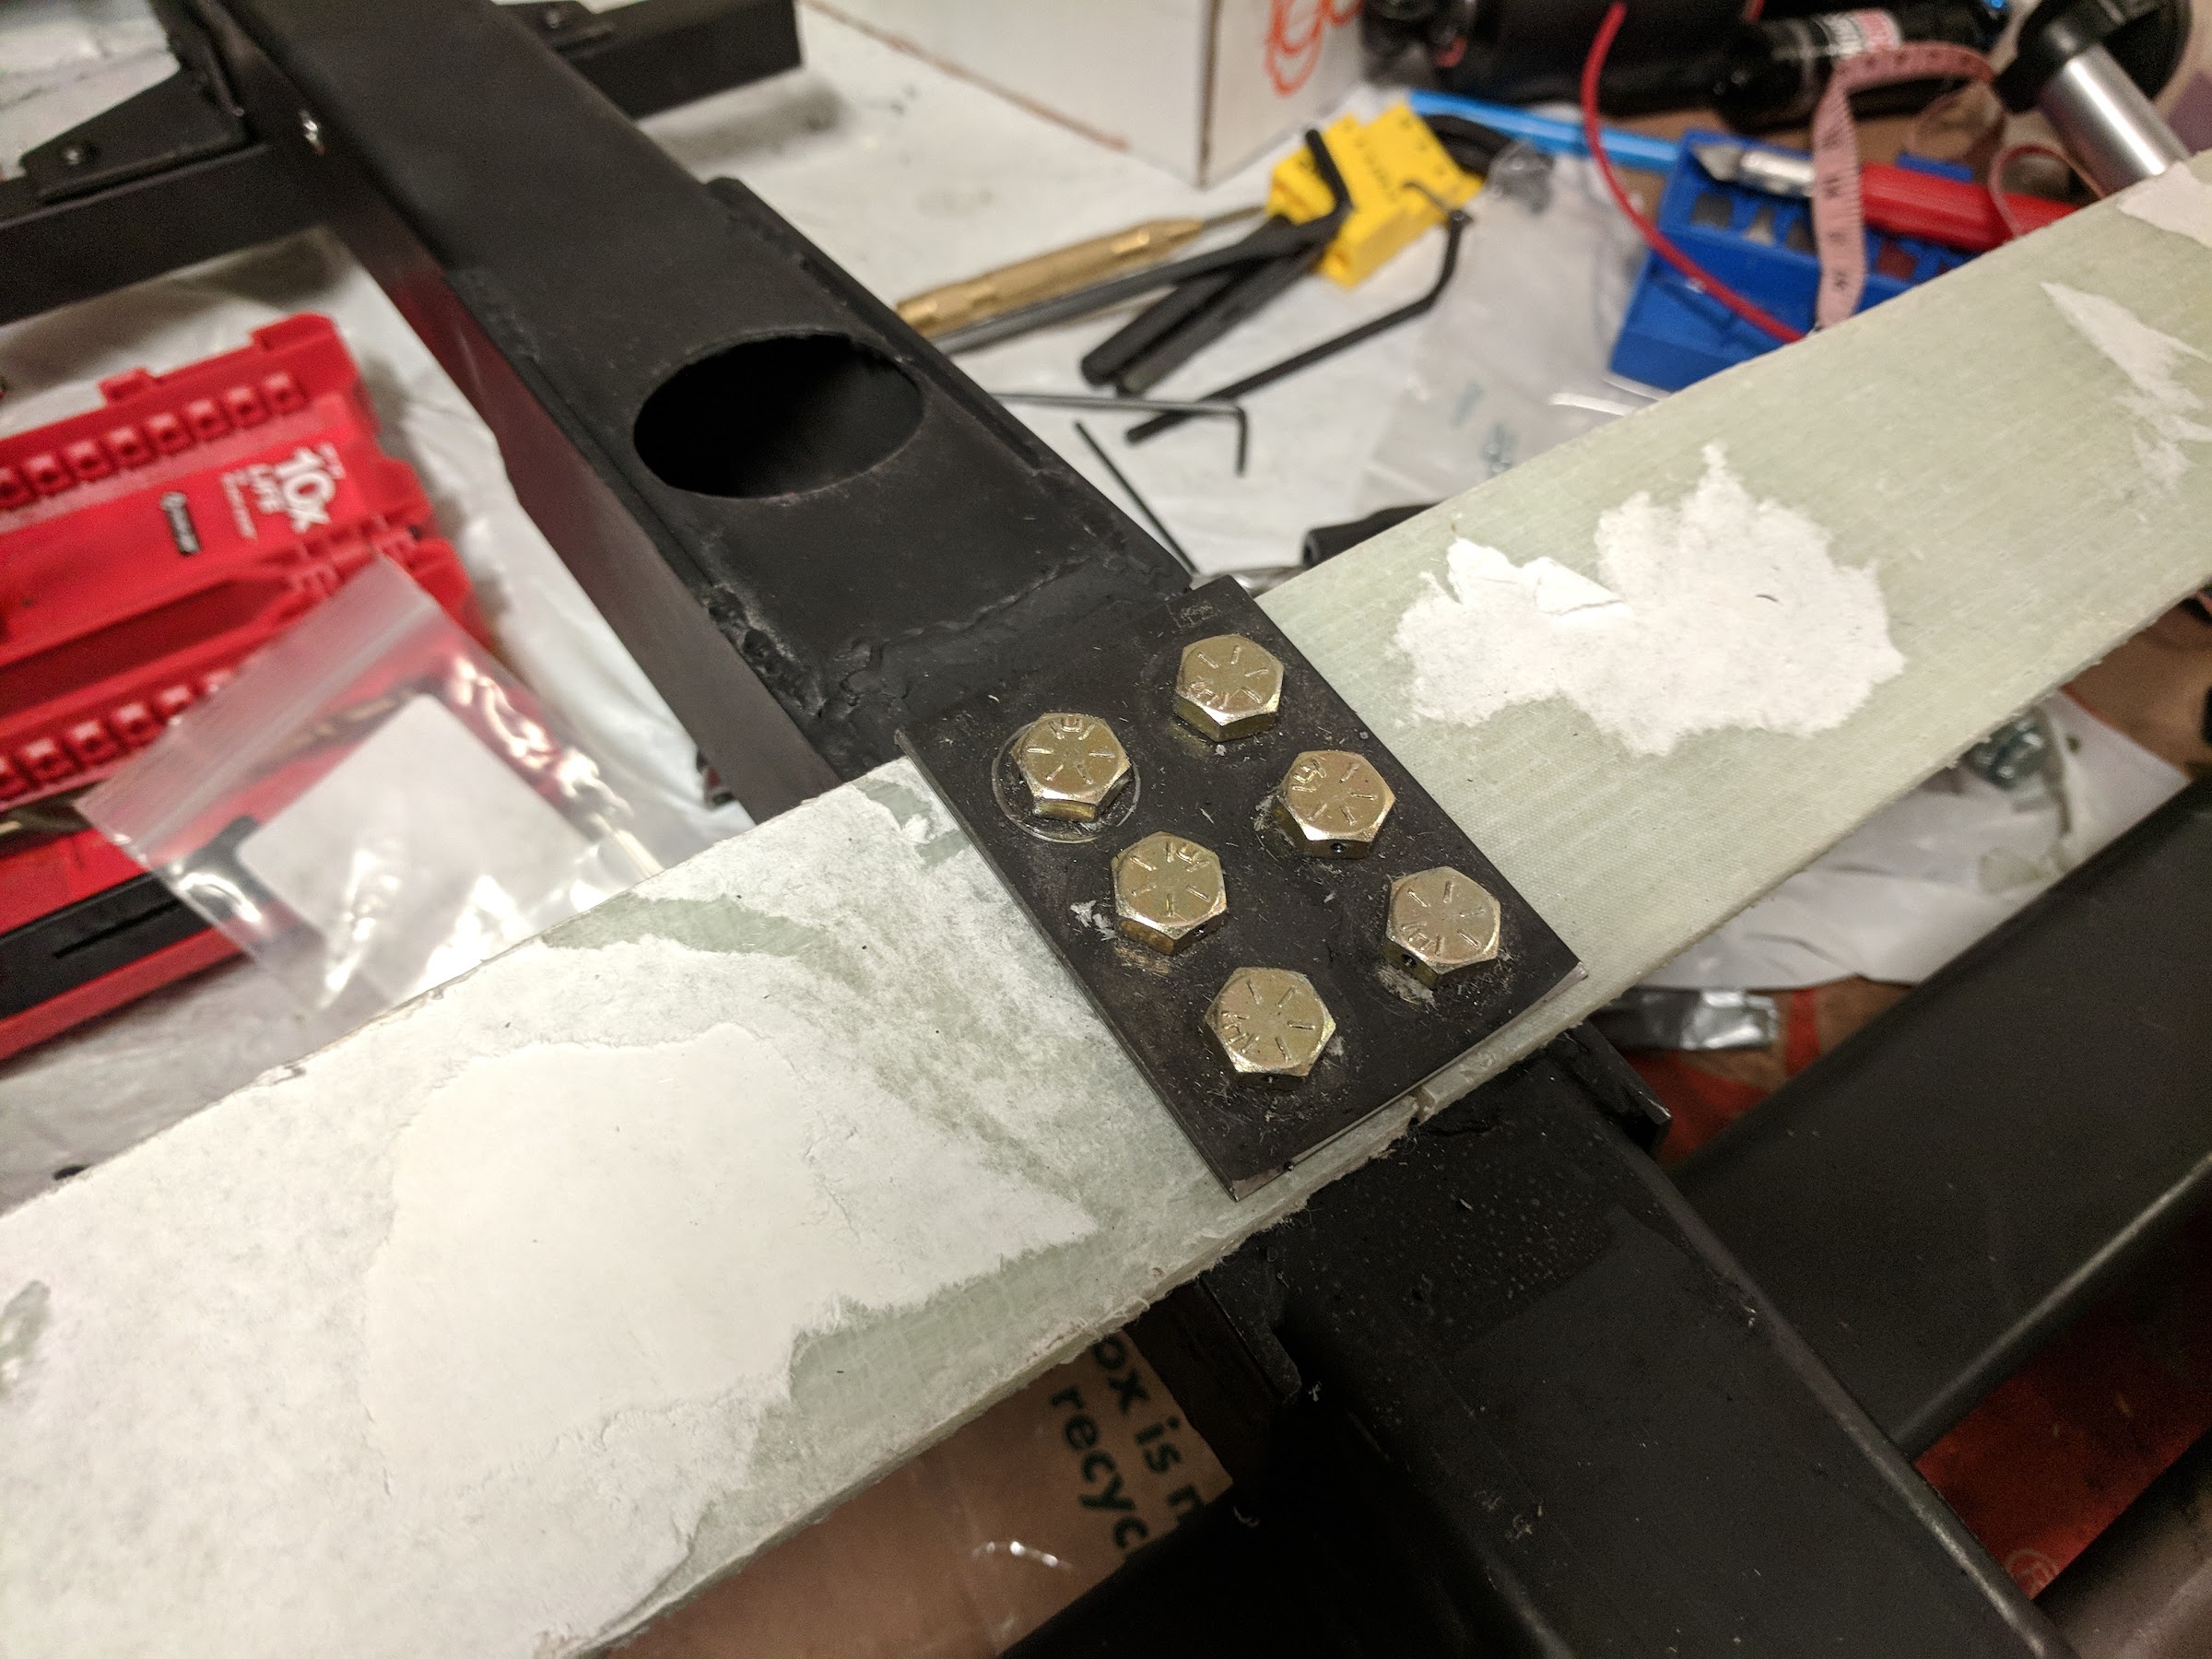
After cutting, sanding, and adding cross-plys (one of the bolts is a bit short currently- oops!):

se887usJlGUPdetkqzp_bAAR8o5I8dxRIDwfuhtLWwTx2Jtl_zz1W9Zqt06Loaum6HXBTh12AbNEFn_Riy-E-HG1Wm714xK3Nkey08aUqLLqrJuWdRzKNXzRsJie-x9D6DsxxnMqok8=w2400


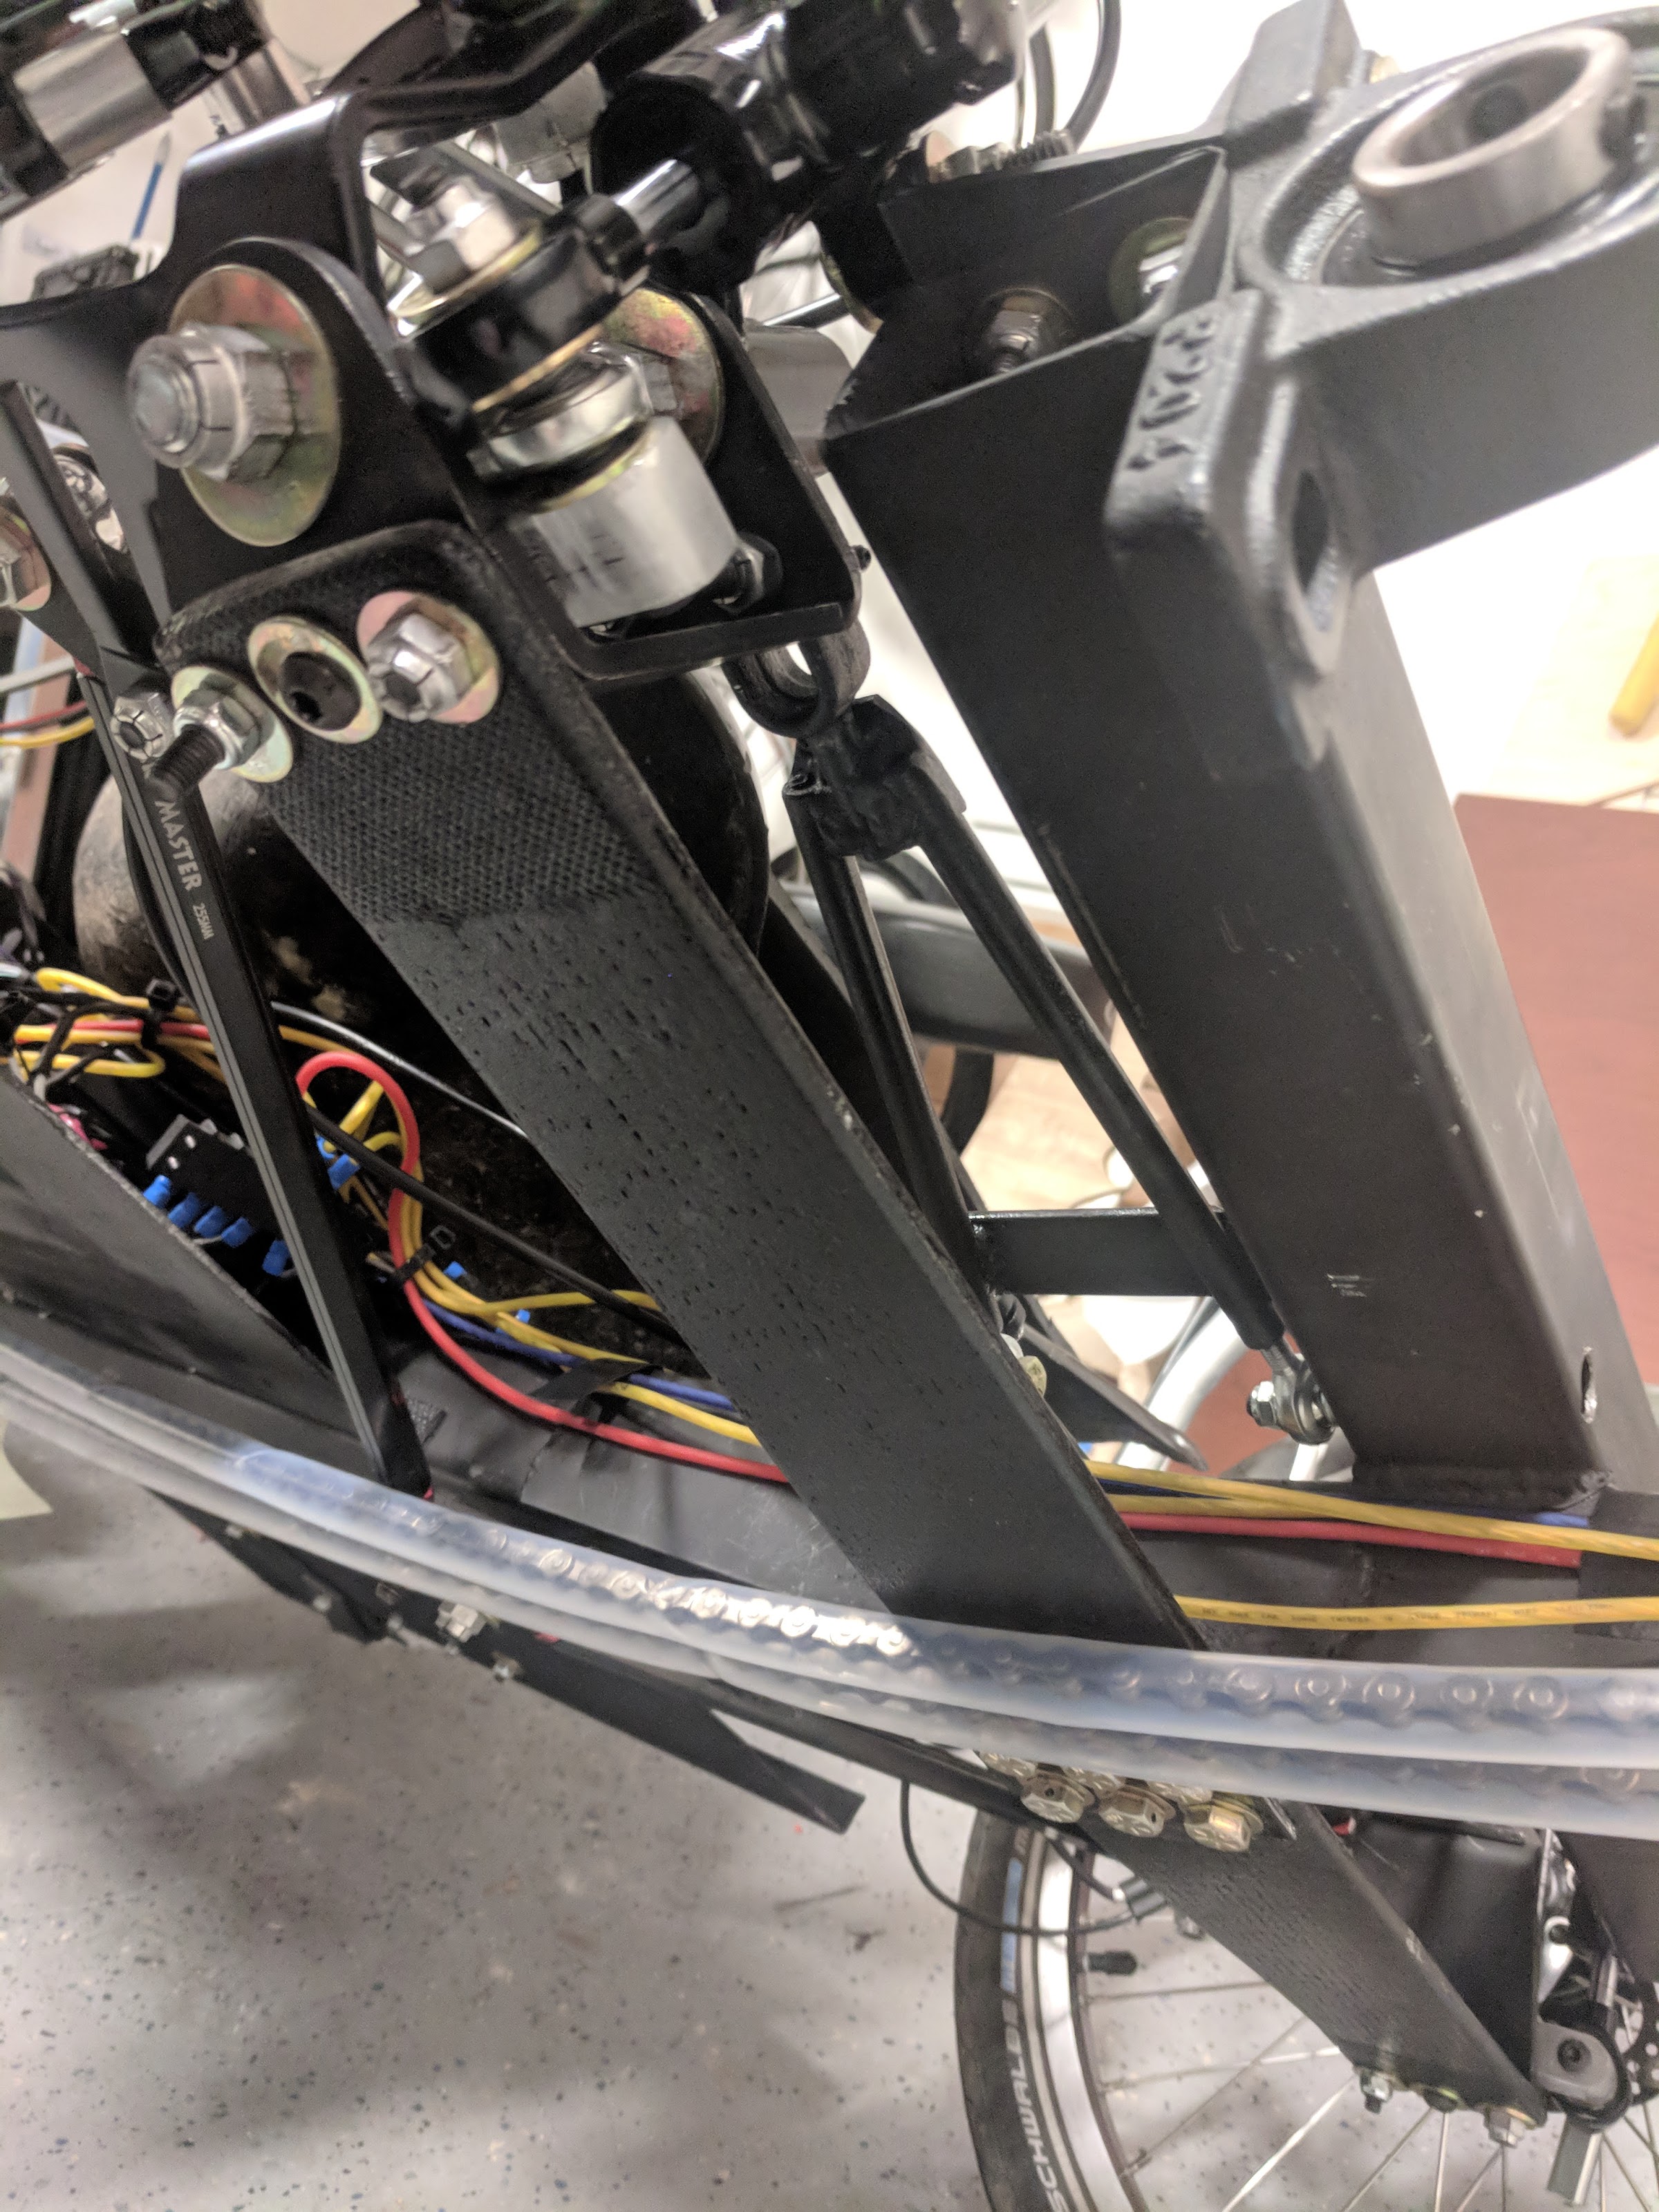
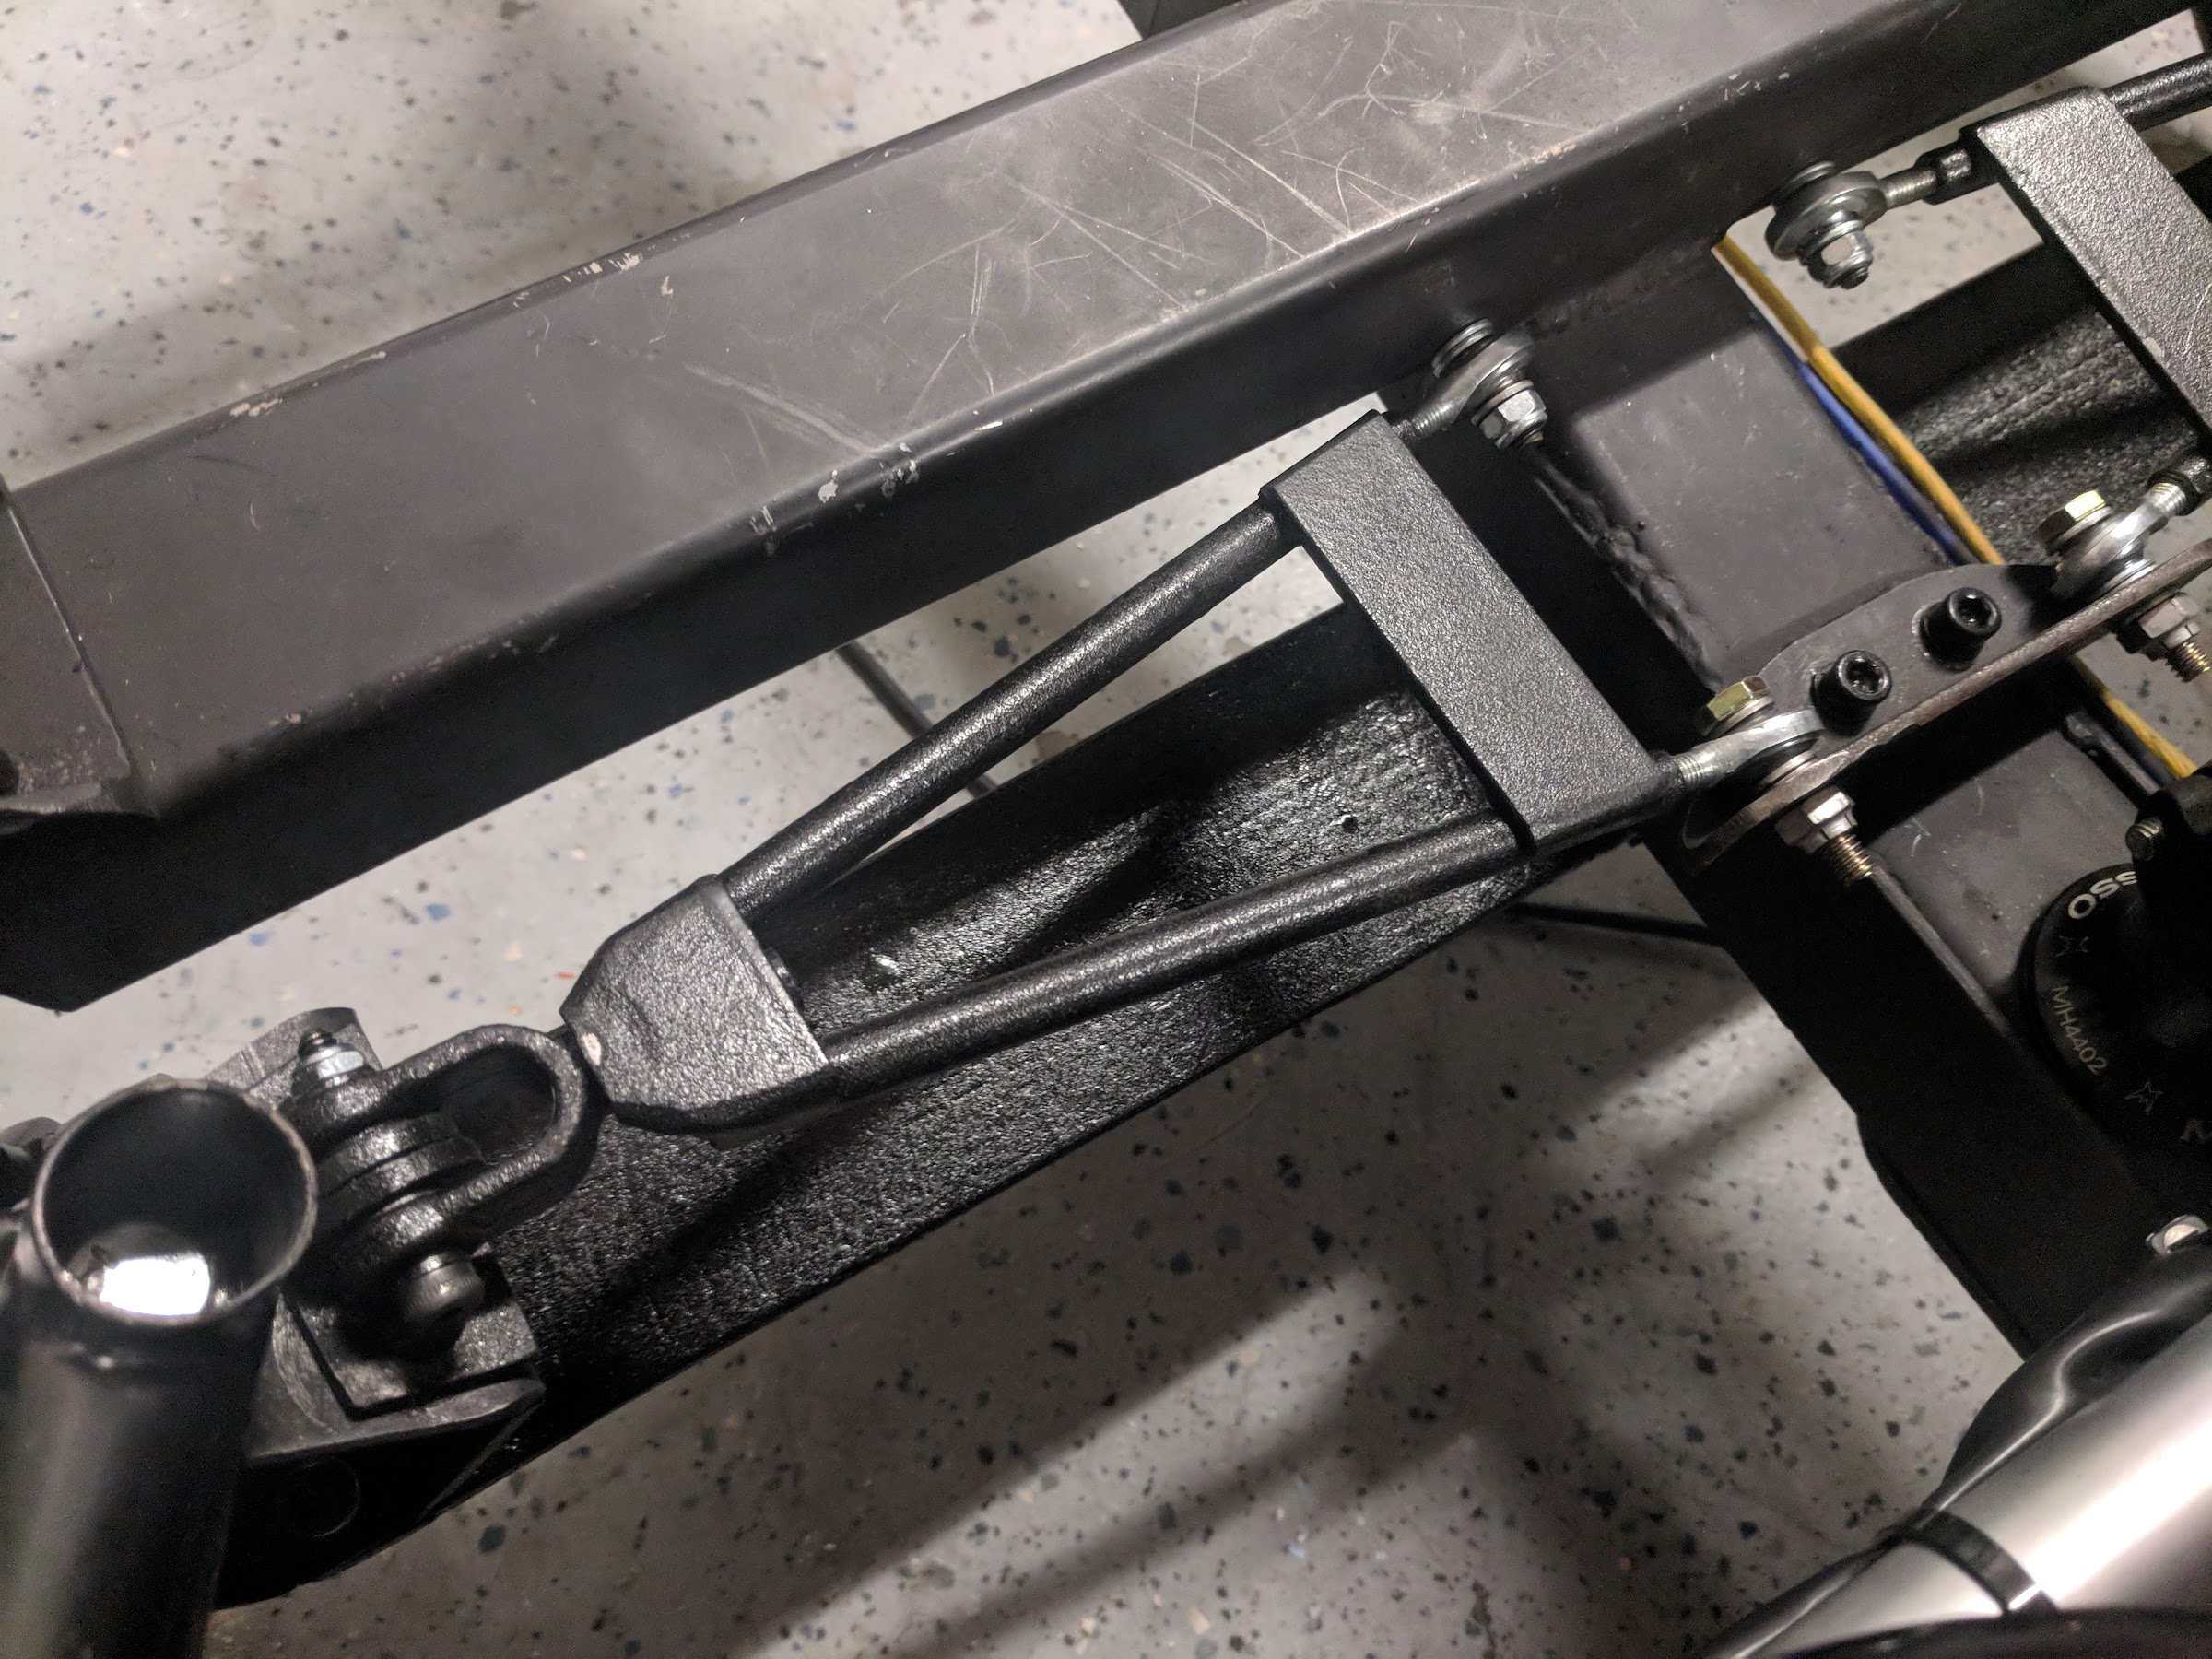
And here's the completed front suspension and steering assembly.

uKSP2gPkxRA536d_6reRgOZ7K7By1rtpF11hlOGJBIm_2ZoV8SCcpcFzIE8rLgbjMTCitJPn9TWhTuy-oBTzABDPQpbBfWxkgx0VK3fq2Wjfo7JLe7o1AmtiUuwML6nJYQR7fVRW8P0=w2400


7HCCqB-lLKdhZWFcshzpuz2CIIHjcLdBZwf38zfZMctPRGqEWEgw0SyUiidEFIdVzfKv-sxmoCy-kQ1tJJCfhQ2eALNppx6gXsbWOYt8pOn6u8F9pC963TRsHeWTi5KYmFvAWGoB7OI=w2400


Stay tuned for updates in the near future!
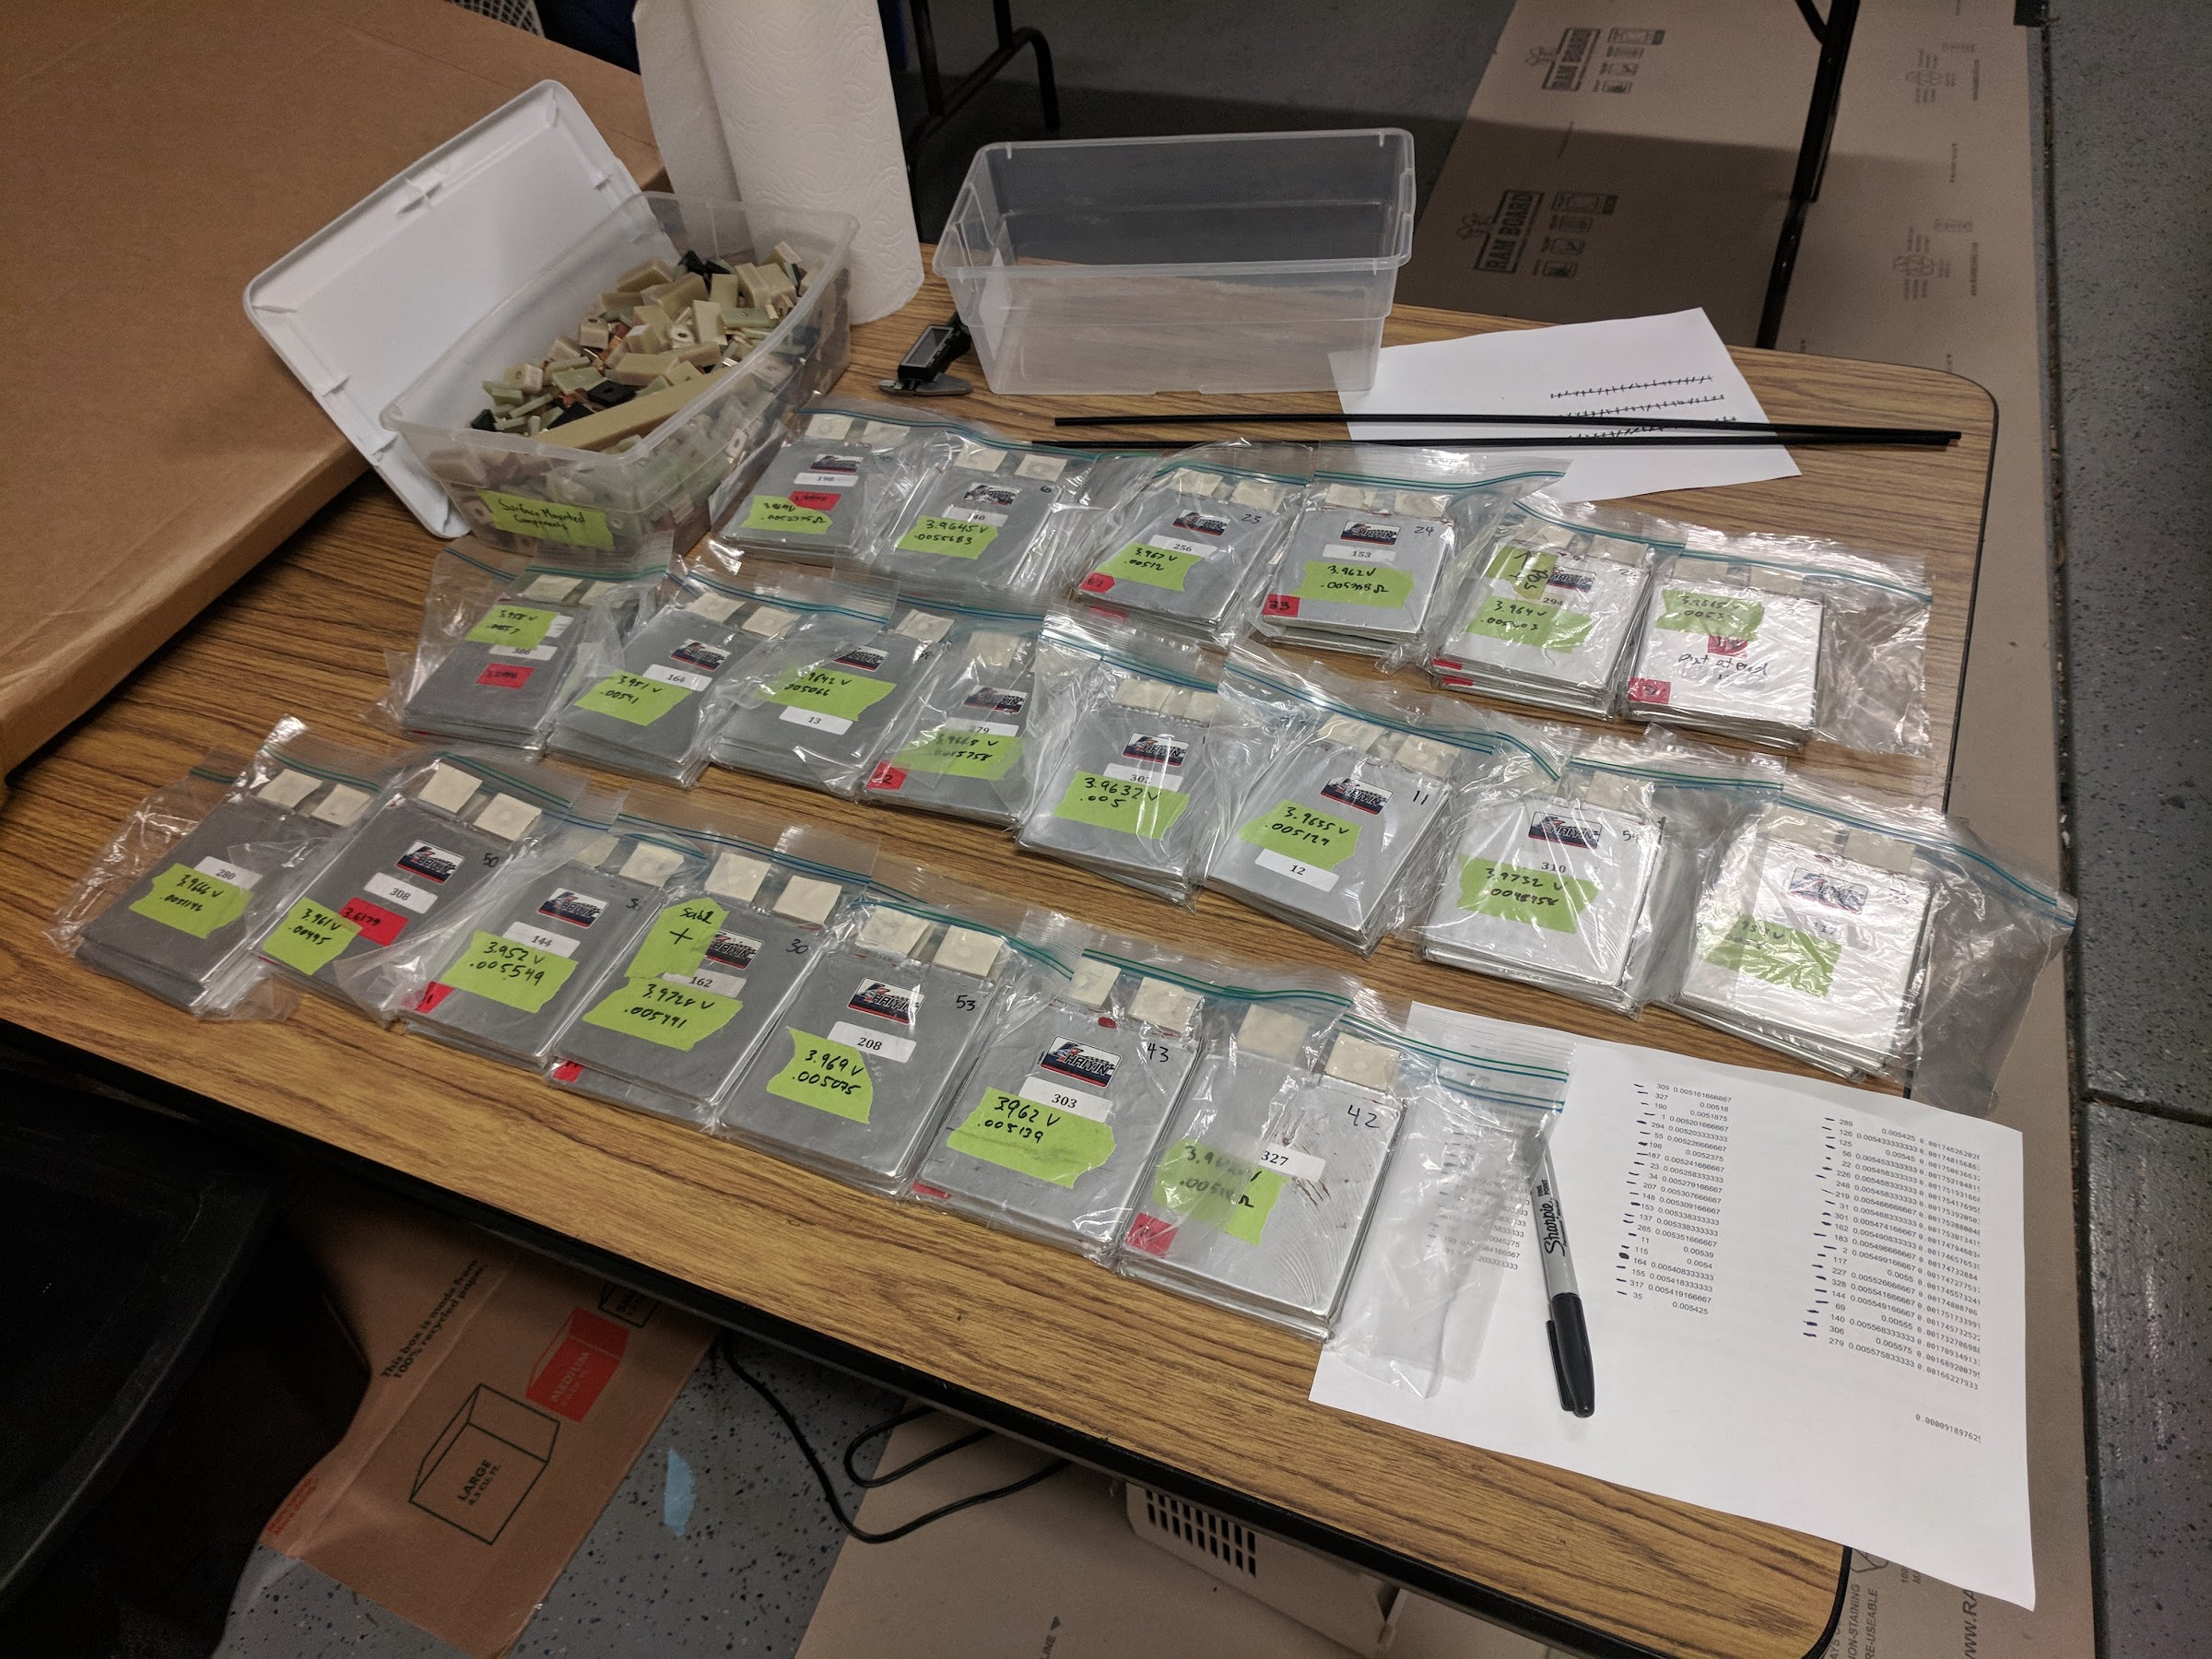
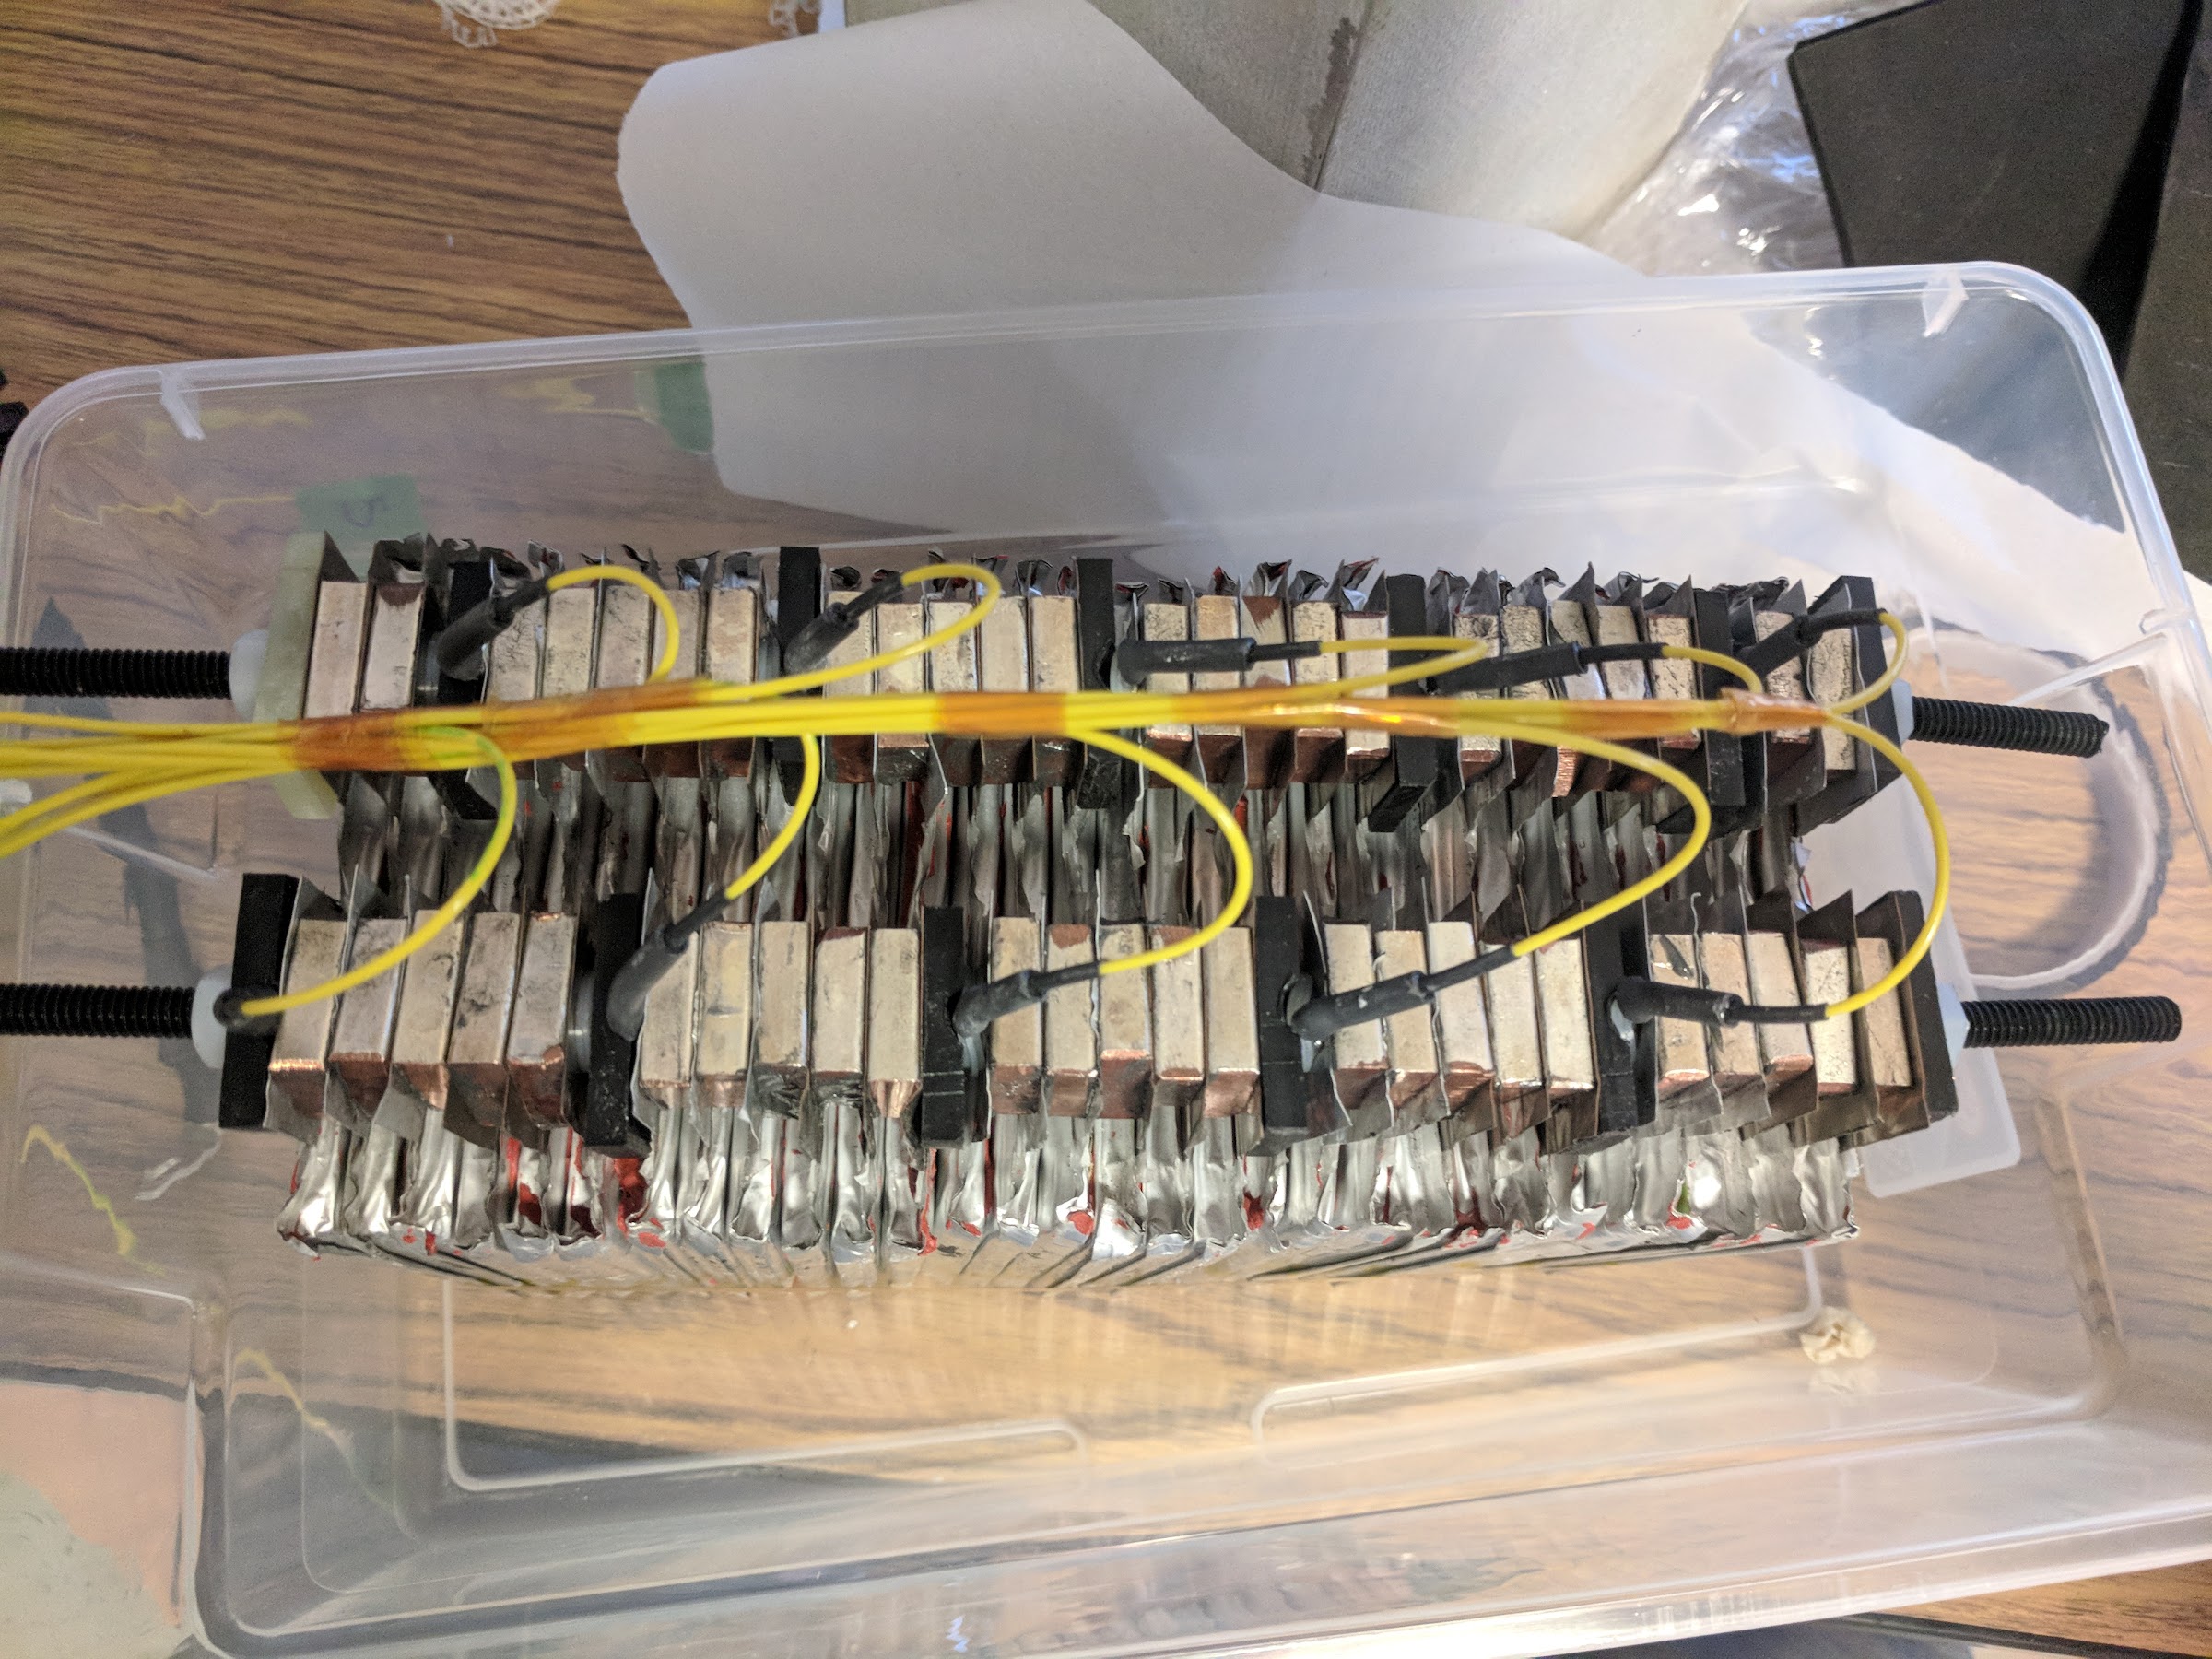
Next up: Battery pack construction.
 
I had a similar idea of using some sort of transverse leaf spring for the front suspension. How does it seem to work? I was thinking the composite arms of a crossbow would work. They are available in different stiffnesses and fairly inexpensive. I’m just not sure if it makes much sense if you need a damper anyway. Do you find it needs a damper? Please tell me what the square tube welded in front of the A arms is for.
 
adam333 said:
wow... Great job!

I will follow your thread.

Thank you Adam! I have certainly admired and drawn inspiration from your kmx trike build.


Jcriv said:
I had a similar idea of using some sort of transverse leaf spring for the front suspension. How does it seem to work? I was thinking the composite arms of a crossbow would work. They are available in different stiffnesses and fairly inexpensive. I’m just not sure if it makes much sense if you need a damper anyway. Do you find it needs a damper? Please tell me what the square tube welded in front of the A arms is for.

The leaf springs seem to work quite well! I ran some simulations to set the thickness, and I am seeing around 10-12mm of travel in the current configuration. I came across Velomo trikes (http://www.velomo.eu/trikes), which use leaf springs without dampers, but they seem to be counting grams. I haven't tested the suspension without the dampers, but I have adjusted them through their range and found that they are very effective in dialing the suspension feel. The square tube mounts both the dampers and the anti roll bar. (which I would say is less important for normal riding)


On to the battery!

Battery Pack Build

As previously stated, the cells are some old used Haiyin lipos. They have all been characterized, so I was able to sift through the data and select cells to make a relatively matched pack.

5y_fUs_aU-ThuVaVB0lXclnQtY2HwYQ7Za7L2MuFv66BAjXzOURa57MkVDZgcllwLGPbi5T8MGrDuKLUFCSlO5QWyrJorvJMh0-FRk14pvQ-2tNKvSP6XF-JCQeOr3czWrx6iEXhw5k=w2400


And here they are, all sorted and ready to go!

VtSWbfg2mDvZUb9h0nLTv_m7e83HPdni7ms863Y2ackGMDUIhKxJhWfeAxUMu84C5nPzm6id-VIukvHXWA9ylz3haf8hDBlDeuYI9z65-8gGCEaHIj7I4zBQyJqUJGk9shbp87TcwGI=w2400


The cells are stacked on threaded nylon rods, with copper bus bars and ABS spacers. There are actually two subpacks - one is 10s3p (which conveniently leaves a bit of extra space for chain routing), and the other is 11s3p.

rV8xDjy8JhjAyRDavHhScZC93HLkPdUCYu07NPiou5Ov7dAx6Sun3-lAm-dR6LzsS4vHkSkkwXUAB51ibTJlKnKvs5dig_Jy_LuuzV0Q_jB3fEw1L0YbTjwFbh1PWaV3qsBaAQTajWo=w2400


I made a few large ~1/8" thick sheets of fiberglass, and cut them down to make the battery boxes and also the electronics trays.

4Qjy4JKpkNCrF_U79cKlykGKzsFOYAnTEnsa-a0HIE0QByEYElcZfEZcN74X_j3Sw8L4RDYTRBtxfcWIYXuFT3Do27Q4U6kBBBln5w90skZ3W9f3bqfEGj_1ry7PKTuZ2OQw4m-43BM=w2400


Each box corner also got a few reinforcing strips of fiberglass, and the assembled packs were carefully inserted. Two sets of cable glands allow a 6ga wire, and the balance wires and thermistor wires to pass between the subpacks.

pDR8qxh5lcavIVpOcHe5mHNF5PGJ8-6kDjXULPbZh_pimxSags_mp1SFV-_ZZsiVEJNJeofTGd6Y6Mc7mHO1MlPJyJCty8oepwozXvS2ziLLsw0G9GkmN0AMT0N_zAtS4gy2Jr82HiI=w2400


5jrclGeANFwTFtil83RWA1IwuAd7TMe9X0vuT9SjURc7AODf1od7tB8okEgjR9CbRTkWZVEqf2cXSQz6oAkiFluIzgPu0rMgU6E0ZKN2a9cEHFqC_NheKqAVLEY-m83EiLt9KyA8Lxw=w2400


RO5LvsyFCL_-Wk1mwReQOvyCYS8di4bbJOuNL8zp_DhGpJW_E7LjQfzj_vmV5peQWL3VHYA9H8Hg6jBRY7aa74_MgyiF_OWbPGTnwnUl0gOE3QtMl8HHm5pyVjRHyjK4jznXqmcvKyE=w2400


One of the boxes also has an extra compartment for the bluetooth BMS.

VdM0dV3Jt_LeJdDEUV6gY-x5V9ABkz4fkAr6NYJzguEcs1Zn4dGGC9OgKF8GG8OWlsxsF-zOnRKvPHhCp13I3D_cHizW-hB-Ffj0_YV6IYRCfQ5bjI8Mt_hojgeVeWH4QYIGClaNoh8=w2400


The completed boxes bolt onto the frame like so:

jdyuWtzacZ6A7oqKPbUNW_PAp2zcJHogaHuUabuFeM861c7kk1FZa36ti-YM1T1HsVeThwBeGn52oeAJy8NZo8kEOJmrrz9Zmn1aiOqeYPiu1Kk1zIKADdC8c3pxz4Cexw9AKHt56Pc=w2400


ScEdNxPghwYkyjG7RjfjPCnWEoA_nsjPJh6FvIhjwsFpl0qPimzN8Xcl-XT8MHKf2BuVykZWJGLOS8BS2mrwqSXqqEBg5Ec52sOg9lXZf8zTBG7PGQt4husNUHnU3Mh-pii0iBWNbMg=w2400


And that's it! It doesn't look too bad, but building packs always seem to take longer than expected.

Next up: Low voltage electronics
 
Wow! That is some super engineering. Great work!
otherDoc
 
docnjoj said:
Wow! That is some super engineering. Great work!
otherDoc

Thanks!


Minor update time:

I have encountered a few problems that have delayed progress/updates on this thread.

In the past three weeks of riding, I have already worn out a front tire. Looks like I never set my toe correctly, and was running quite a bit of toe-in by accident. :oops: Luckily, I had a spare ready to go.
lXZOS-KY_PqkMVjyDzXm7STKlVWiAwoKbKX7i09RXPNsHQXpiwHE8hZpHyTVLgrDuaJL4oa-7ozHy0BbYU_viQMo0U2rHw7O2Vib9BsVYOi-CiOjzUlPymWeugyHZAJdGrRJZmOpsdU=w2400


My lipo cells are showing their age (they've been in use since around 2011), and my overall capacity seems to be around 8.5ah, or 660wh. This isn’t quite giving me the range I’d like, so I’ll probably build a new pack out of 18650s in the future.

My low voltage (12v) system is also getting quite a bit of interference, and it turns out I likely have a phase wire shorted to my motor casing, which I plan to fix this weekend. (update: Fixed! My frame had rubbed through the insulation on a phase wire) My 72v to 12v dc-dc converter also seems to have burned out today. Not sure of the cause, but I have another one on the way. I'm currently using a 3s lipo to power my lights instead.


On the bright side, my lighting setup is quite visible, and I've been told the back of the trike looks like a spaceship at night. Passing cars leave me plenty of space!

adSVFgdXlhw7swZAXnrDkj5uXx1kNKqwVpeLl8hFpEFhcuRffyfUGmsPi8XPiTw0_QioxrlGri6zbu0SG0uZti5jpmy7KVe9FrUWlTLz2rjB3NFgPCn0mAyoDs2gMRxuSaOzn9UXbr4=w2400
 
adam333 said:
On the bright side, my lighting setup is quite visible, and I've been told the back of the trike looks like a spaceship at night. Passing cars leave me plenty of space!

Nice :D

Blue and red combination is reserved for the Police here, do you have this restriction as well?

Yes, I believe we have the same restriction here. The light strip is actually a very cool white, which shows up blue in photos. It also strobes yellow for turn signals, and red for brakes.


David
 
Just an FYI... tadpole trikes are much more stable (less likely to tip over) when the center of gravity is well forward and low. I'd find a way to get the battery pack up front, below the crank.
 
Nice project! Do you have a link for the lighting tube? Thanks.

Sent from my moto g(6) plus using Tapatalk

 
Good point about the CG. For this project, I found that it became a balance between stability and rear traction. In the current arrangement, it is possible to slip the rear tire under hard acceleration, and tipping is possible in Very hard cornering. I'd consider it a good compromise, though it's always good to lower weight when possible. I'm planning to get back to work on this project in a few weeks (3dprinted fairing mold?), and may build an 18650 pack at some point in the next several months and exploring other mounting configurations then.

As far as the light, I believe is is this one.
 
I like the idea of the unified strip to do everything; seems cheap enough.

Because of the lights I have like yours, at night, a fair few cars actually slow down as they pass me to get a better look (or take pics/vids). :) Most of them also give me the whole lane, too, though there's always a few that crowd me or skim so close I wonder if I'll have paint marks. :/

Another way to do the LED lights is using independent and separately-wired different-colored strips, like I did on SB Cruiser recently. Probably costs more and takes more space, though. I got mine via my brother thru an Amazon seller; I think they were about $8 per reel, something like 10 feet each? I don't have a link to them but I can get it from him if interested. They just run off 12v (in my case, 14-16v from the 4s lighting pack).


I did it mostly because I don't want (can't have) white lights directly visible from the rear, and only need red and yellow/amber in the back, though I have white and yellow/amber in the front and some downlighting. (The white downlighting is setup so the lights themselves are not visible, just the light from them reflected off the trike and road; have been switching to red downlighting under the trike at the rear since such bright red lights are now available without using all that much power).

LIke yours, they just stick onto clean smooth (shiny/glossy works best) surfaces. I chose to solder wires to mine that come out of holes in the trike surface right next to the end of the LED strips, and then dab silicone over the wires, hole, and end of strips for waterproofing and better adhesion of the ends of the strips:

More pics of current state here
https://endless-sphere.com/forums/viewtopic.php?f=2&t=67833&start=775#p1428393
still wiring up sidemarker/turnsignal strips, but have the front and rear and downlighting done. Looks more dramatic at night but the latest pics are in twilight. :)

file.php


file.php


file.php


file.php


file.php


file.php


file.php
 
dzilar said:
Good point about the CG. For this project, I found that it became a balance between stability and rear traction. In the current arrangement, it is possible to slip the rear tire under hard acceleration, and tipping is possible in Very hard cornering. I'd consider it a good compromise, though it's always good to lower weight when possible. I'm planning to get back to work on this project in a few weeks (3dprinted fairing mold?), and may build an 18650 pack at some point in the next several months and exploring other mounting configurations then.

As far as the light, I believe is is this one.
Thanks for the link. Perfect for my current long tail build.

Sent from my moto g(6) plus using Tapatalk

 
Back
Top