Screw-reinforced printed motor mount?

ProxRB

10 mW
Joined
Jun 24, 2015
Messages
22
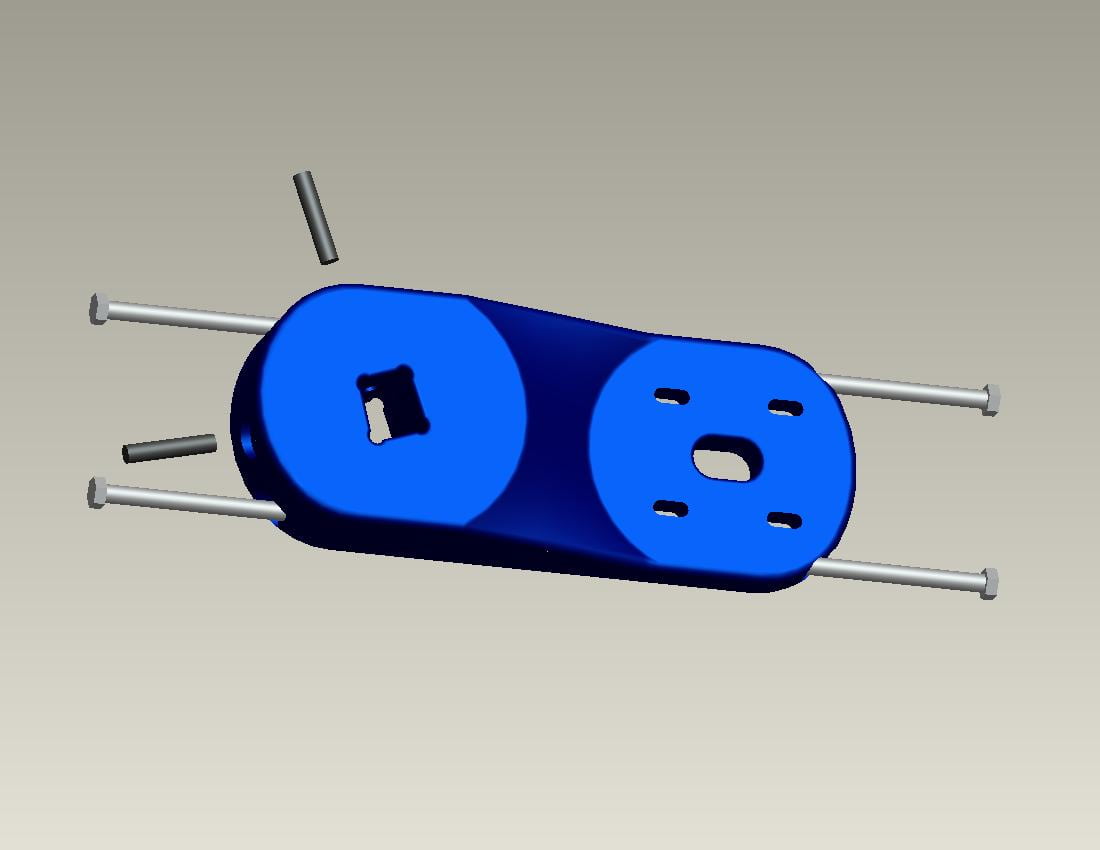
3D printed motor mounts seem to be quite failure prone, but maybe we can reinforce them with metal bolts to make for a relatively cheap mount alternative? What do you think? I'm not really sure what the common modes of failure are, but maybe we can overcome the challenges.

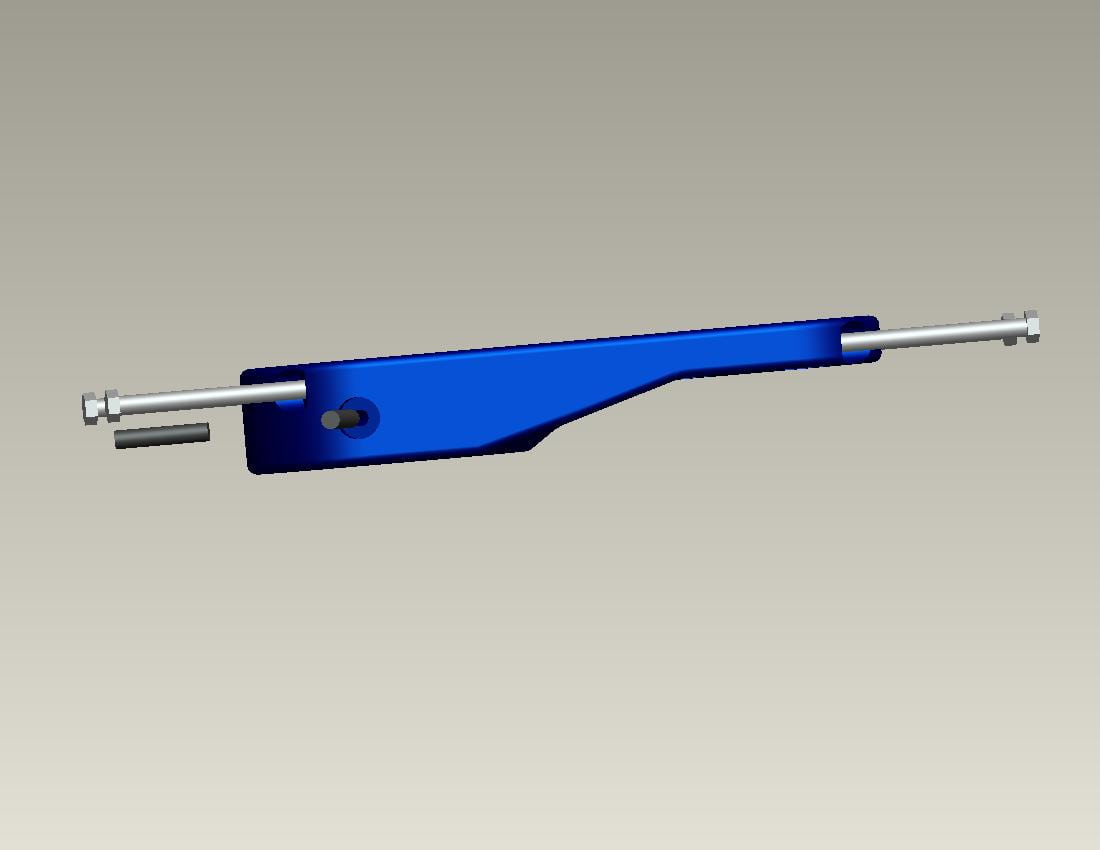
My gut says set screws are probably a better way of fastening plastic trucks than the more typical clamping style since the mounting area will be a single, solid part instead of having a cut run through it?

file.php


file.php
 

Attachments

  • general.jpg
    general.jpg
    28.8 KB · Views: 1,157
  • profile.jpg
    profile.jpg
    17.6 KB · Views: 1,157
This is a pretty ingenious solution. I'm thinking it will probably work. Do you have one mounted yet?
 
I am still building my first board so not yet. But if anyone has a 3d printer and can help me out, ill gladly pay for materials and document the process?
 
Do you have any way to simulate stress loading with the CAD software you have? This will tell you points of failure on the model you have. Depending on what type of material and process you have access to, a testing prototype can be made.
 
I do have the ability to run stress tests, but frankly not sure what the right kinds of analyses would be. I feel like the real trouble would be fatigue-type issues?
 
Hi All,

I was thinking about that, and I found this new material for 3d printer, the IGLIDUR, is 50x more resistant thant other material for 3d printing and designed specifically for mechanical and moving parts :

http://www.laboutiquedu3d.com/igus/365-fil-3d-iglidur-180-175-mm.html

Sorry it's in french...byt you get the idea :)
 
Tartopom said:
Hi All,

I was thinking about that, and I found this new material for 3d printer, the IGLIDUR, is 50x more resistant thant other material for 3d printing and designed specifically for mechanical and moving parts :

http://www.laboutiquedu3d.com/igus/365-fil-3d-iglidur-180-175-mm.html

Sorry it's in french...byt you get the idea :)
I believe the IGUS stuff is really meant for things like bushings and rails; I doubt the ultimate tensile strength is significantly better than that of ABS or Nylon.

Basic stress tests also won't tell you much because the limiting factor in printed parts is typically delamination and layer adhesion, not tensile strength. (assuming your printed at 100% infill)


Putting your life on the line to try it is still an option, though. :lol:
 
well....we will see, I plan to print some parts to electrify my onda longa ;)
I will try first with ABS, and maybe later with this IGLIDUR for the gears :p
 
One of the issues that using a 3D printer side-steps is the ability to quickly and easily make an odd 3D shape. However, this is a great idea to begin thinking of mixed media.

For threads, I like the idea of using a steel nut that has a square shape, and 3D printing a square pocket in the plastic part, I think this is called a "captive nut".

It is expensive to make a 3D shape using CNC and billet aluminum, but I'm sure we all agree it is beautiful to see the results. I would like to suggest that if a part can bedesigned with one side being flat (and the other side having the complex 3D shapes), it may be useful to design-in a flat metal plate to be epoxied onto one side. The plate can be aluminum that is water-jetted/laser-cut, or even stainless steel.

You can also stack several flat plates to make a 3D shape. I remember dontsendbubbamail made RC motor brackets from plywood that had an aluminum plate bonded to one side (or both sides).

Such a plate can be made fairly cheap. I have had plates water-jetted by Big Blue Saw, and I was happy with them.

https://www.electricbike.com/cadcam-the-diy-builders-best-friend/
 
3d designing metal parts need not be too expensive though, I joined Techshop and was using their cad cnc machine and other than the cost of the membership at 100 bucks a month and the cost of the aluminum all else is just electricity and designing. 6000 aluminum is really cheap.
 
This is a really interesting idea. It'll provide a slight preload along that axis of the part which may prevent some failures. However 3d prints often fail along the join between layers (depending on the quality of your print and design) so this preload would be in the wrong direction. if you can do it for free or cheaply at a local maker/hackspace then it's probably worth a go, but otherwise, making a mount with aluminium and getting it welded on is likely to be a cheaper and safer alternative.

or you could do this: http://3dtopo.com/lostPLA/ (i really want to try this...)

It is a great idea, and worth experimenting with, but like pretty much everything to do with 3d printing, if learning and experimenting with 3d printing is your aim, do it, but if making a working reliable e-board is, go with the tried and tested route. i'm really sorry if i sound negative there, but i've seen a lot of people trying to make things with 3d prints and then never finishing as they get sucked into the whirlpool of trying to get the most out of something which is exciting, but not the best way of making things that work.

(disclaimer, i spent at least 6 hours 3d printing e-board parts on monday, so may be a bit irritated with it)
 
I really was into the idea of doing a lost PLA casting as well and found a foundry that would do it for me in aluminum or aluminum bronze. If you look some places will do it for you. Foundrys like the new method and think it's interesting in my experience. Or you can get a kiln, and make one pretty easily, and do it yourself. I bought a smelter that did 3600, enough to melt titanium, but there wasn't enough room in it to fit the casting which must be heated to pretty much the same temp as the molten metal or it will crack. The PLA is said to melt and burn out pretty cleanly and lately there's a wax filament for printers that's even better. The structure of the metal will not be as strong as cold rolled but that shouldn't be too much of an obstacle I think since comparing an 1/8 inch of plate of 6000 series aluminum to some other metal, or even the same metal, with a much better structural design...it should be even stronger with the freedom of making it a structurally more supportive shape. Maybe if the 3d print was more so optimized to deal with the leverage the motor puts out it would work - something with a greater angle coming to the kingpin for more support like the one I made in epoxy and carbon heremotor mount on kids board.JPG and make it as short as possible to have less leverage too. this one isn't my shortest mold and you can get the motor all the way beside the king pin. very short. you're limited very slightly in what pulleys you can use and still have 6 grooves engage which is what the center to center calculator at, pdi or whatever the pulley place is called, says is necessary. pretty much comes down to needing a minimum of 16 grooves on the motor pulley
And then I saw people using microwaves to melt metal and found it's easy to make a crucible in there. You simply have to make a Hot Pocket "crisper" out of ...forget the name but it's just carbon I think. And cover it with a lot of insulation. People are getting to a high enough temp to melt a bunch of metals before their microwave melts down. But getting the mold to the temp of the metal..I gave up on that idea.
I originally made a standard aluminum plate on a cad cnc machine but then when going around trying to find someone to weld it to the hanger I found that EVERYONE said it's not a good idea and was difficult to do and wouldn't do it. Some said it wouldn't work and welding aluminum like that is too hard or brittle or something. I'm thinking I have a 1/4 inch aluminum plate that no one will weld and the world is filled with torqueboard's 1/8 inch plate and they have a lifetime warranty. I ended up just giving the plate away and they probably threw it in the trash.
 
The idea of lost PLA casting is as close to metal 3d printing and cheap. I wish I can do this but, I suck at making my own forge and currently focusing on fixing version 2 of my eboard.
 
U need to make the mount wider and shorter. The set screws won't do much or even the long beams. It will bend at the connection to the hanger. Maybe make it as wide as the complete half of the hanger where it connects And make the end where the motor screws on not a plate but a recess for the motor so it's encased with support on all sides. ...make practically a short brick with a long hole to slide up the skate hanger and a hole for the motor and glue it there or bolt it there. And long screws for the motor and then you'll have to make a recess on the other side for the motor pulley.
 
Back
Top