Hub motor axle does not go into dropouts

suddenurge

100 µW
Joined
Nov 3, 2015
Messages
7
Location
Stockholm
I have a rear mac 10t hub motor that I want to fit to a GT transeo 2. The bike has a quick release system in the rear hub and maybe this is why the dropouts are not wide enough to accomodate the axle diameter of 10mm. In fact, I cannot get the axle into the dropout at all. I know I have no choice but to file the dropouts down to fit.

Could someone please give me some good tips on how to do it, what to keep in mind and what type of file to use. The bike is made of 7005-t6 aluminium if that matters.

Thanks!
 
A rotary bur in a cheap/knockoff dremel would be perfect for something small like that imo. Otherwise a course metal file, prob curved if possible. In US, if something's not handy locally, amazon or ebay are the go-to.

I always thought 10mm was standard for clamping or non, and the step up to 12mm for thru axle hubs. Pix might help if you're still in doubt. Good luck!
 
Many of clamping dropout openings are 9.6 to 9.8mm. Sometimes all you need to remove is the paint for the motor to fit, but other times you'll need to get into the metal. It's fairly simple to do. A Dremel could do the job, but the more care you put into matching the axle's shape, the less likely you are to have a problem down the road.

There are a number of ways to do it. To do it right you need a flat file. A round file, a sharpie, some paper, scissors, and some way to measure precisely. a dial caliper like this is best:http://www.ebay.com/itm/like/390747741421?ul_noapp=true&chn=ps&lpid=82
56247_400x400.jpg

843744003247lg.jpg

File-Round.png

5280a.jpg

150px-Kitchen-Scissors.jpg


First, trace out and cut out a template for your dropout 10mm wide on some stiff paper. Test it to make sure it fits on the motor's axle. The flat sections need to be square with the axle flats, the round section needs to meet the curve of the axle. A close fit is important. It's more important for the fit to be close than it is to be exactly 10mm, so adjust as needed. Use this as your template. Place it on the bike frame around the dropout and use the sharpie to color in everything that is exposed around your dropout. You will need to remove some material in the curved part of the dropout too.

Carefully and slowly start with the flat file. place it in the drop out and with slow strokes, file down each side. try to keep the file flat and moving in flat strokes to avoid rounding out the dropout. after 60 seconds of filing, check your progress with the caliper. When you reach 10mm, start on the rounded portion of the dropout. this needs to be a uniform shape or else the axle won't fully seat in the dropout. Repeat the process for the opposite side.

The secret to success is going slow and measuring often.
 
What he said.
Careful marking ahead of time is important to ensure both sides come out the same and the wheel remains properly aligned. Normally, I'd recommend getting a spare axle from EM3EV for $12 when you order the motor - makes a handy tool for fitting the slots. Without that in hand, fit the motor every few file strokes to ensure the slots actually line up and one isn't rotated from the other - it's more than just the width that needs to be right.

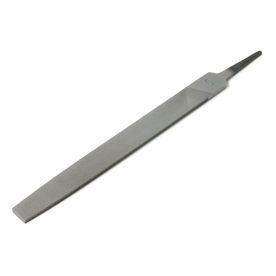
I like to use a longish flat file and wrap the end away from the handle with a couple of turns of heavy paper taped in place so it's smooth (or light cereal box cardboard, etc - you get the idea). That 'no file end' of the file can be placed in the opposite dropout without cutting so you can file the closer dropout near the handle and the slot will be parallel instead of cockeyed (must be straight side-to-side as well as not rotated axially) - just hold the file flat up against the front or rear of both slots when you stroke it. Takes a lot of the guesswork out by using the bike as a filing jig.

wrappedFile.gif
Do not use a Dremel tool - it's a tool for fast small radius cuts, not long flat/parallel surfaces.
This is one of those jobs where patience and a little craftsmanship pay off - you don't need a motor to remove a tiny bit of aluminum.

In the end, if you get a little slop, don't worry too much - your torque arms will take the rotational load. Since you have a MAC with no regen, just clock them around as far as possible in the direction of wheel rotation before you bolt them up so they will take the twist before the axle brings force to bear on the aluminum frame (the motor will try to twist the axle counter to wheel rotation). I put an adjustable wrench snugly on the opposite side axle flats and load the axle slightly in the direction of wheel rotation when clocking the first TA and tightening down the first axle nut...

MACs don't have much shoulder to the shaft, so it's a good plan to put a washer in there so the shoulder doesn't sink into the aluminum dropout and force it open. The washer needs to fit into the flat part of any circular depression in the inside of your dropout (if there is one) - that is - not too large in diameter. You can use a pre-made spacer (example: Spacer from Grin Tech) or get a hardware store 12mm (or equivalent SAE) washer and enlarge the hole just a bit (in a kind of enlongated way) so it just fits the threaded part of the shaft (14mm washers are too sloppy to pick up the shoulder very well).
 
nutspecial said:
A rotary bur in a cheap/knockoff dremel would be perfect for something small like that imo.
Not really: when precision is required (like here) a powertool is generally just a really fast way to screw things up, if you don't have it and the parts to be done in a jig to ensure alignment and prevent removal of too much material. ;)
 
AW and TK, yes I would finesse the aluminum with a dremel. I assumed someone else would be also capable of this with a tiny bit of tool knowledge and some common sense. But I do have alot of experience and wouldn't want the op to mess up his frame.

I'm glad DS and you guys added great details to get it right first time the least risky way!
 
I actually use a 10.0 mm drill bit and a hand drill held square. It's only a Mac.
 
I got some torque plates laser cut from 8mm stainless steel for my MAC 10T on a GT transeo 4. I can post the design if you like. It cost me NZD45 to get the pair made. 8mm is too thick for the non drive side, I've had to run it with no washers or spacers, but 11,000km later the axle and dropouts are still perfect, so I guess it worked out?
 
It might have been mentioned already, but its also good to deepen the dropout enough to make the new axle center match the old wheels. This makes your disk brake fit properly for height.
 
Back
Top