Skeetab's FUTR Beta Build

Joined
Jun 15, 2009
Messages
2,746
Location
MA
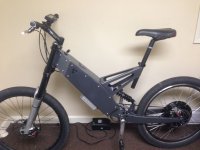
So after being into ebikes for a good 7 years and spending countless thousands of dollars on tons of cheap junk on ebay. I decided to take the plunge and finally buy a decent purpose built ebike frame, the FLX Beta! I have had at least a dozen other bikes and for the most part I hated them all. A few of the memorable ones would have to be the GT Avalanche 3.0 custom build, the Motobecane Fantom, the Tidalforce S-750, the EBIKE from Lee Iacocca and of course the Genesis Farfle v2100(props to Farfle and DanGT for making those swings) The biggest problem I had with almost every bike was where the heck do you put the batteries? I thought I solved this problem with the EBIKE purpose built frames, but they are fairly heavy and small for me (6' 3") and did not allow for rear suspension.

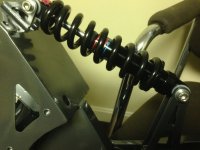
Slow progress so far on the FLX Beta, but i'm working thru it! Got my shock in the mail but the bushings/sleeves are the wrong size. I will have to dremmel them a little bit. Also I have to order the correct seat post size since this one was odd for my collection. One thing to note is that you need to mount the shock before the seat assembly. There is not enough clearance for the allen bolt to get thru the triangle, I wasted a little time on that. The first bottom bracket I put on was off a regular MTB and my crank arms were hitting the side cover allen bolt heads. I have since put on a wider one from sickbikeparts and it worked good.

Im worried about the rear tire clearance since I have a 19" moto wheel/tire. Hopefully it will fit as is. I decided to use my lighter hub which is a 48v 1000w clone motor on a 26" double walled rim.

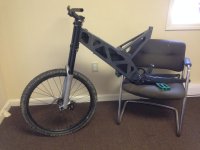
Forks are all I have at the moment, they are a little old but still work nice, They are 2004 Marzocchi Super T PRO's with a 20mm thru axle hub. That front tire will be swapped with a CST Cyclops, and possibly the back tire also to raise it up a little more.
IMG_1093.jpg
IMG_1107.jpg
 
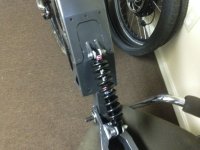
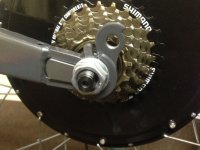
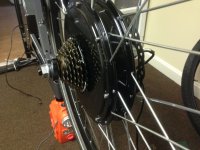
More progress on the FLX Beta. Got the shock sleeves cut and new bushings, installed the whole thing. Had to take the seat stay off and put it back on (this is the only part I dislike so far) Then I was able to mount the rear wheel and bolt the torque plates on. It was super easy and it fits like a glove. I was planning to wire it up but I need to source some little gromets for the cable thru -ways before its too late.

I just got a cheap shock for now with a heavy 750lb rating, never know I could upgrade later. Its 220mm DNM
IMG_1255.jpg
IMG_1256.jpg

Here is the bike upside down mounting the wheel assembly. I was going to use a mxus with 19" moto but I think Samd is right, its way too heavy for this type of bike and would feel out of place.
IMG_1257.jpg
IMG_1258.jpg

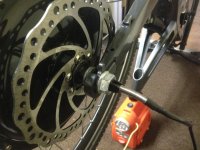
I ended up needing two washers on each side of the swingarm since this is a smaller 48v 1000w clone motor.
IMG_1259.jpg

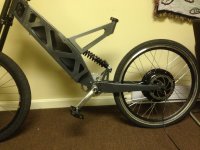
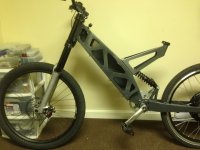
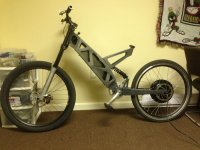
I got the bike back upright, it seems like the seat stay is leaning back a little odd, the headtube angle looks good to me tho
IMG_1264.jpg
IMG_1265.jpg
IMG_1266.jpg
 
So I had some trouble sourcing a seat post and clamp. At first I wasn't sure what size they were. It seems the seat post is 30.6mm but mine is on order still as you can see :( . I ended up finding a seat post clamp from my old Tidalforce S-750 days(see my signature for link)and it fit like a glove. So hopefully my seat post arrives soon so I can get a test fit/ride going.

Also I decided to not put a derailur on. I am going to use a chain tensioner instead, I had a black crank on which I liked but I would have to get a single speed rear freewheel if I would want to keep that. Maybe later I will swap it over again. For now I threw on the silver 170mm crank arms with a thinner chain ring that will work with my 5 speed freewheel/chain size

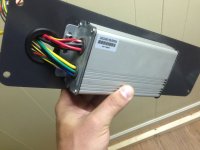
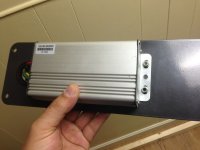
I will be mounting a Lyen 12-fet controller to the bottom of the belly pan cover and drilling a hole for the wires to pass into the frame. I have plans to mount my CA v3 to the top of the frame just under the key switch. This may not happen immediately since im not sure I want to drill a few holes into this thing...

I was thinking if I put another CST Cyclops on the back of the bike it will raise the rear end another 1/2" or so at least. I'm not positive but I think it will fit inside the swing arm
 
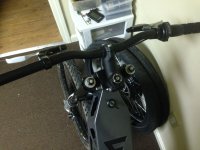
More progress on the FLX Beta! Got the rear tire put on to raise the backside a little more. and then threw the CA on the bars for now. Then after attempting to wire it I find the connector doesn't fit thru the wire way holes, ill have to dremmel one of them. Also got the front brakes all setup and adjusted.
IMG_1269.jpg

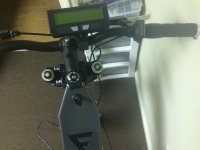
I threw the CA on the handlebars for now. One I don't want to drill into this frame just yet and secondly I'm not sure if I will like looking down below the key everytime I want to see my voltage/stats.
IMG_1271.jpg

Pic of the CA DP end attempting to squeeze thru the wire way hole on the FLX Beta
IMG_1272.jpg
 
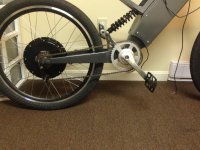
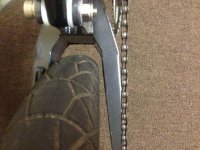
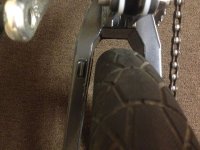
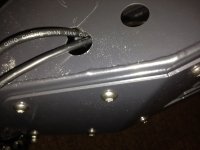
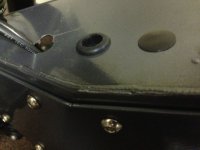
Got the chain and tensioner installed on the Beta. Its weird I saw another person with this same issue, but the chain tensioners with the Beta can only go so far forward since its the way it was designed for the rear derailur bracket, but hopefully the chain wont cause too many issues. Id like a little more chain grabbing more teeth on the rear sprocket. Also had a bitch of a time finding a seat post. I decided to take EMFX's advice and got a cheap digital measuring caliper to find out what it was. I have ordered 4 seat posts so far and it is ridiculous. But oh well lesson learned. Here are some pictures of me installing the controller and widening the hole on the frame so I could fit my CA DP wires thru. I did it by hand with a file and scratched the frame like three times...So dumb but I got it! Also bought rubber grommets and KO seals to blank off the un used holes. Drilled one large hole in the bottom plate for my controller wiring and got a nice big grommet for that too. So far so good!

IMG_1296.jpg
Notice the chain tensioner, it will not spring forward any further than that.
IMG_1295.jpg
A few people are interested in running large wheels with this frame, here are two pictures showing how much clearance is left with a 26" rim and CST Cyclops wide tires.
IMG_1297.jpg
There is a little more room to play with
IMG_1299.jpg
I didn't have my dremmel attachments available this weekend so I stupidly filed the hole bigger by hand to fit the CA DPS and I scratched the frame nicely. Oh well its just a toy :)
IMG_1300.jpg
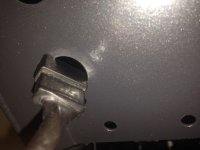
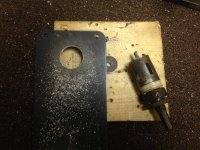
Hole sawed a large diameter hole then filed it and got a grommet for it. this will be my controller wire way
IMG_1302.jpg
Heres a shot of it mocked up before I got a grommet
IMG_1303.jpg
IMG_1305.jpg
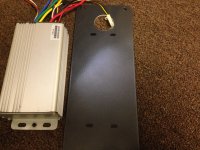
Marked the controller spots so I can drill the holes and mount the controller
IMG_1306.jpg
grommet was a tight fit but it went in nicely
IMG_1307.jpg
Also got grommets and KO's for the extra holes in the frame
IMG_1308.jpg
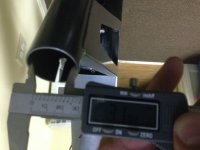
Took EMFX's advice and bought one of these...Only $20 why didn't I do this sooner...

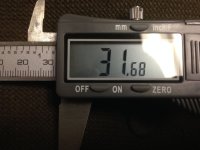
People are telling me this seat stay is a 30.6mm but it measures anywhere from 31.68 to 31.90 so don't ask me why that is. But I have bought a 4th seat post so hopefully I will be riding soon!
IMG_1312.jpg
IMG_1313.jpg
 
Finally got the FLX Beta up and running. Still have to take it for a test ride today to see how she handles. Other then having trouble sourcing a seat post the rest of the build was fairly straight forward. Nothing else gave me trouble. My rear brake is a little tight since i an still using the old cable type and it has to run thru the battery housing area.I will eventually upgrade to hydraulic if this platform proves to be a nice ride, only time will tell if this was worth the $$

Here are a few of the last pictures i took during the build. One thing to note was that my old two lamp f40 2x4 drop in light fixture in my office went bad while working on this build. For a few days i was working in the dark and under table lamps to try and get it done... It hindered me from taking pics a few days. I decided to gut the fixture and removed the ballast and lamps. I upgraded it to two 4ft 5000k direct wire LED linear replacement lamps that run off 120 straight to the tombstones and what a world of difference it made! Let there be light(in my office)

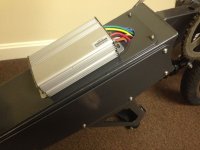
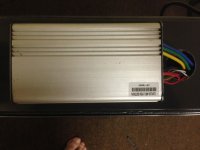
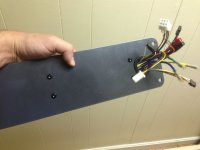
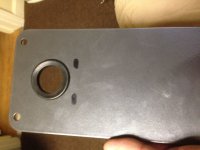
A few pictures of my controller mounted to the rear plate with 5mm SS hardware
IMG_1320.jpg

IMG_1321.jpg
IMG_1322.jpg

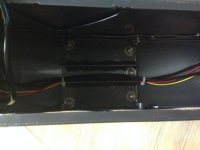
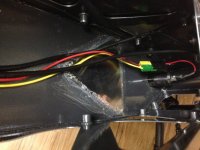
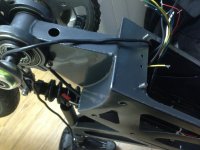
Here are a couple shots of the inside of the frame before I mounted the padding foam and battery pack. I routed the cables up as high as i could and used a few zip ties to hold them there.
IMG_1323.jpg

A picture of the key switch anderson
IMG_1324.jpg

A shot of the wiring all tucked toward the back. Look at my little baby phase wires...they're so cute
IMG_1325.jpg

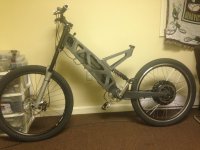
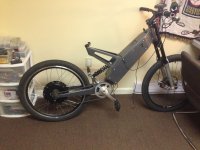
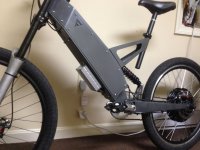
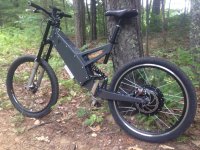
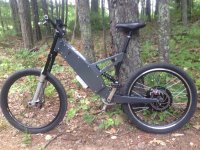
Overall shot of the bike completed
IMG_1326.jpg
IMG_1327.jpg

Shot of the rear brake setup. It is a little hard to actuate the cable. Not happy with it but atleast my rear brakes work incase of IMG_1328.jpg
IMG_1329.jpg

Since I bought my CA second hand, i had to change a bunch of features on it to get the motor to actually spin, this happens alot and people usually think something is broken. It is just the CA limiting power thru setting. After changing a few around and selecting my battery type for further reference it was all setup and ready to go.
IMG_1330.jpg
 
So me and the Beta went out on our maiden voyage this weekend and I had a few issues. First my chain fell of twice at the worst possible time(about to go up a big hill) Something will have to change not sure what yet. And pedaling was useless at anything over 20mph which is always...so I may need a shlumph drive. Also I am not a fan of the DH front forks on this bike, they are too plush with too much travel. These will change also. The rear shock is cheap and I expected this to be an issue, but it is pogo-ish while pedaling up hills.

All the electronics worked well though..no issues with the CA, controller or motor. I did about 10 miles and at the end my motor was pretty warm. Gave it a few minutes to cool off and it was even hotter when I checked it last.. Also expected this running a small hub at 40a 74v, this would be a problem if I had a 40ah battery but since I don't it should be ok for a while. All in all it was a success to me. I fully charged my pack and got more out of it then I thought possible, I still wasn't happy with the range thought. Range anxiety is the worst. In a perfect world I would cram a huge 20s7p pack in this bad boy but I probably will never get the $$ to do so.
 
Finally got around to uploading the pics of the first ride on the Beta. I have already ordered new front forks and since they are 15mm instead of 20mm I have a new front wheel coming and also ordered some hydraulic disc brakes to test the waters. This should solve half of my issues I had on my first ride. Now to fix the drive train.

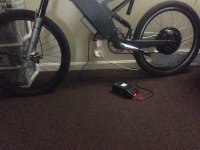
Pic of the bike charging with a 20s bulk charger (battery is 20s 8ah) all I got for now until I try to reconfigure more cells in the frame.
IMG_1340.jpg

Half way thru the ride on some logging trail that wasn't here not too long ago.
IMG_1341.jpg
IMG_1343.jpg

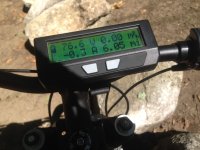
I'm not convinced this CA is perfectly accurate since I am just expecting the lyen 1.33 rshunt value to be correct. I need to throw an amp meter on it though since I feel the readings are a tad high especially compared to the BHT build
IMG_1344.jpg

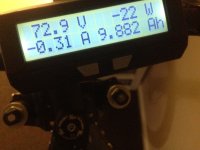
Here are the stats at the end of the ride, as you know I have a 8ah pack but it was charged to almost 84v. It says I took 10ah out. I wasn't discharging crazy fast I went kind of easy this ride.
IMG_1346.jpg
 
Very nice pictures and build coverage. Sweet build goin on man!

I think that -0.3a reading at standstill is the dead giveaway the shunt value needs correction in CA. However, wouldn't a negative value indicate less-than-actual power used?

I know technically voltage isn't supposed to directly impact capacity, but when applied realworld I think it must, and that might be the reason you are seeing the ~1mi/ah on conservative riding. Perhaps a lower voltage (but similar wh) pack would actually give more range for this build/situation?
 
Hmm I guess you are right. Just seems crazy how many amps a DD draws if that is true. Thing is under huge load all the time. I remember putting a amp meter on the BHT build and I set the rshunt off of that. The BHT would draw 15-20a up big hills, this DD draws more on a flat

But that also means my 8ah battery is maybe supplying even more than 10ah's. It is not a powerful pack it sags like old boobs when you get on it. So I set the power to 40a max for now.
 
I also had no regen on that ride. I never really ran it a lot before so its not on the top of my list, but I will eventually put a horn button on the handlebars to activate it. But I will wait until I get my new forks and I will more than likely get a different stem and wider bars since im putting hydraulic brakes on soon and my bars don't feel wide enough for me anymore.
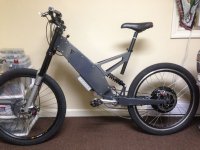
 
Got out for a little ride today on the bike. It was starting to rain a bit so i put the pedal to the metal and burnt thru the battery quick. Towards the end i had the chain fall off yet again, and this time attempting to put it back on on the trail i dropped the bike and bent one of my crank arms...good thing i am replacing them, This bike is heavier then you think when you drop it from a vertical position.

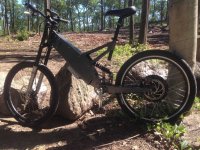
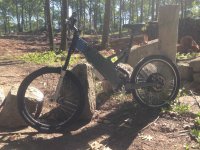
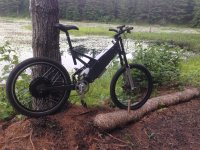
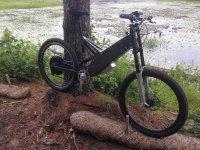
This is my favorite picture of the bike so far. Such good coloring out there today
IMG_1353.jpg
IMG_1351.jpg
IMG_1355.jpg
IMG_1358.jpg
IMG_1359.jpg


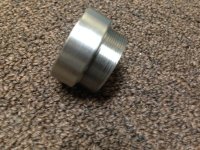
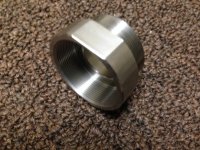
Here is the new adaptor i got from ebikekits.com to put on a standard single speed freewheel and improve my chain line
IMG_1360.jpg
IMG_1361.jpg
 
Took a speed trip to Wally world to get a new pair of headphones today. Got the bike up to 40mph on a flat and up to 46mph going down the big hill getting back into my town. I have to say even with gloves and a full face helmet I was a little scared since i was wearing a T shirt and Gym shorts...but i checked them when i got home and everything was clean. Wish my batteries could handle a bit more abuse i already have range anxiety and I feel like its worse when I can actually see my battery packs voltage. Curse you CA V3!! I also changed my Rshunt to 2.333 temporarily so it has a more accurate reading of watts until I can actually take the bike apart and measure the Rshunt with a meter. It displayed much more realistic numbers today and made me feel better.
 
So I finally took the plunge on a better battery for my bike. It has been 7 years since I bought a purpose built ebike battery so I guess its ok. I typically try to build my own stuff but this item was on sale and I ended up getting a good deal. I'm excited to get this since by my calculations I will be able to ride a lot harder than I do now and get even more mileage probably around 15-18miles per charge!
INSERT LUNA CYCLE JUNK BATTERY PURCHASE HERE
Also I got my hydraulic disc brakes in the mail but the front hose is not long enough...lol wtf Shimano

So now I am ordering more length of hose and a bleed kit so I can create longer hoses and get them thrown on the bike.
 
Curious, how did it go with the BB7s? I can see you want to change them already to hydros. I was planning to use them on mine, hence the curiousity.
 
Tats said:
Rshunt on my lyen mini is 2.0

Is yours a mini monster 6 fet or a 12 fet xtreme modder? I've had a few 12-fets and one of them for sure had a sticker saying 1.333 r shunt from Lyen. But the one i am using now doesn't have one written
 
Lurkin said:
Curious, how did it go with the BB7s? I can see you want to change them already to hydros. I was planning to use them on mine, hence the curiousity.

The front ones work perfectly fine, i like the bb7s. The problem i'm having is with the rear cable. It is getting pinched in the frame compartment and cannot actuate the rear caliper properly. So I am just upgrading both together since front/rear kits are commonly sold.
 
Nice build and pics! The chain drop is unexpected considering the concentric pivot bottom bracket. Glad you posted such detailed views of the frame. I have been wanting more close up views of the bottom bracket area on the flux frames because I have been dreaming of a light mid-drive on one of these for a while. Your pics have set off my latest round of brainstorming and I was hoping you could give me some rough measurements so I can figure out if an idea is even possible. The idea is to get a small mid-drive motor on the swingarm by cutting off the shock mount and replacing it with a shock mount plate that would also hold a motor. The drawing is just a rough estimate borrowed from the Genesis project to convey the general idea. Ignore the hub motors.

How tall is the shock mount on the swing arm? Tall enough to fit an RC motor in there without changing the shock mount by much?
nq4d5e.jpg


Also, how much room is there between the chain and the left side crank arm? Enough width for an 80100? How long of a crank spindle did you have to use to clear the frame? How far from the chain to the Left side pivot bearing?
s6lht2.jpg


Not trying to derail your thread with my crazy ideas but given your other builds it seemed like the kind of idea you might be into. Seems like this light frame would be awesome with a non-hub rear wheel but I would hate to compromise battery space in the frame cavity by trying to cram a motor in there.
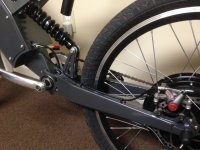
 
Ya i've thought about a mid drive as well after seeing those custom brackets evolution is selling. They wont work with the motors I have but it gets you thinking. This frame is pretty skinny so im pretty sure things would be tight or the motor small.
 
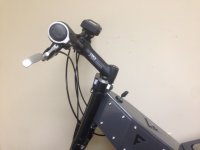
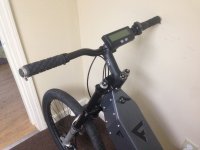
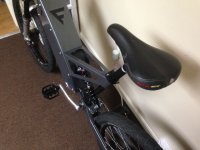
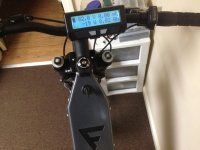
Got around to switching out the stem and the bars on the FLX Beta. The stem was too short and so were the bars. Now i feel like the bike actually fits me perfect! I am 6' 3" tall. It was a great ride this morning and was a lot of fun ripping the trails.

Soon enough I will have the new front end and hydro brakes on, I also got my regen button too!

Another side not...my chain fell off THREE times this ride and it was pretty annoying. I cannot wait to get me freewheel in the mail to switch this setup out.

IMG_1372.jpg
IMG_1373.jpg
IMG_1374.jpg
 
My new battery should be in mid next week, I have tracking for it! I also decided to go a different route and bought another freewheel 12t with a space built into it from Kinaye MS. They are US based and ship for free. Thanks for that. The reason the other adaptor pictured above is out is because I cannot get a small enough tooth count freewheel for the speeds I desire.
I have been slacking on my Hydraulic brakes. I have to cut the hoses to length and bleed them since the hoses on them aren't long enough for this Beast. But I am sort of waiting on the new Battery so I only have to open up the case once and install everything...including the regen button, which could have came with longer wire...I will have to extend them like the key switch.

I have plans when I save some more of my pennies to get a Patterson drive with a large speed sprocket. That with the 12t rear will let me pedal to about 30mph hah, that will be sweet

I really wanted to get a Ebikes.CA center CA mount, but it is $16.00 plus $19.00 shipping LOL don't get me wrong I just wasted $40 on that freewheel adaptor too, but that's just asking too much IMO
 
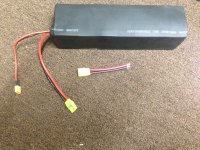
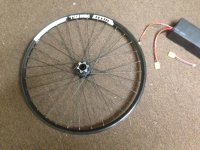
Got my new front rim and my new Luna battery pack! Now only if my damn forks came in the mail I could throw it all together..

IMG_1380.jpg
IMG_1381.jpg
 
Back
Top