Show Us Your Homemade Battery Housing

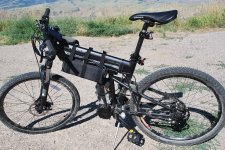
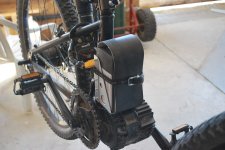
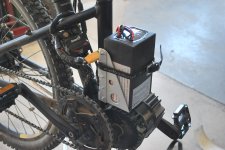
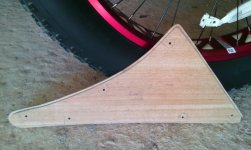
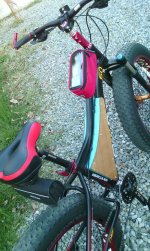
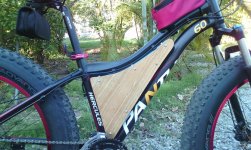
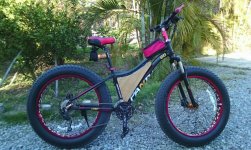
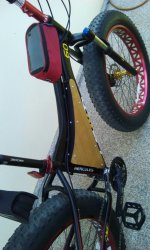
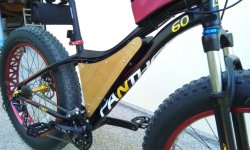
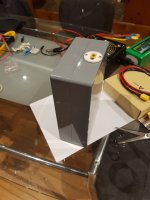
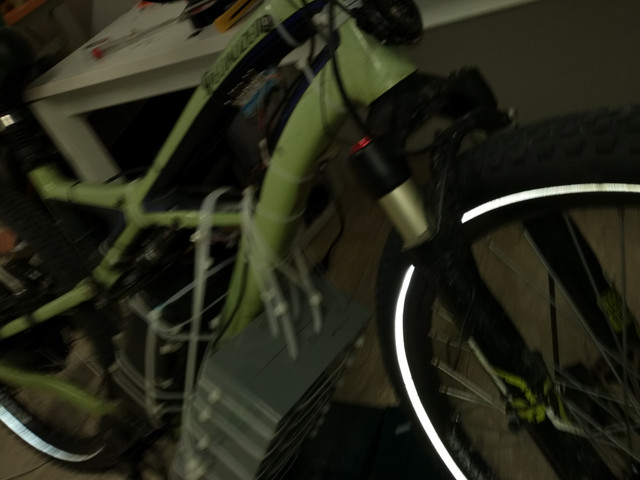
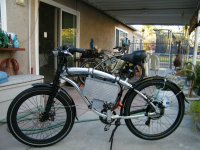
New Montague2 010.jpgNew Montague2 004.jpgNew Montague2 002.jpgA small mount for a small battery, a Mighty Mini 6AH from Luna, on my Montague Pro. I still have the option of also carrying my 11.5 AH battery in it's bag hanging the horizontal frame tube. The EPDM sheet makes it look less battery like, and somewhat waterproofs it. I've also added a top strap, and after over 100 miles of rough trail riding, it doesn't move at all.
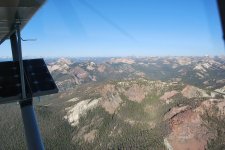
 
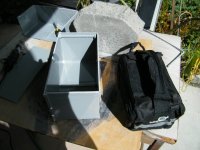
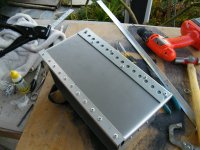
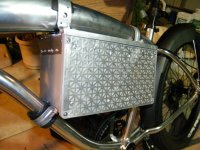
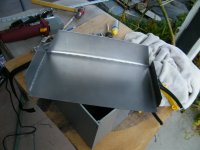
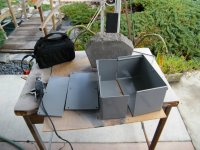
Here are my LiPo pack boxes made of aluminum diamond plate:

(last page of build E-Bronco)

https://endless-sphere.com/forums/viewtopic.php?f=28&t=44997&start=50
 
Hello!

I have been working on my ebike battery housing for the past 4 months, for material I have utilized aluminium for a low weight configuration which was lasercut and later welded. The housing was first drawn in CATIA with real time rendering functionality. It is currently housing a 20 Ah battery with recycled 18650 batteries.
 

Attachments

  • IMG_20160304_140638.jpg
    IMG_20160304_140638.jpg
    130.8 KB · Views: 6,753
  • IMG_20160803_145703.jpg
    IMG_20160803_145703.jpg
    124.5 KB · Views: 3,894
  • IMG_20160803_145717.jpg
    IMG_20160803_145717.jpg
    134.2 KB · Views: 6,753
  • IMG_20160803_145733.jpg
    IMG_20160803_145733.jpg
    117 KB · Views: 3,894
  • IMG_20160803_170233.jpg
    IMG_20160803_170233.jpg
    120.8 KB · Views: 6,753
  • IMG_20160803_170228.jpg
    IMG_20160803_170228.jpg
    107.9 KB · Views: 3,894
Many detailed pics on the sheet-metal buildup.

https://endless-sphere.com/forums/viewtopic.php?f=4&t=41170&start=150#p1194265
file.php
 
Home made leather bag for battery, same smaller for controller
 
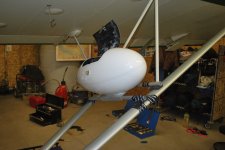
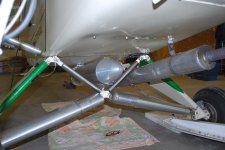
DSC_0953.JPGbattery pod 002.jpgbattery pod 001.jpgLast year was my first of flying with my folding ebike, and I alternated between carrying my battery/batteries (depending on the ride planned, I carry as many as 3) in fire resistant bags (made out of an old US Air Force insulated flight suit, of Nomex) tied onto the lift struts or underneath my seat. Tied on outside, there was zero chance of anything untoward happening (unlike when I carry them inside) in the event of some kind of battery malfunction, but it was draggy and time consuming, and looked like hell. So this year, I decided to come up with a better way, and to totally quit carrying them inside, ever.
I bought this little streamlined pod from an outfit who makes them for pilots like me of home built airplanes,that need a little more baggage space. It is somewhat common to tie things outside the plane, lawn chairs, even tents, and I've delivered quit a few solar panels (no bigger then 100 watt though) using this method. When an external load is tied onto both the front and rear lift struts, it is automatically at the angle of attack of the plane while flying, pretty much. So in theory the only drag is the front area, but it goes without saying securing whatever is being carried is crucial. Now, with this fiberglass pod I can just open the hatch, and put my two 11.5 AH Panasonic packs, along with my 6 AH Samsung MINI pack, with room left over, and I am outa there. No screwing around with straps and other means I used of securing the packs, always a bit tricky as I don't want to put too much force on the packs by over tightening, but I also don't want it coming loose in flight. I'll still use the padded fire resistant bags, so the packs will have a cushy ride. But the streamlined little pod is super low drag, and just looks cool as hell, especially compared to the way I used to carry them. I simply taped part of the mount to the lift struts, as I can't drill holes in it, I may take the time later to make a better looking clamp of some type. But I have to be careful not to scratch them....and the well pipe wrap tape won't do that anyway. the pod itself is quickly removable, the mount itself takes just a few minutes longer, but I'll probably just leave it on.

I already had a 12 gauge line running out to the area, so I can charge in flight using the 12 VDC to 58 V converter I had made. About 1 3/4 amps ( @ 58V, so around 10 or so @ 12V), anymore and I'd be taxing the aircraft's electrical system. The converter tops out at 58, and is "dumb", so it's up to me to balance as usual using my regular LUNA charger. Also, I still have plenty of room outboard of the pod, to carry the occasional solar panel or whatever.
 
Hi All!
First, my thanks to the many members of ES who gave me the inspiration to construct my first Battery Box, for my first E-bike build! I have like many newbies, been reading ES for a good few months, before buying my first new Fatbikes, for myself and my young daughter. Daughters e-fattie is up and running really well, and now is my turn to convert my bike to E-power..!!

Having researched this and a few other forums on e-bikes, and the fact that my home is in the rice and sugar growing plains of NE Thailand, and the nearest proper hills are a few hundred km's away, I decided on a conversion with a 3000w Hubmotor, and as my nice new Fattie has only a small frame triangle, I soon decided that a custom battery box was essential to my plans.

After detailed measurements of the volume available, I realised I had room to fit either 3 x 4s, or 2 x 6s 16000mah Multistar LiPo packs from HK, or I can squeeze in an 18650 30Q 14s6p em3EV triangle pack into my custom battery box. Either of the options are most suitable for my riding on the mainly hard pack trails through the surrounding farmlands at my home in this rural outpost in Thailand! Also, I am a fit, 65 year old guy, and am quite happy cruising around the trails and local roads at around 30 to 50 kph depending on conditions, and I like to pedal a bit as well, so I think these battery specs will suit me fine.

Originally I had envisaged a made to measure frame bag, but seeing some of the nice creations on these pages, decided a custom built battery enclosure could be a lot more aesthetically pleasing.. I like things to look nice, as well as having good functionality..!

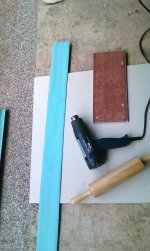
One of the great things I have learned since living in Thailand for the last 12 years is the incredible number of uses that Thai PVC water pipe can have. Having built my home here 8 years ago, and designed and installed all the PVC water and waste pipes myself, I have a great regard for the versatility, availability, strength and ease of working this product exhibits. And it is very inexpensive, and can be hand formed into complex shapes with just a heat gun and bending springs.

Having discarded the ides of 3D printing, because I don't possess a printer, or know anyone in my farming community that does either (plenty of buffaloes, cows, chickens, pigs and rice though,,!) and considering the use of aluminium sheet, my thoughts kept returning to Thai PVC pipe..something of a fetish, you may wonder..!!

I have lots of PVC pipe in all sizes in my store, and a quick measure up revealed a 2" diameter pipe with 3mm wall thickness, cut in half lengthways, would produce a strip of PVC plastic 90mm wide..exactly the width I had in mind for my battery enclosure to accommodate 74mm wide HK lipo packs, with room for foam padding, and no problem with my bikes 120mm BB spacing.

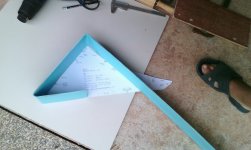
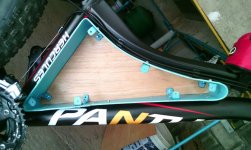
Armed with my heat gun, jigsaw, tools and paper template of my bikes frame triangle, I soon set to work and in a few hours had formed a PVC battery enclosure frame that fitted snugly inside my bikes frame triangle, and was securely fixed in place by the water bottle 5mm bolts. I also will secure the front of the battery enclosure with an additional mount onto the downtube.

Having completed the outer frame, I was considering either using ABS sheet or plywood for the side plates, when my wife produced a nice sheet of 3mm thick Hardwood veneer board, donated to her by our village Buddhist Temple, which was perfect for cutting out 4 pieces for the laminated side plates I had in mind. Plan was for 1 inner plate to fit snugly inside the PVC frame, and the outer plate to fit the external dimensions of the frame. This would give a strong laminated 6mm thick plate, and improved weather sealing and appearance of the completed enclosure, I hoped!

I drew out the shape of the inner plate using the PVC frame itself as the best template, and jigsawed it to shape. Once both sides were cut and a good fit confirmed, I cut the 2 outer plates 3mm larger all around, check fitted for accuracy, then laminated the 2 pieces each for the left and right sides using PVA adhesive, weighting them down onto a large spare porcelain floor tile and left them overnight to dry nice and flat.

The following day, the sides were laminated nicely and rest fitted a treat into the PVC frame..Mounting brackets were bent up from some more 3mm Flattened PVC sheet, measured up and drilled to fit the frame and attach the side plates. The mounting holes were tapped to accept 5mm bolts, so no nuts are required.

After the side plates were bolted in position, I sanded them to exactly match the shape of the PVC frame, and then gave them a few coats of polyeurathane lacquer until they had a nice, smooth finish.

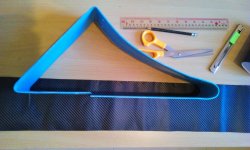
The final job will be to cover the Blue PVC frame with Black Carbon Fiber 3D vinyl adhesive wrap, which I have on order from my supplier in China via Lazada online shopping. My original plan was to also cover the side plates with the Carbon Fiber vinyl wrap as well, but I am really liking the "Woody" look of the varnished side plates, so now I'll wait until the vinyl wrap arrives, cover the PVC frame, and judge the look before deciding to cover or not cover..

What do you think would look best..??!!

Project Costs:
1.3m of 2" x 3 mm PVC water pipe.......0.00 (£1.50 if you needed to purchase)
100cm x 40cm X 3mm Veneer Board...0.00 (maybe £4.00 if purchased)
24 M5 x 10mm Cap Head scews...........£3.00
Laquere and Thinners.……......................£3.00
150cmx60cm Carbon Fiber vinyl wrap..£5.00

My total Cost............…...........................£11.00

I am very happy with the project so far and hope the pictures make everything clear..Now waiting on delivery on 2 x 6s 16000 HK lipo packs, on sale at a very good price and too good to refuse..! Also waiting for all the rest of my electric conversion kit from a store in China via Aliexpress, but I'll keep all that for the later build threads..
PS. Update..

The Carbon Fibre vinyl wrap arrived via courier on Saturday, and Sunday morning saw me hard at work with scissors, exacto knife, hairdryer etc, cutting the wrap and applying it to the battery box PVC frame. I am delighted with the finished look.. I think it suits the Tropical location where the bike is used.. Hope you like too..!
 

Attachments

  • IMG_20170126_153618_762.jpg
    IMG_20170126_153618_762.jpg
    126.5 KB · Views: 6,149
  • IMG_20170126_153552_385.jpg
    IMG_20170126_153552_385.jpg
    90.9 KB · Views: 3,905
  • IMG_20170126_152818_086.jpg
    IMG_20170126_152818_086.jpg
    119 KB · Views: 6,150
  • IMG_20170126_152912_780.jpg
    IMG_20170126_152912_780.jpg
    98.5 KB · Views: 3,905
  • IMG_20170125_170502.jpg
    IMG_20170125_170502.jpg
    392.8 KB · Views: 6,150
  • IMG_20170125_170408.jpg
    IMG_20170125_170408.jpg
    180 KB · Views: 6,150
  • IMG_20170125_170336_20170126210003193.jpg
    IMG_20170125_170336_20170126210003193.jpg
    166.7 KB · Views: 6,150
  • IMG_20170129_073242.jpg
    IMG_20170129_073242.jpg
    113.7 KB · Views: 6,007
  • IMG_20170129_084653.jpg
    IMG_20170129_084653.jpg
    242.4 KB · Views: 6,007
  • IMG_20170129_100523.jpg
    IMG_20170129_100523.jpg
    108.4 KB · Views: 6,007
  • IMG_20170129_100620.jpg
    IMG_20170129_100620.jpg
    109.7 KB · Views: 3,879
This is my temporary battery box, essentially a plywood box wrapped in carbon cloth for strength and camaclad to make it invisible 8)

View attachment 2

Looks quite good when its open, I did consider a clear polycarbonate side panel.

bare battery.jpg

That water bottle will need to be moved!


Attachments

  • Tour de France finnish line.jpg
    Tour de France finnish line.jpg
    100 KB · Views: 6,110
Johne-bike said:
Hi All!
First, my thanks to the many members of ES who gave me the inspiration to construct my first Battery Box, for my first E-bike build! I have like many newbies, been reading ES for a good few months, before buying my first new Fatbikes, for myself and my young daughter. Daughters e-fattie is up and running really well, and now is my turn to convert my bike to E-power..!!

Having researched this and a few other forums on e-bikes, and the fact that my home is in the rice and sugar growing plains of NE Thailand, and the nearest proper hills are a few hundred km's away, I decided on a conversion with a 3000w Hubmotor, and as my nice new Fattie has only a small frame triangle, I soon decided that a custom battery box was essential to my plans.

After detailed measurements of the volume available, I realised I had room to fit either 3 x 4s, or 2 x 6s 16000mah Multistar LiPo packs from HK, or I can squeeze in an 18650 30Q 14s6p em3EV triangle pack into my custom battery box. Either of the options are most suitable for my riding on the mainly hard pack trails through the surrounding farmlands at my home in this rural outpost in Thailand! Also, I am a fit, 65 year old guy, and am quite happy cruising around the trails and local roads at around 30 to 50 kph depending on conditions, and I like to pedal a bit as well, so I think these battery specs will suit me fine.

Originally I had envisaged a made to measure frame bag, but seeing some of the nice creations on these pages, decided a custom built battery enclosure could be a lot more aesthetically pleasing.. I like things to look nice, as well as having good functionality..!

One of the great things I have learned since living in Thailand for the last 12 years is the incredible number of uses that Thai PVC water pipe can have. Having built my home here 8 years ago, and designed and installed all the PVC water and waste pipes myself, I have a great regard for the versatility, availability, strength and ease of working this product exhibits. And it is very inexpensive, and can be hand formed into complex shapes with just a heat gun and bending springs.

Having discarded the ides of 3D printing, because I don't possess a printer, or know anyone in my farming community that does either (plenty of buffaloes, cows, chickens, pigs and rice though,,!) and considering the use of aluminium sheet, my thoughts kept returning to Thai PVC pipe..something of a fetish, you may wonder..!!

I have lots of PVC pipe in all sizes in my store, and a quick measure up revealed a 2" diameter pipe with 3mm wall thickness, cut in half lengthways, would produce a strip of PVC plastic 90mm wide..exactly the width I had in mind for my battery enclosure to accommodate 74mm wide HK lipo packs, with room for foam padding, and no problem with my bikes 120mm BB spacing.

Armed with my heat gun, jigsaw, tools and paper template of my bikes frame triangle, I soon set to work and in a few hours had formed a PVC battery enclosure frame that fitted snugly inside my bikes frame triangle, and was securely fixed in place by the water bottle 5mm bolts. I also will secure the front of the battery enclosure with an additional mount onto the downtube.

Having completed the outer frame, I was considering either using ABS sheet or plywood for the side plates, when my wife produced a nice sheet of 3mm thick Hardwood veneer board, donated to her by our village Buddhist Temple, which was perfect for cutting out 4 pieces for the laminated side plates I had in mind. Plan was for 1 inner plate to fit snugly inside the PVC frame, and the outer plate to fit the external dimensions of the frame. This would give a strong laminated 6mm thick plate, and improved weather sealing and appearance of the completed enclosure, I hoped!

I drew out the shape of the inner plate using the PVC frame itself as the best template, and jigsawed it to shape. Once both sides were cut and a good fit confirmed, I cut the 2 outer plates 3mm larger all around, check fitted for accuracy, then laminated the 2 pieces each for the left and right sides using PVA adhesive, weighting them down onto a large spare porcelain floor tile and left them overnight to dry nice and flat.

The following day, the sides were laminated nicely and rest fitted a treat into the PVC frame..Mounting brackets were bent up from some more 3mm Flattened PVC sheet, measured up and drilled to fit the frame and attach the side plates. The mounting holes were tapped to accept 5mm bolts, so no nuts are required.

After the side plates were bolted in position, I sanded them to exactly match the shape of the PVC frame, and then gave them a few coats of polyeurathane lacquer until they had a nice, smooth finish.

The final job will be to cover the Blue PVC frame with Black Carbon Fiber 3D vinyl adhesive wrap, which I have on order from my supplier in China via Lazada online shopping. My original plan was to also cover the side plates with the Carbon Fiber vinyl wrap as well, but I am really liking the "Woody" look of the varnished side plates, so now I'll wait until the vinyl wrap arrives, cover the PVC frame, and judge the look before deciding to cover or not cover..

What do you think would look best..??!!

Project Costs:
1.3m of 2" x 3 mm PVC water pipe.......0.00 (£1.50 if you needed to purchase)
100cm x 40cm X 3mm Veneer Board...0.00 (maybe £4.00 if purchased)
24 M5 x 10mm Cap Head scews...........£3.00
Laquere and Thinners.……......................£3.00
150cmx60cm Carbon Fiber vinyl wrap..£5.00

My total Cost............…...........................£11.00

I am very happy with the project so far and hope the pictures make everything clear..Now waiting on delivery on 2 x 6s 16000 HK lipo packs, on sale at a very good price and too good to refuse..! Also waiting for all the rest of my electric conversion kit from a store in China via Aliexpress, but I'll keep all that for the later build threads..
Wow Johne-bike, that looks awesome! Nice job...I like the look of the wood panels but CF would be more stealthy. You could possibly even get away spray painting the PVC frame a matte black. I might have to try this PVC pipe trick, thanks!
 
bat pod 002.jpg

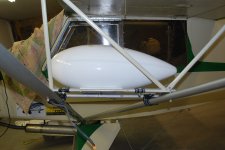
Probably not what the OP had in mind... but I recently made this streamlined container to carry my two Panasonic 11-5 AH batteries OUTSIDE the cockpit. This small belly pod is right on the center of gravity, and adds very minimal extra drag as the airflow in the air is already burbulated pretty good. As opposed to, for instance, putting on top the wing in pretty pristine airflow. The front nose cone hinges down for access, and I have a charging port so I can of ocourse re charge while flying. The thing on the right is the planes muffler, it used to run down the center but when I recently offset it to the right side, it opened up the perfect space for the new battery pod. 6" dia by 24" long.
 
Here mine on my cruiser build 2 years ago.
 

Attachments

  • 1502434_850679644963591_4647046443954221320_o.jpg
    1502434_850679644963591_4647046443954221320_o.jpg
    371.8 KB · Views: 5,936
  • 10750006_838704486161107_8671320236502189791_o.jpg
    10750006_838704486161107_8671320236502189791_o.jpg
    315.6 KB · Views: 5,936
  • 1912253_838704559494433_1790734759267997618_o.jpg
    1912253_838704559494433_1790734759267997618_o.jpg
    267.8 KB · Views: 5,935
  • 1537445_838705176161038_5086217487401245988_o.jpg
    1537445_838705176161038_5086217487401245988_o.jpg
    274.1 KB · Views: 5,935
  • 10553779_838705442827678_7687211826784998689_o.jpg
    10553779_838705442827678_7687211826784998689_o.jpg
    279.7 KB · Views: 5,935
  • 10714532_838704909494398_4187912733040510644_o.jpg
    10714532_838704909494398_4187912733040510644_o.jpg
    208.5 KB · Views: 3,876
This is still a work in progress but here is my 3D printed housing for 6 Hobbyking Lipos.

The 3D design in Fusion360:
16177823_10154940476121532_7217598667629780815_o.jpg


The current status (sprayed and ready for batteries and electronics)

IMG_20170208_WA0002.jpg


Follow this link for the album with inbetween steps:

https://goo.gl/photos/bgUM4aiQ5jn7HECEA
 
I cant believe none of you guys are using MY idea. The bike is a marin mount vision 2008. It has a straight tube from bottom bracket to head. So, I will use a large, 3.5 inch PVC pipe. Cut, to fit into the half moon thingies for the cables. So, it is suspended from the cable routings, and screwed, to the upper of the two water cage bolts.
I will have to drill the frame, and thread, for the other attachment point. It will wrap around the pipe. And will only hang down maybe 1.250 inches below the pipe.

This will be a 48 volt, 17.5 ah and stay low and tight. I will eventually get another battery, and make two, to quick swap. It will be a super short run to controller motor.

It will weigh about 6.5 lbs. No bms, just a high qual balancing charger. The batts aren't well balanced, if you short charge them for longevity. So, I will add outboard limits.
 
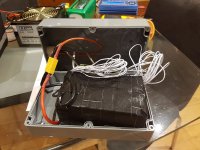
This isn't anywhere near as impressive as many of the ones in this thread, but I thought it was tidy. Not really home made either, but when I looked at the cost of perspex, it was cheaper to buy a premade box.

foto_no_exif (1).jpg

foto_no_exif (2).jpg

That's 5Ah of 16S with a BMS inside. It's had a year of faithful service being a duct tape battery, and the BMS has been perfect - no significant draining of the cells over time, so no need to remove the BMS for long term storage.

My next step is to figure out where and how to mount it. I'm thinking top of rear rack, not easily removed... But if someone can think of a solid way of mounting it easily removable, I'd much prefer that.
 
wow, what a coincidence!
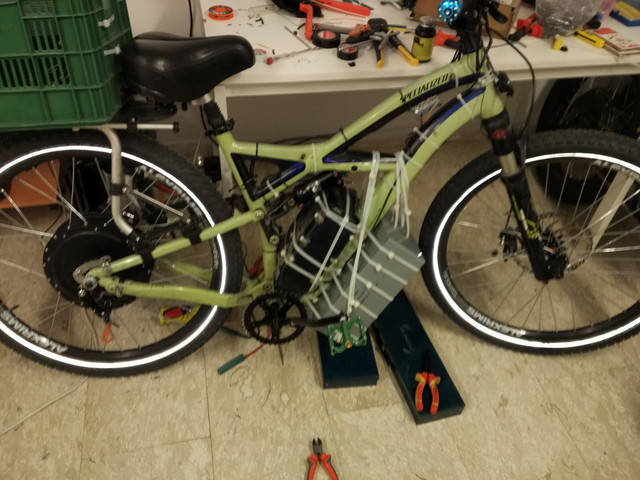
i just finished mounting on the exact same box (but i think a bit bigger).
The must diy mounting haha:


pictures of image

It's ugly as frock but i bet it will do the job.. it's got like 20 big zip ties holding it.
The inside traingle box was made from pvc sheets that i bent with heat gun and glued them togther when got.
Used small zip ties to secure it 100%.
Eace box contain 16ah 20s lipo. So total 32ah 74v lipo - 2368wh.
Waiting for my neat gut to come and then i'll change the zip ties on the big box to aluminum sheet and mount it more seurely.
(the inside box already tested for two weeks of hi speeds, the big is new).
 
Mudale I have used zipties for unusual things but Haha What frame is that . ? I like it.
 
Just a warning about zipties--they degrade rapidly in sunlight, or other UV exposure.

Also, the tiny little tab that holds it against the ratchetramps on the strip doesnt' take stress well, so they tend to snap easily under any sudden stress.

So vibrations and bumps on the road will tend to shake the hanging pack, and pull really hard on tthose little tabs, whcih then can break. Once one breaks (probably on the top end of the pack), the next one down gets more stress, and so on, and the less of them there are the more stress on each one.

It is possible for the pack to appear to be held tightly, even when some of the ties are actaully broken at the tabs, and then suddenly the pack breaks completley off and hits the ground at the next bump.... :(

Don't ask me how I know this, as it has obviously never happened to me. :oops:


I highly recommend steel hose clamps rather than zipties; they break much less often from such loads.

Even a number of long double-sided velcro straps wrapped a couple times around would be more reliable than the zipties, as there are many more connection points so stress is distributed better. .
 
hahahah that's a funny story bro!!! :lol:
But don't worry it's just a temporary setup until i'll mount it with metal/aluminum straps... (and also placed some ugly rag around it... it's intimidate thief and also help with cups since it's look more like a normal bicycle).

did a test ride, hold up pretty nice..
 
Awesome vid. Are you running 60 mph? Love the Race Render ..
 
yep it's seem like 60mph is my top speed.. at the moment :twisted:
i think it will push maybe 5 more after i relocate the rear brake so it won't rub the motor..
 
torker said:
Mudale I have used zipties for unusual things but Haha What frame is that . ? I like it.

it's specalized enduro 2012 comp. The fsr have 170 mm front fork instead of 160 and coil rear instead of air can.
so u can't put batteries in the triangle... so if u buy one, buy the comp version.
 
Back
Top