One of the reasons I don't spend money on things like brand new lights and stuff I can DIY is so I can afford brand new brake pads (and tires, tubes, etc., stuff I can't DIY).
In this case, it's new brake pads for the front tire. A little while back, the Avid pads on the back-front brakes simply stopped providing significant braking power; the Koolstop pads on the front-front brakes still work but aren't sufficient by themselves.
I checked the pads, arms, cable, lever, clamps for the U-brace with the brake bosses, etc., and even swapped the pads between the two sets of brakes, and the problem moves with the pads.
Sanding the pads to remove the existing presumably problematic surface fixed it for one braking instance, but then they were back to useless. I mean, you could grip the lever hard enough to prevent the wheel from moving at a stop just rocking the trike back and forth while sitting on it, but it just didn't significantly slow the trike from 20MPH, in any reasonable distance. It was like crappy caliper brakes on a wet steel rim. :/
So.... New pads required.
Some posts on ES said the new Koolstop "Ebike compound" works pretty well, so I figured I'd try that out. Raine said he found a good deal on Amazon with free shipping for the pads in holders, so we got those to try out. (nobody local had them at all, most don't carry real Koolstops just clones, and I've never gotten any of them to order them). If the pads themselves suck, the holders will work with any other compound pads that fit the VB or VB2 holders.

They are model KS-VBH2E, V2 Holder, UPC 760251080427.

They don't have a pair of spherical washer sets, just one--the other one is part of the holder itself. The bolt floats inside the holder, rather than being firmly fixed into it. Only one set of washers simplifies installation, as theres not as much fiddling getting them to stay in place while it's installed into the arm, good for me and my hands.

The pad is held in with a retention pin, and can just be slid out the back of the holder to replace it. So theoretically once it's adjusted and in-place, I can replace a worn out pad without readjusting the holder (it's always a PITA to readjust new pads, and can take me hours of fiddling with some of them).
These are no exception, becuase they are very long (and narrow and asymmetric). Teh length, combined with the angle at which the bosses are pointed vs the rim's curve, means that setting them up for toe-in like I would with shorter, symmetrical pads results in the back end not touching the rim at all.
But if I set them up for flat, then the rear end of the pad is so long that it touches the rim all the time, unless I loosen teh cable so much that even full squeeze of lever to handlebar won't fully engage the brake.
So it's a compromise.
Now I have almost full braking back, though it's not really any different with the new pads on the back-front brakes vs the original koolstop pads on the front-front brakes. THey both have "ok" braking, but there's still something keeping them from working like the setup did when I did it.
It might be the rim surface; maybe something has happened to the metal itself. It started life as a machined braking surface rim, and the left side still looks normal. But the right side surface appeared different, more worn, shiny, along the center path where it meets the back-front pad (the front-front pad is closer to the inner circumference of the rim). Pics a bit further down.
And after testing with the new pads, it's dull and dark there, and actually sort of looks blued as if it heated severely along that track. Can't really see the difference in the before/after pics very well, but the rim itself was still quite warm, even after I'd been back in the yard and parked long enough to go get the camera. So it probably did get pretty hot during the actual braking--hotter than it would get in use because I was repeatedly accelerating to 20MPH and braking as hard as I could with only the rim brakes, mostly just the new pads to break them in.
But it's *only* on the right side. The left still looks like it did when I got it, and the entire surface from edge to edge is the same, like the edges of the right surface still do.
Pics before testing the new pads, right after installation:
no flash

with flash

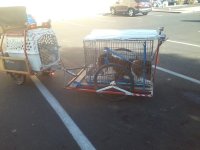
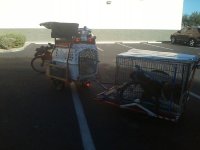
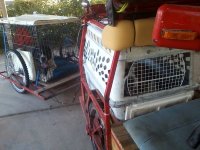
whole brake setup

front front brake with regular koolstop pads

rear front brake/rim after testing
View attachment 5
rim after testing, first with flash then without


What I really need to do is to reconfigure the rear U-brace with bosses so it sits at an angle on the back of the fork such that the bosses are parallel to the rim curve, rather than at an angle away across the top of it. That will require cutting and shaping the bottom end of the U (the two "ends") where the ends fit against the fork so they curve and mate to the fork legs. Then I have to make a plate and "fill" the top of the U ends where they will be spaced away from the top ends of the fork legs. Then I also need a longer bolt to go from the top curve of the front brake U to the rear brake U and thru the fork's own U-brace (which has no bosses on it), so all the parts are tied together and braced against each other during braking.
Another issue that has crept in over the months since changing forks is the bearings/cups in the headsets have accumulated a gap that means braking with the front brake "toggles" the whole fork, tiller, and bars up and down (forward and back). It *looks* like it's just in the top bearing, but it's probably in both top and bottom. pic below, with the plastic cover lifted a bit at the front as I was trying to see the gap (can't).

I can't fix it without putting spacer shims between the bearing outer races and the headtube cups--but I can't easily get to the top one and can't see it really at all to tell how much space there is, because of the square tubing that the headlight/turnsignals/etc is mounted on. That's all welded in place so I'd have to cut it off to do this fix, most likely. It's probably less than 1mm, maybe only half, but it's certainly enough to feel like a lot more during braking. I don't feel it during any other maneuver.
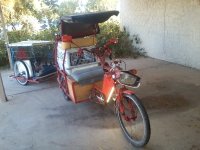
And my ever-present supervisor, Kirin:
View attachment 1
With Yogi mostly wandering around the yard or just going inside to lay down on the cool tile:


") ).
).