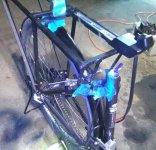
Marin San Rafael Euro frame-up TSDZ2 powered build

I have a set of the BB7 brakes on one of my bikes and although I'm a real dummy when it comes to properly adjusting them luckily I have a next door neighbor who has sold and adjusted a lot of them. He told me to carefully break in the rotors by repeatedly getting up to about 5-10 mph and brake firmly until ALMOST coming to a stop, then rinse and repeat about 20 times. I too had trouble getting them to let the wheel spin freely without a tiny bit of rubbing but after following his advise on the break-in procedure the rubbing went away.

Good to see you've turned the corner to using disks, you're going to love it and I doubt you're going to have any problems with the rotors getting hot-unless you're going down a steep mountain pass braking constantly with a large amount of touring gear and you happen to weigh 280 lbs. If that happens get 203mm rotors-they dissipate heat better due to more surface area.

With the dual brake system you definitely should be able to stop effectively, especially with the addition of the Kook-stops, they in themselves are very effective, have them on one of my bikes and they really grab nicely coming down monster hills at speed. Have fun!

Added:auto-correct always turns Kool Stop into Kook Stop, I'll just leave it since it always gives me a chuckle.
 
Raisedeyebrows said:
I have a set of the BB7 brakes on one of my bikes and although I'm a real dummy when it comes to properly adjusting them luckily I have a next door neighbor who has sold and adjusted a lot of them. He told me to carefully break in the rotors by repeatedly getting up to about 5-10 mph and brake firmly until ALMOST coming to a stop, then rinse and repeat about 20 times. I too had trouble getting them to let the wheel spin freely without a tiny bit of rubbing but after following his advise on the break-in procedure the rubbing went away.

Thank you very much for this! ...I got the Avid BB7s as a used pair of rotors, calipers, cables, etc, from a guy who posts here named Tom - his full posting name escapes me at the moment. I got the idea that maybe the pads were worn some, so I bought a new pair - just two since I only intend to run one of the calipers. So, given your input, I think I'm going to install the new pair in the front caliper first, then do this. But I'll dismount the caliper for now while I work out the brake lever system details.

Raisedeyebrows said:
Good to see you've turned the corner to using disks, you're going to love it and I doubt you're going to have any problems with the rotors getting hot-unless you're going down a steep mountain pass braking constantly with a large amount of touring gear and you happen to weigh 280 lbs. If that happens get 203mm rotors-they dissipate heat better due to more surface area.

I can see here you're a big fan of disks!

In my experience with bike brakes so far, which does not include disks, the only really crappy ones are rim brakes with old, hard shoes on steel rims! Step up to Kool-Stops on those and they then fall into the acceptable category. Make it an aluminum rim with those Kool-Stops, and it's now in the pretty awesome territory! BUT, to my great surprise, the "OEM" shoes that came with my brand-new Origin8 set I put on this bike, mated with an AL rim resulted in braking that easily rivaled the Kool-Stops! :D ... Of course, I never bothered to try the new Origin8 shoes on steel rims! :lol:

Anyway, it's hard to imagine needing more than rim brakes on level ground. I haven't done a really heavy hill-ride in months due to my bum knee, but it's healing - I might be up for a good hill ride in the next week or three! :)

For the record, I'm a pretty big guy at 6'3", broad shouldered, etc., and typically turn the scales at 210 to 220, depending on the season. (I am taller in the torso than legs than the average guy, but only modestly so.)And, my bike has all this extra burden to carry - the big 12.76 ah battery, the TSDZ2 and the rear bike rack and basket probably having more mass than the whole rest of the bike combined! At some point, when I consider it "done," I'll weight it and me together - I'll just stand on a scale holding it in my hands. My wild bet is it'll be over 250, maybe over 270, especially including all the tools, spares, electrical extras and the front basket I'm planning. ... I'm a firm believer in taking vehicle measurements - like "curb weight" - including absolutely everything, as ridden / driven / flown / sailed, etc.

Raisedeyebrows said:
With the dual brake system you definitely should be able to stop effectively, especially with the addition of the Kook-stops, they in themselves are very effective, have them on one of my bikes and they really grab nicely coming down monster hills at speed. Have fun!

I quite agree. ... With the dual fronts, I should be able to dissipate a lot of energy in a damned hurry if desired. Might even risk flipping over on the front wheel with them both in operation - a feat I haven't done since I was around 10 or 12 and don't care to repeat!

You talk about "203" mm rotors. ... Do these mount the same and use the same caliper but using a different caliper mounting bracket?

Raisedeyebrows said:
Added:auto-correct always turns Kool Stop into Kook Stop, I'll just leave it since it always gives me a chuckle.

I noticed that! I also noticed that when just typing along, one can make the same typo since k and l are adjacent. :)

Meanwhile, in skimming over past remarks I notice that I might have given a mistaken impression about the color: I meant to say that I wasn't choosing based on color, just frame details and there really was no choice, but that I liked both the silver and this "smoke". The more I work with it, the more the smoke color is growing on me - purple as you call it! ...I kinda wish I had some rattle-can paint in that same color. If I did, I'd probably have some of the accessories painted in the same color, such as the rear rack. As it is, I think I'm going to just use either grey, when available, or silver / chrome / unpainted aluminum as accents. For example, I'm thinking I'll leave my front derailleur's mounting bracketry I made plain ole AL, though I'll paint it in clear to prevent oxidation.

Oh, and BTW, the 50mm long M5 button-head bolts I ordered for the front derailleur's mount have NOT been received and they are long over due! :( ... I'll have to follow up on that!
 
to use a 180 rotor or 203 rotor on a standard disc brake mount, all you need is a adaptor.
There are two depending on which fork you have .

http://www.jensonusa.com/Shimano-F203PP-Disc-Brake-Adapter/

http://www.jensonusa.com/Shimano-R203PS-Disc-Brake-Adaptor/
 
ScooterMan101 said:
to use a 180 rotor or 203 rotor on a standard disc brake mount, all you need is a adaptor.

Thanks again, ScooterMan. ... I "did the math", and the 160mm disk has about 1/4 the mechanical advantage of the rim brake on a 700C wheel (a factor of 3.888 instead of 4, but close enough for "round numbers"). Bumping it up to the 203 disk helps a lot, with about 1/3 the mechanical advantage. Those calipers have to be pretty awesome to match the rim brakes! I'm keen on getting some first hand experience with it.

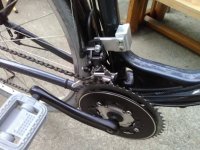
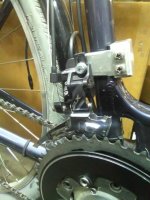
Meanwhile, I got tired of waiting for the M5 X 0.8 X 50mm button-head screws, so I found some make-do for the time being and mounted up the front derailleur! It works great! Here's the assembly from a couple of feet away for "context."

SanRafael_front_deraileur_2_2.jpg

Unfortunately, the contrasts aren't strong so it's a little hard to see. So, I did a close-up:


I adjusted the derailleur, and it's fine! Works great!

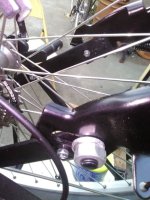
While I was at it, I fixed a small problem I've been having with the kickstand; the kickstand has been rotating sometimes on the M10 studs that attach it to its mounting arms. So, I drilled holes and put in a pin. . . But, the pins I wanted to use weren't that great, so I switched to small M5 screws and matching nuts instead - a tiny bit heavier but no biggie:

SanRafael_kickstand_pins_1_2.jpg
 
The ordered bolts finally came - for the front derailleur mount.

SanRafael_front_derailleur_completed_1_2.jpg

Interestingly, and happily, with these two more proper bolts attaching everything, the system now has more adjustment room and seems to function more smoothly. I'm guessing this is because it's both a bit more rigid and because it's also in better alignment. :D
 
I decided it was time to get on with the next stage of development of the electrical system. A key question was where to put which components?

I already have this lovely frame right next to the battery, why not use it for those components that should be close to the battery? So, I did just that.

I started by sitting with the bike and the various components and contemplating things over a few slowly-nursed beers, getting a feel for the component sizes, what their orientations might be, how the parts might be most simply and elegantly installed and so forth.

Once I decided on my plan, I started by hacking out the front right rack support, grinding off the old weld material, and replacing the support with two drop-down verticals - with pre-drilled holes for an accessory "cigarette lighter" socket, and pre-painted, too. I then gently bent these verticals rearward somewhat so that the socket would drain forward if it ever got water in it.

I then needed to replace that support. I could have made the inner socket support longer, twisted it, and then anchored it to the bike, much as with the original support, but I decided instead that I was going to run a nearly horizontal bar - of the same stock - and that it would be stronger, on whole, if that down-link came from the single piece running rearward with a close-to 90 degree bend in it, with the short end making the link from support anchor to inner socket support. To execute this, I modified the original support to go to the outer socket support, panted the still loose piece, and welded it all up.

View attachment 4

I then fabricated the nearly-horizontal bar that would hold all the rest of the components. It was very simple and straight forward. The 1/2" wide by 1/8" thick bar first received a 100 degree or so bend with the short length being long enough to overlap the anchor link when the 90-ish bend was butted up against the inner socket support bar. This gave a definitive point of measurement for pre-drilling the component mounting holes, since it'd be FAR easier to drill them in advance! I mounted the bar with bend in the vice mounted on my milling machine's table and then it was super easy to drill holes down the dead-center of the bar at whatever distances I desired. I knew I needed some offset from the 90-ish bend, so I just guessed, and that gave a starting point, and then I proceeded down the length of the bar, drilling five holes in all to mount four components (discussed more later).

Now, with something to "argue about" on final fitment, I had to determine how to terminate the rearward end and at what angles the bar should rest when fully welded. I decided that sloping was good, but how much? I also determined that the rearward end had to be pushed outboard a little so the rear-most component would clear the fender, and leaving the fender some future adjustment range would be nice, too. I marked off a length where it should end, then decided to make a "dog leg" or "step" so the nearly horizontal bar would have another nearly 90 degree bend going vertically up, then turn horizontal again for a short bit to let it rest on an existing cross-bar. This would make installation a snap and very efficient in terms of metal, though I could have just left it vertical and saved a gram or two, perhaps.

Mounting bar fabrication complete, I painted it, several coats, and through drying, afternoon became evening...

Once dry, I welded it into place, of course! But, it was now dark and I did have some trouble seeing to start the welds in the right spots! I oopsed on the front face, just below the inner socket support, so there's now a blob there that I couldn't grind off without taking the whole rack off the bike - and I wasn't doing that! - however, it's pretty minor, and everything else went just perfectly. ...After the welding was done, I was anxious to paint the welded areas, and while waiting for that paint to dry, I took some more photos:
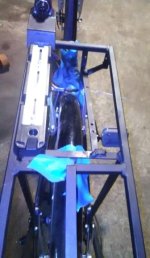
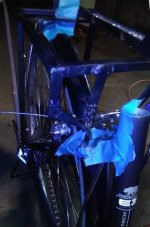
SanRafael_R-Rack_electrical_mounting_bar_1_2.jpg

SanRafael_R-Rack_front_rt_support_done_1_2.jpg

SanRafael_R-Rack_front_rt_support_done_2_2.jpg

Also, while welding, I dug through my M4 and M5 fasteners and got mounting hardware for everything and then, paint dried, I finally got to actually mount the parts!

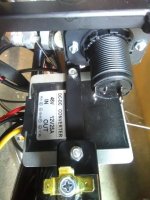
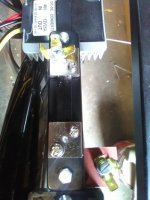
I'll do more photos later - with better lighting - focusing in on each piece, but in this image you can see the basic layout. In the far right corner is the "waterproof" accessory power socket, attached with 2 M4 X 12 screws. Nylock nuts weren't available, so I flipped the mounting ear of the socket around backwards and sunk the M4 nuts into the countersunk region of the ear, and this is an effective locking system I've used in the past. ... Just rearward of the socket, below the bar, is the DC - DC converter, "48v to 12v", attached with one M5 cheese-head screw on the forward end and a longer M5 hex head bolt on the rearward end, both using nylock nuts. The converter's rearward bolt also clamps the forward end of the 50A shunt to the bar. The next fastener, another M5 hex bolt with nylock, attaches the rear end of the shunt and also a thin bit of fiber board with two M5 holes punched in it. This is for a separate ground mounting location for the isolated 12v system. And, finally, attaching the fuse box are two more M5s, this time cheese head screws with nylocs, primarily because the cheese heads fit perfectly within the fuse box.
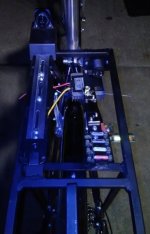
SanRafael_R-Rack_electricals_mounted_1_2.jpg
 
...While waiting for coffee to brew, I went out and took a few more images this AM. It's raining so I'm stuck to shooting inside the shed, but they'll do for this purpose.

First, we see the back-side of the accessory socket and the DC - DC converter. Yes, it reads 25A! In the foreground, we can see a three way male 1/4" molex connector. This is for POSSIBLE use for the load side of the battery's amp meter shunt. I probably won't use it at all since the electric motor needs all the volts it can get, so I'll use a ring connector, and similarly, why skimp on the DC - DC converter? It'll have a ring, too - not sure why else I need more grounds there! (The converter is suppose to have isolated grounds - IDK if it really does, but it seems wired for it, so I'll go with that and assume it does.)

SanRafael_converter_and_accessory_socket_1_2.jpg

Next up, we have the shunt. It's rated at 50A and matches the requirements for the Cycle Analyst series - 75mA, I think? On the far end, the molex grounds discussed above and in the foreground right we have another one, this for the isolated ground for the 12v converter. I'll run a ring connection to the under-side. Of the other three, one will go to the accessory socket, one will go to the front of the bike and the other will be used in the rear for lighting purposes.

SanRafael_shunt_and_12v_gnd_1_2.jpg

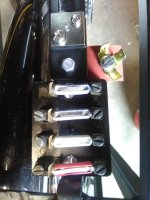
Now, the fuse box. It's taken from a 1950s era Karmann Ghia! 8) Originally they were a no-cover affair because they're inside the trunk, but, for whatever reason, new replacements did come with a cover, and I do have a couple of new ones that have the cover! ... BUT, I'm not giving up a cover for this purpose - too rare! ... though, now that I think of it, this MIGHT be a better use since technically they weren't stock on the Ghia... Hmmm... I can always change it out later!

SanRafael_fuse_box_and_12v_gnd_1_2.jpg

Notice how perfectly the parts all fit, right to the edge - I didn't have a single mm to spare, but it all fits just fine!

The power will go in on the left, the first screw, on the second fuse from top, powers the first two fuses. It's hard to see due to lighting, but those are blue fuses, indicating 25A rating. The upper one will go to the DC - DC converter, the second one to the TSDZ2 motor. The next two are independent, and I've been debating how I'll run the fuses. I'm thinking they'll both receive output from the DC - DC converter, and the upper of the two (third from top), with a white fuse at 8 A, will be for bike lighting, horn, etc, while the lower one, red at 16 A, will be for the accessory socket (nominally rated at 15A, I think.

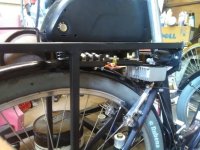
In this next image, we get a feel for the horzontalness of things!

SanRafael_rear_electrical_components_horizontal_1_2.jpg

You can see how all the parts are well "below grade" of the top of the rack. I'm considering how I'll further "package" this area. I'm debating with myself to put a small tool box directly above, adjacent to the battery - it can hold some spares, like fuses, a chain link or so, spare tube, etc. ... I've been using a small seat-mounted pouch for this so far, but its' a bit too small! Hmmm... More work required!
 
Today I got some wiring done...

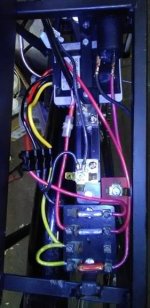
The bike is now powered through the new wiring system described in the last few posts. The battery connects in to the shunt and the fuse box, and both the TSDZ2 system and DC to DC (to 12v) converter are wired to the other end of the shut and their own fuse from the battery.

SanRafael_wiring_1_2.jpg

I used screw contact connectors for all four DC to DC converter connections, the battery + inbound and both power connections to the TSDZ2. The former are black, on the left, the latter are white and near the top left of the image, and the intermediate - the battery + connection - is in the center, adjacent to the upper (in this image) shut connection.

Oh, I also flipped which end I'd use for in vs out of the shunt.

While the accessory socket is wired in, the other 12v accessories are NOT yet mounted, so that fuse was left out!
 
I'm digging the step thru bike :) I was looking at a couple myself (much easier to get on and off considering I have to deal with Cecil too) but I decided to go with a full suspension so it can be taken apart into smaller pieces and stuffed into a pair of airline suitcases. The front derailleur is a great addition too. I may eventually consider that as well depending on how well I can get up hills with my current setup. Italy has crazy hills!

Did you add a custom speed sensor? My seed sensor came with a very short wire so it can only be mounted near the rim, and my receiving unit is not anywhere near as deep as yours either (nor is it adjustable for height). I cannot get mine to work without modifying the mount or something, it is too far away from the magnet.
 
John and Cecil said:
I'm digging the step thru bike :) I was looking at a couple myself (much easier to get on and off considering I have to deal with Cecil too) but I decided to go with a full suspension so it can be taken apart into smaller pieces and stuffed into a pair of airline suitcases. The front derailleur is a great addition too. I may eventually consider that as well depending on how well I can get up hills with my current setup. Italy has crazy hills!

Did you add a custom speed sensor? My seed sensor came with a very short wire so it can only be mounted near the rim, and my receiving unit is not anywhere near as deep as yours either (nor is it adjustable for height). I cannot get mine to work without modifying the mount or something, it is too far away from the magnet.

Thanks, John.

I've decided to make these bikes as a business. It's called Bad Knee Bikes - http://BadKneeBikes.com

I'm still in the developmental phase, you'll see the web site is just a start - more shell than web site.

As for the speed sensor and such, I recommend you post your query(s) on the normal TSDZ2 thread and include a photo or two and I and others can give you a good response which is more easily found by others who may have the same issue(s).

Enjoy Italy! There's a TSDZ2 vendor there. ...Since you already got your unit in the USA, you'll have the advantage of no speed restrictions! :D
 
Thank you. These bikes are wonderful for people that need to exercise as it is helpful going up hills so we don't have to walk the bikes up. The battery went almost dead (44v) on the way back and then I noticed how difficult the hills really are. I rode it without Cecil and I can feel the power difference, I think I need to raise the air pressure in the rear wheel. His new carrier is going to add another 5lbs to the bike too. It will probably take a few weeks to get used to riding a bike again. These newer bikes are nice though, I really like hydraulic brakes.

I did fix the speed sensor. I used a longer bolt and I cut apart a pen and a a tire valve cap to make an extension. I may take another ride this afternoon if I have the energy. I don't want to overdo it though, it has been over 30 years since I last rode a bike. I already rode 5-6 miles today. :)
 
John and Cecil said:
Thank you. These bikes are wonderful for people that need to exercise as it is helpful going up hills so we don't have to walk the bikes up. The battery went almost dead (44v) on the way back and then I noticed how difficult the hills really are. I rode it without Cecil and I can feel the power difference, I think I need to raise the air pressure in the rear wheel. His new carrier is going to add another 5lbs to the bike too. It will probably take a few weeks to get used to riding a bike again. These newer bikes are nice though, I really like hydraulic brakes.

I did fix the speed sensor. I used a longer bolt and I cut apart a pen and a a tire valve cap to make an extension. I may take another ride this afternoon if I have the energy. I don't want to overdo it though, it has been over 30 years since I last rode a bike. I already rode 5-6 miles today. :)

Good job with the mileage you've done already. With the TSDZ2 I think you'll find the miles just melt away behind you. You're going to need a lot bigger battery! :D

Meanwhile, be sure, when you transport Cecil with you to Italy, you don't have a bad experience - I recommend you read this:

https://www.rt.com/usa/421338-united-airlines-pet-deaths/

BTW, your tire diameter and tread will have a LOT to do with how efficient the bike is.
 
Hey RT, I found a couple of the original forks. From Bikewagon, for the 26" and the 700. $39!! Same price ebay except eBay shipping is higher!
 
Cecil flies in the cabin with me under the seat in front of me. I won't let him fly in the cargo hold and if they try to put him in the overhead bin my ADHD will flare up and they'll probably get air marshals to escort us both off the plane. If anyone ends up dying on the plane it is more likely to be me :)

You are correct, I do like riding the bike with the assist. I should have gotten one years ago!
 
Hey RT! Finally feeling well enough t9 move forward with the Stinson Euro. It’s been a steep learning curve and most parts are in place. Found a near OEM fork, The Pig headset, new comfort bars, brakeset, wheels and just missing the BB. Unsure of what size spindle, and somewhat confused by measuring for best fit. What did you use for BB and spidle sizing? After that all i need is a crankset. Kinda tempted to go 1 speed, but i have derailleurs at ready. No front needed. All flat riding with rear MAC. Have a spot reserved for the build list and thread.

Call if you feel like a chat.
 
Back
Top