tangentdave
1 kW
And a thin layer of MG Chemicals 8329TFM securing the stator to the heatsink should yield some serious thermal capabilities...
FastJohnny said:Leeleeducati said:Hey FastJohnny,
Nice setup, your mounting brackets don't look like the standards. Did Dave custom make those for your frame, or are they another series offered? Do you have any dimensional details you could share?
Thanks!
Yes they are custom sized to fit in the frame by our man Dave D. I'm not sure of the dimensions, but I will say the super short mounts are both a gift and a curse. The PRO is that they are short, look cool, and fit just perfectly in the triangle. The CONS are that the mounts are too short to mount the ESC on, and make the simple task of running a chain between the motor freewheel and crank chainring a complete nightmare.
Because the mount is so short you can only run certain chainring/motor freewheel combos. I'm going to struggle to explain this. With a longer mount you can run any chainring you want within reason, just take a link out, or add one to get the chain length and tension just right. With my mount, only certain combos work. For example with the 20T freewheel and a 30T motor chainring, using X number of links on the motor chain, it is so loose that the tensioner can't keep enough tension on the chain to stop it from falling off. If I take out a single link of chain, the chain is now too small to fit. If I swap the 30T for a 32T motor chainring, there is now a length of chain just long enough to fit, and the tensioner can apply tension (pictured).
tangentdave said:Varying the jockey wheel size is a good idea. I'll make the arm of the tensioner a bit longer as well and use a stiffer spring.


tangentdave said:Oh, and first 2nd gen kit headed out the door today! A couple more days and #2 will be out for delivery!
tangentdave said:You're connecting the packs externally? Not soldering, but plugging the XT connectors in series? The order of the series connections doesn't matter, just make sure all the cells are equally charged when connected.

Mugenski said:Is there a better spider/freewheel setup to use? I've noticed a concerning weeble-wobble in mine and I find the clearance of the inner chainring to be very tight with the spider itself. Wouldn't mind swapping it out for something a little higher quality and better clearances. Might be why I've thrown my chain a few times over the last 400km.
tangentdave said:This thread is for the development of the kit, bring all the ideas.
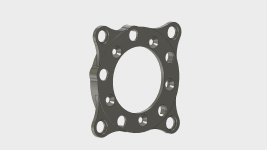
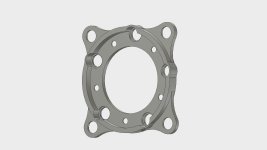
I tried a spider like this so I could use standard chainrings with less than 32 teeth, but then I got tired of modifying each flanged freehweel to allow the chainring bolts to pass through the flange. And the White freewheels do not cut easily at all, even in the mill. You are thinking this spider to be used with the freewheel crankset, right?