Vector Light Commuter Build

I want to try to mount an IGH under the swing arm and in front of the tire. I won't know until everything is in front of me.
 
calfeetwenty said:
I want to try to mount an IGH under the swing arm and in front of the tire. I won't know until everything is in front of me.

That will certainly be unique! post pics please

these frames seem to be based around rear hubs as most ebike frames have been for years. Now they offer the typhoon but it is really big and motorcycle-ish, they need to offer a light mid drive option
 
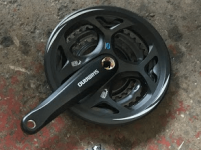
I just ordered this for $30 so hopefully it fits I think it will and it has a guard on it to help chain from falling off a bit. I'm hoping the 170mm crank arm has the same curve as my other side which just barely clears the rear swingarm tubing

I shall find out next week, this is 48t instead of the 42t I have now so it will also tighten the chain that has slack
crank.png
 
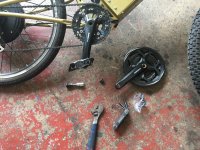
So I had to put a slightly wider BB on the bike but I had it kicking around on another bike so it wasn't a big deal...

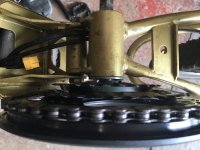
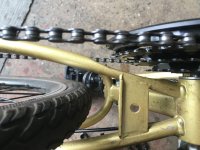
But long story short the 48t just BARELY fits!
IMG_2269.JPG
There is about 2mm of space between the suspension bolt and the small useless gear on the crank. If it hit I would have cut it off since its steel riveted together
IMG_2270.JPG
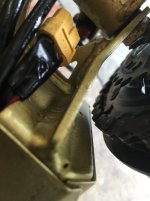
And its like 5mm from the front battery enclosure, this may scrape a bit if the chain still happens to fall off, we will see
IMG_2271.JPG
IMG_2272.JPG
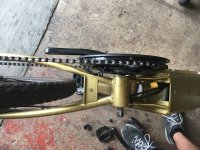
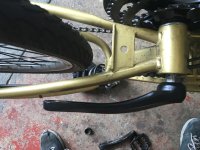
Came with the other side crank arm which was cool even though I didn't need it, like to make them match shiny together
IMG_2273.JPG
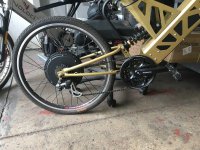
its not even close to hitting the swingarm on the back side
IMG_2274.JPG
Notice how the derailur is more forward now the chain is tighter since I increased 6 teeth on the front hopefully this will also help the chain falling off
IMG_2275.JPG
 
you might be right we have had rain so I haven't had a chance to try it yet, I can add a few links

what is the downside to the chain being too short when I don't chance gears? just the derailur hanging low?
 
No downside at all if you don't shift to the bigger cogs in back... and the higher tension reduces the chain slap too. You just have to watch out loaning it to people who forget not to shift.
 
Also, what is that xt60 coming out of your frame? If it's the charging plug, then I think you should move it up to the location that vector of theirs. That's where I put it and it was very convenient and kept it dry and clean (my bike got stolen :( )
 
The only other spot you can come out is up front where the cables enter on each side of the headtube. I have been keeping an eye on it just incase. I don't ride in the rain much anymore (free company truck) makes me lazy

single cog would work but then you need a chain tensioner and regular bmx chain, and its cheaper to use a derailur you have kicking around with 7-9 speed MTB chain components off a donor bike

edit: sorry to hear your bike got stolen you need any parts?
 
Had a little time to work on a new battery build. Looking to up the bike to 13s as cheap as possible so im using some old LIPO 2C 4250mah cells I have kicking around and a 20a bottle battery BMS

should get me where I want to go a little faster than the 10s6p 18650 battery we will see if I ever finish it.

This is how far I got today

Taking 3s packs apart to bare cells
IMG_2278.JPG
Pic on the BMS
IMG_2279.JPG
Cells have been sitting so I blew the dust off them
IMG_2281.JPG
Mocking them up in 4p configs
IMG_2282.JPG
Then soldering some 16awg CU across tabs
IMG_2283.JPG
Simple simple
IMG_2284.JPG
two down 11 to go
IMG_2285.JPG
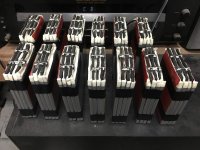
Got all 13 done that enough for today
IMG_2286.JPG
 
I would take a picture of my bike of I still had it, but this is the same as mine. Basically
I just drilled a small hole and inserted the female end and soldered the charge wires on the connected the male end to the charger. Easy operation. :roll:

On my phone and can't be bothered trying to upload photos now, so I created an album with how I set it up.

https://photos.app.goo.gl/ak7AzpCY8KEG5TGR9

skeetab5780 said:
The only other spot you can come out is up front where the cables enter on each side of the headtube. I have been keeping an eye on it just incase. I don't ride in the rain much anymore (free company truck) makes me lazy

single cog would work but then you need a chain tensioner and regular bmx chain, and its cheaper to use a derailur you have kicking around with 7-9 speed MTB chain components off a donor bike

edit: sorry to hear your bike got stolen you need any parts?
 
Oh i actually do like that spot for a charge port. But i will certainly have to source a special type of port and drill holes. One of those wants more than needs type of things.
 
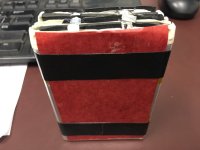
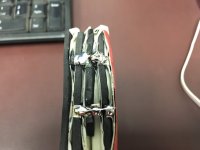
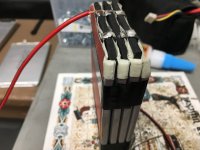
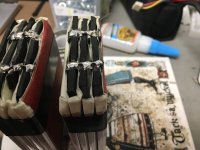
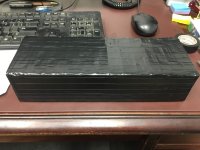
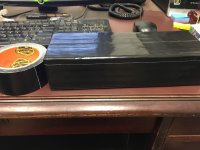
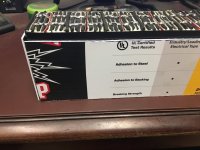
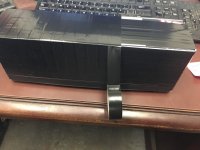
Little more progress on the battery build. Put the cells in a line and tested the voltages. Lightly compressed them with a clamp and threw a layer of 33+ electrical tape over the bare cells. Then a layer of gorilla tape over that to hold them in place. These cells are not perfect as you can see in the pics they are salvaged out of other packs so this will likely be their final resting place...

IMG_2288.JPG
IMG_2289.JPG
IMG_2290.JPG
IMG_2291.JPG
IMG_2292.JPG
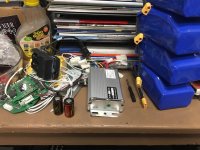
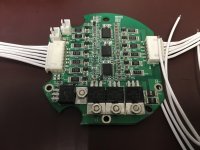
Here is the BMS I want to attempt to use, there is not much to it...hopefully it does something...
IMG_2293.JPG
 
It looks very well made.
If it would be my own battery i would add in addition to the tape angle sections and plates to all sides for more dimensional stability.
 
I completely agree with you, in my head I had plan to use some thin plastic board and cut squares for sides and a bottom. I will have to do that before it goes in the bike and gets banged up!
 
New crank worked great on the last ride last weekend. Took the bike to a lake in CT about 15 miles away, and barely had enough juice to get home. I cannot wait to put in the larger battery. Have not had time to work on it

the chain only had I issue the whole ride which is a big improvement, It didn't fall off but sort of went onto the plastic guard, was odd but easily fixed. Not without my handlebars slapping me in the face which is always fun
 
This has been a great thread, thanks for keeping it updated. I’m in NW CT, just about on the MA border, and the roads around here are ridiculously hilly, so regular cycling is kinda not realistic for me. It sounds like that may be the case for you as well.

I’m about to start my first rear-hub conversion project, while thinking about a more specialized frame further down the road, so threads like this are my favorite thing on the internet right now.

Did the new crankset fix your chain issues too?
 
skeetab5780 said:
Ehh ok.. need to address shock issue to improve ride quality
[youtube]C-jAb-Vwxj0[/youtube]
You need a shorter shock and also did I hear you say you're running a 48v controller and a 60v battery? That's not gonna work long. You will fry your controller but I guess it's a cheapy anyway so no biggie but you definitely need a shorter shock. I wouldn't go changing the frame cause you're messing with the geometry. Call vector and ask them what size shock it takes. Just my 2 cents.
 
Posted that last reply before I was done with all the other comments and posts. I see you have got pretty much straightened out and it's looking good. Good luck with your build.
 
Raketemensch said:
This has been a great thread, thanks for keeping it updated. I’m in NW CT, just about on the MA border, and the roads around here are ridiculously hilly, so regular cycling is kinda not realistic for me. It sounds like that may be the case for you as well.

I’m about to start my first rear-hub conversion project, while thinking about a more specialized frame further down the road, so threads like this are my favorite thing on the internet right now.

Did the new crankset fix your chain issues too?

Nice someone from CT, let me know if you want to get out for a nice 20 miles rip one day

Yes that 48t crank fixed my chain falling off problems and lets me commute a few MPH faster. The only downside is that on really big hills I cannot do much to help the motor. It is not that big of an issue if you have a good battery, but on a large uphill I could overheat the motor.
 
ERP said:
Posted that last reply before I was done with all the other comments and posts. I see you have got pretty much straightened out and it's looking good. Good luck with your build.

Thanks for reply, yes the shock was me being cheap and not buying good stuff at first...And then I had to file the shock mount down a bit to get it to fit in the top swingarm position to make it perfect, now there is not pedal strike happening on corners and the geometry is as good as it will get for this frame.

The controller is a em3ev 9-fet 3077 63v caps with auto regen and 3-speed set at 20a max current

I have a 10s battery in now, but im working on a 13s with 20a bms to get higher top speeds on flats
 
Little progress on the battery, about to start wiring pack but just wanted to protect the cells before I throw them into the frame and forget about them!

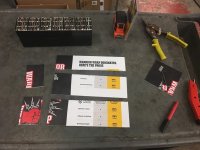
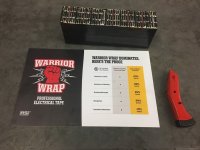
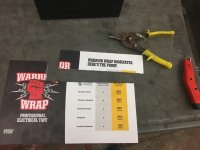
Sacrificed a display sign I had kicking around that is made of some nice sturdy yet flexible board. tried to cut it with a razor knife but I could not, had to use tin snips
IMG_2479.JPG
IMG_2480.JPG
quick and easy, onto the next step
IMG_2481.JPG
taped them in place
IMG_2482.JPG
IMG_2483.JPG
tape is my friend
IMG_2484.JPG
 
Back
Top