APL
100 kW
- Joined
- Aug 6, 2018
- Messages
- 1,113
I thought it would be a good Idea to do a short 'how to' on the DD motor mid drive-drive cog set up. In case future builds
are interested. If you have another way to do this, then please post it here.
Also, if you can think of another way of saying 'mid drive drive cog', then put it on here, so that the search engine will
locate it, if someone else is doing a search. Thanks.
The problem with using a rear hub motor in a mid drive format is that the threads for the freewheel on the motor are
backwards for it to work. When the motor turns the drive cog, it wants to spin it off.
So how do we stop that from happening? There are a few ways to do this. The common way is to turn the motor around,
and run a cog on the disc brake mount.
But you might not have a disc mount, or you don't want to reverse the voltage wires, or the spacing isn't going to work out,
or you have plans for the disc mount already. Always something.
You can try using a lock ring from a BB cup, and some thread lock, but if it fails out on the road, then you walk back. And
it probably won't handle high power.
Some people screw a track cog on, and drill between the threads, and put a pin in it, but now you've really messed up your
nice motor, and it's resale value. And it's not so easy to change cogs.
In this method, you still have to drill a little, but it might even be seen as an upgrade for resale, and it doesn't hurt the motor.
There are all kinds of combos possible with these parts, but this is the most basic.
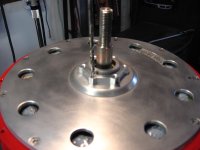
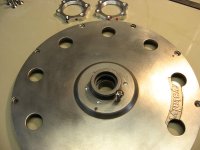
You will need to buy one or two rear hub disc brake adapters from Ebay. You can also get disc spacers to fine tune your spacing.
Screw one on the freewheel threads tight. then twirl a drill bit in the threaded holes, lightly taping on it with a small hammer,
to make a center punch mark on the motor face.
View attachment 4

You can unscrew the adapter, but I like to use it to drill the holes a little at first, very carefully, and then take it off to drill
down into the motor face about 1/8" or so, with a drill bit the same size as the bolts. It's important that you get the holes in
the right place so that it doesn't wind up with a sloppy fit.
You might hit a steel reinforcement plate at that depth on some motors. You can either stop right there, or, if you really want
to make sure theres no chance of slippage, drill all the way through. I've never had the need to do that.

If you do this with the motor put together, then be very careful, and a good trick is to put a pice of vinyl tubbing on the drill bit
to keep it from plowing all the way through the motor when it breaks through the side plate.
If you use both adaptors, you might want to tap through both of them to align the threads, because the screws will want to bind sometimes. But the best way is to drill out the threads on the top adaptor, so the bottom one can pull everything tightly together.
View attachment 1
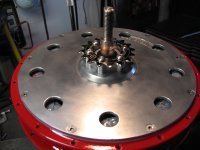
You can use one, or two adaptors, and spacers, to get the position you want. Or even put two cogs on.
 Make sure your bolts go all the way down into the motor face, to get a good adaptor lock.

Thats it! And if anyone has another way, please post it here so people don't have to look all over for it. Thanks!
are interested. If you have another way to do this, then please post it here.
Also, if you can think of another way of saying 'mid drive drive cog', then put it on here, so that the search engine will
locate it, if someone else is doing a search. Thanks.
The problem with using a rear hub motor in a mid drive format is that the threads for the freewheel on the motor are
backwards for it to work. When the motor turns the drive cog, it wants to spin it off.
So how do we stop that from happening? There are a few ways to do this. The common way is to turn the motor around,
and run a cog on the disc brake mount.
But you might not have a disc mount, or you don't want to reverse the voltage wires, or the spacing isn't going to work out,
or you have plans for the disc mount already. Always something.
You can try using a lock ring from a BB cup, and some thread lock, but if it fails out on the road, then you walk back. And
it probably won't handle high power.
Some people screw a track cog on, and drill between the threads, and put a pin in it, but now you've really messed up your
nice motor, and it's resale value. And it's not so easy to change cogs.
In this method, you still have to drill a little, but it might even be seen as an upgrade for resale, and it doesn't hurt the motor.
There are all kinds of combos possible with these parts, but this is the most basic.
You will need to buy one or two rear hub disc brake adapters from Ebay. You can also get disc spacers to fine tune your spacing.
Screw one on the freewheel threads tight. then twirl a drill bit in the threaded holes, lightly taping on it with a small hammer,
to make a center punch mark on the motor face.
View attachment 4

You can unscrew the adapter, but I like to use it to drill the holes a little at first, very carefully, and then take it off to drill
down into the motor face about 1/8" or so, with a drill bit the same size as the bolts. It's important that you get the holes in
the right place so that it doesn't wind up with a sloppy fit.
You might hit a steel reinforcement plate at that depth on some motors. You can either stop right there, or, if you really want
to make sure theres no chance of slippage, drill all the way through. I've never had the need to do that.

If you do this with the motor put together, then be very careful, and a good trick is to put a pice of vinyl tubbing on the drill bit
to keep it from plowing all the way through the motor when it breaks through the side plate.
If you use both adaptors, you might want to tap through both of them to align the threads, because the screws will want to bind sometimes. But the best way is to drill out the threads on the top adaptor, so the bottom one can pull everything tightly together.
View attachment 1
You can use one, or two adaptors, and spacers, to get the position you want. Or even put two cogs on.

Thats it! And if anyone has another way, please post it here so people don't have to look all over for it. Thanks!

