How good is Cyclone 4kw coaxial suspension bike?

Automatic clutch setup. It is a brake sensor that fires when the upshift level is pulled. This stops the motor for a second but the drivetrain inertia completes the gear change. By the time the motor picks up speed again it is all done.The higher rpm the better it works. See it in action:

That's really cool.
 
I have a doubt.

I think both Tomm and Sac037 has the straight down tube version of the frame, not the curve version.
Whats the difference between this 2 frames ?
It's one more strong that the other?
What kind of axles has in the rear? a QR 8mm ?

And which kind of battery and controllers are you running on it ? because the cyclone website says 40 Amps and i read in someplace in this post 60amps ?
 
Enric, there is no curved frame version. The alloy curved frame isn't sold as far as I know.
I have one of the first frames it has 10mm drop out. I now have converted to 12mm through axle.
The current frame has a 10mm through axle and no drop outs.
I have the 60amp controller. You can order the kit however you like. Just email paco with your requests.
 
The tube frame, at least the newer ones are curved a little, it looks better in person. It is hard to see it on camera. This design allows for a bigger battery than the one on the site.
Mine is matte black, not shiny like Sac's.

Sac037 said:
Enric, there is no curved frame version. The alloy curved frame isn't sold as far as I know.
I have one of the first frames it has 10mm drop out. I now have converted to 12mm through axle.
The current frame has a 10mm through axle and no drop outs.
I have the 60amp controller. You can order the kit however you like. Just email paco with your requests.
As of april, the rear is 142mm with 12mm axle.
The front depends on your fork, with the coil fork I linked, it is 110mm and 20mm axle.


Enric said:
And which kind of battery and controllers are you running on it ? because the cyclone website says 40 Amps and i read in someplace in this post 60amps ?
The 60amp one is included with bluetooth dongle, so you should rather get that one. I run it with a 72v 70A bms 160 pf cell pack from unitpackpower. When it is in service, I dial down the amps to 50% in bluetooth app and use it with a hailong pack.
 
I emailed Paco with some questions about the coaxial motor and frame, and says me that they're working in a Alu frame for the coaxial motor, that will be finished in 2019 January, and will have the battery integrated.

I will wait and see.
 
Enric said:
I emailed Paco with some questions about the coaxial motor and frame, and says me that they're working in a Alu frame for the coaxial motor, that will be finished in 2019 January, and will have the battery integrated.

I will wait and see.

https://youtu.be/8dZKRNYIIS8
If the case is like this I would pass :mrgreen:
I am happy with the steel bike as it is very stable and will not fail catastrophically. The ride quality of steel is great. My build is 25kg before battery, alu would be only few kilos less. It would be better if they worked on quality, like suspension bearings instead of bushings.

If they change the design completely to something much better, that is a different story.

Still it is good to hear, as it will use the same motor, which means parts will be avaliable for our motor for a long time.
 
Hello.

Im new here and very happy that i found this thread about this ebike kit.

I dont have much expirience with ebikes, i just convertet my Mountainbike with a 350w 8fun kit 3 jears ago. I love it.

In the spring i get a New job and its 15km one way, so i need more than 32km/h.

This kit looks awesome to me but i have a couple oft questions, maybe you guy want to hell me out.

1. is there any good display that i can use with this?
2. the Batterie pack they offer for 999, what cells they use and is it good?
3. would this fit in the frame and is it good? https://m.de.dhgate.com/product/free-customs-tax-2000w-72v-25ah-lithium-battery/424148616.html#pd-103
And what Batterie connector i would need?

Thanks!
 
franky82 said:
Hello.

Im new here and very happy that i found this thread about this ebike kit.

I dont have much expirience with ebikes, i just convertet my Mountainbike with a 350w 8fun kit 3 jears ago. I love it.

In the spring i get a New job and its 15km one way, so i need more than 32km/h.

This kit looks awesome to me but i have a couple oft questions, maybe you guy want to hell me out.

1. is there any good display that i can use with this?
2. the Batterie pack they offer for 999, what cells they use and is it good?
3. would this fit in the frame and is it good? https://m.de.dhgate.com/product/free-customs-tax-2000w-72v-25ah-lithium-battery/424148616.html#pd-103
And what Batterie connector i would need?

Thanks!

1, The display is your phone. The controller doesn't have an lcd display, but a bluetooth dongle, and an app. Get an aluminum phone mount and it will be your display. Personally I think this is better than an lcd as my handlebars are full as it is.
2, I wouldn't get their battery as I don't know where they come from. I think it also adds a lot to shipping cost.
3, The battery you linked only has a 50A BMS. Since the controller is 60A, you will want a battery with at least 70A. Most of these battery vendors will make your custom battery to order. The ones they show for listings are just samples. The controller I think came with anderson connectors, but that's shit. Only use xt90-s. Buy a pack of 5 pairs and you will be set. Ask the battery builder to use xt90-s too. Also ask for a fast 5-6A charger.

How I built my battery:
1, Get measurements, send it to seller (I used UnitPackPower on aliexpress.)
IaG5fRt.jpg

2, Seller confirms final battery size (I used 160 cells, bike will fit 180 easy, probably 200).
m4vCQlj.jpg

3, Bought some material and sized it. (Lexan 2mm)
FXu8QoZ.jpg

4, Use 3 water cage holes in frame to fix bottom.
PKmpPzh.jpg

5, Rubber bump stops to fix top. I added more padding of packing foam after this pic. The battery should be cushioned and not move in any direction.
SPJbYDL.jpg

6, Sides held inside by 5 screws and 6 cable ties on each side. (Both the screws or the zip ties can hold it in by themselves.)
9PDPXgm.jpg


The material is completely see through, the white is just protective film. I'm leaning towards painting it matte black to keep it stealth.
BF4tJSE.jpg

I was originally thinking making both the case and the battery see through, so you could see the cells, but I would rather have some stealth instead. I gain maximum attention as it is already. :mrgreen:

Some guy said cyclone is making aluminum version from 2019 jan, the size might be different than mine.
 
Wow what a reply. Thank you very very much!

And how do you like the bike, have you already done a lot oft miles?
 
franky82 said:
Wow what a reply. Thank you very very much!

And how do you like the bike, have you already done a lot oft miles?

I think it is great for a commuter that can take dirt roads at irresponsible speeds all day. A true adventure bike, but not a dirt bike, like the sur ron. It is cheap to maintain as long as you ask for the 104mm bcd adaptor so you can use $10 30t narrow wide chainrings on the front from ali, since the 22t one that comes on the motor costs $50 and is not great quality(soft material). Also the biggest rear cassette you can find. 42t is the absolute minimum. I will be making another post of the drivetrain when I get it dialed in.
I have done about 300 miles, because I keep tinkering so there is a lot of downtime.
 
Great. What Batterie cells are in your pack? Do you charge you Batterie to 100%? I have a 10s3p that i built by my self with Sony konion without BMS and i charge just to 41v. I dont know how much cycles i got in it, 14000km now and its still OK.
 
franky82 said:
Great. What Batterie cells are in your pack? Do you charge you Batterie to 100%? I have a 10s3p that i built by my self with Sony konion without BMS and i charge just to 41v. I dont know how much cycles i got in it, 14000km now and its still OK.

No, I have never charged it 100% before. I use it 75% to 25%. I have pf cells, same as in sur ron. They supposedly have an extremely long cycle life, but with the noname BMS they probably used, we will see about it. It is 72v 23.2ah with 70A bms, and 5A charger. A strong charger is important, as you want to store it a good bit below 75% and top it off before a ride.
 
Li ion with bms batteries I have concluded are much like airbags. There's a lot of fear about not having a bms. I think it's more aptly named BS.
I've made 4 packs so far. The first pack 160 x 18650 cells. And i was absolutely paranoid about the dangers i read about.
The bms was every problem i encountered with my first home made pack.
Does....
i bought all cells for each pack from one order. (Same batch)
Charge with low amp chargers. 4a. Good. 8a too fast. ( fast charging effects the balance)
All soldered together flat tops with 2mm copper rod (another fear scare that is BS)
Fully charged to 100% every charge.
Discharged 1 amp per cell above max recommended, regularly.
Discharged to 3v per cell every time.
100's of cycles later with no bms, and every cell is still 100% exactly the same voltage and no sign of any degrading of amp hours.
$360 usd for 120 x Samsung cells. Or 84v 20ah 60amp drain pack. Some copper wire, 80w soldering iron and duct tape 4 layers thick, and a battery that lasts 6hours (longest tested) still juice in the tank.
The only dangers seem to be short circuit or over charging at too high a voltage.
Over discharging below 2.5v just seems to turn them off forever.
 
Sac037 said:
100's of cycles later with no bms, and every cell is still 100% exactly the same voltage and no sign of any degrading of amp hours.
$360 usd for 120 x Samsung cells. Or 84v 20ah 60amp drain pack. Some copper wire, 80w soldering iron and duct tape 4 layers thick, and a battery that lasts 6hours (longest tested) still juice in the tank.
The only dangers seem to be short circuit or over charging at too high a voltage.
Over discharging below 2.5v just seems to turn them off forever.

What do you join the cell bodies togeather with? Holders or hot glue? Good stuff, it sounds like you are good with the welder, makes me think I could do it for my next pack too. (I have everything for it, car battery style.)


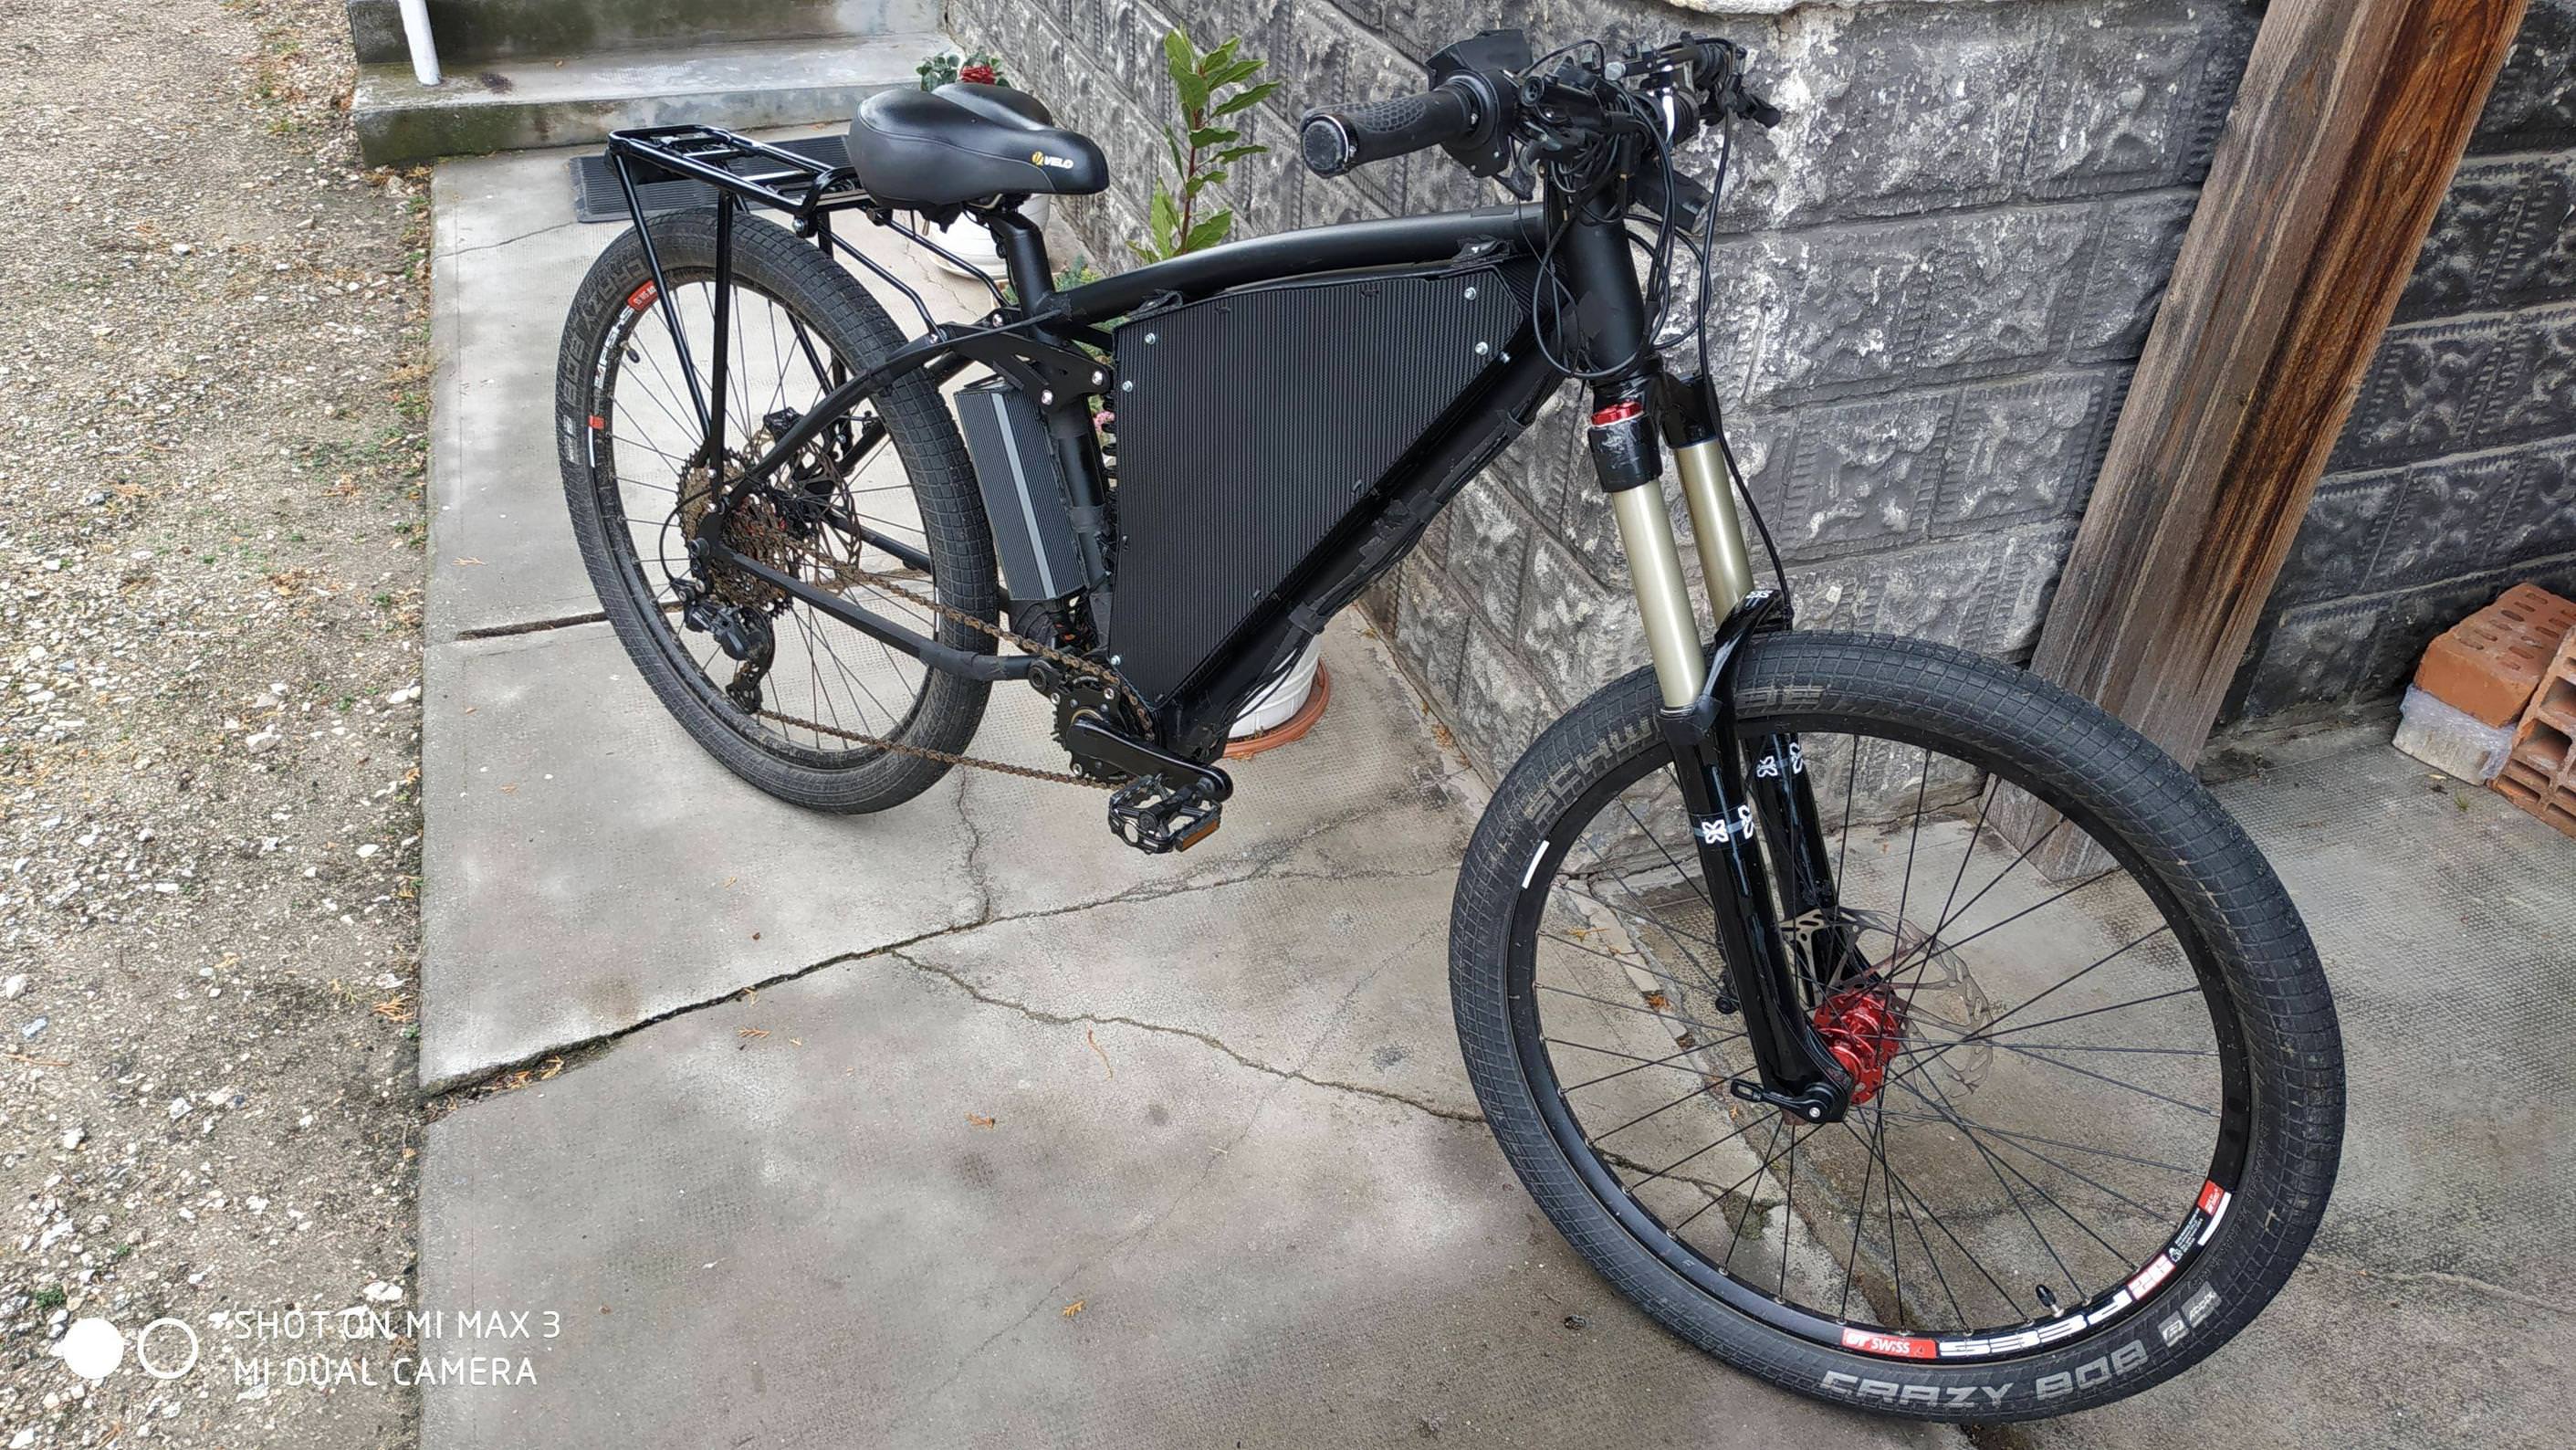
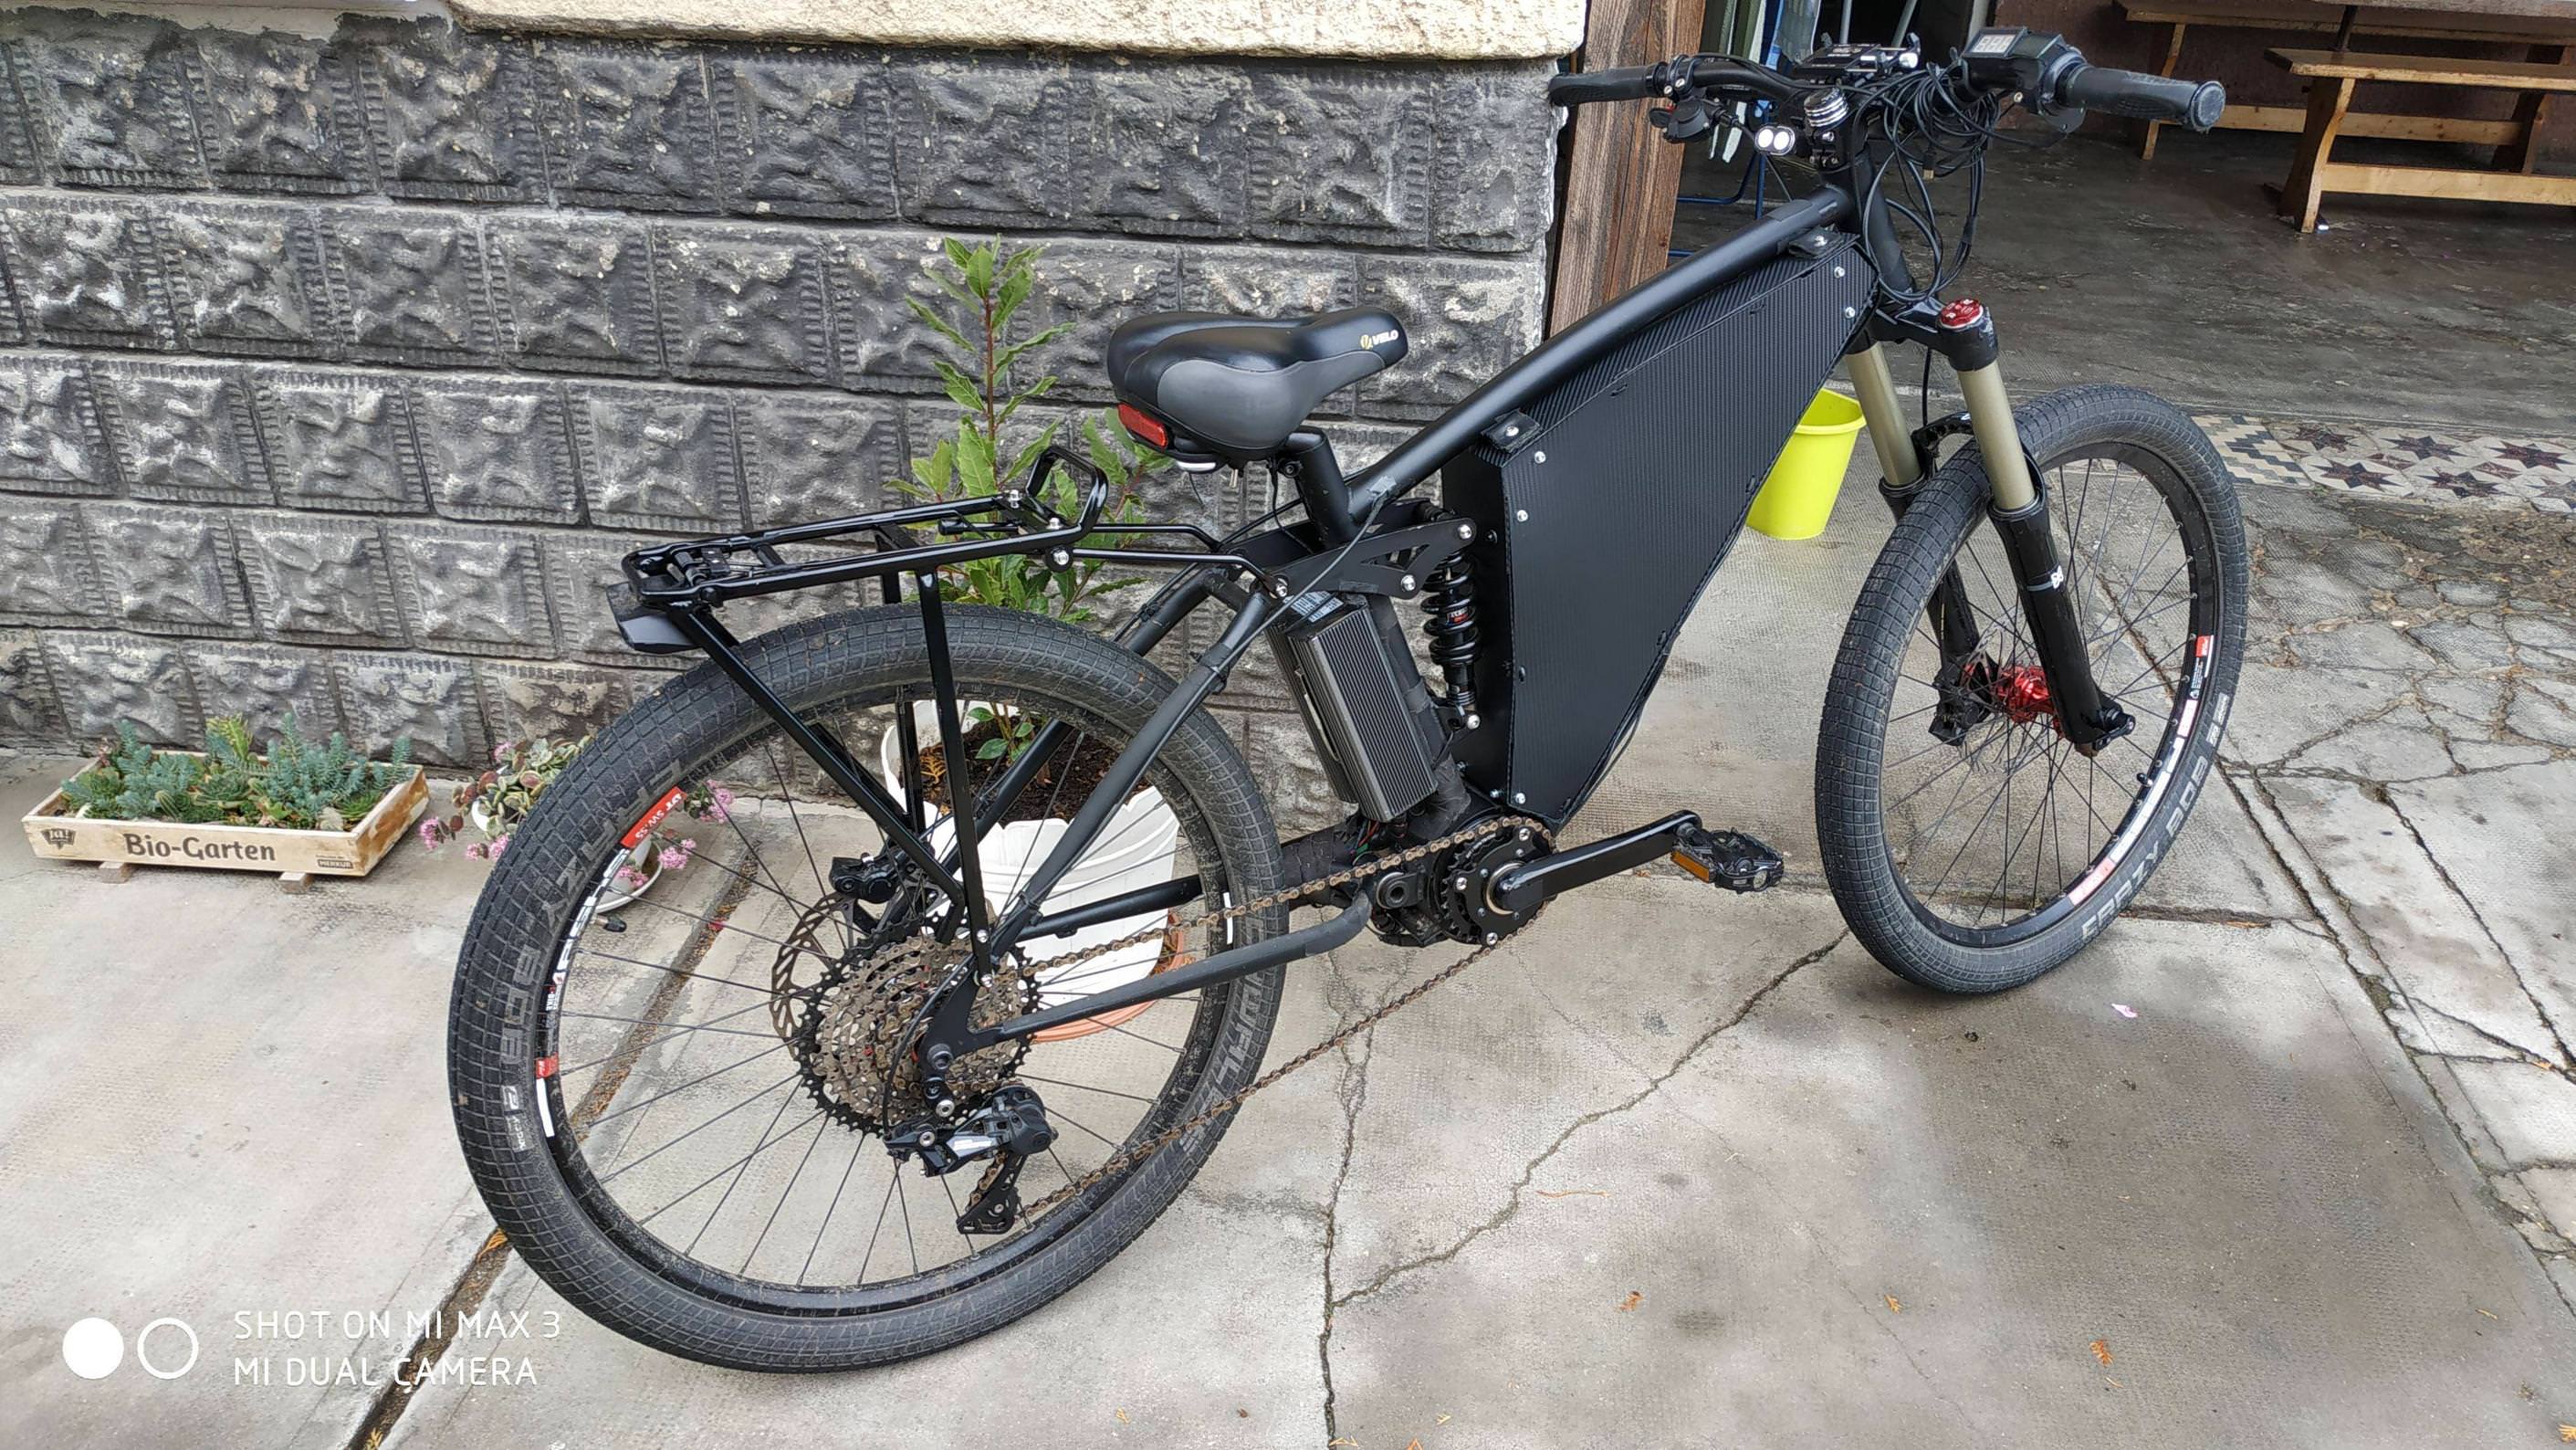
An update on my bike:
Going road legal in a few weeks, I had a vin plaque being etched now. Will legally be a moped. (4kw max continous power, 45kph limit, can use road wherever, except highways), $20 insurance yearly.
Changed controller to yuyangking 24fet 72v 80a one, can probably handle shunt up to 110a (battery limited now, until my next one). I had to cut the controller case to the exact size of the circuit board to make it fit (~4cm gained).
Got the rear rack from paco.
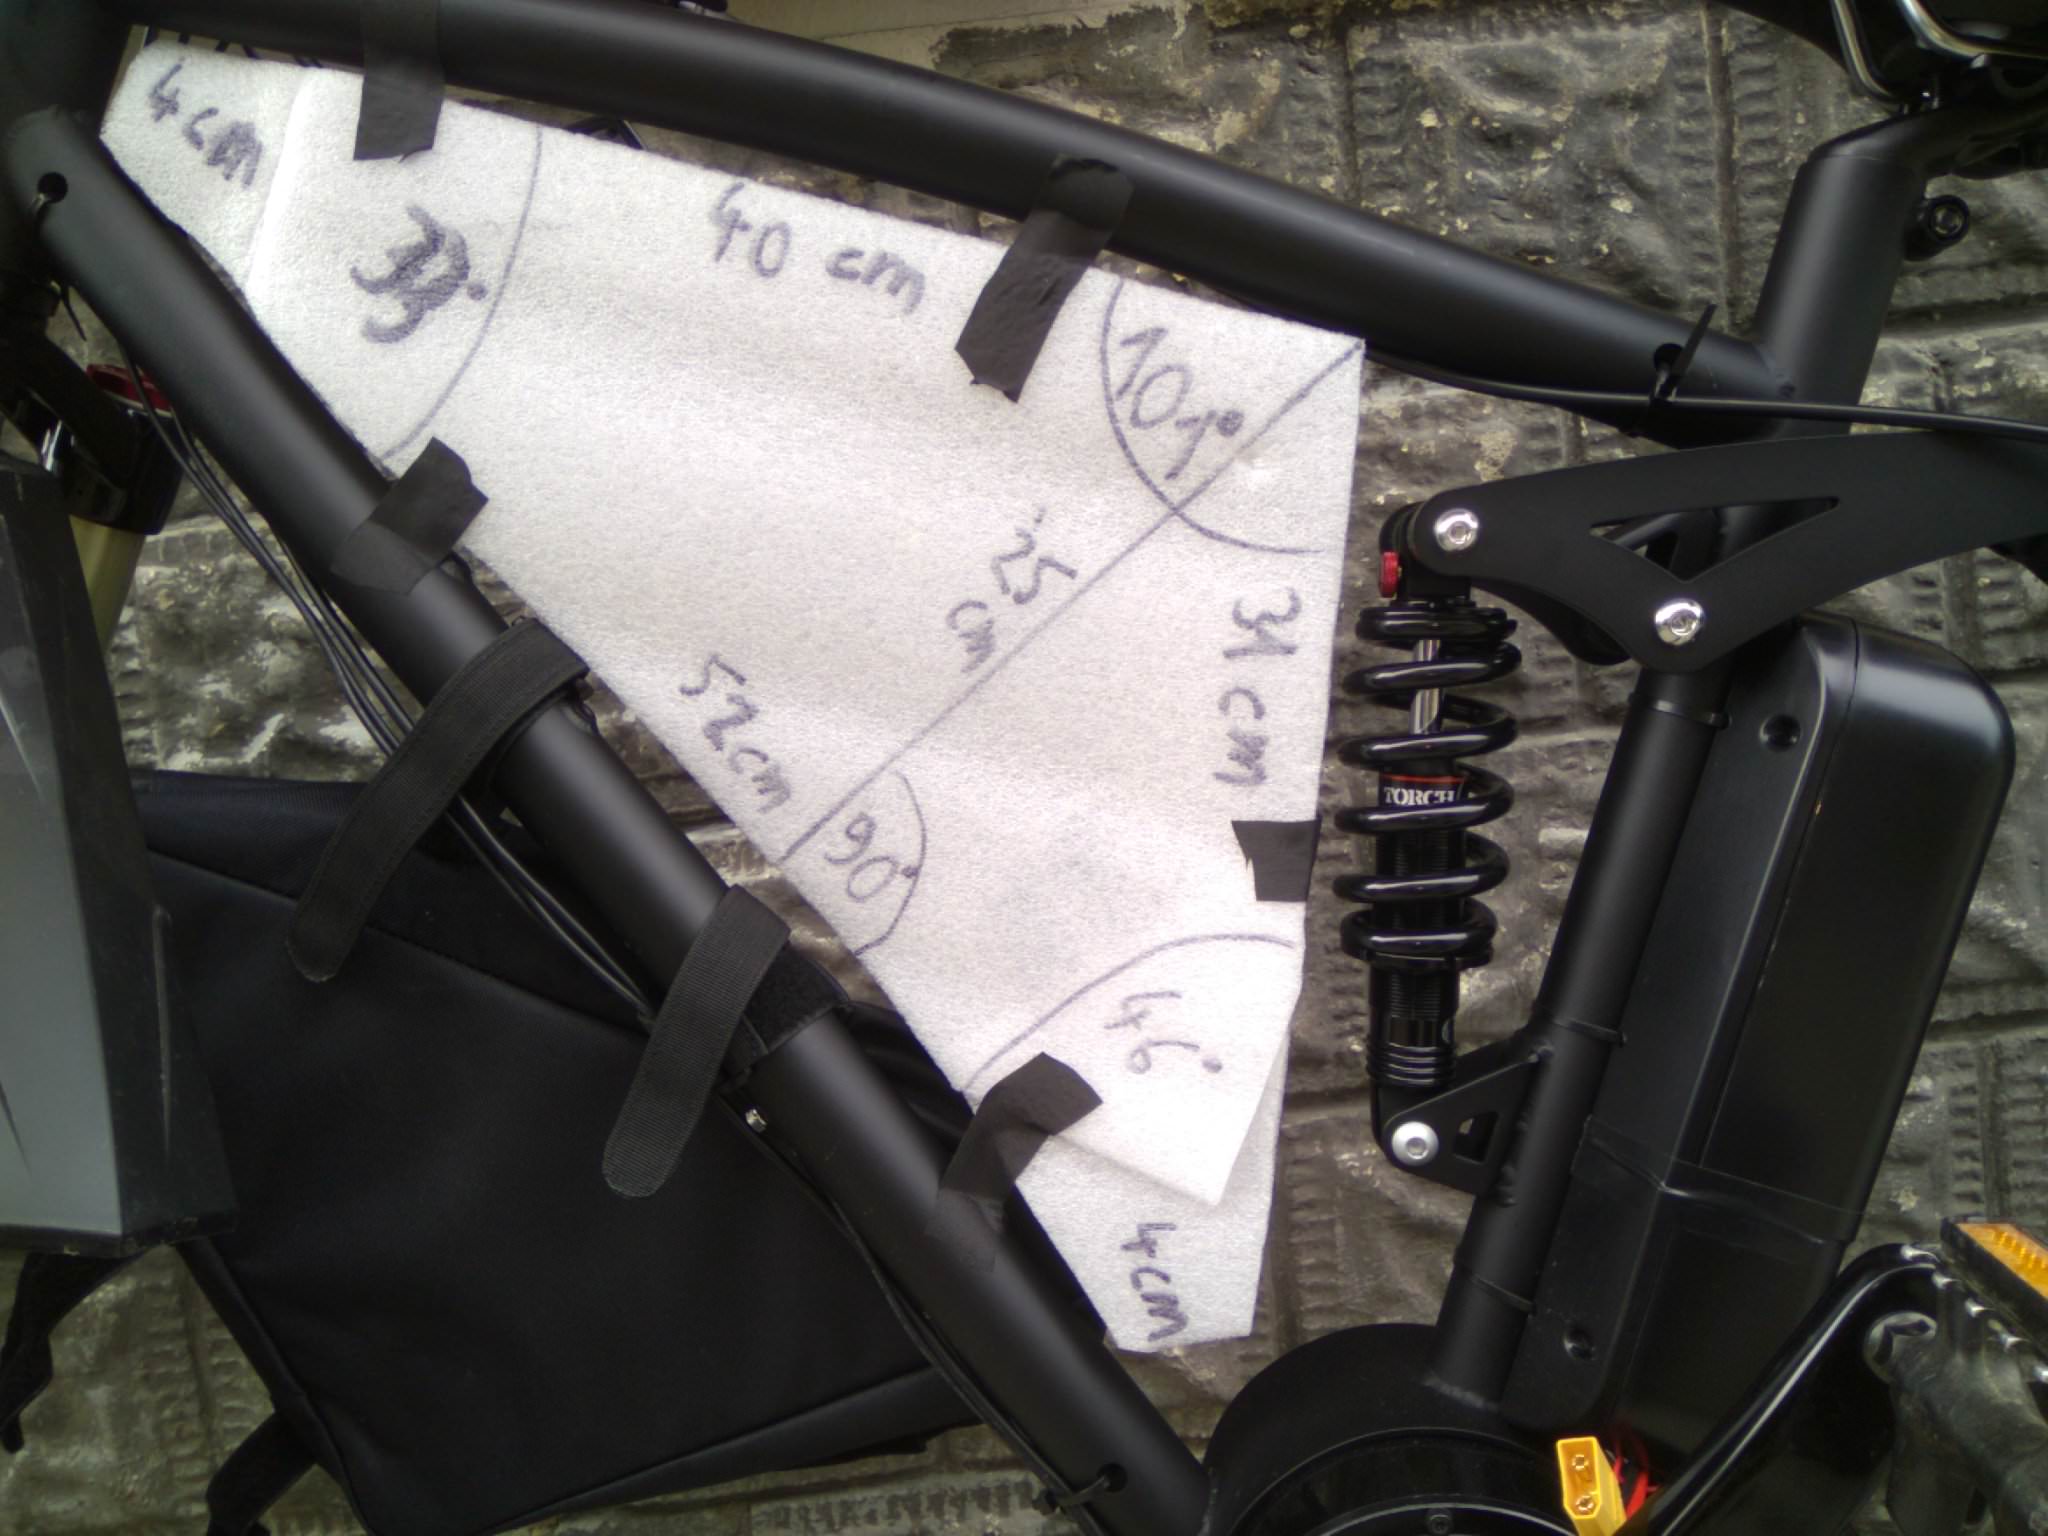
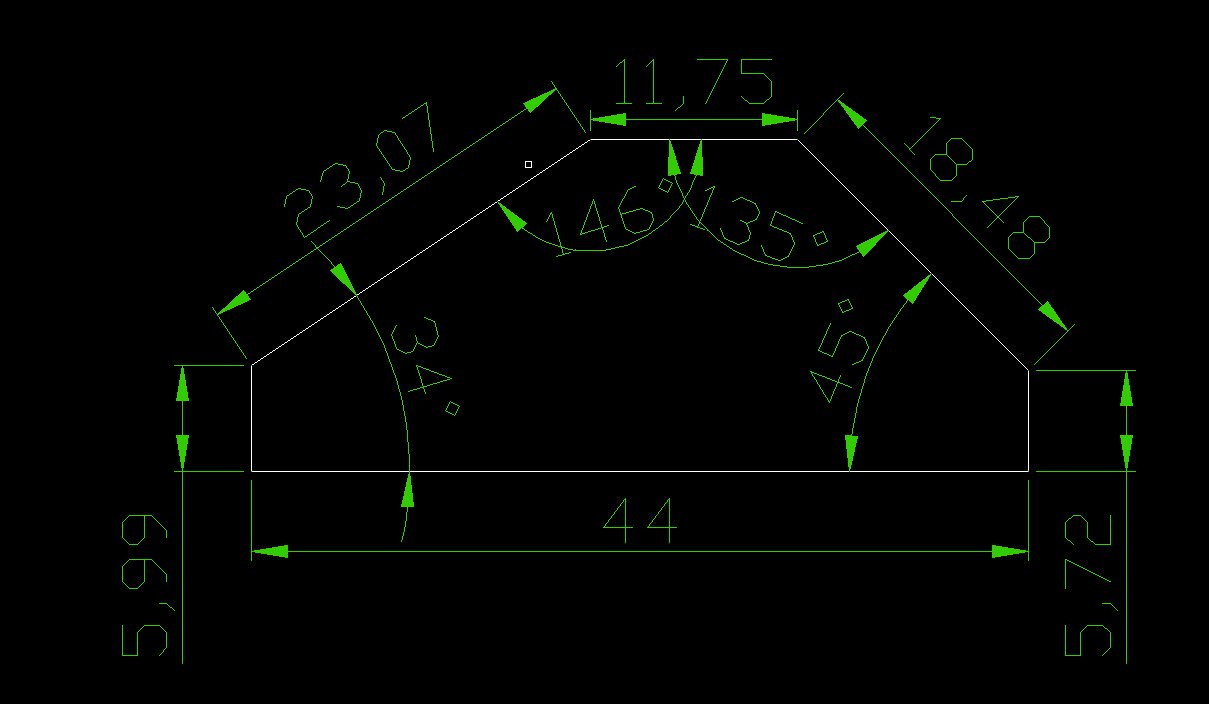
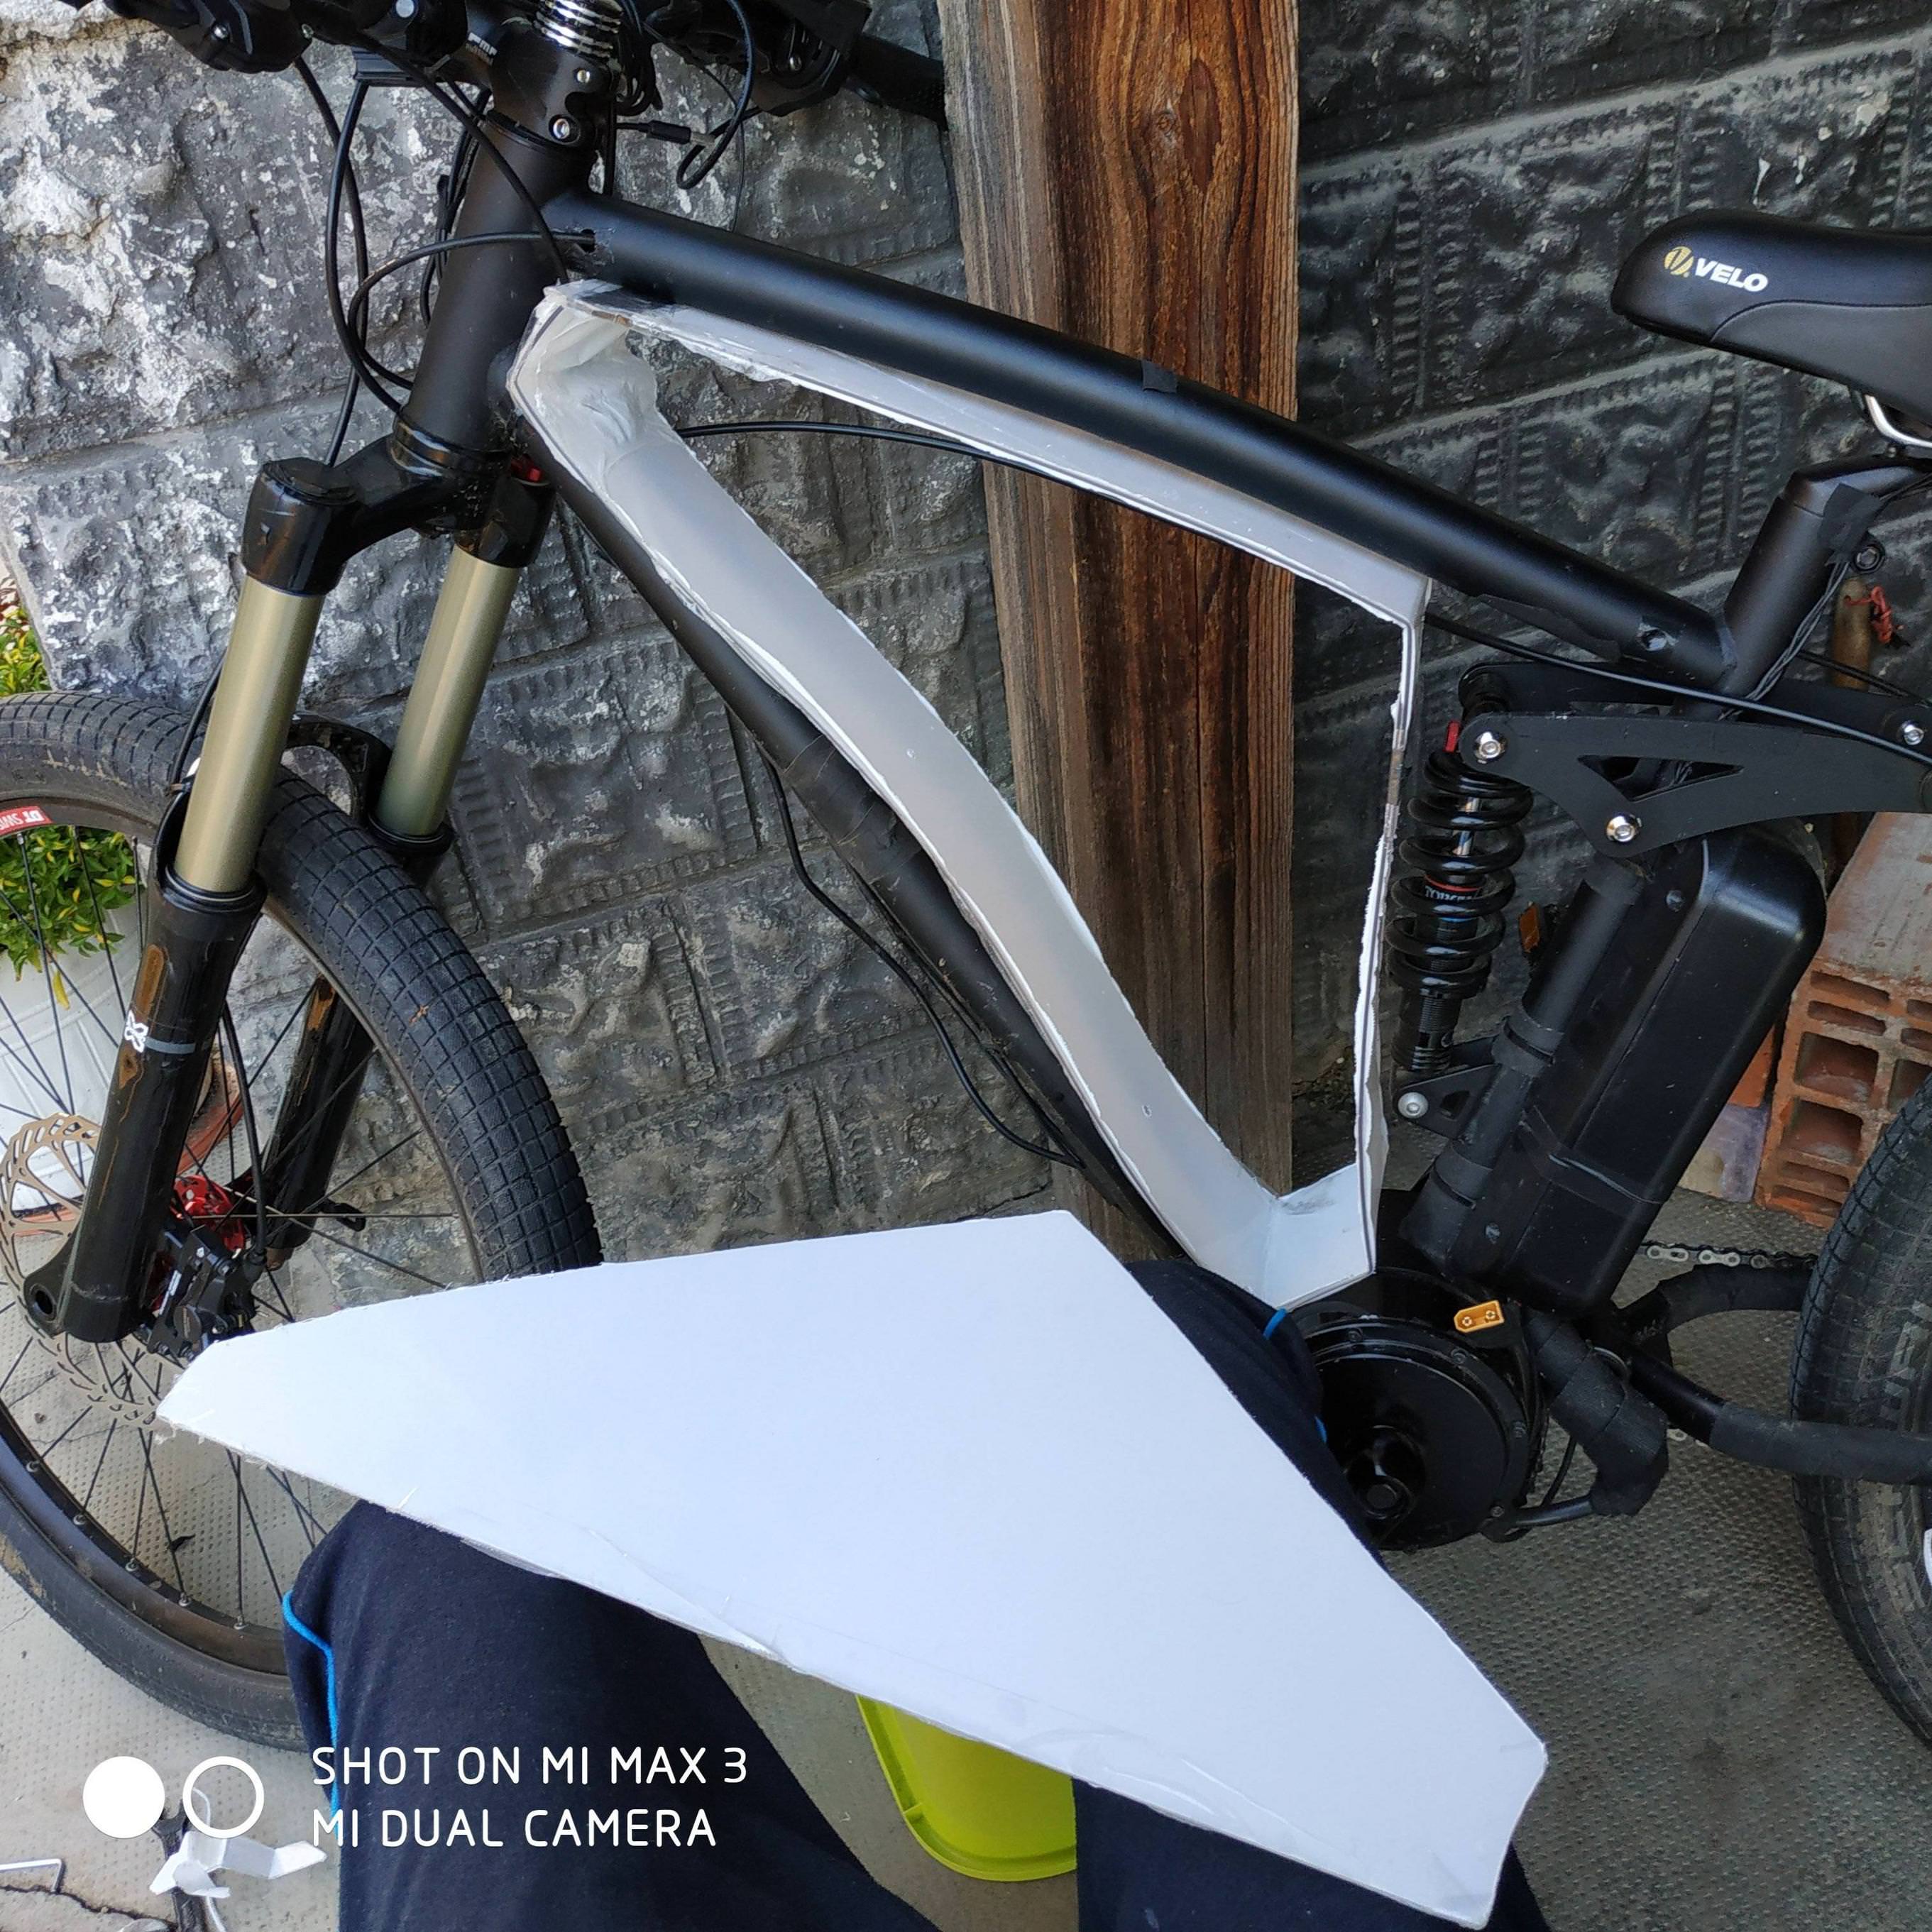
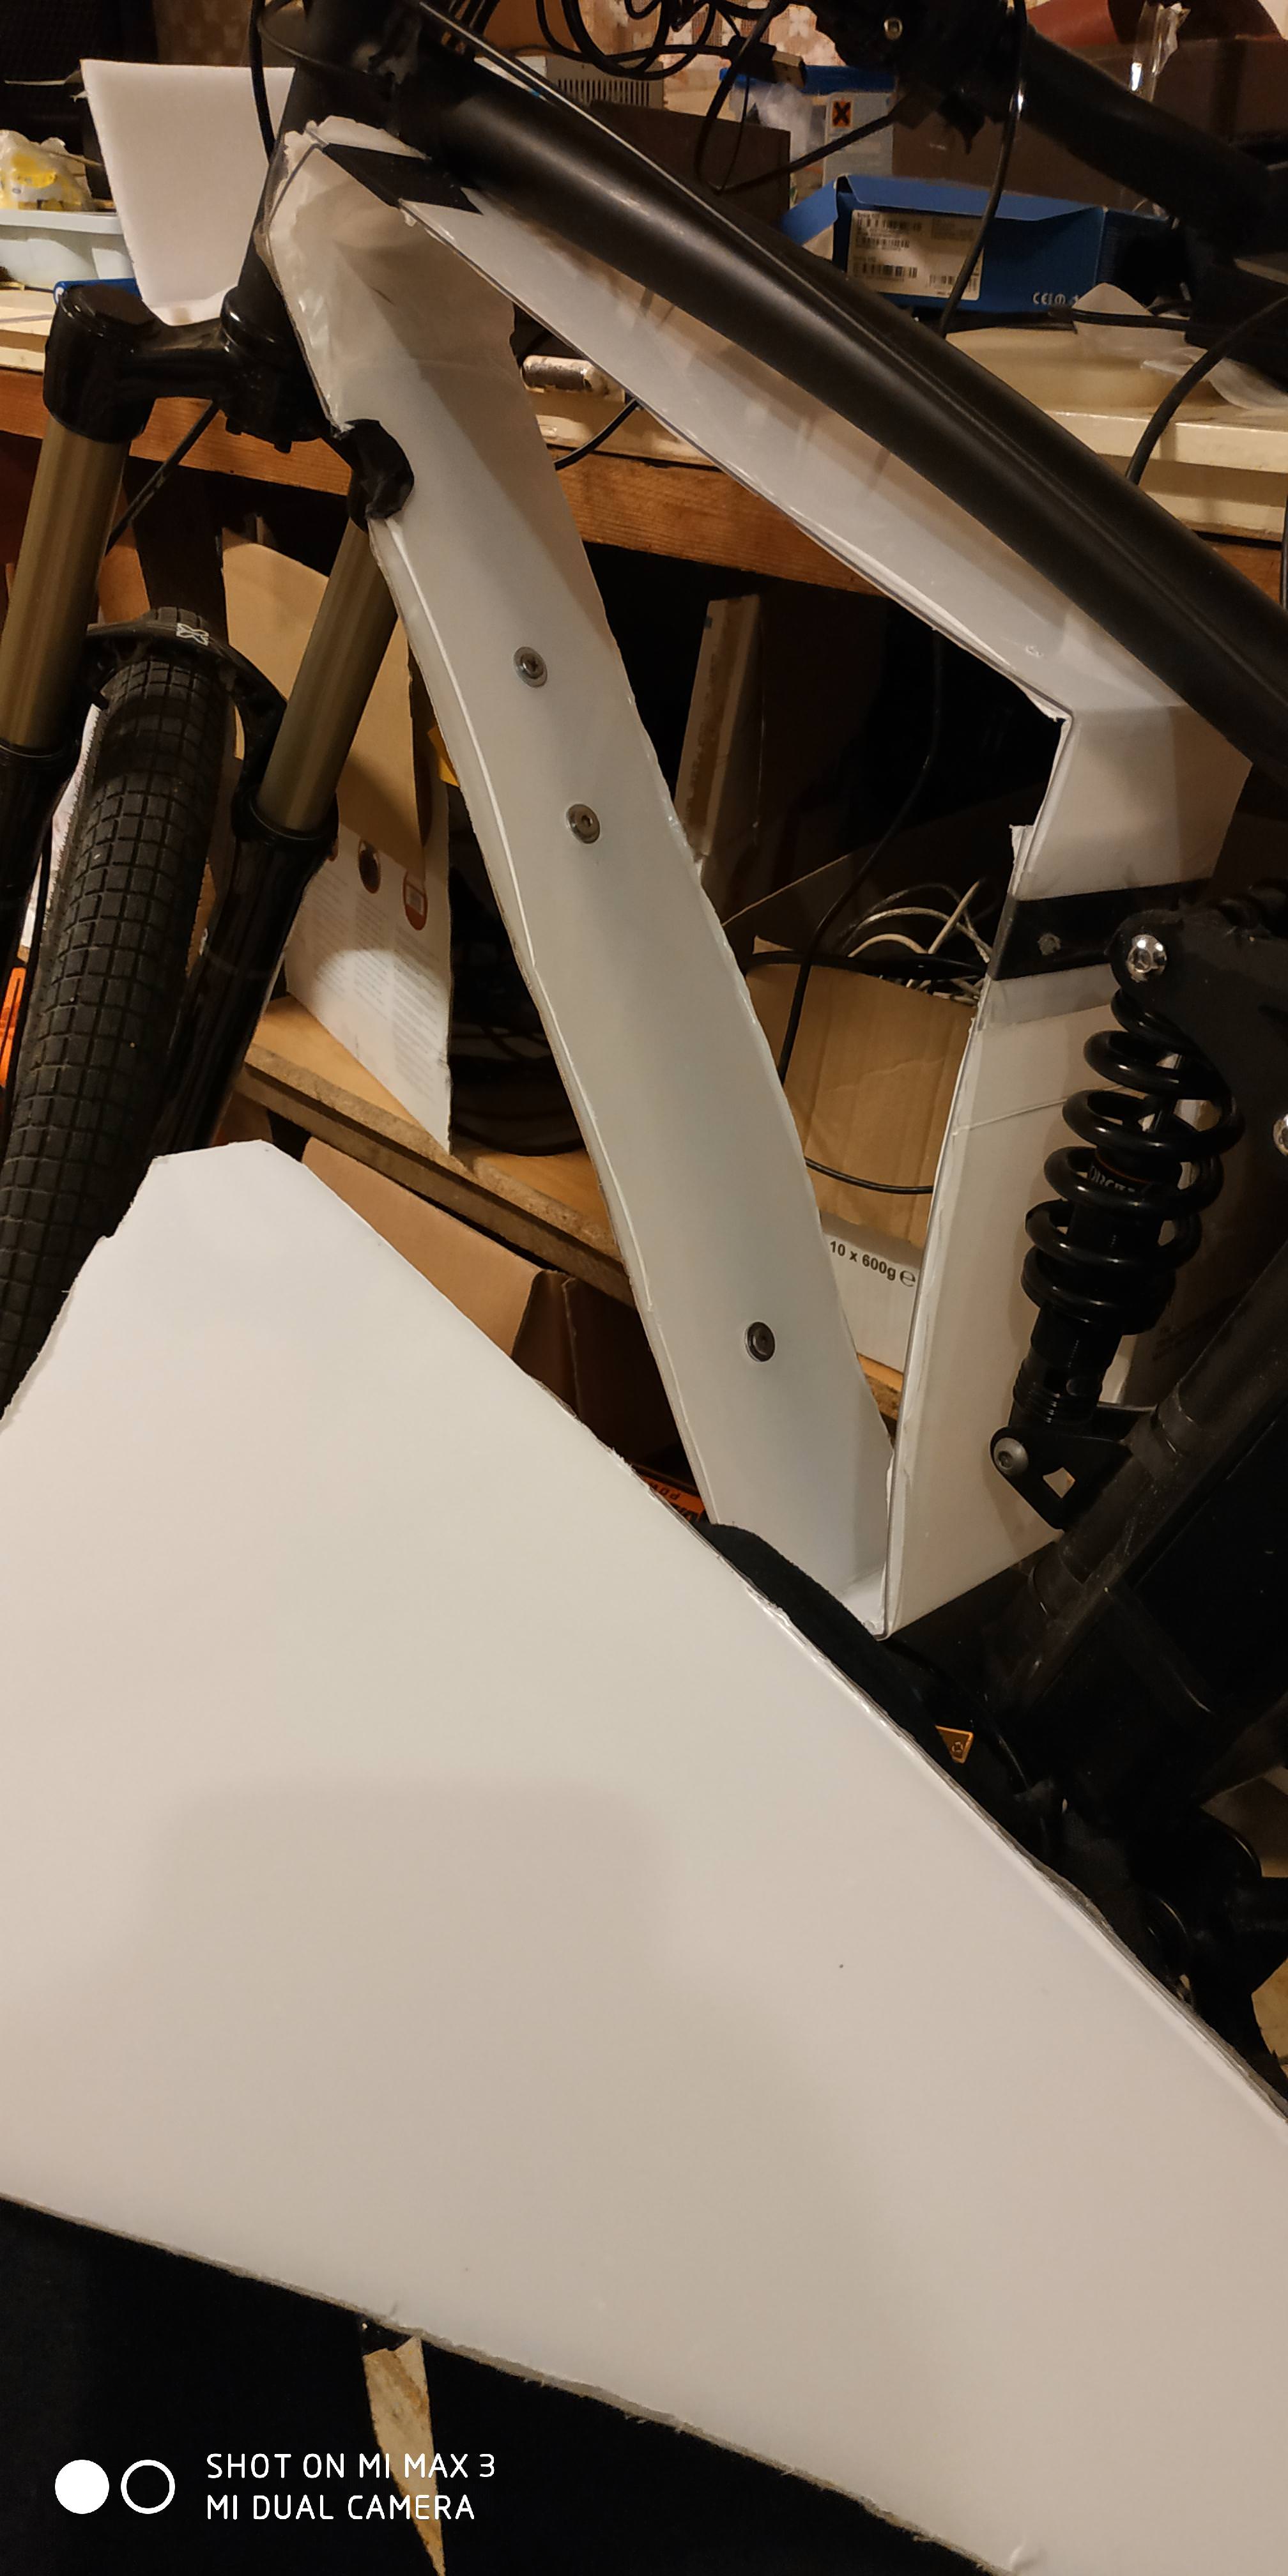
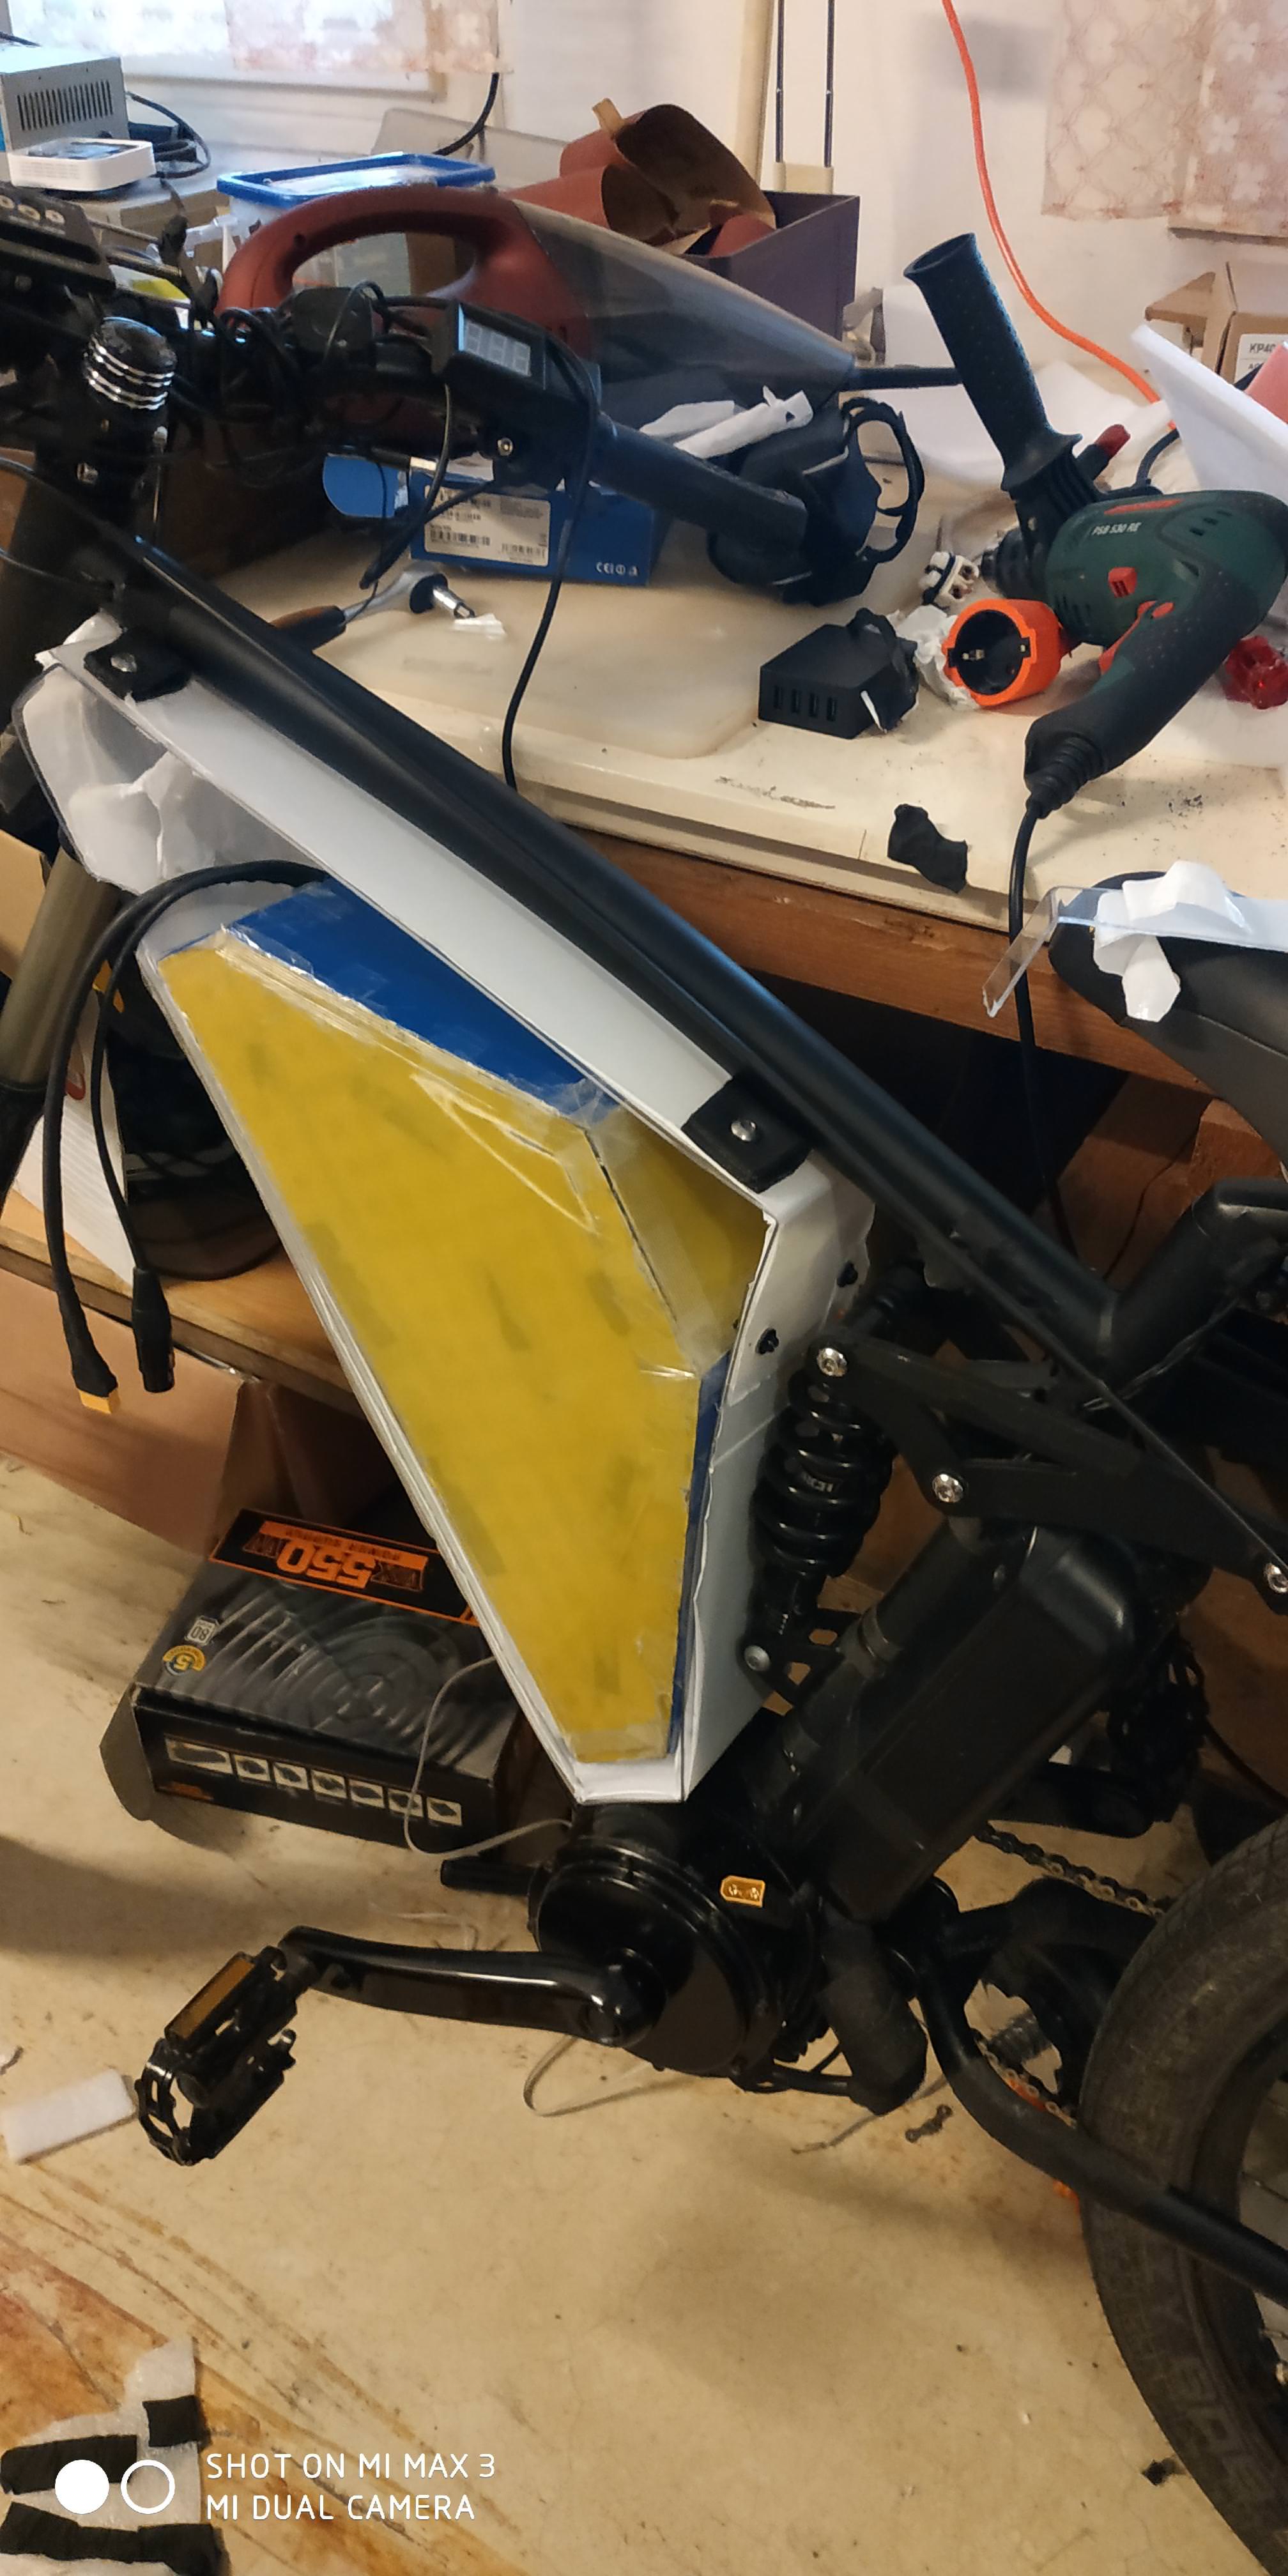
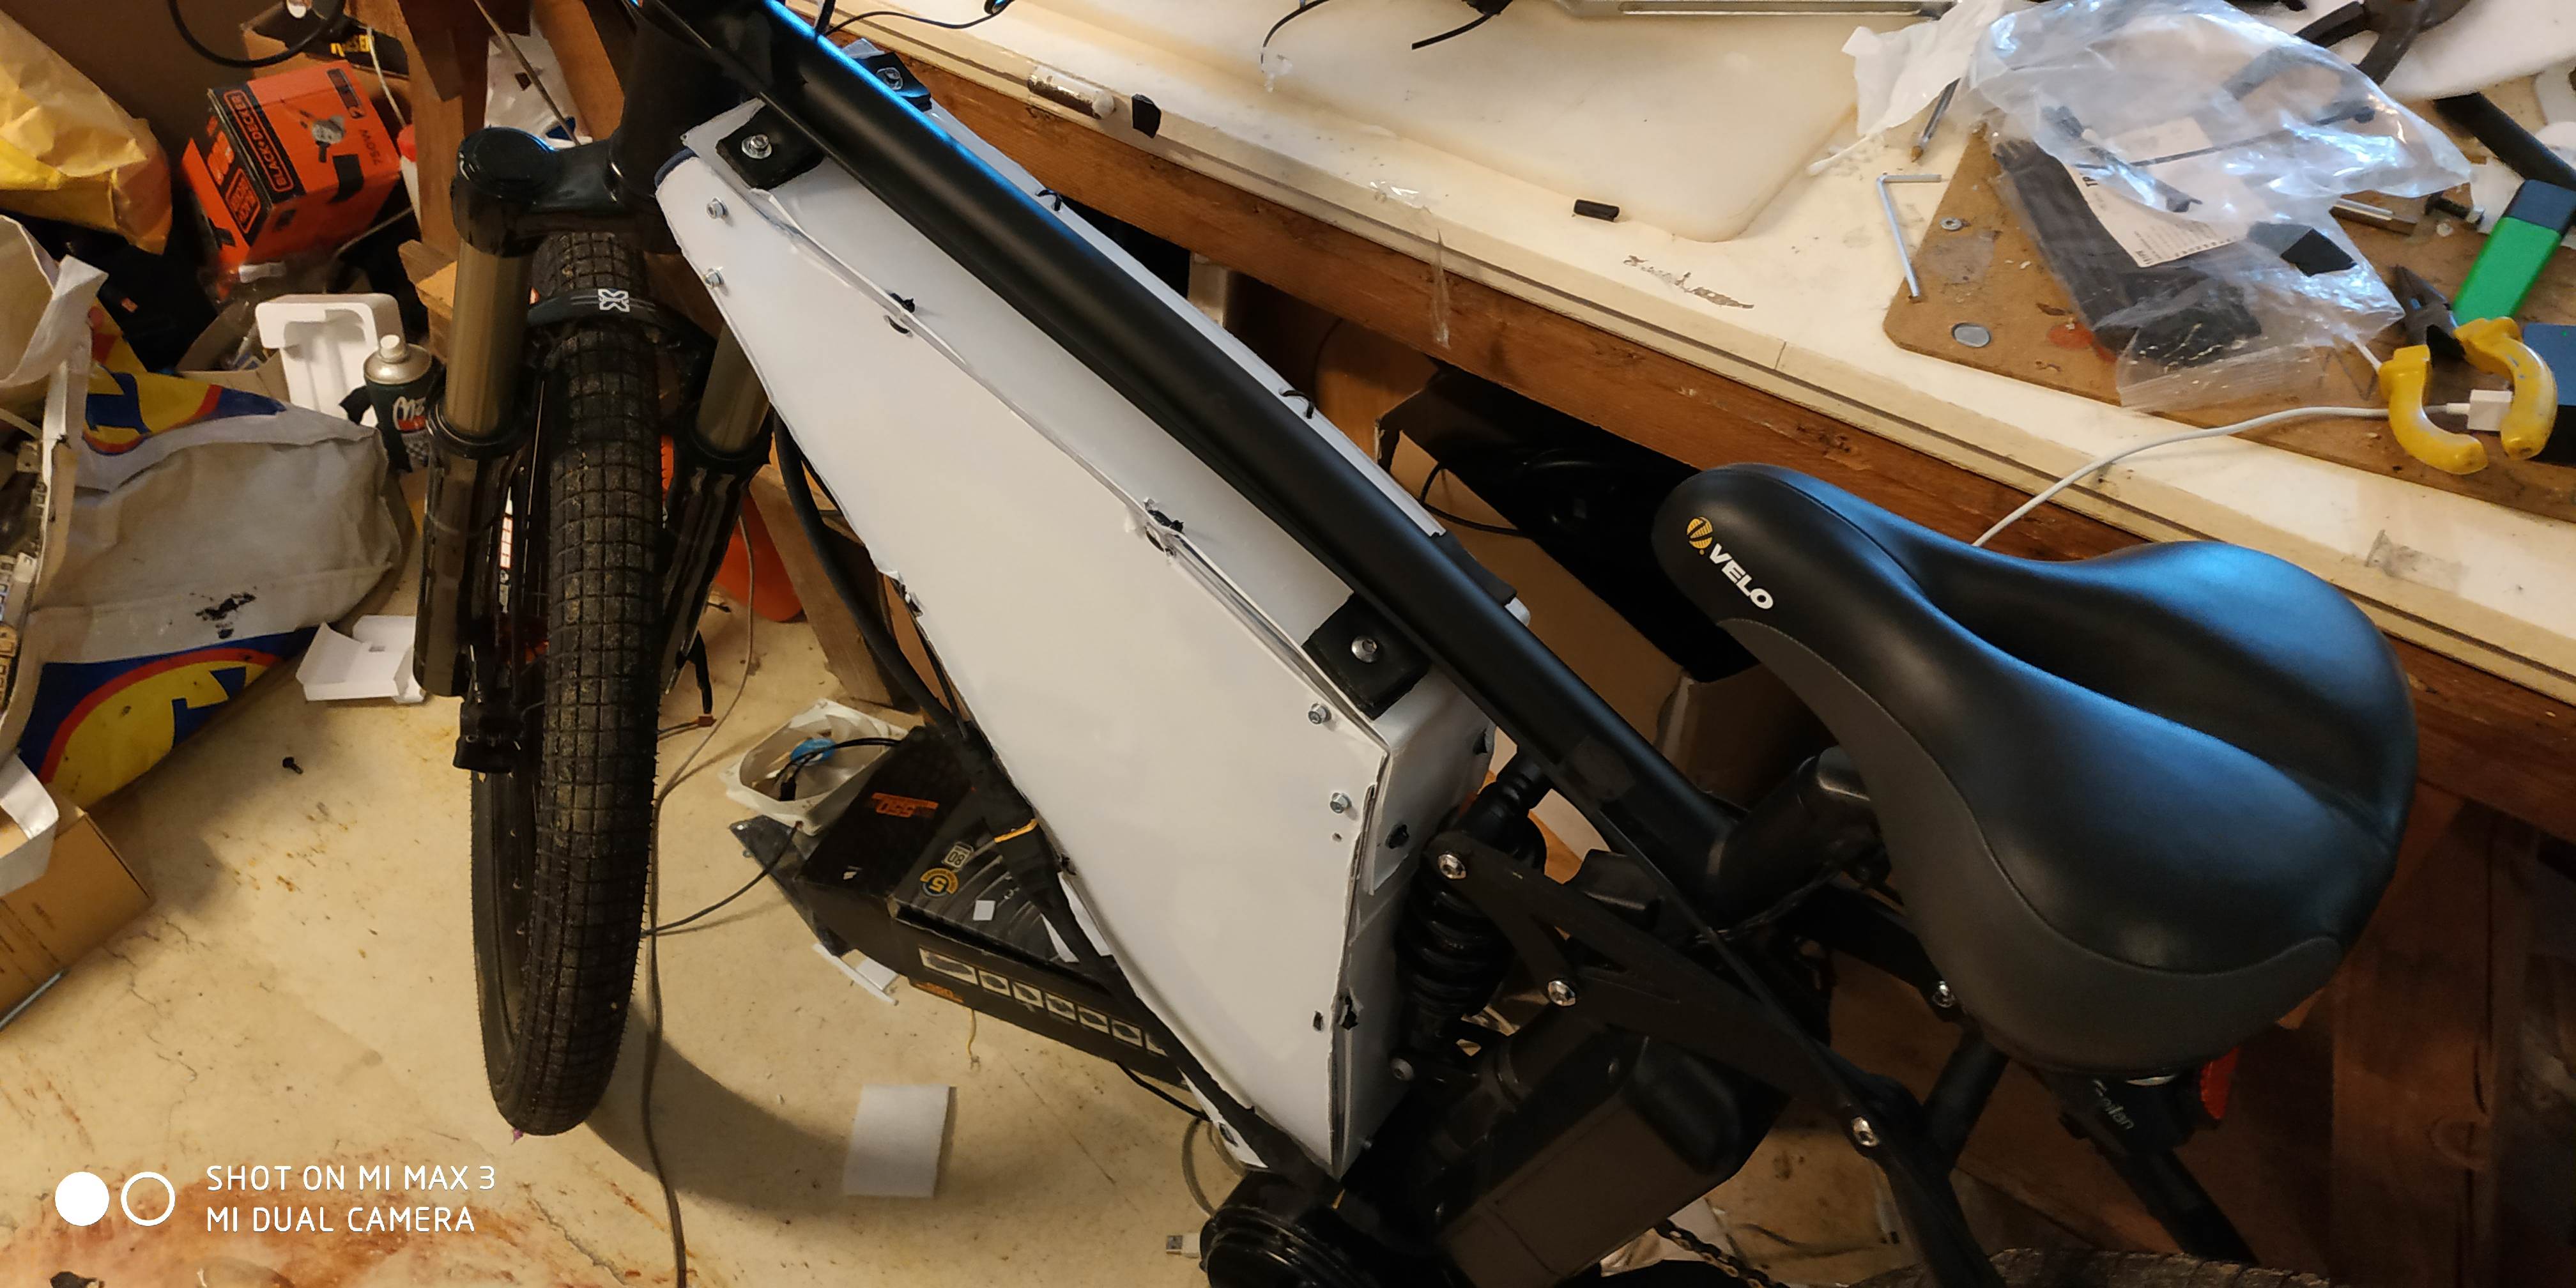
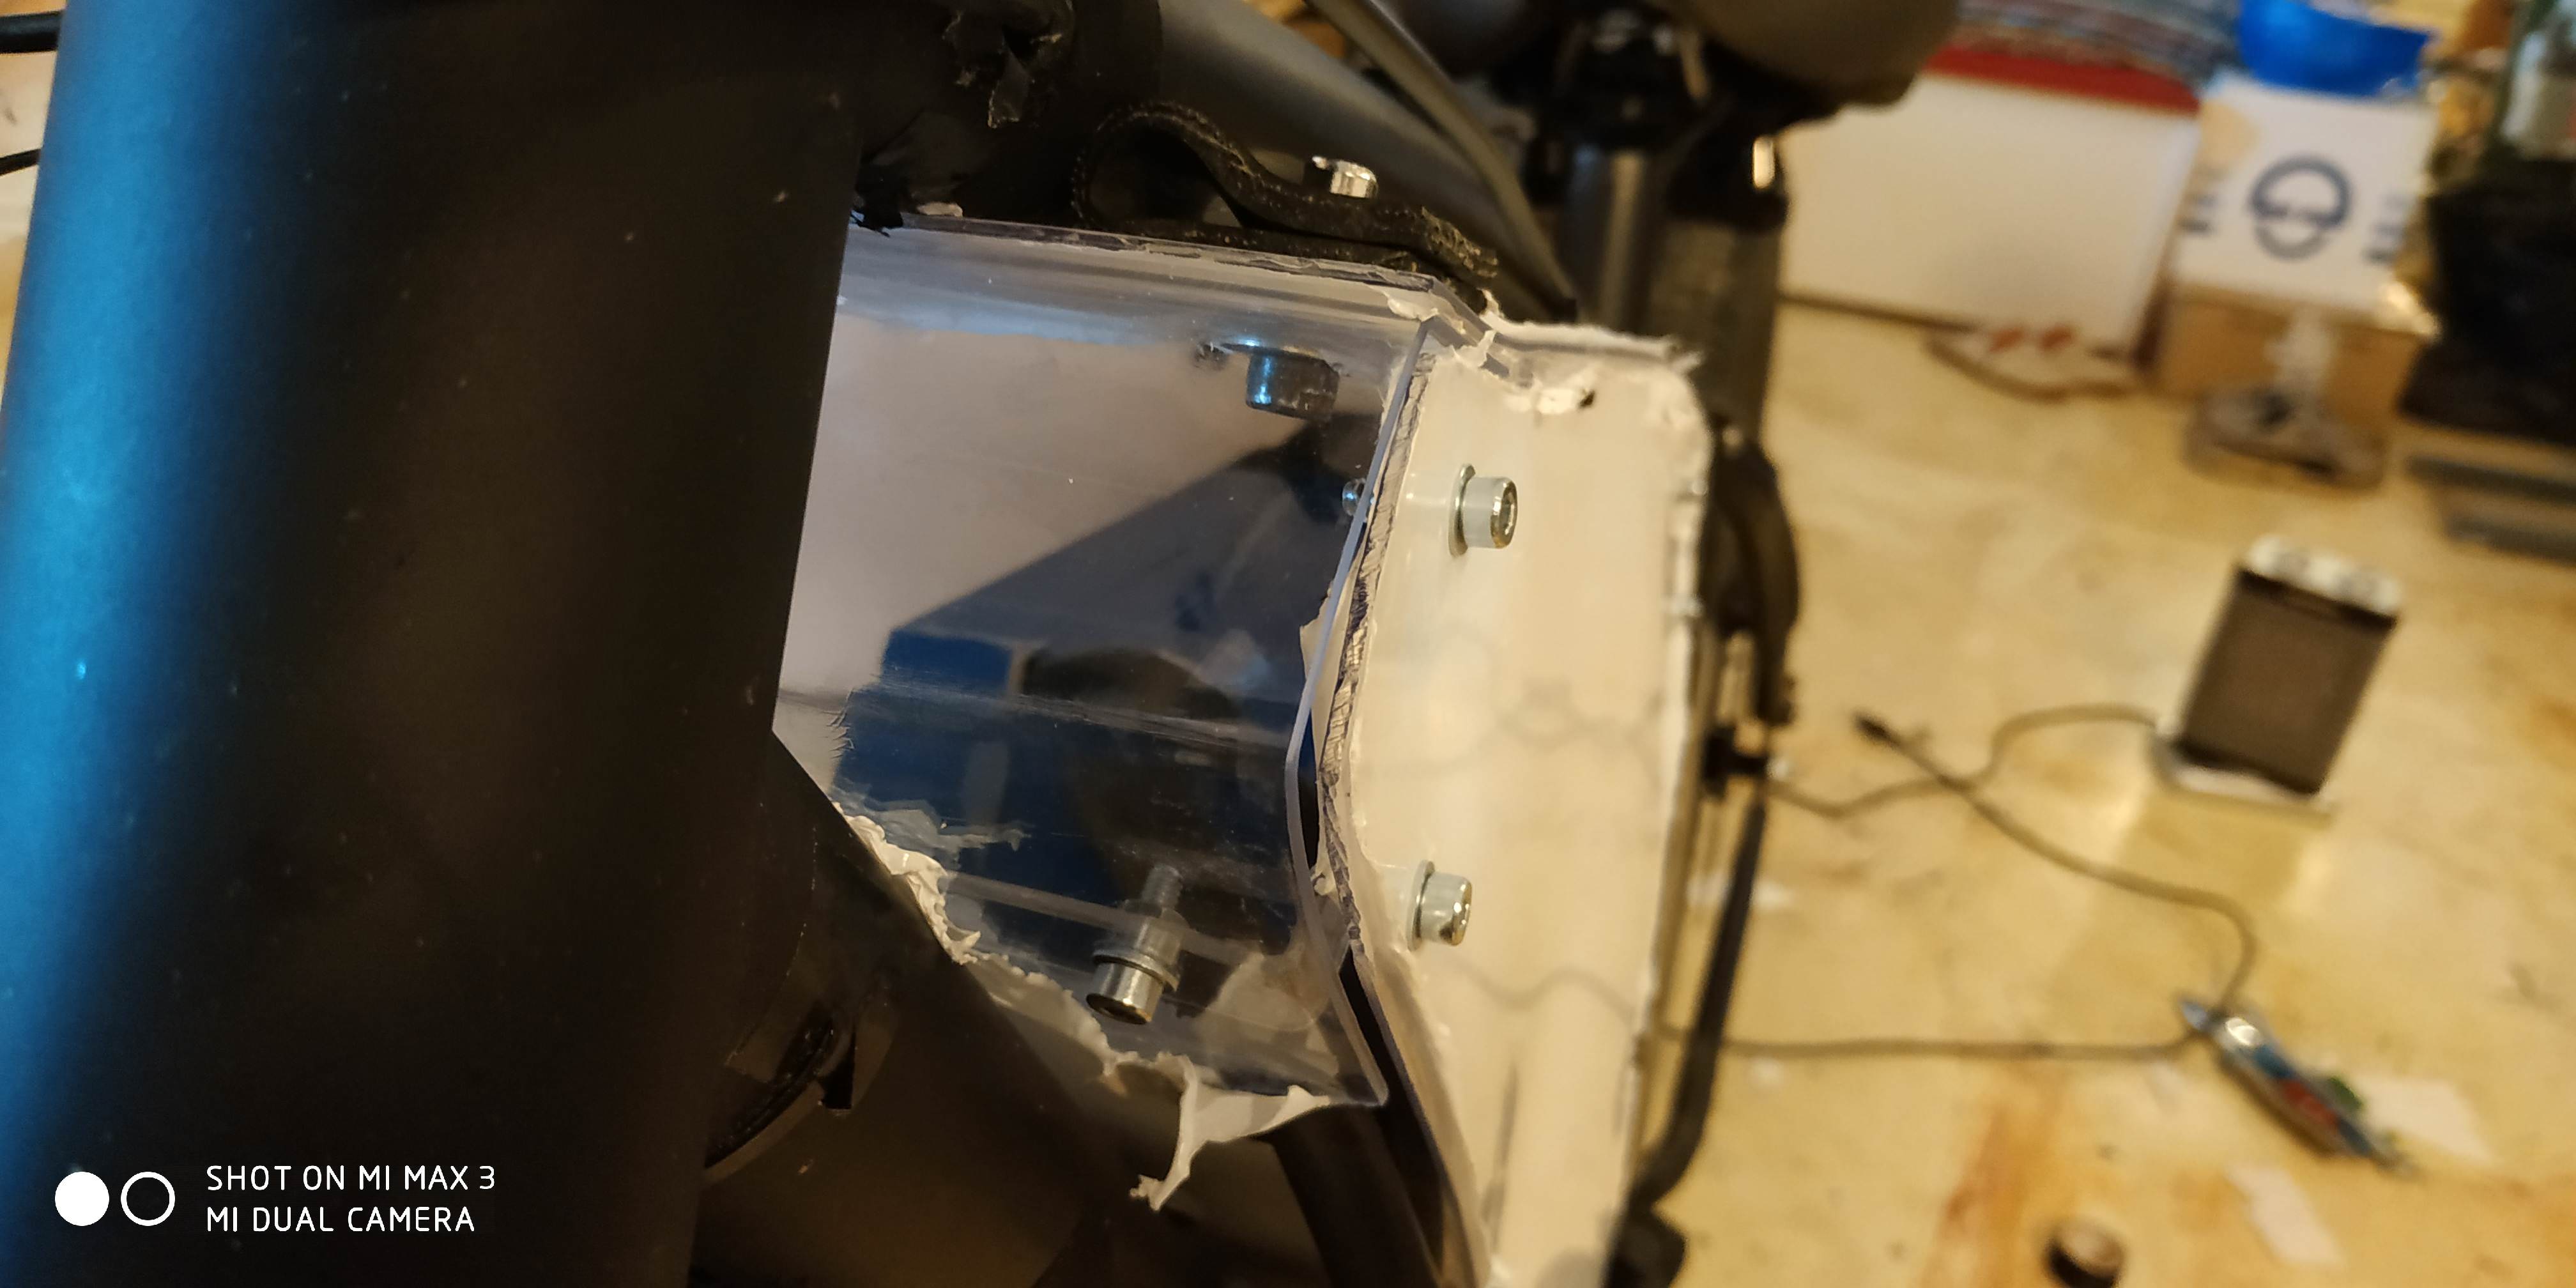
Got my transparent lexan 2mm battery box in a CF wrap so it looks matte black like the rest of the bike.
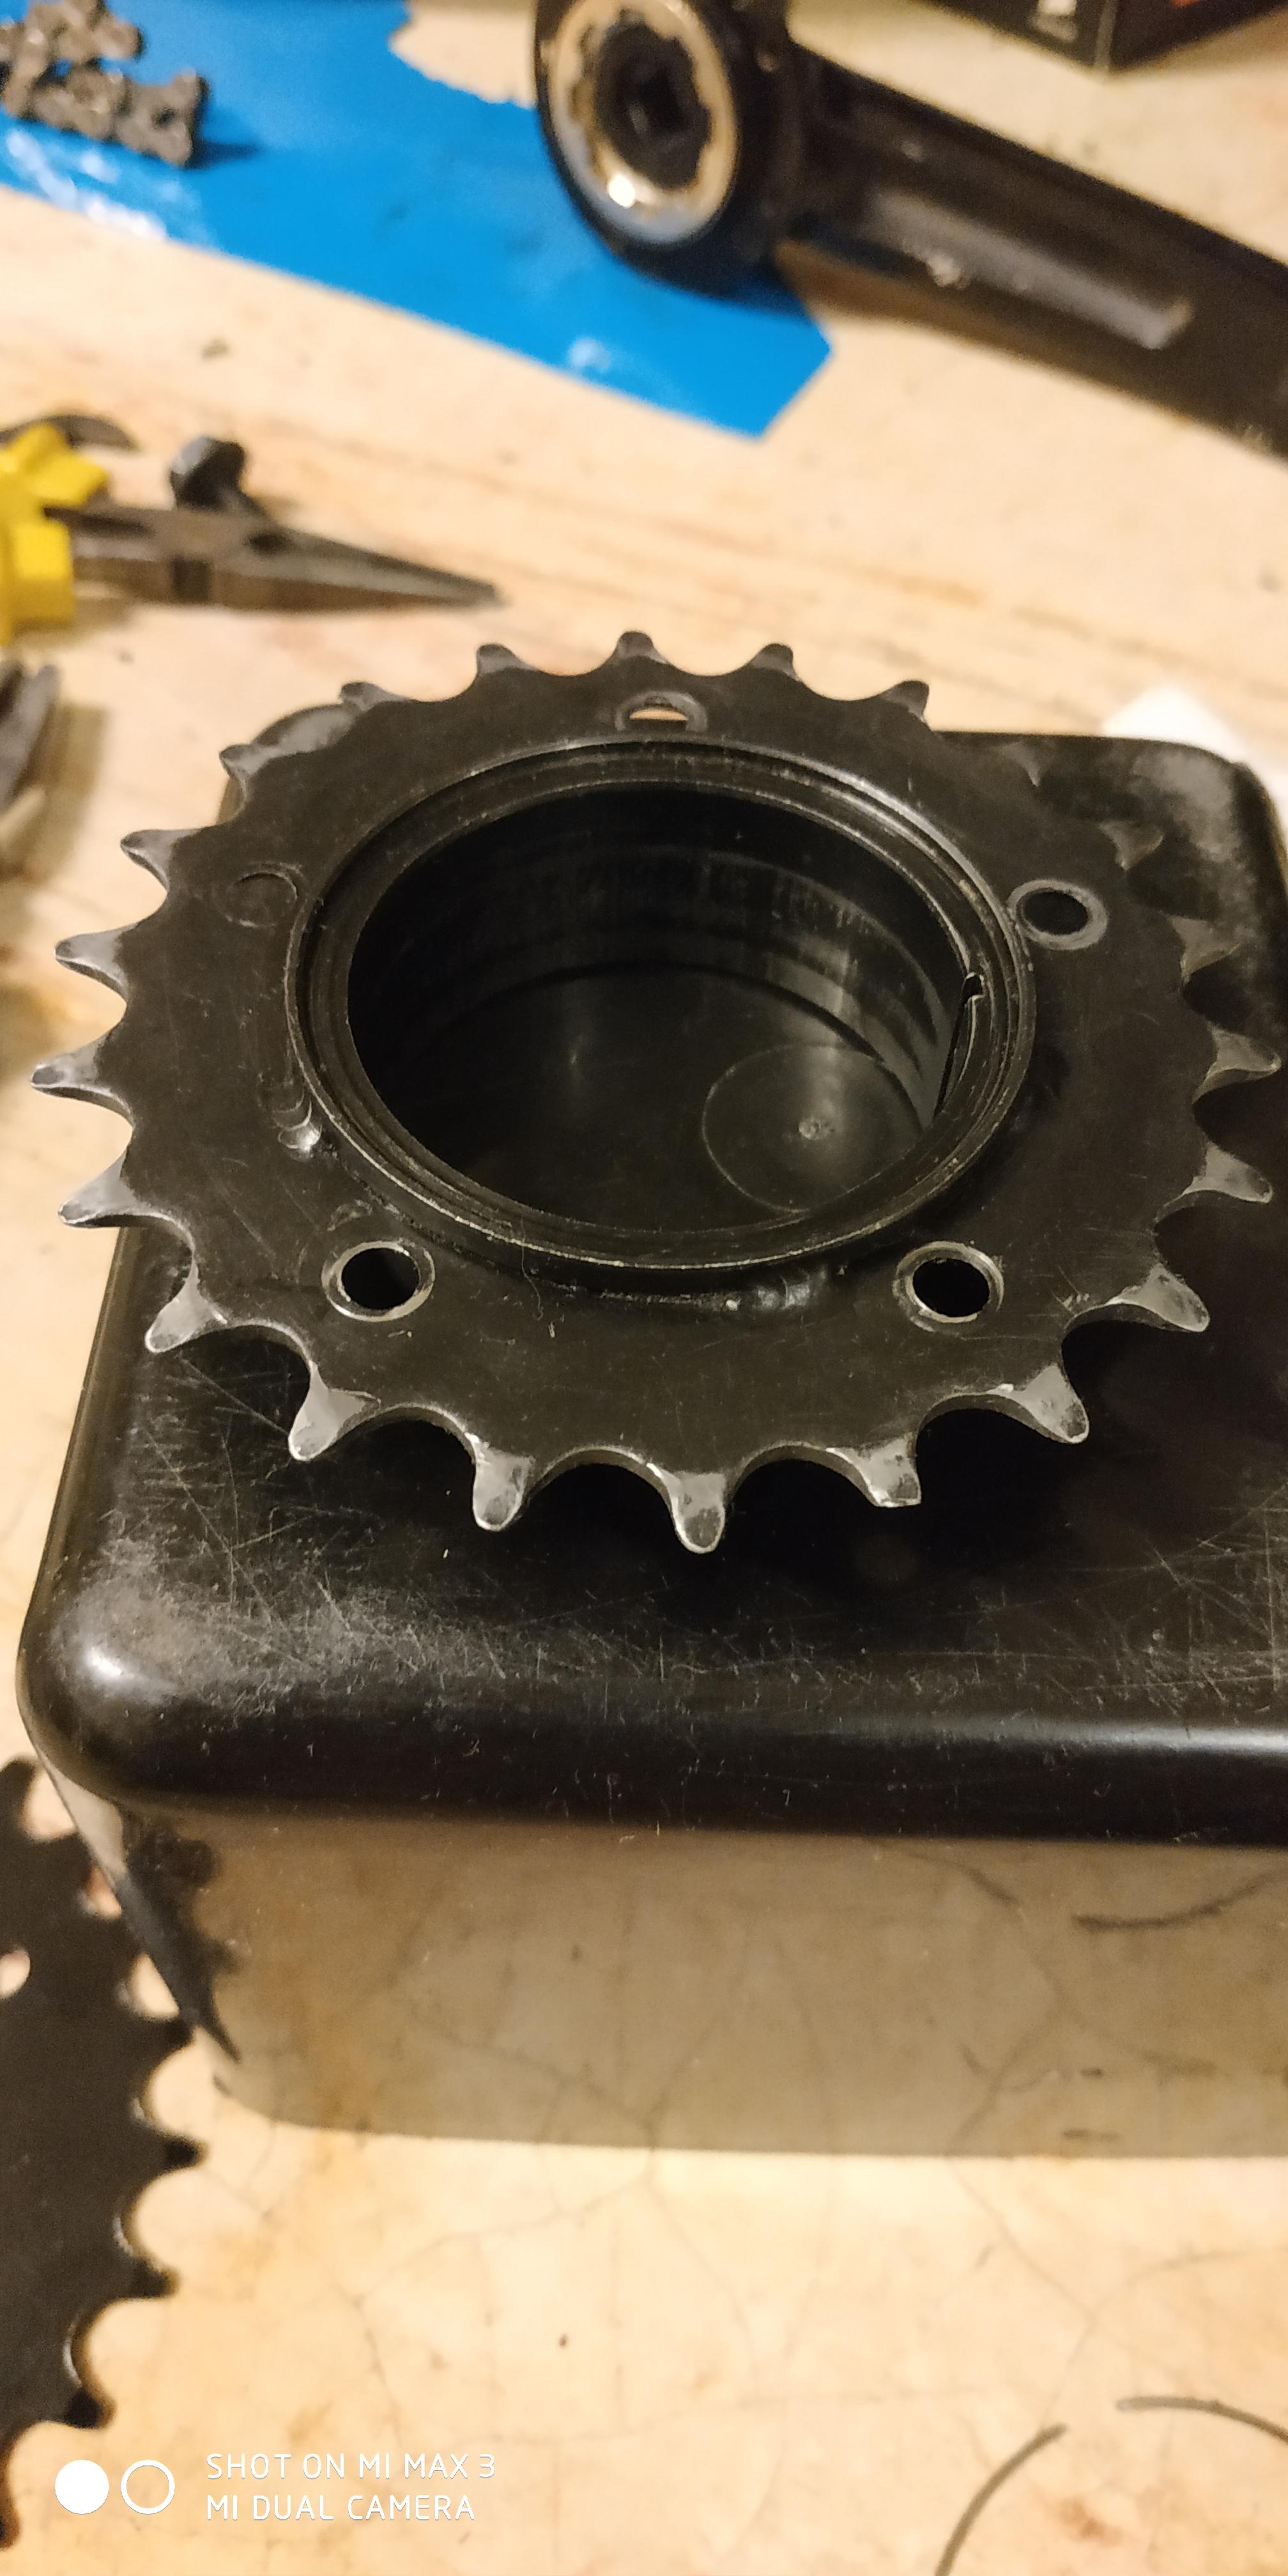
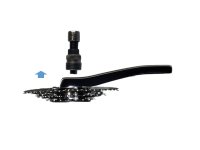
Changed to 30t chainring with an adapter. The 22t original one is too soft for the tooth, 3 broke off in just 300mi of average riding. 30t front 50t rear has the same ratio as 22t front 36t rear. Will still spin wheel on dirt and wheelie, so I didn't lose anything. So now instead of a $50 piece I change change the standard 104mm bcd for $10, and it is narrow wide too.
Can pedal with it up to ~40kph (holding throttle works as an assist).
19mm very hard key steel instead of 16mm. I will look into having the 22t piece made (without the tooth) from a harder material.
p9RtEaS.jpg

taAep8h.jpg

I have pushed it on a few trains now, never got an eye bat at me. The bike rack adds to the bike look, they probably think the battery box is a storage box. I use it as a long range tourer that takes dirt roads whenever the route is shorter. I hope to complete another 200km and two 500km trips this year.
I have this 3 piece bag to go on the rack: https://www.aliexpress.com/item/ROS...ycling-Double-Side-Rear-Rack/32677313841.html

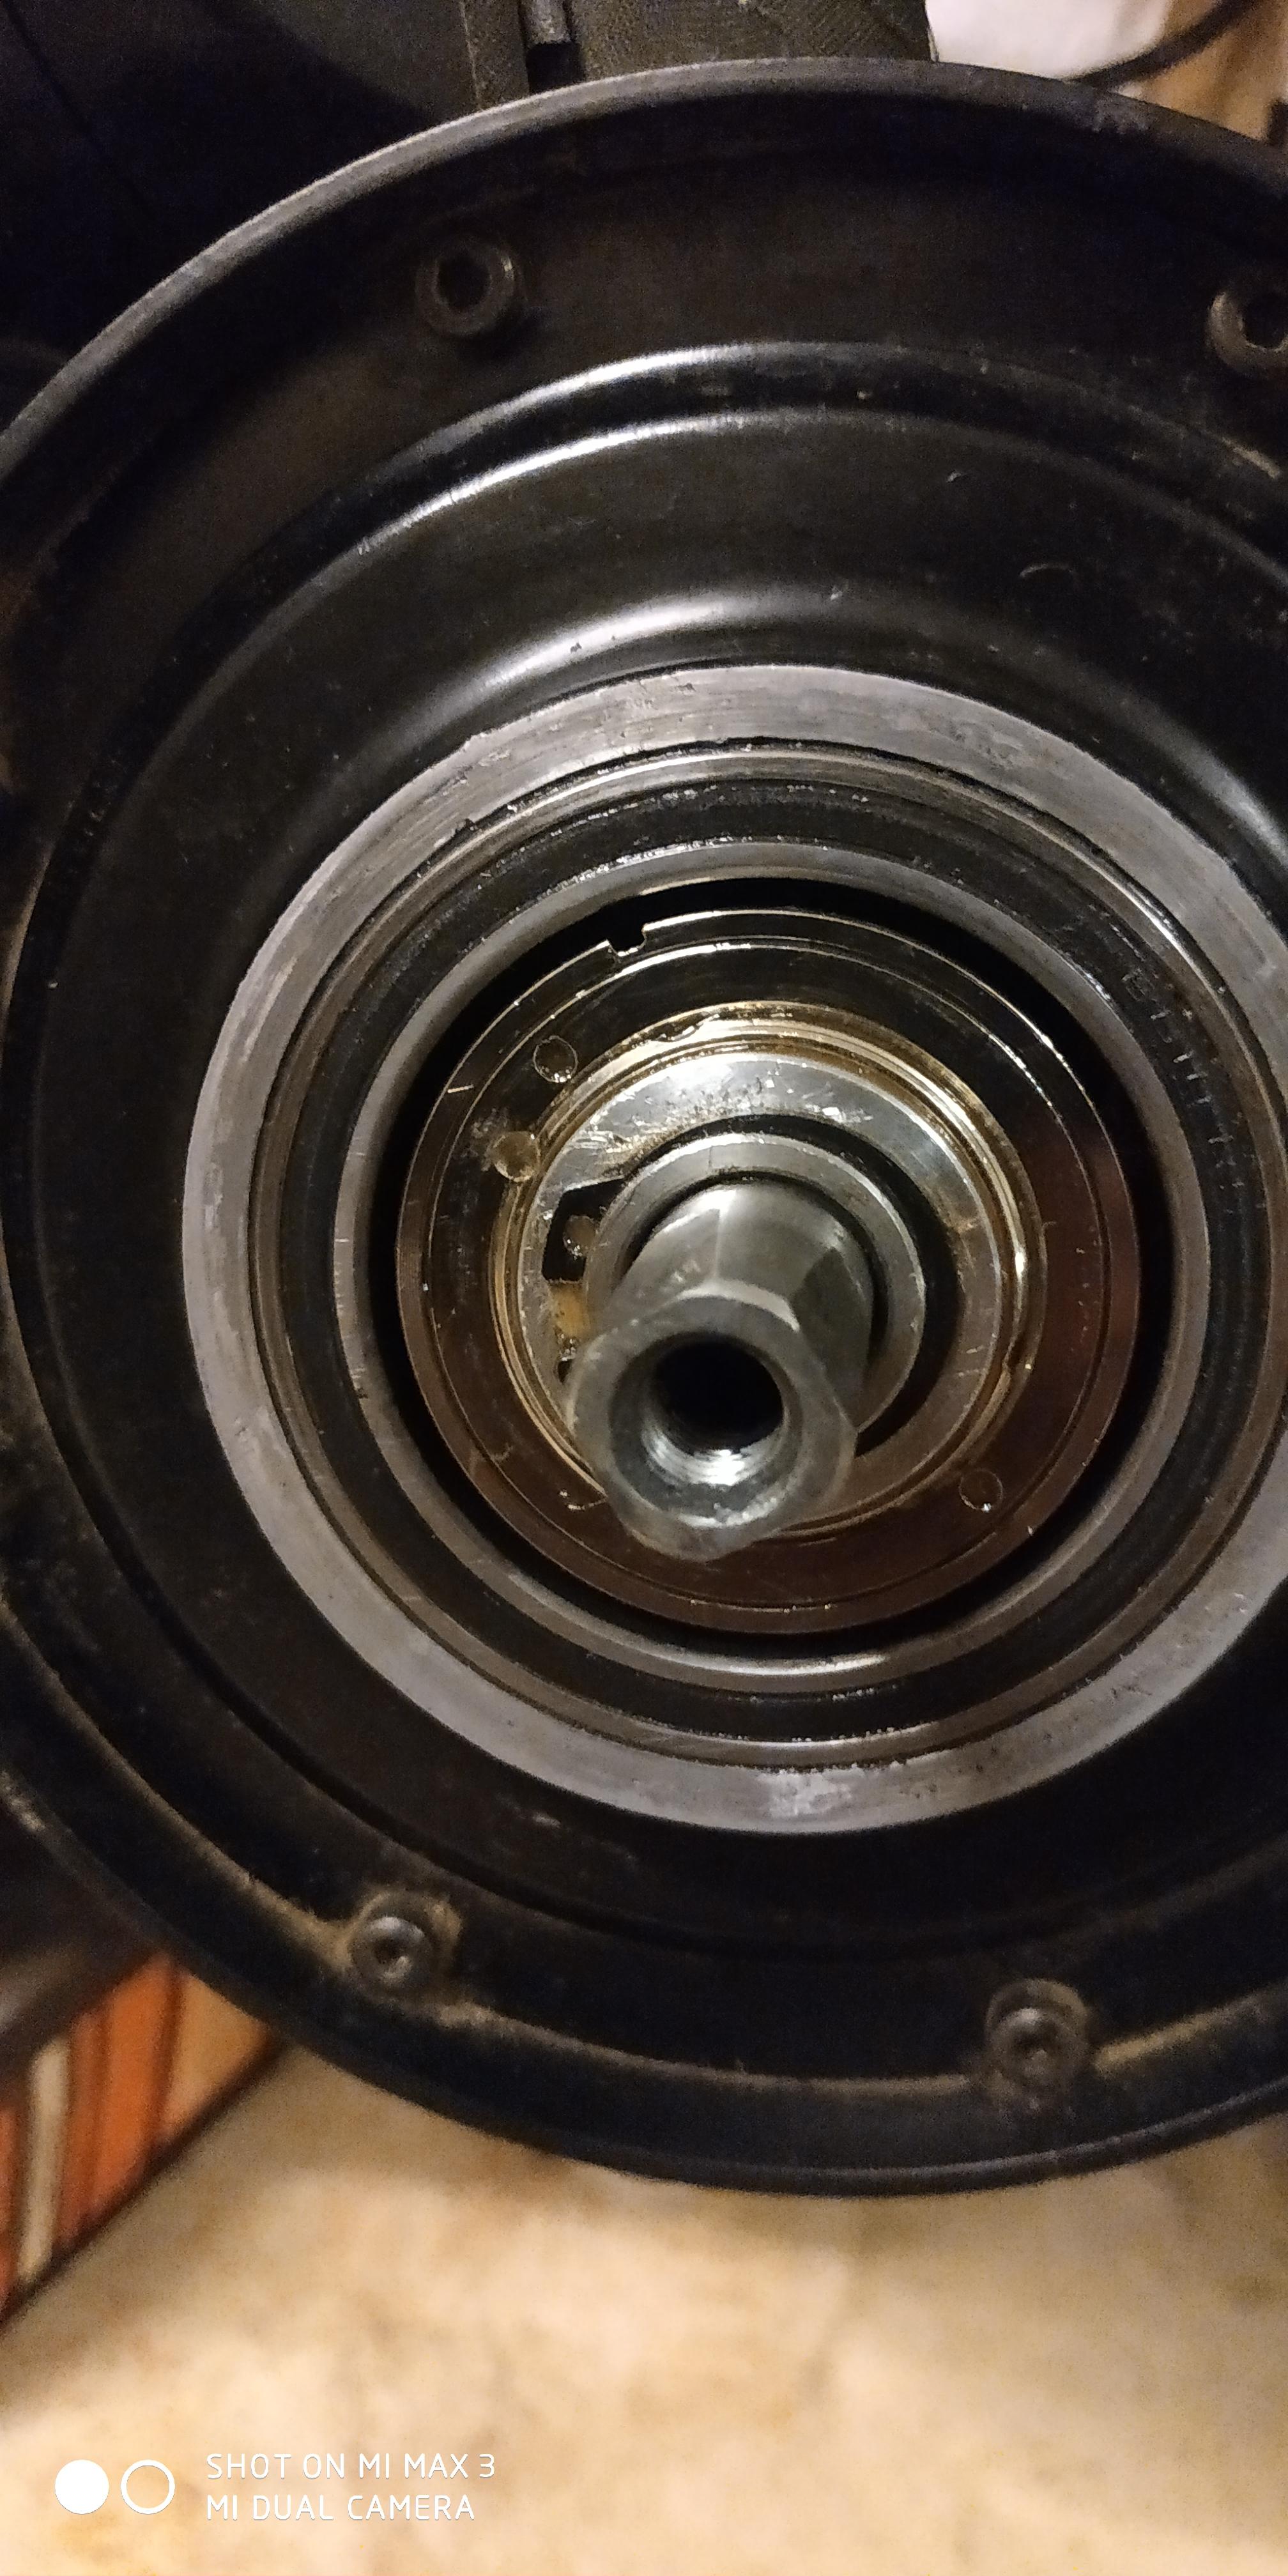
Some things of interest for us coaxial owners:
https://www.facebook.com/groups/endless.sphere/permalink/1922889881113404/
https://cdn10.bigcommerce.com/s-5gs6sywox4/products/199/images/510/5__13010.1521938456.1000.1200.jpg
Check out the pictures in the listing, also he is the lightning rods guy, replying in comments. The hubs he makes are motor driven on one side, pedal driven on the other and still have a brake disc. He wrote he would consider doing a custom axle. If we would flip out motor, I believe we could use this piece kit with some modification.

https://www.alibaba.com/product-detail/QS-2000W-120-70H-electric-mid_60769337137.html
QS motor 2000w mid drive. They are reguarded as high quality, and would fit inside out circular shape BB perfectly. While the outside diameter is not given, I asked a 3000w owner, their outside diameter is 154mm with a 136mm inner (stator) one, so this 2000w motor with a 120mm inner diameter should translate to a perfect match for our 136mm hole. The 3000w can take ~20kw without major warming, this 2000w would take more than our current motor, and for longer. The price is with controller, which we don't need. I've seen the 10kg 3000w motor for $260 on ali, this should be around $200 with a cheaper shipping price at ~6-7kg.
If nothing else done would lose our pedaling, but with a motor this high quality used as a single speed with a thick chain, it would be very reliable.

https://www.laadkabelfabriek.nl/product/verloop-type-2-naar-schuko-contrastekker/
Depending where you live, you are probably able to charge this bike with existing EV charge stations. This is the adapter I need in EU. Only $180. I have seen it demo-ed by a guy running a power drill off it. :lol: Of course, you can filter to normal sockets in plugshare too.
 
Hi tomm.
I glued cells together with liquid nails. Gives me plenty of time to move them around while configuring the pack.sets overnight.
Using an 80w iron and pushing in solder quickly. 3 seconds max contact. And cool off with air immediately after each connection.
I practiced on some cheap chinese cells first from an ebay laptop battery.
The cells should only get warm.
Scratch the battery tops first to get good adhesion. The copper rod 2mm needs to be touching the cell. Heat the copper with the most part of the tip. And just touching the cell push the solder in quickly until a nice pool sits on the cell. Cool with air.

Be carefull not to melt the insulation on the edge of the cell. The copper wire should not be touching the edge of the cell. If you break through the plastic on the edge. It will short circuit with the + button top.
 
Hey guys I posted a review on the 3kw cyclone forum but I catually purchased the 4kw full bike and ended having a real bad experience!
 
AlpinaEbiker said:
Hey guys I posted a review on the 3kw cyclone forum but I catually purchased the 4kw full bike and ended having a real bad experience!

He bought the complete bike, which is no good. They should sell this as a frame kit only.
For others interested, here is the post from the other thread I will reply to:

I haven't seen the 3kw motor but from pics it seems the 4kw is of a similar design with much more torque, and if you replace the nylon gears by the metalic ones it will break the piece that holds them together instead of wearing them out. that's the "disaster" I'm pointing out on the pics. seems the axles of the 3 gears are welded onto this part instead of having it made from one solid bloc, but again at this price... so I sent the whole thing back to Paco.

I have a job that involves heavy hours so I wanted a ready to ride bike with the specs I mentioned earlier, therefore I logically thought (stupidly ? :roll: ) that if cyclone designs the motors they must sell you a fully mounted bike that holds their own product.

In addition no info on the PAS and as you mention it doesnt really work well.

As I live at the french / swiss border the regulations are a bit different and Geneva is now allowing ebikes with PAS only up to 50kmh or 30kmh in bike lanes which are everywhere... so basically I got a fair warning as they didnt stop me on the road itself but clearly they don't like to see something accelerating without PAS on the streets. the main brand around is stromer but daaamn it is expensive for a city ride. I will most likely pick something from vector ebike once I am done with this one ( unless you guys can recommand a perfect balance of PAS city ride and decent acceleration off road )

I never even tried jumping the slightest thing but just the vibrations from riding oof road are disconnecting those cheap cables one after the other. and I actually broke the back wheel driving down a 20cm sidewalk...

About the gears:
Well I have been running 80A albeit at a high rpm, and I haven't broken my metal gears. It should be fine if you run it high rpm as there is less torque on the drive train. Maybe there is something else at play?

About riding legally:
Well in crowded areas you should be clown pedaling, while using the throttle. So you won't be bothered. You are asking for trouble using throttle only in a metro area using a bike lane. Clown pedaling and going at a reasonable speed is fine.
The way I ride, I do some interval training, so in very slow/stop and go parts I will pedal only, until I am tired. Then I use throttle only while clown pedaling until I am fresh again. So my legs are always moving.

About the PAS:
You can make it road legal with a switch that turns PAS feature on, the same switch turns the throttle off at the same time. You just need to hide the switch. For the PAS to not launch you to space, I think the energy (low speed mode) of the switch applies to the PAS's speed too. So it should be possible to wire them to the same switch, giving you low speed(under 25kph) PAS and be fully legal with just one moment. I have done this but never got to trying it out(one pas wire broke).

About the rims:
You can get quality rims for very cheap, I use dt swiss 535(ebike rim rated 140kg) rear and 533d front (enduro rim 130kg). They are under $30. https://www.dtswiss.com/en/products/rims/mtb/enduro/533d/ https://www.dtswiss.com/en/products/rims/trekking/535/

About your battery:
You really need to get some hard padding on the sides (top, bottom, rear, front) of the bag or whatever enclosure you put it in, and then get some soft padding. The battery should not move at all if you shake the bike or lift the bike in any direction, it should be silent. And get the cells replaced that need to be fixed. Or your battery will blow up with your bike.

I have had luck jumping this beast, only my suspension screws get lose after a while, because I didn't threadlock them.

[youtube]DE-7U-dQjq4[/youtube]
 
Hello all,
here is a status of the new cyclone coax bike, after severall hundred of kms.
the motor is very fluid noiseless. This is very pleasant. as mentionned in the thread of the discussion, the motor loves spinning which is completely different from the other mid drive motors.
Now, i recently have an issue, and I'm interested to know if other cyclone coax bike owners already have the same issue:
the 5 screws of the small sprocket are untightened and due to the design of the coax motor, these screws are not accessible without removing the small sprocket. Does anyone already have to remove the small sprocket to tight the screws?
 
olivier38 said:
Hello all,
here is a status of the new cyclone coax bike, after severall hundred of kms.
the motor is very fluid noiseless. This is very pleasant. as mentionned in the thread of the discussion, the motor loves spinning which is completely different from the other mid drive motors.
Now, i recently have an issue, and I'm interested to know if other cyclone coax bike owners already have the same issue:
the 5 screws of the small sprocket are untightened and due to the design of the coax motor, these screws are not accessible without removing the small sprocket. Does anyone already have to remove the small sprocket to tight the screws?

You have to take the small sprocket off with the standard crank extractor tool. Just do it without removing the crank and freewheel piece. Have all 5 screws in it.
Just screw it in and keep pulling, it should be easy.

The cutouts are for 2x2mm key steel. It transfers the torque. You should check it if you already have it open. The stock part is 15mm but you can replace it with 19mm, you will get ~30% extra torque transfer area that way.
https://www.ebay.com/itm/2mm-3mm-4m...e-Milling-Mold-Making-200mm-Long/222649265505

Get some clean the tunnels for those screws and use threadlocker in them.
uy78DBF.jpg

5zPqVQ6.jpg


I love this bike, it can ride dirt, jump, ride street and do it all.

[youtube]MPbg1g1nzBc[/youtube]
 
Hi Tom,
thank you for your recommendations. It's helpfull.
just to be sure that I well understand your explanations:
i remove the entire crankset (without disassembling the sprocket) with the crank extractor tool and it's only after then that I can remove the screws of the small sprocket? (as I tried to summarize on the picture). thanks again.
by the way, In parallel of this, i contacted Paco who seems to be aware of this issue and he solved it by a solder point to lock the screws on the small sprocket.
Otherwise like you, I really like this bike: ver fluid, battery inside frame => the backpack is very light, only for camel pack.
I replaced the rear shock because the shock provided with the bike is very cheap.
 

Attachments

  • cyclone_remove_crank.jpg
    cyclone_remove_crank.jpg
    18.4 KB · Views: 3,139
Thank you Tom,
I finally extract the sprocket from the motor with the crank extract tool. But now, I have another problem: how to separate the sprocket from the bearing?
 
olivier38 said:
Thank you Tom,
I finally extract the sprocket from the motor with the crank extract tool. But now, I have another problem: how to separate the sprocket from the bearing?
removed_sprocket.jpg

They are connected through the pin I showed you. There is a square channel for the pin and a channel in the bearing for the pin too. You have to loosen it out by pushing it in or pulling it out, or just separating the two from underneath where there pin is.
The pin material is a bit softer than ideal (the one I linked is harder and more brittle) so it can deform to take on the shape of either sides.
 
Hi,
Understood. In fact, in my case, as shown on my picture the bearing should have stay in place when I use the crank extractor tool. But unfortuntely it comes with the sprocket. On your photo we can see that the bearing is still in place.
I contact Paco who will send to me a new sprocket (with soldered screws)+bearing. I will use bearing extractor to separate it from the sprocket.
thanks again
 
Back
Top