High Power Battery 2kWh (20S-9P) for Flux Beta Frame

That's still a great battery, if you turn your DC amps down to say 100, that would probably buy your more time with this battery. All in all, I think you did great.
 
Rix said:
That's still a great battery, if you turn your DC amps down to say 100, that would probably buy your more time with this battery. All in all, I think you did great.

Thanks Rix for the advice, you have always something nice to say!
 
Hi icherouveim,

What's the power of your bike?

I want to build a special bike capable of doing 70km at 70-80 km/h (Isle of Man challenge).

I'm considering a 5kW (80A controller) kit with a 20s9p (still not decided about the cells). Basically I'll build a similar battery pack.
Not worried about the speed, but not sure if it'd reach the required distance... Perhaps upgrading to 20s10p, 20s11p... :?:

What speed and range do you get from your bike?

Thanks
 
BenjAZ said:
Hi icherouveim,

What's the power of your bike?

I want to build a special bike capable of doing 70km at 70-80 km/h (Isle of Man challenge).

I'm considering a 5kW (80A controller) kit with a 20s9p (still not decided about the cells). Basically I'll build a similar battery pack.
Not worried about the speed, but not sure if it'd reach the required distance... Perhaps upgrading to 20s10p, 20s11p... :?:

What speed and range do you get from your bike?

Thanks

Hello,

My peak power is 8-9 Kw, When I travel outside of the city I set my top speed at 75 km/h the power consumption for this speed is about 3000-3500 W and I can do maximum 45 km (when there is not strong head wind).

If you want to cover 80 km at this speed you need the double capacity.

Actually this will be my next project. I want to build an ebike capable of traveling from City to City at the speed of 75km/h and distance 80 km.

From my calculations I will need at least a battery pack with "real usable" capacity 3000Wh.

So If I use the same Samsung 30Q cells I will need 20s - 18P battery pack.

I hope that helps with your build :)
 
icherouveim said:
Hello,

My peak power is 8-9 Kw, When I travel outside of the city I set my top speed at 75 km/h the power consumption for this speed is about 3000-3500 W and I can do maximum 45 km (when there is not strong head wind).

If you want to cover 80 km at this speed you need the double capacity.

Actually this will be my next project. I want to build an ebike capable of traveling from City to City at the speed of 75km/h and distance 80 km.

From my calculations I will need at least a battery pack with "real usable" capacity 3000Wh.

So If I use the same Samsung 30Q cells I will need 20s - 18P battery pack.

I hope that helps with your build :)

What a great info you are giving me! That's even more than I was asking for... Thanks!!
That's gonna be a huge battery pack

Do you have by any chance the consumption data? Is it something like 44Wh/km?

Thanks
 
BenjAZ said:
icherouveim said:
Hello,

My peak power is 8-9 Kw, When I travel outside of the city I set my top speed at 75 km/h the power consumption for this speed is about 3000-3500 W and I can do maximum 45 km (when there is not strong head wind).

If you want to cover 80 km at this speed you need the double capacity.

Actually this will be my next project. I want to build an ebike capable of traveling from City to City at the speed of 75km/h and distance 80 km.

From my calculations I will need at least a battery pack with "real usable" capacity 3000Wh.

So If I use the same Samsung 30Q cells I will need 20s - 18P battery pack.

I hope that helps with your build :)

What a great info you are giving me! That's even more than I was asking for... Thanks!!
That's gonna be a huge battery pack

Do you have by any chance the consumption data? Is it something like 44Wh/km?

Thanks

Hello again,

If you go at the end of the first page you will see the detailed stats, actually I've posted them 5 days ago.
The power consumption for my e bike, 84 kilos rider at this speed is about 36 Wh / km.
 
You're right, sorry.
I'm reading a good bunch of threads and I forgot it.

Thanks
 
Cowardlyduck said:
Well I'm mostly copying this pack. Thanks icherouveim for all the info!

[youtube]R8NgGlP6k38[/youtube]

Cheers
Hello there!

You are welcome,
Good Job!
I watched the first 10 minutes of your video. You won't have problem to fit the first pack as one block. The second pack (5S - 9P) is the one that fits tight also its very important at the end to add some padding at the sides, up & down to keep the pack secure in place.
Post the rest of the pack when is finished.
 
icherouveim said:
Hello there!

You are welcome,
Good Job!
I watched the first 10 minutes of your video. You won't have problem to fit the first pack as one block. The second pack (5S - 9P) is the one that fits tight also its very important at the end to add some padding at the sides, up & down to keep the pack secure in place.
Post the rest of the pack when is finished.
Thanks for the feedback!
I expected the larger pack to be the tricky one to fit, not the smaller pack. Interesting!

The plan is for padding to be minimal under the heatshrink so that it's guaranteed to fit. Then if any room still exists, additional padding can easily be added around the packs on the inside of the frame.

How did you do the balance wires for the sub pack so that it can still read the last cell from the pack before it? Or does the Adaptto BMS not need that?

Cheers
 
The balance wires are connected with the main pack with the two white connectors you can see at the photos so all the cells can be monitored by the adaptto controller.
About the padding you have to put only at the main pack up and down (not at the sides) and at the second small pack not to add padding at all except double heat shrink to make it strong.
When you finish with the battery installation into the frame you fill all the gaps with padding to prevent any movement. You can do this very well thru the side windows. Pity that I don't have photos from the padding installation.
Something last, the wire that connects the packs together should be at least 20-25CM because first you install the big pack and then the small one.
 
Thanks again icherouveim!

Perfect timing. My very next step was the main pack negative lead that connects to the sub pack positive. I had already made the sub-pack positive only about 10mm, so I made the main pack negative about 15mm.

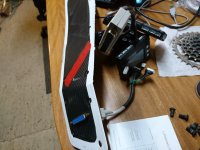
In my case there is no Adaptto BMS, rather I'm setting it up with balance wires to a parrallel port up in the neck that will connect to 4 x Battery medics for balancing when needed. This will consist of 3 x 5S (6pin) JST plugs from the main pack and 1 from the sub pack.
So I have all 6 measuring points I already need in the subpack for that to work...no need for a balance wire connection between the two halves. :D

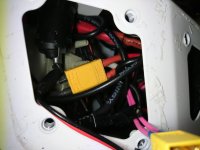
The only thing I'm still unsure of is how/what is going to need to be changed/adjusted on the frame wiring in order to make this fit as the controller wires came out just near the underside of the neck from memory. I should get the bike some time later this week so I can figure it out then, but I'm really hoping I don't have to drill any new holes for wires. :|

Thanks again icherouveim. Couldn't have done this without your contribution here!

Cheers
 
Hopefully I'm not spamming your thread too much icherouveim.

Here is where I'm up to now with this pack build:
[youtube]fz2la8bccC8[/youtube]

I also forgot to mention, I used 8 nickel layers per side on the smaller sub-pack, 6 of which were 8mm wide. That gives it a theoretical max of well over 150A, but in reality this pack is ~90A so should be more than adequate.

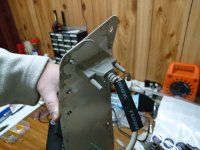
As mentioned in the video, this pack did not fit this beta frame without modifications.
Anyone else looking to build the same, be prepared to make mods to your frame if you want to make this fit!

Cheers
 
Cowardlyduck said:
Hopefully I'm not spamming your thread too much icherouveim.

Here is where I'm up to now with this pack build:
[youtube]fz2la8bccC8[/youtube]

I also forgot to mention, I used 8 nickel layers per side on the smaller sub-pack, 6 of which were 8mm wide. That gives it a theoretical max of well over 150A, but in reality this pack is ~90A so should be more than adequate.

As mentioned in the video, this pack did not fit this beta frame without modifications.
Anyone else looking to build the same, be prepared to make mods to your frame if you want to make this fit!

Cheers

Hello,

Very nice & professional job!!
It seems you do everything very carefully, you are not in a hurry at all!
Pity that battery didn't fit without any modifications, if you have a true 10CM opening it should fit fine.
I was lucky because the battery opening was right according to factory specs.
Just make sure to have long enough cable because you install the big pack first and then the second one while they are connected.
Keep posting videos with the progress.
 
Thanks for the kind words!
I wouldn't call myself a professional, but try to do my best. :)

Thanks for the tip on the long cable. I ended up making a double connection as I didn't want to change the existing XT90 connectors, but this pack is split so won't work with a joined connector like that. I make an XT150 to XT90 harness that joins the two halves together and is definitely going be long enough.

Tonight I made the first 5S balance lead coming of the sub pack. I hate doing balance leads, so it's good to get some of it out of the way. I will see how I go for time and might make another video showing how I do the balance stuff.

Cheers
 
Hey Icherouveim, similarly inspired by your build. Waiting for a final few components to come in before I start documenting my build.

I had the same issue CD had with his frame. Used a flappy to fix the issue.
 
Yeah, it doesn't surprise me more frames have this extra material. It seems like they did a sloppy job laser cutting or whatever they did to make the hole on some of these frames.

I've finished my pack now and installed it in the frame, but haven't put together the final build video yet as I will also include the BMS solution I'm still working on.
Getting the pack in was a huge PITA and very difficult. I really don't want to take it out again, but probably need to in order to sort out some wires and padding. Will see how I go.

Cheers
 
Cowardlyduck said:
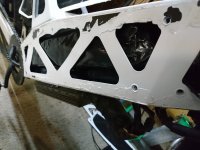
Yeah, it doesn't surprise me more frames have this extra material. It seems like they did a sloppy job laser cutting or whatever they did to make the hole on some of these frames.

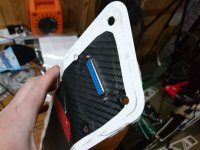
I've finished my pack now and installed it in the frame, but haven't put together the final build video yet as I will also include the BMS solution I'm still working on.
Getting the pack in was a huge PITA and very difficult. I really don't want to take it out again, but probably need to in order to sort out some wires and padding. Will see how I go.

Cheers
Hello,

Yes as I remember I've spent lot of time for the cable management before to install the battery pack.
All the cables should be routed at the sides in order to maximize the available space.
Post the video when you finish to see the finished job!
 
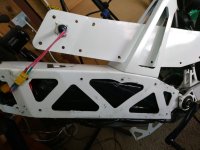
Still finalising a few things, but I managed to push the sub pack further down in the frame so it clears the existing cables much better.
I'm much more comfortable with it now and have sealed up the bottom hatch now. Only thing left to do is the balance plug which I'm 3/4 of the way through. :)

DSC_5403.JPG

I haven't had time to make the final video yet, but hopefully this week. :)

Cheers
 
Still haven't had time to make another video, but the bike is finally ready for pick up. :D

Here is some final shots of my balancing solution and the final side cover being installed.
DSC_5436.JPGDSC_5437.JPG
DSC_5439.JPGDSC_5441.JPG
DSC_5444.JPG
The balancing solution is 4 x battery medics through a DB-25 parallel port. I've used this solution on a number of bikes now and it works well. :)

The owner also wanted me to do a bunch of other things like FerroFluid in the motor, truing the wheels, tuning of the Cycle Analyst, etc. So even though the battery was done it's taken a bit more time to finish off this Beta.

I did quite a few test runs and it now performs great hitting 5.8KW pulling quite hard all the way up to about 75kph. I did a 'burn in' test of the battery dumping nearly 10AH (~750Wh) in a bunch of hard pulls up hills etc and the battery only hit 30C. I would say this pack is going to be pretty good so long as the owner doesn't let it go over 50-60C which it shouldn't unless it's really hot summer temps and he rides real hard. I have made a handlebar temp sensor for him to monitor for this exact purpose.

Hopefully I can wrap up this build in a video soon.

Cheers
 
Cowardlyduck said:
Rix said:
Nicely done CD, I like the set up, looks great.
Thanks!

Well it's all done now, just getting around to putting together the video's.
Here is the final main pack build video...the balance solution is yet to come.
[youtube]-2sdU1pQkyM[/youtube]

Cheers

Very nice job as always!
Were you drinking wine while you were making the battery?? :shock:
By the way did you have the chance to ride the bike?
Does the battery sag a lot when you draw 90A?
I am really curious.
 
icherouveim said:
Very nice job as always!
Were you drinking wine while you were making the battery?? :shock:
By the way did you have the chance to ride the bike?
Does the battery sag a lot when you draw 90A?
I am really curious.
Thanks.
Yeah a glass of wine alway's helps build a better battery. :)

I took the bike on a few test rides. Couldn't draw the full 90A as the controller is limited to just under 80A. At full load it would sag about 8V which is about what I would expect with 9P.
I did a test ride where I chewed about 10AH in 20min going full throttle repeatedly and the battery only rose in temperature about 15C.

In hot summer temps, I would say a very hard ride could push the pack over the 60C limit I'm recommending, but I think the motor would definitely overheat first in that case forcing the CA to limit power anyway, so it's unlikely it will ever be a problem.

Cheers
 
Back
Top