Donor for tall guys

e-beach said:
Sounds to me like you are going in a good direction with your e-bike plan.

Other small details,

you might consider, after riding for a while, to change your rear break to the left side lever. They call it Moto style, why I don't know as all my motorcycles had a foot pedal for a rear break. However, ones right hand can get tired doing all the throttling and breaking. When you start riding you will feel it in your thumb anyway from the throttle. That goes away over time. Some prefer twist throttles for that reason, and that they might fit your handle bars better depending on your shifters. You may not ride enough to have a tired right hand. Just know it can happen.

We used to own a nice GearBox toy hauler and 3 ATV's for trips down to pismo beach. I know ALL about thumb throttle fatigue. :(

The kit came with a twist throttle. But I may relocate the rear brake to the left on the rebuild since I have no real preference to start with.

e-beach said:
Some of us around here make sure our front break can not lock up the front tire. I got hurt once when a car cut me off and I pulled my breaks so hard the front tire stopped rotating. If it only washed out I would have been better off, but my inertia caused my bike to flip as everything rotated over the front wheel leaving meflying over the handlebars. I landed hands first injuring both hands and my right solder. My hands healed in a few months, but my solder took a year to heal. So now my back break locks up the wheel, but the front break grabs hard but is not adjusted to lock up the wheel. It also allows you to steer the bike while breaking while breaking hard.

:D :bolt:

Good points on the front lockup. :wink:
 
My wife's bike has a similar motor kit, 1000 watts on a steel frame. Using the included tabbed washers, tight axle nuts and a lack of regen support, it hasn't moved at all without a torque arm. I have taken it apart to change the freewheel once and tire the second time, and the dropouts weren't stretched at all.
 
40 foot pounds (55 nm) is a good place to have your e-bike nuts torqued to prevent unwanted axle rotation. I would still suggest a good torque arm.

:D :bolt:
 
Bummer on the tire. Mine was actually quite usable. I used it as a front tire for a couple thousand miles until a it became compromised by a 1/2 in cut from something very sharp. But even then, I cut the sides off and am using it inside my rear tire in addition to a anti-flat strip.

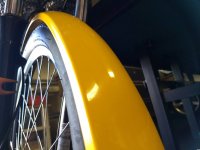
Auto paint and a real sprayer are obviously superior, but I was able to do a very nice job on my fenders using a standard "rattle can" and finishing it with three coats of clear. I think rattle can fumes are a bit less toxic than two-part car paint. A little car wax shines it up nicely and make them easier to clean.
file.php


Because I'm using a voltage boost converter to bring 36 volt batteries up to 54 volts, my installation's throttle response may be different than yours. I found the throttle to be fairly non-linear. This isn't a big problem because the power to weight ratio is very low on a 1000 watt or less ebike. So you can easily maintain desired speeds by easing into and out of the throttle because inertia tends to damp acceleration. I eventually reconfigured my bike to be Class 3 compliant when AZ bike laws were recently changed. That meant relying on the PAS to apply and/or enable throttle. What I've found is that once I got used to it, it was actually a nicer more bicycle-like ride using the PAS almost exclusively. I typically select power levels 2, 3, or 4 (power draw at that first four levels is about 150, 300, 450 & 600 watts respectively) depending on terrain, wind, desired speed and desired level of effort. After a while, picking a level becomes as automatic as switching gears. The twist throttle stays operative and I use it to get full power on-demand without hitting buttons on the LCD panel. So I only use the twist throttle occasionally when riding.

If you install the PAS, be careful about forcing it onto the crank spindle. I pressed mine on with substantial force and broke the inner ring that has "fingers" that grip the crank. I was able to repair the crack, and re-install after grinding the "fingers" down to allow for the larger diameter crank spindle.
file.php


https://endless-sphere.com/forums/viewtopic.php?f=2&t=90369#p1332443

As for the torque arm, you can probably get away without using one if you torque the motor axle nuts down appropriately as mentioned earlier (actually quite important based on testing done by Justin) with properly installed tab washers. But why take the chance? Torque arms are easy to make and/or cheap to purchase. Knowing the motor is secure is worth it IMO. Just installing one torque arm would probably be enough to give easy peace of mind.
 
On the other hand, No PAS, No sweat...... :wink:

If it is not necessary where you work and live, IMO it is just one more thing to go wrong.

:D :bolt:
 
e-beach said:
On the other hand, No PAS, No sweat...... :wink:

If it is not necessary where you work and live, IMO it is just one more thing to go wrong.

:D :bolt:

I look at it as having two throttles installed so I have a ready-to-go backup installed and working :^) I have about 7000 miles on my broken PAS. They seem pretty reliable. But my experience is a sample of one. Not sure what the general experience is. But yes, PAS is hardly necessary (unless you need the bike to be Class 3). Just something to consider since the OP has it with the kit he bought.
 
wturber said:
e-beach said:
On the other hand, No PAS, No sweat...... :wink:

If it is not necessary where you work and live, IMO it is just one more thing to go wrong.

:D :bolt:

I look at it as having two throttles installed so I have a ready-to-go backup installed and working :^) I have about 7000 miles on my broken PAS. They seem pretty reliable. But my experience is a sample of one. Not sure what the general experience is. But yes, PAS is hardly necessary (unless you need the bike to be Class 3). Just something to consider since the OP has it with the kit he bought.

I'm going to install the PAS since I have the cranks off anyway. I figure it's there if I decide to use it.

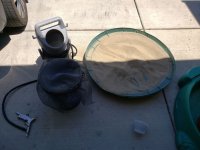
I had to go over to harbor freight this AM for some things and ran across their $29.00 "Abrasive Blaster"

https://www.harborfreight.com/portable-abrasive-blaster-kit-37025.html

I figured for $30 ($22.5 after my 25% coupon), why not give it a try. I didn't want to invest in their $25 bag of walnut shell abrasive since I was unsure if I could even return that if I wasn't happy with the results. I had a 50lb bag of play sand at my house leftover from my pool filter, so I decided to give that a shot.

I filtered the sand through some screen and was left with a pretty good stock of usable material, or so I thought. I was able to get small bursts of good action from the gun, but the damn hose kept clogging with sand. Plus. I didn't have a face shield and really needed one for this task. My goggles and respirator mask were great, but a face shield was obviously necessary for safety, so I packed it in for the afternoon. Not sure if I'm going to keep the unit since I'm not happy with the results. If I had the right medium and dialed in my setup, it appears to do what I need it to do. It was just too sporadic in it's effectiveness.
 

Attachments

  • sandblast.jpg
    sandblast.jpg
    153.1 KB · Views: 1,041
  • forks1.jpg
    forks1.jpg
    147.8 KB · Views: 1,041
Any thoughts about a large DIY sandblasting cabinet?
 
e-beach said:
Any thoughts about a large DIY sandblasting cabinet?

Don't really have the real estate in my garage for something of that magnitude. Nor do I see it as something I'm going to use regularly enough to construct.
 
How about sandpaper for the long tubes and the sandblaster for the hard to get places.

:D :bolt:
 
e-beach said:
How about sandpaper for the long tubes and the sandblaster for the hard to get places.

:D :bolt:

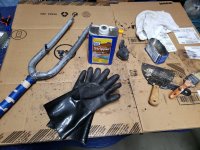
Thinking about stripper for the tubes and SB for the angles. Problem is that stores have been pulling the strippers with Methylene Chloride (like Aircraft stripper) from shelves. Tried 3 stores today and nothing. Grabbed some other stuff to try and we'll see how it goes.
 
FWIW, there's a bunch of cat litters and bird litters made from walnut shells. If you have a feed store near you, they probably have them cheaper than pet stores.

wturber said:
I look at it as having two throttles installed so I have a ready-to-go backup installed and working :^)
PAS is also handy if for some reason you can't use the throttle (hand problems, having to hold onto something while riding, etc etc).

ATM I use my PAS (via the Cycle Analyst) to just keep me going at whatever speed limit I have switched to via preset switch, rather than actually controlling the speed with the pedals, since my input is pretty useless above a couple MPH due to the gearing I have to use.
 
Stripper is nasty stuff. Probably going to take multiple applications. Let it sit a long time to do what ever it can do and then probably do it again.
 
amberwolf said:
FWIW, there's a bunch of cat litters and bird litters made from walnut shells. If you have a feed store near you, they probably have them cheaper than pet stores.

wturber said:
I look at it as having two throttles installed so I have a ready-to-go backup installed and working :^)
PAS is also handy if for some reason you can't use the throttle (hand problems, having to hold onto something while riding, etc etc).

ATM I use my PAS (via the Cycle Analyst) to just keep me going at whatever speed limit I have switched to via preset switch, rather than actually controlling the speed with the pedals, since my input is pretty useless above a couple MPH due to the gearing I have to use.

Good points on the PAS. I'm was probably writing it off prematurely, but it will also help me extend my battery life as well.

e-beach said:
Stripper is nasty stuff. Probably going to take multiple applications. Let it sit a long time to do what ever it can do and then probably do it again.

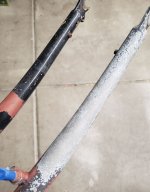
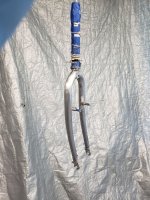
Yeah, the stripper is pretty nasty. But I had great results and it worked better than I thought with a scraper and steel wool, even on the nooks. I had a good breeze blowing through the garage this evening to ventilate, but the bugs started to come in after my shop lights, so I had to close up early. Got the forks stripped though in about 30 minutes. There's no paint left on them, so I'll hit them with sandpaper tomorrow to smooth them out, then get started on the frame.
 

Attachments

  • forks2.jpg
    forks2.jpg
    200.8 KB · Views: 1,018
wturber said:
Auto paint and a real sprayer are obviously superior, but I was able to do a very nice job on my fenders using a standard "rattle can" and finishing it with three coats of clear. I think rattle can fumes are a bit less toxic than two-part car paint. A little car wax shines it up nicely and make them easier to clean.

Missed this post. That fender does look nice. Did you strip the fender? Primer? Any specific type of paint?
 
rootshell said:
wturber said:
Auto paint and a real sprayer are obviously superior, but I was able to do a very nice job on my fenders using a standard "rattle can" and finishing it with three coats of clear. I think rattle can fumes are a bit less toxic than two-part car paint. A little car wax shines it up nicely and make them easier to clean.

Missed this post. That fender does look nice. Did you strip the fender? Primer? Any specific type of paint?

The fenders were new, So I just cleaned them well with rubbing alcohol and I might have roughed them up with fine sandpaper. I forget. The fenders are black plastic.

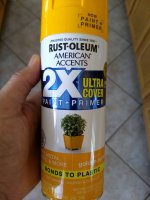
I used Rust-Oleum American Accents 2X UltraCover Paint & Primer - "Bonds to Plastic" for the base color coat. Golden Sunset was the color. It had the "Yellow Cab" slightly orange-ish yellow color I was looking for. The clear coat was Krylon ColorMaxx Gloss Crystal Clear (ironic name for clear) Paint & Primer. I was seriously tempted by the two part automotive clear products that you can purchase. But I kept reading the warning about making sure you wore a fume mask. So I went old school. I'm sure the two part automotive paints are tougher. And a proper spray gun will probably either do a nicer job, or make it easier to do one. But it is a bike with round tubes after all. There aren't long, wide smooth surfaces that will show up even the tiniest of flaws. And there is the hassle/cost/health factor. I think in the end it comes down to good spraying technique and waiting between coats.

I applied many coats since I had a whole can available for two fenders and because I had to cover black with yellow. I did create a couple runs from coating too heavily. I let the fenders dry and sanded the runs out. I think I may have lightly sanded between coats. I forget. I'm pretty sure I used steel wool before I did the clear coat.

Whatever you do, consider waxing the frame with a modern synthetic auto wax when yer done. I did that and the fenders wipe clean super easily now. I wish I'd done that to the whole bike. If I were to strip it down in the future or build a new bike, I will. The problem will be re-waxing with wires and such attached.

https://www.youtube.com/watch?v=FNY7VhnOq-s
https://www.youtube.com/watch?v=ed6IBkaP6LU
 
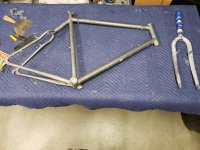
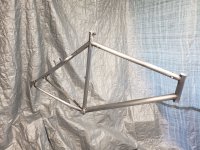
Well, spent the day off and on stripping the frame. The stripper works pretty well, but two applications were necessary for the most part. The stickers were also something the stripper wasn't meant to handle, but it only took an additional application to get through them.

Now to figure out if I want to get some tarps and build a paint area to rattle can this thing in my garage, or deal with it outside.
 

Attachments

  • frame-sanded.jpg
    frame-sanded.jpg
    178 KB · Views: 990
Spray painting depends on dust blowing or the wind blowing all the paint away from it's intended target. If the air is still, outside is fine. Also, like the video's and instruction previous, to get a really nice finish takes tlc. Base coats, color coats, clear coats. Letting it dry properly, rubbing with finer and finer grit sand paper until you are into 1500 grit, then the buffing polish.

Takes time.

:D :bolt:
 
So a little update on my project (in hindsight I should have just started a progress thread instead I suppose)....

It's been pretty hot in the bay area lately and my garage has not been very hospitable for painting. Don't want to waste my efforts by rushing through hot weather to prime and paint.

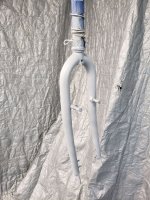
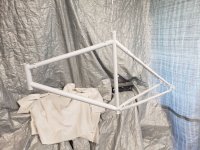
I decided to continue stripping my frame and forks with sandpaper to get it as clean as possible before priming (220 grit then 400). Cleaned it up real good with denatured alcohol before hitting it with the primer.

Probably be a couple of weeks before my battery comes in, so I will take my time and wait until later this week to wet sand the primer and hit it with the color coat since it will be a bit cooler.
 

Attachments

  • Forks-sanded.jpg
    Forks-sanded.jpg
    342.8 KB · Views: 931
  • forks-primer.jpg
    forks-primer.jpg
    329.3 KB · Views: 931
  • frame-sanded.jpg
    frame-sanded.jpg
    223.8 KB · Views: 931
  • frame-primer.jpg
    frame-primer.jpg
    190.5 KB · Views: 931
wturber said:
Looks good so far. Didja go spray can or car paint?

Spray paint. My daughter pestered me until I let her pick out the color, so I guess we're going with fire engine red.

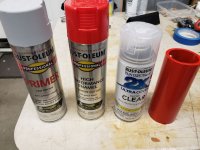
I've got a piece of irrigation pipe I'm using which is one step ahead of the bike frame, so I can test different methods. After the first coat of paint was completely dry for 48 hours on the pipe, I tried a bit of sanding with 1000 and 1200 grit paper, but it really didn't do anything to the texture of the paint. A few of the videos I watched did not include this step, so I'll probably not bother and just wet sand the clear coat at the end. This kid did a pretty good job, so I'll follow his lead:

https://www.youtube.com/watch?v=QEaoQN0B3Iw
 

Attachments

  • paint.jpg
    paint.jpg
    146.7 KB · Views: 893
Hard to go wrong with Fire Engine Red IMO.

I didn't sand except where I had some small runs on the sides of my fender. But then, I never had any orange peel. I'm pretty sure I used 0000 steel wool lightly between (fully dried) coats - wiping with a damp cloth afterwards. I think I sprayed before going to work and then when got home, laying down a lot of coats.

Testing on the pipe seems like a good idea to me.
 
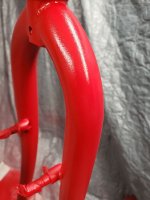
Well, applied a coat of paint on the forks and not happy at all with the results. Try as I might, with 3-4 small coats every 10-15 mins, the texture is horrible. Holding off on the frame until I can ensure that I can smooth this out.
 

Attachments

  • fork-paint1.jpg
    fork-paint1.jpg
    106.3 KB · Views: 845
rootshell said:
Well, applied a coat of paint on the forks and not happy at all with the results. Try as I might, with 3-4 small coats every 10-15 mins, the texture is horrible. Holding off on the frame until I can ensure that I can smooth this out.

Agreed. Not sure if maybe its the actual nature of the paint (I didn't use enamel) or if perhaps you are spraying a too light of a spray from too far away. I didn't get a perfectly smooth finish, but it was not pebbled and was fairly reflective. I think you have to spray close enough so that you almost risk getting runs. Somewhere around 8 inches or so. It has to go on thick enough so that the droplets flow into each other.

Fender_close_sm.jpg
Paint_sm.jpg
 
Sanding. Give it several coats, let it dry completely. Give a light sanding with a fine grit sandpaper to smooth it out. It will dull but will get shiny again when you give it a gloss coat. The gloss coat is where you will need the super fine sand paper to smooth it out while still polishing it to a glass like shine.
 
Back
Top