
casainho said:I put it under the FAQ: https://github.com/OpenSource-EBike-firmware/TSDZ2_wiki/wiki/FAQ#Bearings_codesthineight said:Very useful to put this info on the wiki!
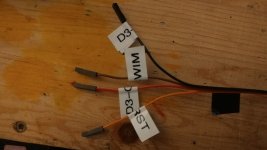
So, on that picture we can see 1 wire of the torque sensor broken... probably you had torque sensor wires connected while disassembling, right?thineight said:Note that my motors from late 2017 have already 2 bearings on the left side of the pedal shaft, whereas more recent ones looks they have one only. The user andrea_104kg recently added the second bearing right below the rubber protection and this helps to reduce the bending moment of the shaft.
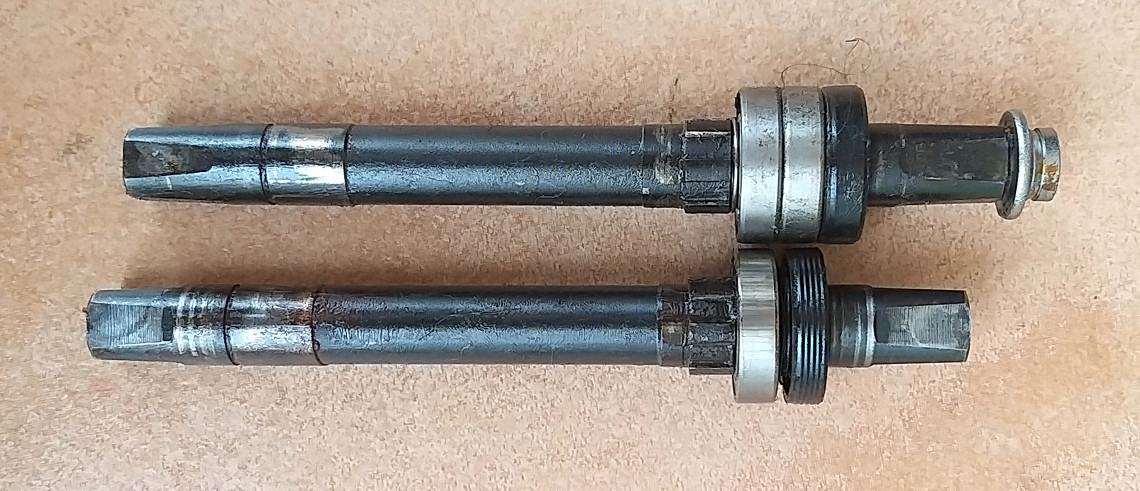
Also the older versions had a different axle that includes 2 bearings and it is also longer. The torque sensor is also a bit different size on the part that fixes on the axle. Axles comparison:
Also note that I just received 2 torque sensors from PSWPower and they are clearly better for assembling, reducing the risk of damage and they have the measures to work only with this recent shafts that has only 1 bearing.
I think I will add that second bearing and compare the reduce the bending moment of the shaft. Maybe we can put this as a suggestion on the wiki??
Maybe you can look at youtube videos. I watch all of them and then played with my old motors, as I have currently 4 bicycles for all the family I have spare motors to use for spare parts, etc.dameri said:Is somewhere instructions how to uninstall and install main pedal shaft.
I'm going to make full service to my motor and change bearings etc.
If you are going to make full service, you will then remove the torque sensor and so I suggest you to do a good calibration: https://github.com/OpenSource-EBike-firmware/TSDZ2_wiki/wiki/How-to-calibrate-the-torque-sensor
I really hope we can improve the firmware in a way it will be able to use the full range of the torque sensor, including the no linear range and probably make a calibrated torque sensor to detect up to 60kg of force.
And please read that page about the torque sensor to avoid damage it, it is kind of fragile and you need to take careful when disassembling and assembling.
From what I can understand there are 2 versions of the motor - spindle. Is this true? I am asking because I want to buy a second motor for my tandem and I will need the longer drive side spindle to accommodate the linking chainring spider crank arm. And I like the 2 bearing set on the drive side, as the linking drive will be on the same side as the rear drive side (typically the linking chain is on the left side of the BB).
From the outside (without disassembling) is there a way determine which version I currently have? I think I have the long spindle version. I would like to have the second motor be the same so I can swap parts, and accomidate my dual chainring setup and the drive side chainring spider (for Tandem).
Is there a way to specify the spindle type?
Thanks


") , from Sicily Island in South of Italy.I'm New user of endless. I have the 36v and 350W tsdz2 with vlcd5 display, I recently modified the stock fw with morcoq Java configurator, the latest one.. I'm very happy of my installation, and very compliment and congratulation to the major actor of this tsdz2 adventure. Thank you very much.
, from Sicily Island in South of Italy.I'm New user of endless. I have the 36v and 350W tsdz2 with vlcd5 display, I recently modified the stock fw with morcoq Java configurator, the latest one.. I'm very happy of my installation, and very compliment and congratulation to the major actor of this tsdz2 adventure. Thank you very much. 


