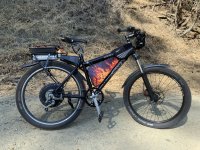
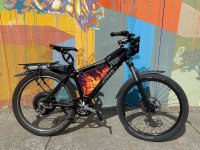
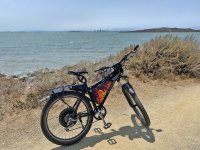
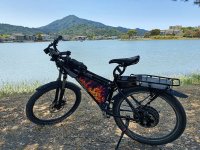
My econo-e-bike

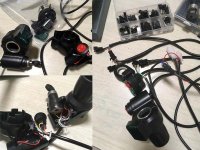
Finished mounting my switch box and making most of the connections, but still need to wire my buck converters for running the rear lights and 12v subsystem (bought this 4 wire harness for bringing the battery level and 12v power to the switch box https://www.amazon.com/gp/product/B07PB3YRBY/ref=ppx_yo_dt_b_asin_title_o01_s00?ie=UTF8&psc=1). At least the headlight is wired, since it's battery level voltage. I stole 5v from my throttle to run the meter LED.

Mounted a new trigger throttle (thanks amberwolf for the suggestion), but not before opening it up and tweaking the spring to reduce spring tension to about a third. I'll be testing it during the week, but so far it's pretty easy to use with a little more precision than the old throttle. I may chop off some of the paddle, since with the reduced tension, it can be short and still be easy to use.

Lastly, got rid of my boost/regen pushbutton switch and added another toggle on the switch panel. I decided with the new trigger throttle, it's just as easy to tap it to get the boost while on PAS, and a toggle will work better for locking the throttle for regen. With the switch off, the throttle works normally and the bike will coast when letting off the throttle. In the on position, the throttle is sort of locked to the motor, so letting off causes the motor to brake (like riding around in 1st gear with a manual tranny), which works great when navigating past foot traffic. Also replaced the pot with fixed resistors.


EDIT: That wire harness is way too thick, so it's going back. Back to the original plan, two lengths of Walmart black extension cord. :|
Oh ya, I figured out that the Statorade is working. Not sure if it's because I was using a lot a throttle doing testing this afternoon, but after about 45 minutes of riding around, including some pretty steep stuff, I stopped to take a break and felt the motor. Pretty hot, or at least the hottest I've ever felt it.
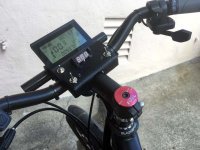
cockpit 100619.jpg

EDIT: 10-08-19
I noticed at battery level voltages, my LED meter is reading high by 0.2 volts when measuring at the battery terminal with my multi-meter. At the same time, my LCD3 reads 0.2 volts low. Interestingly, the little cheapo LED meter has a calibration pot on the rear, so I'm going to calibrate it to be accurate at the battery terminals, even though the difference it tiny.

EDIT: 10-11-19
I’m loving this trigger throttle after a week. It’s really easy to use with no jerkiness or dead spots, and the reduced spring tension makes it really easy on my thumb. Now my bars feel perfect too.

I’m going to move the regen switch next to the throttle, since I found I really need to be able to quickly disengage it, so reaching over to the switch panel wasn’t cutting it.

Got my tail lights in the mail yesterday, so only waiting for my smaller buck converter before finishing off my lighting and 12V subsystem.

EDIT: 10-13-19
Used some scrap ABS for the switch plate for relocating the regen switch to the trigger throttle area. The current switch will tap into the signal wire instead of the ground, so I can use it as an emergency throttle cutoff.

Bent the ABS after heating it so that it will curve and meet the handlebar, and hide the wiring a little. It's notched so that the flat part can either be hot glued or epoxied to the throttle's handlebar mount, and housing. The wires can go directly into the housing, or alternatively splice into the throttle cable right behind the plate.
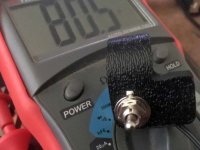
RegenSwitchPlate1.jpg

I went back to using a pot instead of fixed resistor, since I switched throttles and need to re-tune it anyway, but also by mounting on the switch plate, it's easily accessible. i also switched to a 200 ohm pot, since the resistance that works is below 100 ohms, so the pot allows for really fine tuning.
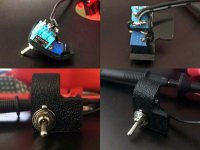
RegenSwitchPlate2.jpg

Test fit, not attached, but this is how where it will mount, within easy thumb reach.
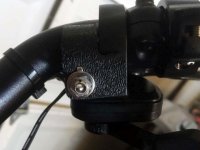
RegenSwitchPlate3.jpg
I covered/sealed all of the connections in the back with black hot glue, just for some weather protection.

EDIT: 10-20-19
I got tired of waiting for the smaller 12v buck converter to arrive, so just went ahead and wired up the 15A one and finishing "most" of the switch panel.

I had a minor setback, and fried the LED voltmeter by taking a shortcut and drilling and access hole from the back of the ABS panel. Went a little to far...ordered a replacement, but in blue, thanks to a tip from pwd on one of his threads. Dremeled the access hole to make sure the new meter will be easy to adjust, so should take a few minute to install once I get the new one.

I mounted the 12v buck converter to the front of my cargo box. Used a Molex connector between it and the rest of the wiring to make it easy to remove the box when I want to.
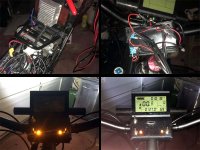
panel.jpg

I'm glad my connector box covers that snarl of wires! So now the top left switch is the emergency throttle cutoff, the lower left is the 12v subsystem, right are the lights, voltmeter in the center.

EDIT: 10-24-19

Got the new voltmeters, 2 each red, green, and blue. Good thing I got extras, since if fried one of the new ones again, attempting to calibrate the voltage. I figured out that it was safer to turn off the power, adjust, and power back up to avoid making the same mistake. Took longer, but got it dialed in perfectly after 4 tries.

Re-solder everything since I changed the configuration slightly to avoid bringing too many battery level voltage wires up front. After putting it all back together, including wiring up the rear light, I encountered a hiccup. The main switch for the 12v subsystem wasn't working; permanently on. Replaced the switch and then figured out the problem. The mini toggles couldn't handle the voltage and you could see it arcing each time it was turned on and off, eventually welding itself permanently on. Ugh. I'll need to order a heavy duty toggle for the main switch, but can use my main battery shutoff until then to power everything down.
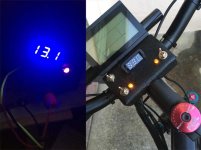
Blue.jpg

The blue LEDs are great though. I can see them in daylight, but will wash out in direct sunlight, but it's way brighter than the red ones. :thumb:

EDIT: 10-26-19
Changing direction. Going to use solid state relays and skip bringing any battery level voltage wires up front. I can keep the existing switches (replace the burnt one) and LEDs, and use the controller's 5v for operating the relays. Since my headlight can operate at 12v, I'll switch that over as well. This also prevents ever leaving the lights and 12v converter on, since it all shuts down with the controller.
 
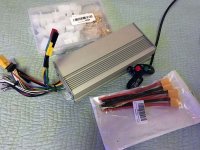
My new controller and display arrived, which will allow me to experiment with different voltage levels and battery setups. It's chunkier than my KT, so I started planning the placement. I've decided to redo the mounting points for my rack, and go back to my original plan of using a seat collar with rack mounting points for the front support.

The rear mounts will remain the same, but because the controller will be moving from below the rack to above it, the overall rack can move down and slightly forward (~2" down, and ~1" forward). This will lower my cargo box, which will help with weight distribution and when swinging my leg over the bike. Here's the before and after mock up, with connector box modifications.
New Controller.jpg

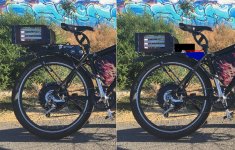
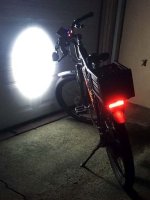
Anyway, with the time switch, I have to rely on my lights on the way home every day now. They work great, and work better than a bell on the path. My original plan was to add a second tail light to the back of the cargo box, but it's looking like the one light is bright enough, at least for now.

lights.jpg

EDIT: The new controller went back to the seller. The bluetooth module wouldn't communicate with the controller, and the 5V signal voltage on the throttle and PAS was measuring intermittent voltage between 5V and 1.1V, which may have been part of the problem.
 
I saw a news report that the Richmond-San Rafael Bridge near my house had opened up a new bike/pedestrian lane, so I could now ride from the East Bay to the North Bay (Marin County) on my ebike. And, since the Golden Gate Bridge already has a lane, I can also ride all the way to San Francisco, and to work if I really wanted to. Anyway, since that would be a 35 mile trip one way, with a pretty steep climb in the middle, I'm going to try a few shorter rides to see if my battery is up to it.

I tried the first test run today, riding from my house to San Quentin, which is just on the other side of the bridge. Google maps says about 22 miles round trip, so no problem from the range perspective. There were a ton of bikes out, for what may be one of the last pleasant weekends of the year, and temps were around 65-70 degrees the whole way, with a little wind. And, they seemed to all be heading to the bridge to check out the new path.

On the way across, there was a mix of riders, some casual, and a larger percentage of the Lycra crowd. The incline of the bridge was steeper than I recall, but in reality is only about 3%, and since it was a test run, I was riding to conserve battery, as though I were riding all the way to SF. With PAS set to 3 of 5, I was pulling about 750 watts to the top of the first incline (there are two in each direction) with a decent amount of pedaling. Fortunately I was riding fast enough past the Lycra crowd that I doubt they could tell I was on an ebike. Stopped near the top of the second incline to take an artsy pic:

RSRB1A.jpg

The weather on the Marin side was even nicer. Here's a pic of the big house, from right outside the guard shack.

RSRB2.jpg

Just a half block up the road, people relaxing on the beach, with the bridge in the background:

View attachment 3

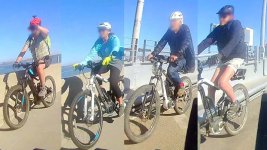
Interesting that on the way back, watching the bikes coming the other direction (toward Marin), about 20%-25% of the bikes were ebikes! Mainly factory bikes, but a few home brewed ones as well. I could see a long cargo bike coming up the incline towards me, so I figured it must be assisted. Yup, Bosch mid-drive. But there was a good mix of hub and mid-drive bikes out there.

So, the first test run was a success. Starting voltage was 58.8V resting, and 56.8V resting at the halfway point outside of the prison. I have my regen set too high to use on the downside of the bridge, so no real benefit on this ride. Had an issue on the way home when I started hearing a rubbing noise. I found one of the main bolts holding my rack had worked it's way out, so my rack was flopping around. Half the other screws were loose too. I ended up holding it with one had and throttling home. The voltage was 53.6V when I got home due to the last couple of miles going throttle only. When I got home, I noticed I had lost a couple of nuts from the rack bolts, so I guess they've been working their way loose for a while. Other than that, no big issues; so I think my next test run with be to the Golden Gate Bridge and back :D

EDIT: I had shot video with my cheapo clone camera, all the way up until the mount snapped off from too much bouncing around on the way back. After reviewing the footage on the first incline section of the bridge on the way back, the ratio of ebikes to regular is more like 50/50.
AND, of the ebikes, is was 50/50 on hubs to mids.

Hard to tell, but the first bike looks like an ST1, not sure about the trio, but the hub looks like they could be BionX.
Hubdrive.jpg

And the middrives....
Middrive.jpg
 
That sounds like pretty good range! What speeds were you aiming for?

E-HP said:
There were a ton of bikes out, for what may be one of the last pleasant weekends of the year, and temps were around 65-70 degrees the whole way, with a little wind.
You just need to lower your standards :p

My last video was done with my 10 year old gopro HD hero, which I'm just thankfull still works for a couple hours. My friend did one video with his cheap 360 camera, and I think I like that format more. Viewers can just look whichever direction they choose, as if they were there at the time it was recorded :) Maybe I'll buy one next year.
 
thundercamel said:
That sounds like pretty good range! What speeds were you aiming for?

My last video was done with my 10 year old gopro HD hero, which I'm just thankfull still works for a couple hours. My friend did one video with his cheap 360 camera, and I think I like that format more. Viewers can just look whichever direction they choose, as if they were there at the time it was recorded :) Maybe I'll buy one next year.

I rode my usual speed of 17 mph, which works well for me, but I realized why my mileage was better than expected on the way out may be due to the off shore winds we've been having. I also noticed on the way back that there was a head wind, so the times I applied full throttle, I was a couple mph lower than usual. This will be another factor I'll need to consider when trying to stretch the range on the next couple of test rides. :shock:

I got this camera on an impulse, when it showed up in the sidebar advertising with a really cheap price. Wasn't considering one at all, but the ad got me. When the camera is stable and the action is smooth, it works well, but with movement or vibration, there are a lot of video artifacts, so I think the processor is pretty slow. What I've found that I like is that I can review the performance of my bike over different terrain, since I have the display in the frame and can see how many watts I'm pulling.

This is the very first video with the camera that I shot a couple of months ago. It's a ride around the hills by my house, but riding throttle only to see how my power consumption looks going up and down the hills. In this video, there's virtually no flat ground, and most grades around around 5%-7%, with a couple of short spots that hit about 10% (which you can see when the watts are peaking). You can also hear the howl the motor makes with regen when the battery display is scrolling.

If I get another one of these, it will have image stabilization, but it works fine for now, for my purposes. Of course, I'll be looking for a better mounting system, since the bumpy riding snapped off the tripod mount screw.
https://www.youtube.com/watch?v=C3Bl-xrV63g&feature=youtu.be
 
That regen howl isn't so bad; wind on that mic is pretty bad though :) Those sure are some steep hills!

I mounted the cam on my helmet to avoid the vibrations. Also found the sample of 360 video from the beginning of this year. We should have used it more! https://www.youtube.com/watch?v=XeLD6lq_2pY
 
My ebike had its one year birthday earlier this month. It's had one major upgrade, switching over to the new frame, which added disc brakes and better front suspension. Lots of minor upgrades, like tires, lights, etc, but now I'm getting excited about this controller upgrade that will add so much fun and flexibility.

I'm not expecting a performance gain at this stage (well maybe a little messing with the phase currents and flux weakening), but better and easier fine tuning of the controller via bluetooth, and a lot of new options with the Cycle Analyst will provide so much more stuff to play with.

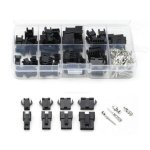
The controller, switches, XT90 connectors, and JST connectors that fit the PowerVelocity controller are waiting for the rest of the parts to arrive. (controller link: http://powervelocity.com/home/48-18f-ebike-sinewavesilent-controller-android-ios-bluetooth-programmable-8kw.html)
parts.jpg
I'll use the Left/Right part of the switch for my three-way switch for the controller; the light switch for lights, and the horn button as my cruise control button.

The CA, a new thumb throttle, and a pack of JST connectors that fit the CA should all arrive on Friday.
parts 2.jpg
The thumb throttle has a switch for the controller on/off, and a blue LED voltmeter.
I got a second set of XT90 connectors that I'll use as the interface to add my future series pack upgrade. I'll spice the female connector into the positive cable, and add a pigtail to the male connector, when no add on pack is present.

Right now I'm looking at four 4S 5Ah lipo packs in parallel that I would plug in to the series XT90 connector on weekends for fun with 18S 20Ah. Still researching though.
 
Hummina Shadeeba said:
I just ordered that throttle. Was it hard to connect? I’d be connecting it to the asi 800 esc

I didn't like it, too stiff, and I could feel my thumb aching even without installing it. But, I did like the blue LED voltmeter, and the on/off switch, compared to the very first throttle I used when I put together my kit originally. I actually like that old half-twist throttle better than the ones I've used since then, so I decided to harvest parts from the new throttle to "improve" my original throttle.

Harness.jpg

The two throttles are the same format, except for the interface, which made swapping parts easy. I swapped over the blue LED meter first, but then decided to trade the switch as well, since I didn't like the key switch of the old throttle.

For my CA3 and controller, I decided to make things as modular as possible and made several wiring harnesses to make it easier for maintenance and swapping out things later; so throttle, brakes, PAS, and switches all have JSTs that connect to the harnesses at the CA3 and branch out from there. I used the throttle 5V from the CA to route to my non-Grin PAS, per the CA3 instructions. I also combined the wiring to minimize the number of harnesses routing back to my connection.

The good thing about my thumb throttle purchase mistake is that for $10, it cost less than the sum of its parts. I'll be able to use the red LED I replaced for monitoring my serial pack when I upgrade, too. I used the cable to make the harness for my other wiring, so it turned out to be a good purchase after all. :thumb:

Now I only have to add connectors on two of the harnesses at the connector box end. I'm going to add those last, since I want to minimize the extra wires that end up at the connector box, since I may fabricate a new one that won't need to be as big.

I may buy another thumb throttle to harvest the cable and LED from. I'll look for one with a green LED, so the green would monitor the main pack, red for the add on Lipo pack, and the blue on the throttle will be the overall voltage. The cable harness has one more wires than one of the ones I have now, which would be ideal.

Since I'm pretty sure I'll end up with a 17S main pack setup in the end, by going the 3S lipo add on pack route for my current 14S pack, the same add on pack can be used later with a 17S pack to go to 20S on weekend fun rides. :mrgreen:
 
any way to add a resistor or something to the twist throttle to dim the lcd screen and lower the current draw? The voltmeter is always on and uses 1.3v a day with even a 52v 625 watthour new Luna wolf battery. I worry I’m going to go away a long weekend and come back to a destroyed battery.
 
Hummina Shadeeba said:
any way to add a resistor or something to the twist throttle to dim the lcd screen and lower the current draw? The voltmeter is always on and uses 1.3v a day with even a 52v 625 watthour new Luna wolf battery. I worry I’m going to go away a long weekend and come back to a destroyed battery.

Sorry, got busy and didn't see your post. On my throttle, the switch turns off the LED along with turning off (or on) the controller. I've used a couple of these and both worked that way.

Anyway, the holidays put a hold on the controller upgrade, but I haven't stopped planning for it. I've decided to do 2S lipo packs to piggy back on my existing pack to get me to 16S, and finally just starting to acquire some hands on lipo experience. I bought a mini/micro RC rock crawler on an impulse buy, that's powered by a tiny 2S lipo (500mAh), and a little lipo bag during the holidays, so it's fun to play with while starting to understand the chemistry. Now I have a 1/10th scale crawler that uses 2S or 3S lipos being delivered tomorrow, which I'll be running 2S 5000mAh packs on. Getting some ammo cans for storage and charging and researching better chargers (I only have a small balance charger for 2S/3S pack, which will take forever to charge 5000mAh). 4 of those packs in parallel will eventually become my 2S piggy back pack for me ebike, but I'll have some fun playing with the crawler in my backyard, and adding to my lipo experience, during the winter.

I'm a little hesitant about starting a new, and expensive hobby, but I'm hoping to keep the RC stuff controlled, and can see combining the two, strapping the RC car to my bike rack, to get to areas with good terrain, rather than driving and walking.
 
I finally got motivated to install my new/upgrade controller and Cycle Analyst. One of the legs of my rear rack broke, putting my bike out of commission, so since I had to replace it, I changed out the controller and display. It didn't go as smoothly as I would have wished, since I found out the new throttle was defective, and ended up installing my original half twist throttle after a lot of trouble shooting. My old PAS sensor didn't work, even after wiring it for 5V, instead of the CA's 10V. I could get one of the indicators toggle, that is supposed to mean it's a one wire PAS, but couldn't get it to activate, so I bit the bullet and bought the mini PAS from Grin, which hopefully will arrive soon, since I like to ride mostly with pedal assist.

The other problem is that I can't get the phone app to read and write settings to the Powervelocity 7KW controller. It connects fine, but times out during the read and write. Pretty close to what this youtube video shows:
https://www.youtube.com/watch?v=TWXLI-Y98qw

Not sure how the controller defaults are, but I've taken a couple of test rides and it's working well. I have a lot more tweaking of the CA settings to play with, but with the new controller, set in the middle position of the 3 speed switch, I'm getting a little mores speed, which I didn't expect. about 25mph instead of the 22mph with the old KT sine wave controller. Setting the switch to high (field weakening), gets me up to 30mph (but of course, using a fair amount of power). Climbing is also faster, (position 2) when I climbed the ~750ft from the bottom of the hill to the top. The motor did get warm, but not hot, but I'm glad I have Statorade.

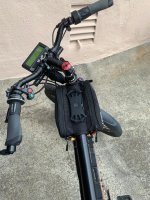
I'll need to redo my connection box, since I decided to change how the rack mounts in the front, hoping to make it more stable so it doesn't break again from fatigue. Here it is, with all the wires still hanging out. The CA is big, but I have it mounted low, so I doesn't look bad.

New Controller.jpg
 
A suggestion: move the emergency cutoff switch to the upper right side of the panel. You moved the Regen switch because it was hard to activate with your right hand while riding, so the same would be true of the shutoff. You can put a light switch where the shutoff is now. Awesome build, BTW. (Although I still think the flames look like a battery fire.) :)
 
LeftieBiker said:
A suggestion: move the emergency cutoff switch to the upper right side of the panel. You moved the Regen switch because it was hard to activate with your right hand while riding, so the same would be true of the shutoff. You can put a light switch where the shutoff is now. Awesome build, BTW. (Although I still think the flames look like a battery fire.) :)

I'm redoing most of the controls with the new set up, so no more regen button. My PAS should arrive tomorrow, and I'm adding a small pot to use as an analog input for the cycle analyst. :thumb:

This morning I finally go around to soldering up my series/parallel harnesses to start experimenting with more voltage.
Harness.jpg
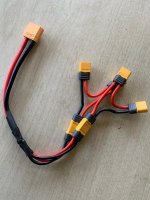
The main harness accepts two packs in parallel. The other two sub harnesses each allow two packs to be wired in series.
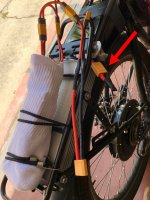
I wired an XT90 so that it can accept the harness, and have it accessible from the back of my wiring box on the bike. The male side of the XT90 is shorted, to provide continuity when not in use (arrow).
Lipo Sock.jpg

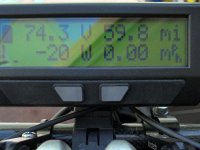
I crossed my fingers that the controller wouldn't hit some sort of HVC or power limit when adding more volts in series. I tried 16S first, by putting two 5Ah 2S lipos in parallel, and then in series with the main pack. Controller was OK with it, and I took the bike for a quick ride around. Pretty fun to have the extra speed and power. I put alarms on both lipos even though I wasn't going far enough to use up 10Ah. Got back home to check for heat and everything seemed fine, so I topped off the main pack and lipos to try out 18S. This would be a shorter test, since I'd only have 5Ah at that voltage.
74 point 3.jpg
Wow, that was fun! And not twitchy or anything, although I didn't spend a lot of time riding slow :lol: . I need at least one more 2S pack to try 20S out, but right now, I'm don't think replacing my main pack with a 72V pack would be manageable. I won't know for sure until I test out the PAS and get that tuned.
 
Ran bike for a test ride just now at 22S (around 90 volts), using my 14s8p main battery, plus two sets of 4s lipos in series, just for fun. My "regular" set up that I'll be riding with until my battery upgrade is to run at 18s; 14s from my main battery, and 4 - 4s lipos in parallel, or 20 Ah at 66 V, which feels just right. I'm limiting current to 30 A, due to my cheap main battery. but even at that current, 66V and 90V produced a big bump in power. :bigthumb:

But, when I ran the bike without the current limit (not good for my main battery), it ran strong, pulling 40 A+. So now, I've decided to scrap upgrading to 60 V or 72 V for my main UPP hard cased pack, since even with the best cells, I won't have enough parallel groups for the current I'm looking for. So, now I'm saving my pennies for the same UPP hard cased pack, but with Sanyo cells, which should give me the grunt I'm looking for. I'm still going to run the 4s lipos in series for fun, which should really be nice when upping the current limit. 22s might be a little scary, but still an option.

22s on my slow wind motor got me to 35mph with field weakening before I let off the throttle (I didn't feel like crashing and burning today). 18s ran at around 29 mph. Both were controllable, with only a tendency to wheelie if you do any pedaling from a stop or pedal harder at slow speeds.

If I can get the past the bluetooth problem with my controller, in order to program it, I'd be close to my final setup with this bike, but so far no response from the PV forum. I'm starting to look at other options, like Grin's 40 A unit. It will handle up to 20s, and 40 A continuous should work fine for my needs (just not as flexible with my current 200A 100V max).

EDIT 7/16/20 - I've gone through three charge cycles with the 4 - 4S 5Ah lipos that are paralleled and placed in series with my main 52V pack. Based on my testing, it looks like my main pack has degraded to about 85% of its original 20Ah capacity. This is looking at the individual cell voltage for the pack vs the lipos; so when I'm at about half charge overall, the pack cells are sitting close to 3.7V while the lipos are sitting closer to 3.8V. Even though I have the max current set to 30A, I think I'm probably beating up my main pack more now from playing with the throttle a lot, and hitting 3kW peaks more regulary.
 
Still organizing things after upgrading my controller and adding the Cycle Analyst. I bought a new top tube bag to hold my 4 lipos, instead of keeping them in a box zip tied to my rack, which I can now remove. I think this will be a better location, since it's suspended, and won't suffer the hard jolts from being mounted on the rear rack. The bag is actually tiny, although it looks bigger in the pics, and just fits 2 lipos on each side. I ordered more XT90's and 10 AWG wire that will arrive this afternoon, to extend my harness to the front.

Other clean up items are to re-fabricate my connector box, since I used plexiglass when forming the current version, instead of ABS, which is more brittle and ended up cracking (hence the duct tape). Handlebar controls will be redone as well, since I've only been experimenting with the CA functionality for now, using the analog/pot option for controlling PAS levels; but I prefer up/down switches instead. I'm also using the green button as a "coasting" button, which applies around 18W of throttle (through the pot attached to the left of the stem) to allow the bike to coast, since the throttle is set to braking mode. The pot will be replaced with fixed resistors, and the entire switch assemble on the left will be replaced. Using the L/R signal switch as my 3-position switch works, but the positions aren't very distinct, so I'll probably replace it with a rocker.

Even though my bike is in a constant state of development, I like having things neat and tidy in between major upgrades.
bag 2.jpg
bag 1.jpg

EDIT: I took a short ride while waiting from my parts to arrive. Rode over to a trail head a few miles away in order to practice my throttle control on some short single track sections that are windy, hilly, and narrow. I'm starting to like this throttle-braking setting that my controller is stuck on, especially on the trails. I was able to navigate some pretty tight switchbacks using only throttle, and not touching the brakes at all; less things to concentrate on. I'm getting used to using it on the street too, so I'm starting to get to the point where the pros outweigh the cons. Using the lipos for that additional power feels perfect on the trail too. Anyway, here's the glamour shot; the lines of the new lipo bag fit the bike well, to my eye. Once I solder up my harness to relocate the batteries to the bag, I can lose the plastic box zip tied to my rack, and clean up that mess. The cables exiting the Cycle Analyst could use some cleaning up as well.


Lipo bag.jpg

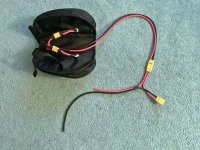
EDIT: 7/24 - Amazon was two days late on their "One-Day" delivery, so I just get my order this afternoon and just finished the harness to my new lipo bag. The harness starts at the connector box, with the open XT-90 going to my main battery (switching to XT-90 for most stuff now). The red wire goes to my breaker/switch, then to the controller, and the black to the controller.
Bat Bag 1.jpg
The connectors under the bag fit inside space at the top triangle of the bike frame, then the main cable will run below the frame top tube to the connector box.

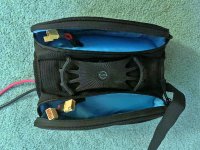
On the inside are two pairs of XT-60's that connect the 4 hard cased 4S 5Ah lipos in parallel.
Bat Bag 2.jpg

EDIT: 7/25 - Installed the harness and lipo bag this morning. I ended up adding another pair of XT90 connectors up front to make it easier to jumper the harness when not using the lipos. Everything turned out to fit just right.
072520 Lipo Bag small.jpg
 
I’ve been riding a lot lately, short rides, to keep from feeling cooped up and to help with sanity. Usually 15, sometimes 20 miles a day. Riding with the main pack + lipos, getting used to running the combo. Today I charged both up to about 95% and went out to get a better feel for how the batteries perform on a little longer ride. It was cool out, so I put on a hooded sweatshirt and headed out, with no real route planned.

I rode down the hill then rode along the bay. It’s relatively flat getting there, with only one short 6 block hill that’s about 8%-10%, but flat again after that. It’s a good ride to test out my pedal assist. I rode along the shoreline for several miles; the weather was perfect, with the sun starting to shine through the overcast. Stopped for a rest near an area called Point Richmond.
PR sm.jpg
From there I could either head inland, backtrack, or cross the bridge to Marin County. I chose the bridge, since the weather looked pretty nice on that side of the bay. The bridge itself is a decent climb on a pedal bike, which I passed leisurely on my ebike.

Stock photo
RSFB2.jpg
I always make a wrong turn on the other side of the bridge, and end up at the same dead end road. The view from there is nice
SQV sm.jpg
Depending on which direction you’re looking
SQ.jpg
SQPO.jpg
Headed back to the main road and rode into Larkspur. Marin County has tons of paved paths. I never really explored them since I’d always gone to that side of the bay for mountain biking. But the paths are great for a leisurely ebike ride. I found a nice shady bench to rest before heading back. A pleasant, bucolic scene of the water, with Mt Tamalpais in the background. When my wife and I were younger and into mountain biking, we'd ride up that mountain twice a month.
Mt Tam sm.jpg
I saw this sign before heading back. Luckily it thwarted the temptation.
No Jumping.jpg

I had covered 40 miles when I got home. Enough to gather some data points on my battery performance. The main 52V 20Ah pack has maybe 75 cycles on it. The four paralleled 5Ah Tenergy lipos have about 10 cycles. Based on the voltage levels, the main pack was about 60% spent. The lipos were about half spent. It appears that my main pack has lost about 10% of its capacity.

I’m continuing to learn more about using these lipos. I learned a lesson with respect to parallel charging the other day, making me even more cautious. I found that even if the packs are at the same voltage, when paralleled, the individual cells from those packs can go out of balance, so I realized I have to compare at the cell level before plugging in the balance leads for parallel charging. That was after plugging in a lead, seeing a little spark, and quickly disconnecting while the wires were getting hot. Terrifying for a lipo newbie, but everything seems fine. The second lesson is to buy better lipos. Plus two 10Ah are probably easier to manage than four 5Ah, when these get replaced down the line.

The last observation is that although I’ve increased the overall battery capacity by adding 20Ah at 4S, my range from this trip doesn’t appear to have gone up. Although I tried to use pedal assist for much of the ride, it’s still hard not to goose the throttle and have fun playing with the power, so the add-on pack only provided more entertainment, not range. I suppose with more discipline, it would translate to more range though. :roll:
 
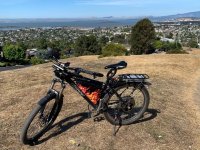
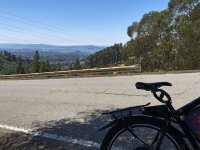
The skies were so clear today that I decided to ride to the Grizzly Peak lookout, next to the Lawrence Hall of Science above Berkeley. There's a panoramic view of the whole bay from there and the weather would be perfect. My destination:
https://www.google.com/maps/@37.8804722,-122.2475306,3a,15y,239.47h,87.99t/data=!3m6!1e1!3m4!1snwXO3nZCTwXpcnSQZdYB7w!2e0!7i16384!8i8192?hl=en&authuser=0 - 1080ft

It's a decent climb to the lookout, which is just under 1100ft. My ride starts at 75ft, but the main climb up to the lookout starts at around 400ft. I used pedal assist most of the way there to conserve battery for the climb up the hill. The climb that winds up the hill is about 1.7 miles, starts out at around 7% for the first third, 10% for the middle, and 14% for the last third. There are some short steep parts mixed in along the way.

It was getting hot when I started up the hill, and I forgot to bring water. I was counting on finding a drinking fountain up at the lookout. I stopped to check my motor after the 10% section to make sure I could make it the rest of the way without a meltdown. Slightly warm, so I kept going. The weather was really warming up now, with no shade in sight. I was huffing and puffing, and as I rounded the corner, I started hearing a weird clicking noise. It sounded like it was coming from the back, and it sounded like it matched the rotation of my wheel. Crap. I saw a shady spot about 50 yards ahead, under this tree (you can pan around to see what the road looks like):
https://www.google.com/maps/@37.876447,-122.2420897,3a,37.5y,53.02h,88.97t/data=!3m6!1e1!3m4!1sekUW9Rca_wF74pgTNdL-_w!2e0!7i16384!8i8192?hl=en&authuser=0 - 940ft
Screwed  sm.jpg

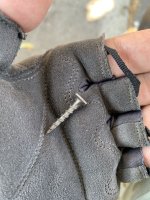
I was hoping it was maybe a stick or something stuck in the spokes...my fenders have very little clearance, so maybe a pebble got stuck in the tire tread....I couldn't think of any other easy problems, when I spotted it. The head of a sheetrock screw sticking out of the tread. Wasn't sure how long it was, but I didn't hear hissing. Do I take it out?, Do I leave it in and keep going? I decided to leave it in, and descend down the hill, and remove it once I was back down the hill.

I got to the bottom (love that regen) and pulled over. I slowly unscrewed the screw from the tire. It was coming out at an angle. It turned out to be a 1" sheetrock screw. And, still no hissing. That was a relief, given that I had to ride 9 miles home. It was at that point that I felt really good about having decent tires, heavy duty tubes, Mr Tuffy liners, and Slime for insurance. I think the liners saved the day in this case, deflecting the screw enough so it didn't penetrate.
Screwed sm.jpg

I had so much battery left when I got home, that I wish I would have just throttled it up the hill. Given that the motor was barely warm after the first 2/3 of the climb, I probably didn't have to worry about melting the motor, which is what I thought was my biggest concern :shock:
 
I just had to shorten some Mr Tuffys to fit 20” fat tires. They didn’t put up as much resistance to being cut with scissors as a business card. I would have a very hard time believing they deflected anything. I think you just got lucky. I’ve seen it a few times before— a bike comes into the shop with a nail or staple driven into the tire and out the other side, but still holding air because the tube wasn’t punctured.

Much more often, I have replaced tubes that were punctured because the Tuffys chafed all the way through them.
 
Nice job! I had considered using Mr. Tuffys, but thankfully haven't had a flat since riding roadsides to work last year. Those two flats were with regular tubes and tires. Now I mostly use puncture/thorn resistant tubes and tires with some sort of flat protection (Schwalbe Plus), but I've mostly been on nature trails this year.
 
I charged up the lipos and went to do some testing, running only the lipos in series. :bolt: I'm also testing my new power supply for charging them, so I wanted to run them down a little. I ended up just riding around, playing with the controller's cruise control, with PAS and cruise turned off on the cycle analyst. The controller cruise is speed based, just like a car, and almost works as well, up even pretty good grades. Using it instead of PAS works well, since I just set the speed to 2 or 3 mph less than I want to ride at, and pedal up to that speed, watching the watts decrease. I used cruise before on my old KT controller, but it could only deal with very small grades. What is cool is that it automatically adds power when I'm pedaling up hill, so not torque based, or cadence based assist, but what I don't add, the controller does. Anyway, I digress, still more to play around with, but basically, I drained down my lipos.

The question I have is, what does hitting LVC do? I've actually never hit LVC, even on my old KT controller, since it was a 48V unit, and I was using 52V, so even with the max adjustment in the setup, it was still .5V too low; so I just paid attention to my voltage as my LVC. Since switching controllers, I've had my BMS (current) trip a few times, since the controller allows more current to flow, especially on a grade. No experience with LVC though. Anyway, I hit the LVC that I set on the CA today, so I see how it handles the limit now. Not sure if the controller limits do the same. :confused:

For these lipos, I set my LVC to 3.7V per cell through the CA; I was only out for a short ride with only had 60V 5Ah, but I ended up hitting the LVC under throttle as I was on the final block (7%) up to my house. Power scaled back to about 800 watts, and voltage stayed pegged at 3.7V. I had to pedal harder, and just shifted down (hmm, it actually shifts) and pedaled a little more to the house. I was expecting power just to cutout, so that was cool. :thumb:

EDIT: planning on changing the battery graphics to something more stealthy.

Skunkworks Right.jpg
 
LVC on my two cheap controllers starts to limit power as voltage reaches the LVC. It's very nice, since it does a better job of not going below that voltage threshold than I could ever do manually. The result is, instead of having my BMS cut all power going up a hill when I need it, I can just keep the throttle full, and it will give whatever power is available at that voltage.

Look at how linear the result is in this screenshot:
ACtC-3cU-YYqyWi4LgXLO_SokbFi9ZLj40ex9xB9VJHXMB40_miKTGbwdEDQVNwAqmk45b6uUwxaUdWQ0YBhEfKvDuS6tuCiuSUyvu49gC3LHbzOvXVWNRJc_kwaEUx0suVY9pD4lFyExSMvPW8tIPlOJCWz=w788-h757-no
 
thundercamel said:
LVC on my two cheap controllers starts to limit power as voltage reaches the LVC. It's very nice, since it does a better job of not going below that voltage threshold than I could ever do manually. The result is, instead of having my BMS cut all power going up a hill when I need it, I can just keep the throttle full, and it will give whatever power is available at that voltage.

Thanks, so it sounds normal. I like how that works :bigthumb:

EDIT 09/06/20: I finally tried a top speed run yesterday while riding home. My pack was more than half depleted, sitting at 66V from a starting voltage of 74V. With field weakening on, I hit 34 mph. It wasn't bad on a smooth, known, section of road. I may need to do a 90V top speed run, just for data collection purposes... :lol:
 
I suppose a better way to think of the LVC is just like the charger does Constant Current, then Constant Voltage while charging the battery. The motor controller discharges the battery at a constant current until the LVC, then it discharges at a constant voltage.
 
Back
Top