Upload Your Circuit Schematics & Requests Here...

fechter said:
bigchief said:
I have a 48v ebike controller that I'm trying to adjust the LVC down for a 36v battery. I'm really sleep deprived at the moment and my brain isn't working well enough to sort out the exact resistor I'm to replace:

Check out this thread:
https://endless-sphere.com/forums/viewtopic.php?f=2&t=101242&p=1480347&hilit=lvc+resistor#p1480347

Looks like the same controller.

Thanks, it is definitely the same manufacturer but it seems to be a slightly different layout, possibly because mine is 48v nominal when his was 36v nominal, or maybe because it is just a different PCB revision. I posted an inline pic of the resistor I tried changing, in the thread you linked me to. Changing the resistor to less resistance makes it cut out more easily, but making it a higher resistance doesn't improve it. Maybe on my PBC it is a high voltage cut off and not a low voltage cutoff? Hopefully someone smarter than I can eyeball it and let me know what I should be trying.
 
Try completely removing the resistor like he did and see what happens. For sure there is a way to lower the cutoff point, but to really trace it out from a picture is challenging. If you had a good picture of the bottom of the board, I could take a look.

Also good if you attach the picture here instead of a hosting service. Just go to the bottom of the page where it says Attachments and attach the picture files.
 
Removing the resistor makes it cut off just about instantly. I think I'm messing with the wrong resistor. Maybe it's actually the really tiny one next to it marked "222" and not the "2001".

I was using file hosting services because the forum caps at 512kb which isn't that high of a resolution. Here's a pic of the bottom as an inline image and the source file. Thanks for taking a look!

IMG_20190727_1446162.jpg

https://imgur.com/TdddY9R
 
This thing is really kicking my butt since I'm reduced to trial and error.

I took out the SMD for the 2000 and 2200 ohm resistors and replaced them both with higher and lower resistance. I also took out the 25k resistor and replaced that with higher and lower resistance.

None of these value changes improved the low voltage cutoff, only messing with the 2000 ohm resistor caused it to cut off much more quickly. For now I have it so the 2000 and 2200 are both replaced with 2200 (my pack of resistors didn't have 2k flat) and I left the 25k replaced with an 18k for now (33k didn't help either). So the current status is as in the picture attached.

I've probably opened this thing up 30 times now. Spending this much time I'm thinking I should just call it a day and get a Kelly programmable controller instead.
 

Attachments

  • IMG_20190731_140341.jpg
    IMG_20190731_140341.jpg
    63.1 KB · Views: 11,007
I realize this is is probably so obvious it's already been attempted and failed, but:

Since there are four existing jumpers for battery choices, with increasing resistance as voltage goes down, why not leave all the rest of the circuit alone, and just change out one of the resistors on one of those jumpers, jumper it in?

You'd calculate the resistance you need based on the existing four values and voltages; dunno how to make a formula for it but can't be that hard with all the internet calculators out there, must be one of them that does this sort of thing. ;)

I'd guess you calculate the value based on teh average voltage of the pack, not the LVC, based on the numbers printed on there.
 
It's just a voltage divider circuit that feeds to the microprocessor. The thing to do is trace out the circuit so you know which resistors make the divider, then do some math on the resistor values.

I couldn't trace it out from the picture. An ohmmeter would be better.
 
Hi,

What do you think if this schematic ?
This is for a low power Ebike that will serve as a test bed for a full blown electric bike.
That's why I'm testing the BMS Bypass to see how to do it (My BMS is capable of the power this bike will be doing).
DO you think it's overkill ?
It's going to be a 4P10S battery with a 500W mid drive engine.
The 200A fuse is needed by the regulation for a street legal motorcycle so I'm doing everything in this build with respect to the law.
I can add more description if needed.

circuit(2).png

Thanks for your help.
 
Arimhan said:
Hi,

What do you think if this schematic ?
This is for a low power Ebike that will serve as a test bed for a full blown electric bike.
That's why I'm testing the BMS Bypass to see how to do it (My BMS is capable of the power this bike will be doing).
DO you think it's overkill ?
It's going to be a 4P10S battery with a 500W mid drive engine.
The 200A fuse is needed by the regulation for a street legal motorcycle so I'm doing everything in this build with respect to the law.
I can add more description if needed.

circuit(2).png

Thanks for your help.
The relay bypassing the BMS will be always on and drain the pack slowly. It would be better if there was a switch to turn it off. There is probably a way to use a single relay.
 
Thanks,

I'm planning on putting a switch on my bike, forgot to put it in the drawing.
In the motorcycle it will be done by the key switch.

I'm looking right now at how to do it in a single contactor while keeping the bms control over the current.
I could completely bypass the bms and let the controller handle the low-voltage cut-off but I prefer more security.
 
Arimhan said:
I could completely bypass the bms and let the controller handle the low-voltage cut-off but I prefer more security.
you probably actaully want both.

the bms is not really an everyday shutoff; most of the ones i've seen posted about and encoutnered myself have such low lvcs that they basically run the cells to completely dead before they shutdown, which is hard on the cells.

if it's not programmable to bring that up higher, then the controller lvc is usually preset (or programmable) to an lvc that's more like 80-90% empty, which is easier on the battery, and doesn't age it as fast, and tends to let it stay balanced better (depends on the quality of the cells to start with, and how well-matched they were).

so you have teh bms and the relay system to shut off the pack as a last-ditch "dont kill the cells", and the controller lvc as the everyday "oops the pack is low, stop now".


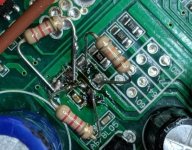
regarding doing everything with a single contactor (presumably operated by the keyswitch): you can use a dpst (doulbe-pole single-throw) type, so you have two separate electrical paths, both of which turn on / off at the same time. (a dpdt can also be used but you're never using the nc contact so no point in spending the money on that, and they're sometimes larger and heavier so wasting space/weight too. )

the keyswitch will need to be a spring-loaded type, like a ice-car's starting keyswitch, so that it returns to "run" after being turned to "start", so it cannot interfere with the bms's ability to shut the system off. but it needs another set of contacts in the "run" mode, that close the connection between the bms's discharge output connection (p-?) and the relay's coil. so the keyswitch is also a two-pole single-throw type, but one that has a constant "run" connection, and a momentary "start" connection, if that makes sense. i can see what the contacts inside would look like, i'm just having a hard time explaining it.

the keyswitch's "start" contacts would be wired in series with a large resistor (say, a 10watt sized 1ohm resistor) and create a circuit *across* the n.o. and common relay contacts of whichever circuit will create current thru the coil to keep it on. you might actually need a third contact set (3pst) for this part, whose nc contact goes to battery positive, and whose common contact goes to one end of the coil, then the coil goes to p-. i am having troulbe thinking clearly enough to draw it out but it's easily done. look up self-latching relay circuits and you'll see what i'm talking about.

(if you can't find a keyswitch with this function, you can use a regular two-position (off / on) switch for the "run" / off switch, and use a separate pushbutton momentary spst n.o. switch for the "start" switch; a number of motorcycle handlebar control clusters already have such a switch, and sometimes also a "run/stop".

so the relay coil for the upper-left relay would be wired in series with the common contact and "run" part of the keyswitch, rather than powered constantly as it is now.

so the way it works is that there is no circuit at all until the keyswitch is pushed past the springloading to short the coil on. the resistor in series with teh switch slows current flow enough to not damage the keyswitch contacts, until the coil has enough current flowing to switch the relay contact that then shorts across the keyswitch and resistor. you can size the resistor experimentally if necessary to make it the right ohms for just a quick twist of the key, so you don't have to hold it very long (like a second or less). might not need to be as high a wattage either, you can calculate that out by the resistance and voltage in the circuit.

the idea is that the relay self-latches itself on during the initial keyswitch pulse, so everythign stays turned on after this. but the bms will shut off the relay if any pack condition it's setup to turn off for occurs, or the keyswitch is turned from "run" to "off", as either one of htose breaks the relay coil's circuit from b+ to p-.

the relay coil for the rightside relay no longer exists; it's now just the coil in the upper left relay, as these are both in the same contactor if it's dpst.


does all that make sense?

totally separate from that, and off-topic for this thread:

...if all you have is a 500w middrive, it's not going to be much of a motorcycle. if it's a motorcycle frame and wheels and such, it's going to be so heavy that it's likely to take you a long long ways to get up to speed from a stop, unless you have a transmission you can shift down to high torque for startups, then to lower torque and higher speeds as you get faster....but it is still not likely to get past around 20mph or so, unless it is a fully-faired recumbent type.

if the battery and drive size is just because it's the test bed for the future project, then the above isn't an issue. :)

just that your original post's wording describes this as a low-power ebike, a test bed for a full blown electric bike, and mentions regulations for a street-legal motorcycle, so it's a bit confusing to me (especially since there's still too much blood in my caffeinestream right now). :?

if you would like to discuss this part of the project, please start a build thread over in the motorcycle section, and post a link here in this thread, and i'll follow you over there to figure out what it will actually take to do what you want (whatever that ends up being).
 
Thanks for the explanation and the help.

Yeah for now it's a cheap and underpowered e bike that will serve as a test frame before moving to a real motorcycle (with a real motor and battery).
For the dpst you mean just use it to command the 2 contactor so that will allow a single key switch to shut down both ?
I don't really see how to replace the 2 contactor with a dpst.

I'm going to do a build thread when I start the work, for now i'm just finishing the shematic and buying all the pieces.
 
Arimhan said:
For the dpst you mean just use it to command the 2 contactor so that will allow a single key switch to shut down both ?
I don't really see how to replace the 2 contactor with a dpst.
as long as your purposes don't require two independent ways for the bms to turn off the power, and thus two separate coils controllin separate contact sets, then you only need one coil controlling both contact sets. in that case, the dpst or 3pst will work fine, becuase both contact sets are still electrically independent. i'll try to draw what i was talking about.

I'm going to do a build thread when I start the work, for now i'm just finishing the shematic and buying all the pieces.
unless you're really sure of all the stuff you need to buy, sometimes a build thread with detailed needs and usage info may help us help you select the right parts before spending money, so you don't accidentally end up with stuff that won't do what you want. ;)
 
Thanks a lot.

I put 2 contactor at first because on the Kelly schematic they use one between the battery and the controller but I suppose this one is optional ?

For a build thread is this a e bike or already a motorcycle ? this will be on a bike frame but with no pedal.
 
i'd usually call them motorcycles when they'd be classified as that in the places they're used (this is different in different parts of the world).

pedals or no pedals may change what it's classified as where you are, but some places don't require pedals on a bicycle, or even specify they must be human-powered at all, so....


so it's up to you where you put the thread(s) for the various projects. :)


regarding the contactors, both of your contactors are between the battery and controller--there's not really anywhere else to put them. ;)

even if you use a single multi-contact-set contactor, you're still wiring it basically the same way you diagrammed it already, just that they're both switched at the same time by the same "switch". i still need to make that drawing for you, but it won't be till tomorrow or the next day, most likely, at the earliest.
 
I'm going to do a build thread then.
Well after looking back at my schematic yeah one contactor controlled by the bms should be enough.
 
After some rework of my diagram I've come up with this:

circuit(5).png

I'm going to go with 2 contactor and 2 switch.
Well I will use a 3 Position key switch so that OFF position cut all power, ON allow power to the BMS for the precharge and to the lights and horn and everything and the Ignition position will allow power to the second coil and allow the engine to start.

Thanks all for your help on this forum
 
That looks better. The 3 position switch will be key though since if the right side switch is on first, there will be no precharge and you could possibly damage the contacts in the main relay. The left side diode is backward but you would figure that out.

Good illustration of how to use a "wimpy" BMS to protect a high current pack.

For charging, you might run into current limitations in the BMS. Using a single port style would probably help as you could charge at the BMS's rated discharge current.
 
Thanks, yeah I've made a mistake with the diode.
Yeah the two switch will be separate on the bike but on the full blown motorcycle it will be a real 2 stages switch.
For now I only have a separate port bms but I will look into it.
For the full size Motorcycle I will take a lot of time before choosing the correct component because I need every one of them to be ECC certified..
 
I had to replace the motor controller on my ELF. This involved unplugging a bunch of stuff. I really need a diagram or photo of what is in the "black box" behind the keyswitch. I am most interested in the connections between the battery, solar panel controller, DC-DC Controller, Shunt, and of course the motor controller

OT is of no help. They're hostile to anyone needing customer service
 
Hi wiring wizzards
I almost finished the raw construction of my motobike, its a QS 8KW Hub motor and KLS96601-8080I. I have two BMW i3 Gen3 modules in series.
It would be awesome if you could point me on mistakes before I burn all the sh**
Ezuki_Wiring_1.png
as j bjork wrote
I have blown one discharge fet when turning on, and a charge fet when turning on the bms with connected and powered up charger.
Now I first turn on the bms, then the contactors. So there is no load when the bms turns on.
I am trying to figure out a way to switch on the ANT BMS with the main Gigavac-Switch before I can even switch the contactor with the main-keyswitch.
any comment welcome!
here are some pics of my building process so far
stay alive!
best, m
 
maSch said:
Hi wiring wizzards
I almost finished the raw construction of my motobike, its a QS 8KW Hub motor and KLS96601-8080I. I have two BMW i3 Gen3 modules in series.
It would be awesome if you could point me on mistakes before I burn all the sh**
Ezuki_Wiring_1.png
as j bjork wrote
I have blown one discharge fet when turning on, and a charge fet when turning on the bms with connected and powered up charger.
Now I first turn on the bms, then the contactors. So there is no load when the bms turns on.
I am trying to figure out a way to switch on the ANT BMS with the main Gigavac-Switch bbeforeefore I can even switch the contactor with the main-keyswitch.
any comment welcome!
here are some pics of my building process so far
stay alive!
best, m

I ended up with a similar circuit for my EV motorcycle conversion. But I'm wondering if there needs to be a switch/relay between the charger and the battery? Thinking that the charger might be consuming when the bike is in use.

TIA, Tim!
 
MXUS XF15R rear hub motor, 36V/ 350 Watt 10.4 AH, Im trying to get any info on how i can unlock the speed limiter,
 
I am looking for a CR S104.250.FC bafang controller wiring diagram. I've been google searching but could not find it. Some one here that has one or could guide me where to look?
 
This one?
https://bafang-e.com/en/oem-area/components/component/controller/cr-s104250fc/
https://bafang-e.com/fileadmin/Media/Abstractions/cr_s104.250.sn.png
cr_s104.250.sn[1].png

What specifically are you looking to connect it to? Note that it is CANbus communication protocol, so whatever it has to talk to (display) must be the same.

Bafang tends to use the same pinouts on their connectors, usually using Higo or Julet waterproof plugs, so it is likely that an image search like this may show you matching pinouts to those on the controller:
https://www.google.com/search?newwindow=1&source=univ&tbm=isch&q=bafang+pinouts
Assuming it's the same connector, then this is likely the motor connector pinout
https://m.media-amazon.com/images/I/710YCg00HwL._SY256.jpg
710YCg00HwL._SY256[1].jpg
https://m.media-amazon.com/images/I/71VkhgXtscL._SY256.jpg
71VkhgXtscL._SY256[1].jpg

This is for a different bafang system but has pinouts for various connectors
https://endless-sphere.com/forums/viewtopic.php?t=100777&start=1100#p1707081


SPECIFICATIONS
Rated Voltage (DCV) 36/43
Low Voltage Protection (DCV) 32/38
Current Limit (A) 15/13
Rated Current (A) 7/6
Rated Power (W) 250
Weight (g) 240
Operating Temperature -20 - 45℃
Mounting Parameters
Dimensions (mm) 76*52*30.7
Com. Protocol CAN
E-Brake Level Yes
Further Specifications
PAS Mode Speed, Speed and Torque Sensor
Throttle Voltage Input (DCV) 1.1-3.9
Control Type Sine Wave
Support Mode 0-9
Speed Limit (km/h) 25
Walk Assistance (km/h) 4.5
Lighting Drive Capacity (DCV/W) 6 / 3(max)
 
Back
Top