Sur-Ron - New Mid drive Bike

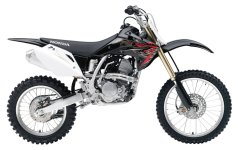
What happened with me is i normally drive very defensively on the streets. This time I saw a police car in the oncoming lane approaching me and since ebikes or unregistered motorcycles is really what we have with the sur-ron, are illegal in my area and probably most areas in the country, I will sometimes ride directly to someones right side to avoid being seen as I drive past a police car.

So I sped up to this car to use as cover and this car decided to do a sharp turn into the parking lot, I was going pretty fast so luckily it wasn't too bad of an accident considering the circumstances.I reacted quickly and turned with him, and only rubbed the side of his car car with the side of my bike.

I don't even know why I worry as police cars are not suppose to chase in my area and would never be able to catch a bike like the sur-ron before I would be deep inside any park or woods. It would be almost laughable if the police tried to chase me on the Sur-Ron because it has such incredible speed and agility, and able to easily go off-road and ride over most any obstacles and could even be carried over things in a pinch. This is why I like the smaller 19" wheels because the bike turns amazingly sharp and with a very tight turning radius which means if you simply turn your bike 180 degrees in a small street you could do it in seconds while a car and especially an SUV which most police use would take a very long time to turn around 180 degrees.
 
Offroader said:
LeRdubois said:
can i ask where you got that 1kg3 1.6 rim ? the only supplier i can find is on alibaba, and i'm not sure for the weight though
Here is the Rim I bought, I searched aliexpress and contacted many companies but their rims were all too heavy. I was happy to find this light weight 1.6" rim.

The rim is a Rising Sun 36 hole 1.6 x 18. Hopefully you live in USA.

https://www.amazon.com/gp/product/B07DVXHWRJ/ref=ppx_yo_dt_b_search_asin_title?ie=UTF8&psc=1

Thank you, i'm in EU and i saw these in italy on ebay, but raw aluminum color only. not RisingSun branded but they are the same. not a big deal.

@Rix
I read somewhere that you had a 18x1.85" weighting 3 pounds...was that a pro-wheel ? does the dimension folowed by "DOT" was inscribed on it ?
 
Would anyone know where exactly that washer in number 17 goes? It fell out while I was dismantling everything. I think it is part of the kickstand, but where exactly?

Does it go between the bolt 13 and nut 15? Is it inside the wishbone part of the kickstand?

If anyone could check it would be greatly appreciated.

Nkhxka8.png
 
The washer 17 goes on bolt 13 before you install it in the kickstand, not on the backside. :thumb:
 
X-Nitro said:
The washer 17 goes on bolt 13 before you install it in the kickstand, not on the backside. :thumb:

I think the only places it can go are where I have indicated with an arrow. The washer will not fit in the recessed hole where the nut goes on and where the bolt first goes on. I placed the washer in the space where I have drawn the red arrow that is closer to the spring side. I only guessed it fits here.

The washer is necessary in this space because without it there will be too much play, the washer makes everything fit tight.

I think nobody is able to see the washer inside this space because I really can't see where I put it either. Unless someone has to take apart their kickstand they may not know. You have to be careful when you take it apart because the washer will fall out and you will not know either where it goes. I am not sure it even matters on what side you place the washer as both are flat metal to metal.

To be honest, I am really lucky I noticed the washer even fall out as it blended into the vice, I was not even sure that the washer came out of this kickstand or was from someplace else.

The spring is not easy to get on easy, I had to look on youtube how to get it back on and it is recommended to use a bunch of pennies to elongate the spring. It did work.

Replacing this was more of a pain in the ass than I thought. You also have to deal with the kickstand magnetic switch which the wires are very delicate and you can break easily. Make sure you take pictures before you do anything so you can reference how everything goes back.

Everything is back to normal now.

KSRdcAS.jpg


u1n7mnL.jpg
 
Nice 25 cent tool. I'll have to remember that trick. I used to have a brake spring tool that might have worked but long lost.
 
Offroader said:
X-Nitro said:
The washer 17 goes on bolt 13 before you install it in the kickstand, not on the backside. :thumb:

I think
bla bla bla, not very well from what all I've seen. I took mine apart dolt, and that's where the washer was.
 
Are you saying it goes right under that bolt head? I could have sworn it would not fit in the recessed hole, the washer was too big. I am 99% sure about this but I can't say 100% unless I take everything apart, which is something I definitely don't want to do.

I can say this, without the washer inside there was lots of side to side play in that kickstand joint, with the washer inside it was much tighter. Since everything feels normal, I'm just going to leave it.

If anyone else happens to take their kickstand apart, please post here exactly where you find your washer.

raQwxgA.jpg
 
X-Nitro said:
Offroader said:
X-Nitro said:
The washer 17 goes on bolt 13 before you install it in the kickstand, not on the backside. :thumb:

I think
bla bla bla, not very well from what all I've seen. I took mine apart dolt, and that's where the washer was, and that's where all the others will find it also. Quit with your bad information.

First I'm not giving out bad information when I clearly stated many times I have no idea where this washer goes and am taking a guess. I also told everyone to pay careful attention when removing the kickstand to see where this washer was as its easy to lose it.

I may have proof on why you may be wrong. This clearly disproves where you say the washer should be and proves where I say it should be and you are the one actually giving out the bad information.

If you look at two different schematics of the sur-ron kickstand you will see that they do not line up the washer where you say it should be. This is probably because they can not clearly draw the washer which is inside the kickstand wishbone. They had to draw it next to where it should be because there was no way they could have drawn it inside the wishbone where I placed the washer.

If the washer was on the bolt head or nut where you say it should be, it would be next to those areas in the schematic with a red line through it. They could have clarified this better exactly where this washer goes in the schematics but you can see they have drawn it right next to the wishbone of the kickstand, or where I placed it.

The washer is too large to fit where you say it should be, the only reason I'm saying I'm not 100% certain is I didn't actually try and fit it in the the recessed hole, I actually just eyeballed the size and said no way it would fit in that hole.

What does this all mean? By you placing the washer where you placed it and not inside the wishbone, you have just added a ton of side to side play in your kickstand. Now your bike is going to be more wobbly when on the kickstand. I verified this by installing it without the washer and there was a ton of side to side play that was gone once I installed the washer.

b8nQsIM.png


Nkhxka8.png
 
Allex said:
Washer goes inside the wishbone, usually where your right red arrow is pointing, sometimes you need two, each on both sides.
I see that offroader is using a different bolt arrangement than my bike was assembled with, this is apparent from the posted diagrams. My kickstand bolt head is a plain cap style like most of others on the bike.
On Mark Kitaoka site I see a kickstand disassembled with what appears to be a shim washer (don't think that will fit bolt-pocket)in the pic, his bolt looks almost the same as mine, sadly my bike has no shim in the kickstand an that's a valid concern I can address, thanks to offroader for raising this question and I concede your post is correct.

.
 
Mistertrixer said:
I have ordered a nuvoton icp programmer. Will let you know how it goes.

Cool.

while we are waiting, what is the operating voltage range for the X controller? The controller kicks into limp mode at some low voltage value but is it told to limp by the BMS or does it do it on its own? Is the limp mode the same as ECO mode and what is it, a simple restriction by the controller of phase amps allowed in addition to a max motor rpm (top speed)? As the voltage continues to drop, the bike shuts down. Is it the battery BMS or the controller that shuts the bike down?
 
motomoto said:
I am adding an extra 2S battery pack to my sur-ron just to see if it makes it any faster. I have heard you can do it without
blowing the stock controller. My question to you smart battery pack guys is which side should I put the 2S pack on, the red
wire or the black wire or doesn't it matter? I know it somehow goes through the battery BMS but if I put it on one side it is pushing electrons into the Sur-ron battery and the other side it is adding to pushing the electrons into the controller. I just don't feel like toasting the BMS because I put the batteries on the wrong leg.2s picture.jpg2s battery.jpg
I was hoping this experiment would shed some light on the upper voltage cutoff & bms behavior with external voltage, but I saw no follow-up posts.
 
Making our own Storm Bee but with better performance and lower price. 4kW motor that needs no reduction gears or jack shaft. 60v 45ah 450amps Sony vtc6 cells that fits in the bike under the lid when you take out some plastics and the bracket for the controller. 80 more cells than the stock battery but does not stick up out of the top of the bike. handles and looks a lot better. Aluminum case and handle are next steps. Last pic is the battery in the bike. Working on a frame that will take all the components, seat etc from a 190 pound CRF150 R Expert Honda and will be about 165 pounds but have the power of a 450cc. The Honda components cost less and easier to get than small run downhill components and will be much stronger. Styling will look like a 2013 Carbon Fiber GT Fury downhill bike frame. Tube steel frame. Integrated controller rapid charger built into the bike.
 

Attachments

  • IMG-20200519-WA0028.jpg
    IMG-20200519-WA0028.jpg
    403.8 KB · Views: 1,887
  • IMG-20200519-WA0026.jpg
    IMG-20200519-WA0026.jpg
    315 KB · Views: 1,887
  • IMG-20200519-WA0005.jpg
    IMG-20200519-WA0005.jpg
    322 KB · Views: 1,886
  • IMG-20200519-WA0017.jpg
    IMG-20200519-WA0017.jpg
    123 KB · Views: 1,886
  • IMG-20200515-WA0031.jpg
    IMG-20200515-WA0031.jpg
    170.9 KB · Views: 1,886
  • IMG-20200515-WA0033.jpg
    IMG-20200515-WA0033.jpg
    169.7 KB · Views: 1,887
  • IMG-20200622-WA0054.jpeg
    IMG-20200622-WA0054.jpeg
    99.8 KB · Views: 1,886
  • IMG-20200622-WA0061 (5).jpg
    IMG-20200622-WA0061 (5).jpg
    468.8 KB · Views: 1,883
  • IMG-20200621-WA0013.jpg
    IMG-20200621-WA0013.jpg
    237.3 KB · Views: 1,880
  • IMG-20200614-WA0046.jpg
    IMG-20200614-WA0046.jpg
    207.7 KB · Views: 1,879
  • IMG_20200522_113341594 (1).jpg
    IMG_20200522_113341594 (1).jpg
    208.7 KB · Views: 1,877
  • IMG_20200522_113353773 (1).jpg
    IMG_20200522_113353773 (1).jpg
    202.4 KB · Views: 1,878
  • 1200px-Honda-crf150-2009-2009-0_8aWbdSr.jpg
    1200px-Honda-crf150-2009-2009-0_8aWbdSr.jpg
    110.9 KB · Views: 1,873
ebikeguy123 said:
Making our own Storm Bee but with better performance and lower price. 4kW motor that needs no reduction gears or jack shaft. 60v 45ah 450amps Sony vtc6 cells that fits in the bike under the lid when you take out some plastics and the bracket for the controller. 80 more cells than the stock battery but does not stick up out of the top of the bike. handles and looks a lot better. Aluminum case and handle are next steps. Last pic is the battery in the bike. Working on a frame that will take all the components, seat etc from a 190 pound CRF150 R Expert Honda and will be about 165 pounds but have the power of a 450cc. The Honda components cost less and easier to get than small run downhill components and will be much stronger. Styling will look like a 2013 Carbon Fiber GT Fury downhill bike frame. Tube steel frame. Integrated controller rapid charger built into the bike.

looks good mate! any plans to offer it as a bolt on kit? else I might just have to copy you :p

motor looks weird though - tripple stator? seems like a single stator motor would handle far more power... fewer end turn losses (1/3rd) and more active material (~ x150%)?

Also going to want a far more robust bash guard to protect the lower edge of that battery...
 
great mechanical skills but electric/battery wise its a bit weird.
your ductape battery is
20s12p... 240cells only.
dont know where you get these cells. but those stickers were used on refurbished, used or just fake cells.
VTC6 has nominal voltage 3.6v not 3.7v.(have you measured iR of these cells before?)
and i think they are 3120mah rated.
your nickel strips used on this battery are not much for your 450A wish. Copper "ends" are great idea. but all the current hav eto flow thru your tiny nickel strips.
beside that. no offend, its a solder fiasko :shock: 8)
 
Merlin said:
great mechanical skills but electric/battery wise its a bit weird.
your ductape battery is
20s12p... 240cells only.
dont know where you get these cells. but those stickers were used on refurbished, used or just fake cells.
VTC6 has nominal voltage 3.6v not 3.7v.(have you measured iR of these cells before?)
and i think they are 3120mah rated.
your nickel strips used on this battery are not much for your 450A wish. Copper "ends" are great idea. but all the current hav eto flow thru your tiny nickel strips.
beside that. no offend, its a solder fiasko :shock: 8)

lol good point dind't even look at the battery
 
Merlin said:
great mechanical skills but electric/battery wise its a bit weird.
your ductape battery is
20s12p... 240cells only.

under the ductape is some sheilding.. lol

Thanks for the feedback. Yes.. my bad.. thats the wrong pic. this is a 72v pack.

dont know where you get these cells. but those stickers were used on refurbished, used or just fake cells.

Yeah.. could be.. will know soon after we stress cycle them. Was just looking for inexpensive $3 cells to play with. Cells came from https://litespeedbikes.mybigcommerce.com/72v-surron-rebuild-drop-in/ and yes voltage sag is an issue. Will no more soon after more cycles.. charge and discharge...

VTC6 has nominal voltage 3.6v not 3.7v.(have you measured iR of these cells before?)
and i think they are 3120mah rated.

Will check and get back to ya.

your nickel strips used on this battery are not much for your 450A wish. Copper "ends" are great idea. but all the current hav eto flow thru your tiny nickel strips.

Yeah.. next battery is hex pattern to get some more room on the side and will have heavier gauge. 160A is what we have it limited to. Motor may not like much more than that ... over time. We have access to wire bonding for final product. Tis is just for fun to see what the extra size and weight is like. GPS for top speed and range is whats next. Off to ASI office Monday to play with the controller to see what we can get out of it.

beside that. no offend, its a solder fiasko :shock: 8)

yep. forgot to solder bus bar before spot weld to cells and afraid to heat it up too much. It does suck. :roll:
 

Attachments

  • IMG-20200621-WA0042.jpg
    IMG-20200621-WA0042.jpg
    122.6 KB · Views: 1,773
sn0wchyld said:
ebikeguy123 said:
Making our own Storm Bee but with better performance and lower price. 4kW motor that needs no reduction gears or jack shaft. 60v 45ah 450amps Sony vtc6 cells that fits in the bike under the lid when you take out some plastics and the bracket for the controller. 80 more cells than the stock battery but does not stick up out of the top of the bike. handles and looks a lot better. Aluminum case and handle are next steps. Last pic is the battery in the bike. Working on a frame that will take all the components, seat etc from a 190 pound CRF150 R Expert Honda and will be about 165 pounds but have the power of a 450cc. The Honda components cost less and easier to get than small run downhill components and will be much stronger. Styling will look like a 2013 Carbon Fiber GT Fury downhill bike frame. Tube steel frame. Integrated controller rapid charger built into the bike.

looks good mate! any plans to offer it as a bolt on kit? else I might just have to copy you :p

Thank you for the feedback. Yes. Battery and controller kit and frame. Complete bike by spring 2021. Anyone here recommend cells or packs, BMS and cases? Chargers?

motor looks weird though - tripple stator? seems like a single stator motor would handle far more power... fewer end turn losses (1/3rd) and more active material (~ x150%)?

Will explain more later.. the controller is a bit exotic and different approach. The three stators are like 3 separate motors. Goal is to be efficient at low and high rpm without need for reduction gears. Does anyone else have suggestion of a 4kW motor that needs no reduction and would be an upgrade from the Sur Ron Golden motor 3000b?

Also going to want a far more robust bash guard to protect the lower edge of that battery...

Making a whole new frame.
 
ebikeguy123 said:
Merlin said:
great mechanical skills but electric/battery wise its a bit weird.
your ductape battery is
20s12p... 240cells only.

under the ductape is some shielding.... Plexiglas .. lol.. this is just to learn and have some fun for space budget.

this looks interesting http://www.zemso.eu/Surron.html

Thanks for the feedback. Yes.. my bad.. thats the wrong pic. this is a 72v pack.

dont know where you get these cells. but those stickers were used on refurbished, used or just fake cells.

Yeah.. could be.. will know soon after we stress cycle them. Was just looking for inexpensive $3 cells to play with. Cells came from https://litespeedbikes.mybigcommerce.com/72v-surron-rebuild-drop-in/ and yes voltage sag is an issue. Will no more soon after more cycles.. charge and discharge...

VTC6 has nominal voltage 3.6v not 3.7v.(have you measured iR of these cells before?)
and i think they are 3120mah rated.

Will check and get back to ya.

your nickel strips used on this battery are not much for your 450A wish. Copper "ends" are great idea. but all the current hav eto flow thru your tiny nickel strips.

Yeah.. next battery is hex pattern to get some more room on the side and will have heavier gauge. 160A is what we have it limited to. Motor may not like much more than that ... over time. We have access to wire bonding for final product. Tis is just for fun to see what the extra size and weight is like. GPS for top speed and range is whats next. Off to ASI office Monday to play with the controller to see what we can get out of it.

beside that. no offend, its a solder fiasko :shock: 8)

yep. forgot to solder bus bar before spot weld to cells and afraid to heat it up too much. It does suck. :roll:
 
ebikeguy123 said:
ebikeguy123 said:
Merlin said:
great mechanical skills but electric/battery wise its a bit weird.
your ductape battery is
20s12p... 240cells only.

under the ductape is some shielding.... Plexiglas .. lol.. this is just to learn and have some fun for space budget.

This looks interesting ZEMSO SURRON BATTERY 72V45AH - 3240WH - 450A PEAK fits under lid aluminum case IP54 waterproof $2100 USD Germany http://www.zemso.eu/Surron.html

Any other suppliers that make anything better for that price?????

Thanks for the feedback. Yes.. my bad.. thats the wrong pic. this is a 72v pack.

dont know where you get these cells. but those stickers were used on refurbished, used or just fake cells.

Yeah.. could be.. will know soon after we stress cycle them. Was just looking for inexpensive $3 cells to play with. Cells came from https://litespeedbikes.mybigcommerce.com/72v-surron-rebuild-drop-in/ and yes voltage sag is an issue. Will no more soon after more cycles.. charge and discharge...

VTC6 has nominal voltage 3.6v not 3.7v.(have you measured iR of these cells before?)
and i think they are 3120mah rated.

Will check and get back to ya.

your nickel strips used on this battery are not much for your 450A wish. Copper "ends" are great idea. but all the current hav eto flow thru your tiny nickel strips.

Yeah.. next battery is hex pattern to get some more room on the side and will have heavier gauge. 160A is what we have it limited to. Motor may not like much more than that ... over time. We have access to wire bonding for final product. Tis is just for fun to see what the extra size and weight is like. GPS for top speed and range is whats next. Off to ASI office Monday to play with the controller to see what we can get out of it.

beside that. no offend, its a solder fiasko :shock: 8)

yep. forgot to solder bus bar before spot weld to cells and afraid to heat it up too much. It does suck. :roll:
 
Back
Top