E-S Stealth Electric Bike Owners

1abv said:
MOTOR:
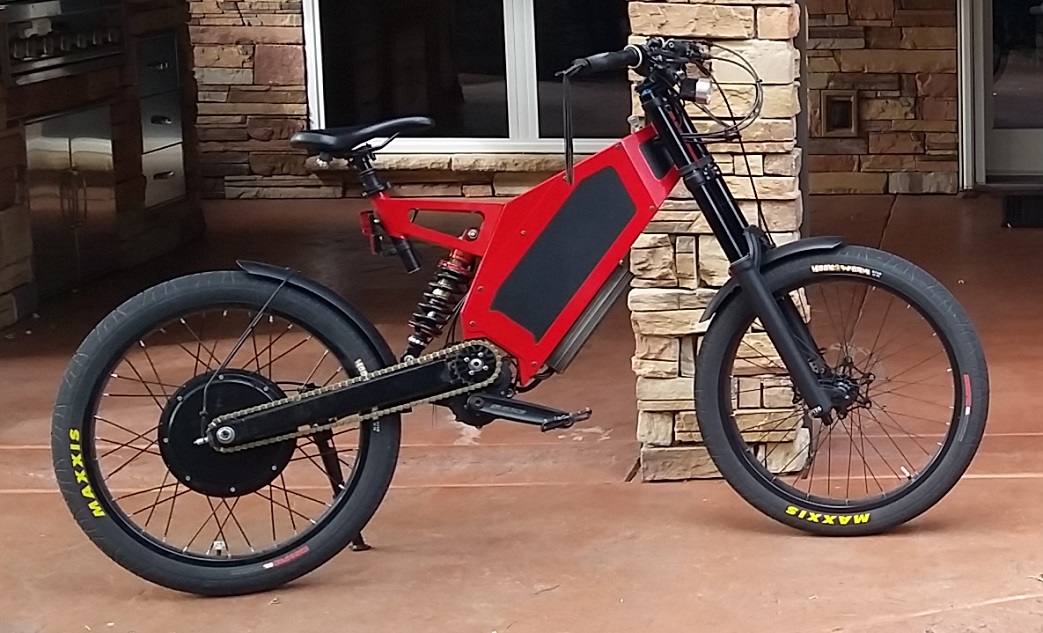
The dinosaur as its been called….replaced the stock wire w 10 gauge silicone wire, did the heat shrink trick to get it to fit through the channel in the axle.
27756710841_3a3953a874_z.jpg


By passed the little board inside the motor because the thicker gauge wires wouldn’t fit. Cleaned out all of the solder mess, removed the stock temp gauge and installed a grin tech one. Touched up all of the motor varnish and also fixed where the stator ends were separating.
The bearings have been replaced w sealed bearings. One of the bearings was loose inside the cover so I had to dimple the cover. The new bearings were all frozen so they were easier to fit in. anywhere where I could put high temp sealant I did, around the bearings, on the covers, and covering the wires and the temp sensor inside the motor including the channel in the axle.
27974473691_367884915e_z.jpg


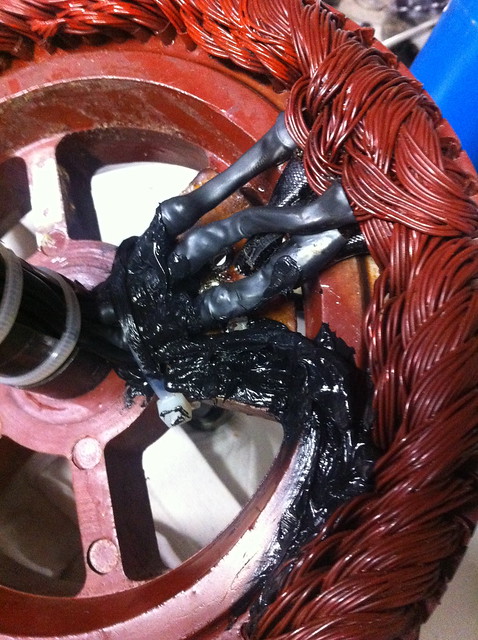
Where the covers have the small holes in them they have been drilled out and threaded for 5mm bolts. Bolts were added and the threading was covered in high temp silicone.An additional 5mm hole was added close to the axle for breathing. I wanted to set up the motor for oilcooling. Went w ferro fluid… more on this later..

When I took the motor apart I dimpled the side cover and the center to make it easy to line up
26933597971_cba03e3c41_z.jpg


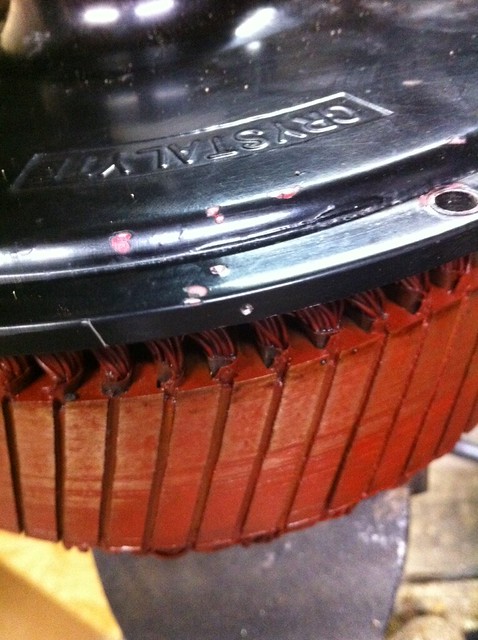
I also chucked in new seals on both sides

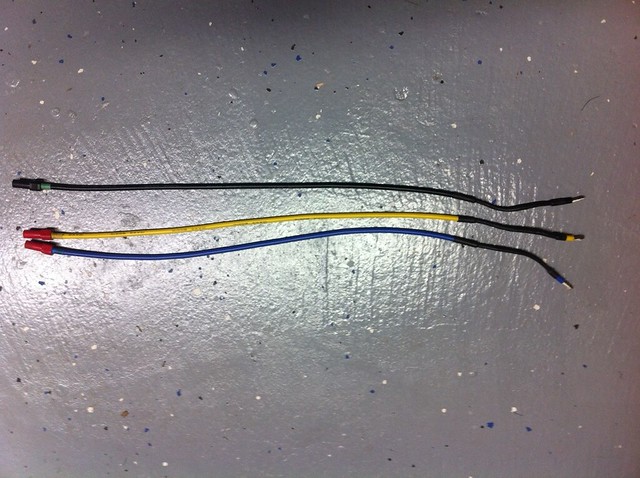
take a look at this. you will have to remove the sheathing on the wire when it passes through the motor. I wound up cutting the coating off the wire and re coated with thinner heat shrink. Never had any issues with doing it that way. If you go thicker gauge wire you will be able to pass more power through it w/o worry the wires melting. If you decide to go with the stock wire gauge I would still go with silicone wire.
 
Longest thread evar.

I see the guy who either sells these or bought the company on LinkedIn all the time. Matthew bought one at some point, had a blast, sold it for a fair return.

I remember the very first prototype pics.

... man have times changed. In Santa Cruz -> Literally more than half of the bikes on the road are ebikes. Of those, a good many are high end mid-drive. Its awesome.

Live the dream

-methods
 
TimL said:
Thanks for that! Good questions. I thought direct drive like the stealth. I don't need high power - its really to push me up the hills so i don't end up bathing in sweat and 30km/hr or so uphill would be ok. Weight is not critical as the motor fixes that problem and when cruising at a constant speed it shouldn't matter. Efficiency not critical either. Only 22km commute to work, so providing it can get me there and back with plenty of reserve then no worries. Higher power in the future unlikely as i can't see super smooth roads/paths being an option and although fun, its not safe enough. Cost - IDK - must be suitable kits available?

If you're insistent on a direct drive, you can't go wrong with a 1000W Leafbike hub motor with a 5T wind. With a 48V nominal battery pack in a 20" wheel, it would reach about 55 km/h on flat ground. The motor itself is overkill for what you need, but you could run it at only 500W if you choose, and you'd get great reliability for your application. Do beware that you can only fit a 7-speed freewheel for the freewheel version in 135mm dropouts, or 7sp cassette with the cassette version. This motor has great efficiency as far as direct drive hub motors go, broadly getting about 75-85% and peaking at about 91%, and the main reason I recommend it is that it has low cogging losses, so if your battery runs dead, the velomobile still remains very pedalable. I also recommend the 1000W version instead of the 1500W version because it has a thinner 30mm stator(versus 35mm for the 1500w version), which will further cut your cogging losses. If you get the 1500W version, a 5T wind version in a 20" bicycle wheel would get you a top speed of around 45 km/h on flat ground with a 48V nominal battery pack, but you could choose a different wind if you want a top speed that is either higher or lower for that voltage, or if you're not stuck with a kit and go with your own system, vary that voltage.

If you'd be okay with a cadence-sensing PAS, Leafbike has a full kit available, but IMO, you'd be better off just getting the motor by itself and using a Grin Phaserunner controller, Cycle Analyst computer, and a torque sensing bottom bracket. While you'd spend less to get the full Leafbike kit, by going to what I recommended, you'd have a fully programmable setup which would allow you to choose whatever battery pack voltage you want instead of being stuck with having to have one within the parameters of the Leafbike kit, and with a torque sensor, you'd get a smoother operating vehicle that is better suited to hills since it would be able to tell how hard you are pedaling and scale power output accordingly, and the FOC controller would slightly increase your efficiency, giving slightly more range, while allowing silent operation.

If you have questions about this motor, please do searches in and/or read and/or ask questions in the following topic:

https://endless-sphere.com/forums/viewtopic.php?f=30&t=66489
 
Theodore Voltaire said:
Can someone explain why more Bombers don't get QS205 motors to replace their dinosaurs?

Hi Theo,

Man I would love to do that. I actually have one but it is having some sort of sensor issue now so I’ve been trying to fix it. On another note you were helping me with my front fork decision before and had another question please. So I was going to install the DVO forks that stealth sells as an upgrade but it became way too much of a pain in the ass. First of all it was tapered so I needed to get an adapter. I bought the cane creek EC and it did it’s job but the forks that I bought had the steerer tube cut too short. Stealth B52s need a really long tube. So I sold that and bought some Fox 40s and wow what a difference. I am so much of a better rider with these things they provide a HUGE advantage over the DNM 8 that it came with. It feels like a completely different bike and I can literally rip down the trails at twice the speed now. My only issue is finding the right adapter to mount the MT7 brakes. Can you please point me in the right direction, what did you use? Thanks again!
 
Odogster said:
Theodore Voltaire said:
Can someone explain why more Bombers don't get QS205 motors to replace their dinosaurs?

Hi Theo,

Man I would love to do that. I actually have one but it is having some sort of sensor issue now so I’ve been trying to fix it. On another note you were helping me with my front fork decision before and had another question please. So I was going to install the DVO forks that stealth sells as an upgrade but it became way too much of a pain in the ass. First of all it was tapered so I needed to get an adapter. I bought the cane creek EC and it did it’s job but the forks that I bought had the steerer tube cut too short. Stealth B52s need a really long tube. So I sold that and bought some Fox 40s and wow what a difference. I am so much of a better rider with these things they provide a HUGE advantage over the DNM 8 that it came with. It feels like a completely different bike and I can literally rip down the trails at twice the speed now. My only issue is finding the right adapter to mount the MT7 brakes. Can you please point me in the right direction, what did you use? Thanks again!

These Fox 40 forks should be set up to run 203mm disks with no adapter. Mine are like that.
XT-Shimano-f-caliper.jpg


The forks are the tits. They're genius's. Running fast nothing can fool them. Hard sharp hit's? Nope. Rough washboards? Nope. Bad pavement in turns? Nope. The way the front tire sticks to the road it feels magnetic. I can ride through turns now at higher speeds too. And it feels a lot safer. They're expensive, but you get a lot for your money.
 
bigbore said:
[ because I wrapped each of the 280 cells in a turn of kapton tape and then I roughened them with sandpaper all this because I did not like how hot glue sticks on the surface of the bare cells.

i did the same with a build for a friend 14S4P for a BBS02 thanks for the tip
 
Has anyone tried a little Sabvoton controller like this?
https://www.aliexpress.com/item/1005001431276575.html?spm=a2g0o.productlist.0.0.52632f59VESVeL&algo_pvid=12d83782-15e4-44d1-9938-1f0f32f5e738&algo_expid=12d83782-15e4-44d1-9938-1f0f32f5e738-12&btsid=0bb0622a16062582388992797ef2e3&ws_ab_test=searchweb0_0,searchweb201602_,searchweb201603_

says 80A max battery current so i'm still thinking thats more than the stock one can deliver.

i'm still hurting at the concept of throwing another $2K at a decent fork and another $700 ish on a controller
when the bike is still running strong.

The new rubber, front crank, chain, pads, discs were about a $500 exercise too.

I'm glad the fuel is cheap :) everything else is $$ vs a dirtbike LOL
 
KarlJ said:
Has anyone tried a little Sabvoton controller like this?
https://www.aliexpress.com/item/1005001431276575.html?spm=a2g0o.productlist.0.0.52632f59VESVeL&algo_pvid=12d83782-15e4-44d1-9938-1f0f32f5e738&algo_expid=12d83782-15e4-44d1-9938-1f0f32f5e738-12&btsid=0bb0622a16062582388992797ef2e3&ws_ab_test=searchweb0_0,searchweb201602_,searchweb201603_

says 80A max battery current so i'm still thinking thats more than the stock one can deliver.

i'm still hurting at the concept of throwing another $2K at a decent fork and another $700 ish on a controller
when the bike is still running strong.

The new rubber, front crank, chain, pads, discs were about a $500 exercise too.

I'm glad the fuel is cheap :) everything else is $$ vs a dirtbike LOL

That controller looks like a replacement for a Huck. I like the idea of a 80 amp controller, but that one looks like a biache to mount on our bikes.

My stock controller is 65 amp, and it came from the factory programed to 60 amp.
 
Hey guys... sorry about the delay getting back, I had a bit of a family emergency that I had to address. Anyway, I finally had a chance to take some time off to work on the bike yesterday. I did a little more troubleshooting and here is where I'm at.

Here she sits all a part waiting for me...lol

Bike.jpg


1abv - I like your concept of your "re-wire" job and having the ability to disconnect it in different places. That may be a winter project this year. Also, I took your advice and removed the wheel and removed the controller from the bike for a closer inspection.

- I checked continuity on all 3 phase wires (B/G/Y) from the connector back to where it goes in at the axle (All was good). The wires did not appear to be pinched where it follows the axle into the hub.

motor.jpg


- I remove the controller for a closer inspection of all the wires as well. I check continuity on all 3 phase wires (B/G/Y) from the connector back to the controller, and that too was good. I did not open up the controller though. One other issue occurred when I was removing the controller and I dont believe it cause any damage, but I wanted to mention it as it sure scared the @$#% out of me. I removed the battery about 2 hrs prior, and when I was removing the controller, the positive wire touched the ground wire and and arched for a quick second. As I picked myself up off the floor, wondering what the hell happened, I realized that it must have been still energized somehow. Again, the battery was disconnected and remove 2 hours prior... so I'm assuming that a capacitor was still holding the charge.

Controller.jpg


Looking at the 5-pin silver round-connector, I did notice that some of the male pins were sitting lower in the connector. I was able to gently pull them up with a pair of pointy nose pliers. I'm wondering if they are not properly seating in the other half of the connector and being pushed down. Because of the size of the wires, I did not check continuity on the 5-pin connector. That being said, would you suggest looking at the 5-pin connector first, or looking at the controller or the internals of the motor..?

Connector.jpg


Thank you for any help or advice...!! - I hope Everyone has a Happy Thanksgiving...!! be safe..
 
I need a new chain too for my Bomber. Are the chain available already closed or we need to buy a chain like this one and close it with the rivet?
https://www.skatepro.it/381-12689.htm?stockcode=STP-CH-WL/CRH&gclid=Cj0KCQiAwf39BRCCARIsALXWETxrrMbXeZ3QnUO_H_CgxuX3StkrNmLIL2Nfviz1me2mTgfb9qaNEiUaAp75EALw_wcB
 
bigbore said:
I need a new chain too for my Bomber. Are the chain available already closed or we need to buy a chain like this one and close it with the rivet?
https://www.skatepro.it/381-12689.htm?stockcode=STP-CH-WL/CRH&gclid=Cj0KCQiAwf39BRCCARIsALXWETxrrMbXeZ3QnUO_H_CgxuX3StkrNmLIL2Nfviz1me2mTgfb9qaNEiUaAp75EALw_wcB

bigbore, all you need is a tool like this. I just installed a new chain on my bike. All you do is use the tool to press the pin out enough to remove the correct number of rollers, and then press it back in. You need 94 rollers total for a Bomber. Try not to press the pin all the way out, and it's a lot easier to press it back together. Don't ask me how I know.

Even if you accidentally press the pin all the way out you can still press it back in if you hold your mouth right, it's just kind of hard to get it started

https://www.ebay.com/itm/Park-Tool-CT-5-Mini-5-to-12-Speed-Bicycle-Chain-Breaker-Repair-Compact-3-32/221697176062?epid=710094085&_trkparms=ispr%3D1&hash=item339e2e71fe:g:zoUAAOSwrNlZv3eb&amdata=enc%3AAQAFAAACYBaobrjLl8XobRIiIML1V4Imu%252Fn%252BzU5L90Z278x5ickkgCVySCgrNFPU8Iu85TabMFOgapQwtze57MjmlrwV4xzZb5DHLvicySC6z6QHLL59yUBI%252F5ads5Avud7IYy18Rk7LGbbeT9it3a3ZcHV4YePgr1xxVDmTsXWyQIpxQktsbuW8w72zruahzc9EbLlVhxB9zeIi6EXjtZ6t0TongGVugbj2yDjuycZdTomlwhPwIoTyLb9Ofd7vGrJYQ4gz7YEreayGEZDcwaq6dFFhKnHX9j4%252B0819PqyWMd5RXwl5W%252BTO9GhOk3wCDNBCk9FxsdNEYV3U1T410YfS2bTAD05PfYLf739Kc0oEzmVfCT0ULUcXg0uAFb7WuAi%252Bl9lz709i2ZCpiZBDf1H9lp04kxI3eTDdWL4N%252BnFWmM06JMzyGfX5xIaJ7P3j3JfNSnIIMiYRMPrUQ31j200c9Yi6sA4xHYWRzgEZ%252FQWTUUwRO6YapXlCY%252FFuyBf%252By6882RgwxxDYIdg1my3l3iUV9nqrt49oUNcxRvRkdebnIdlgjK1ZYP8u5a24peU3Q04vY2k1bI2Z64Vcn%252BxUo%252BWv36Pshpc12OqFDuWXAk%252BwMRt7CNssWJ3f97uV7KHN1fxT6%252FNBp8X6zOUSK6CfxGLQtuS2yANA9DeJoc4gHHQkVVGbMiOjDAAkn%252FDqIQLBu79T0jTyKxyWDcGO9JVGszyF8gCnEqBtT0UL7dt6RQj6Mdr3QZtisLXPLF6gxj2dCTlGzLY%252FYntKDXKF9O3IV1XGtxQHBs96oTlRvOeD1f0MdP2XTNUA%7Ccksum%3A2216971760622b23b24e72964821be0c930abdc538f6%7Campid%3APL_CLK%7Cclp%3A2334524
 
My bike's not working. After cleaning it. I turned key on. Turned the throttle a little bit the bike shuttered and then nothing. Disconnected all connectors to let it dry out. Reconnected.. nothing no shutter.Cav3 turns on but no power the wheel. Replaced the hall connector thinking that was the problem. Still no power to the wheel. All connectors look to be fine. Also tried my old motor nothing no power. :( Could I have fried the controller getting water in it?
 
FL bomber said:
My bike's not working. After cleaning it. I turned key on. Turned the throttle a little bit the bike shuttered and then nothing. Disconnected all connectors to let it dry out. Reconnected.. nothing no shutter.Cav3 turns on but no power the wheel. Replaced the hall connector thinking that was the problem. Still no power to the wheel. All connectors look to be fine. Also tried my old motor nothing no power. :( Could I have fried the controller getting water in it?

FL a couple of times after washing my bike it studdered when I tried to give it power. I turned it off and let it dry out a little and it worked ok after that. I felt like it was because the metal sensor connecter got water in it. I'm sorry, I know that doesn't help very much.
 
Back
Top