Intermittent no power problem

rick_p

100 W
Joined
Feb 16, 2021
Messages
260
Location
Los Angeles
Hello,

My ebike, which is powered by a BAFANG RMG06 48 volt 750 watt rear hub motor, sometimes works normally and sometimes it doesn't. When it works normally, it's fast, powerful, and quiet. Here are the symptoms when it acts up. With a fully charged battery I turn the bike on and everything lights up like normal, except there is no power to the wheel via throttle or pedal assist. Here is what is strange, if I roll the bike backwards a foot or so and then hit the throttle, it tries to go, you can feel a little pulse from the motor but then it cuts off immediately. If I repeat this process, but instead of using the throttle I just start peddling, it will try to kick in but it makes a growling noise, at which point I pull the brake lever to kill the power to the motor because that is, it can't be good for the motor. The bike doesn't have a throttle only mode by the way, only pedal assist and throttle mode together. If I give up on trying to get the motor working and just simply peddle the bike, it will sometimes kick in at some random amount of time, and from that point run normally. My first thought was it has a bad controller, but when I discovered the rolling backward thing I started questioning that thought and starting thinking it's a motor problem. Has anyone experienced any of these symptoms? All thoughts and suggestions welcome of course.

Thanks, Rick
 
rick_p said:
There won’t be any ability to check any connections inside here, whatever that material is, it was poured in and solid enough that any attempt to remove the circuit board from the housing would certainly destroy it. On to just testing cables and connectors.

Dang! and the potting is supposed to prevent it from breaking. Guess that one is a brick.

I have de-potted a few things like that but not all potting is the same. I heated mine up with boiling water and it gets like rubber and not so hard to dig out. When it cools off its like a rock.
 
rick_p said:
There won’t be any ability to check any connections inside here, whatever that material is, it was poured in and solid enough that any attempt to remove the circuit board from the housing would certainly destroy it. On to just testing cables and connectors.
5FF392BD-5C3E-4385-8481-BF1C9D074311.jpeg
Hey, at least you knwo it's not internal water damage. :lol:
 
amberwolf said:
The way to test the sensors without a controller is to power them with something around 5v (3 AA, AAA, C, D batteries in series, an old USB wall charger supply for a phone, etc.), and then to wire up your voltmeter's red test lead with a resistor (anywhere from 1kohm to 10kohm is fine), so the resistor connects one end to the red test lead, and the other end connects to the + of the "5v" powering the sensors. That acts as the pullup from the controller during the signal test.

Then put the black meter lead on the - of the "5v" powering the sensors, and use the red lead on each of the hall signals in turn while slowly hand-turning the wheel (backwards in the case ofa geared hub, either way in a DD hub). As long as the signal toggles from about the same as the 5v supply reads by itself, to around 0v-1v, and all three halls give the same readings, then they're generally fine.
I’d like to try this but I don’t understand the instructions. I’m confused on how you power the Halls, where the resistor goes, and where the probes (leads) from the voltmeter go.
 
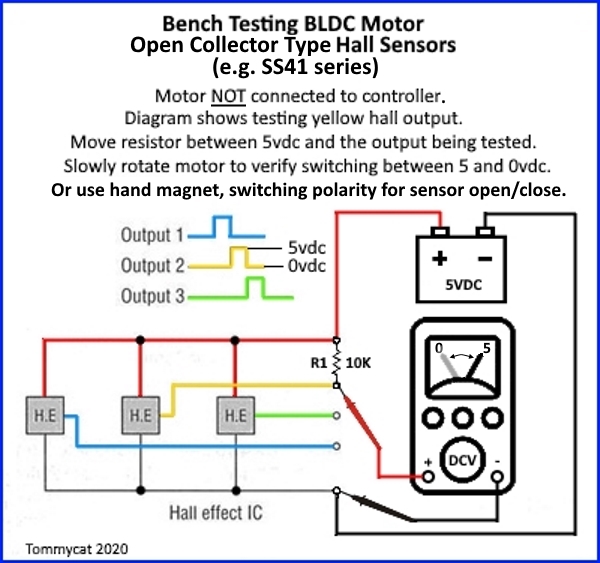
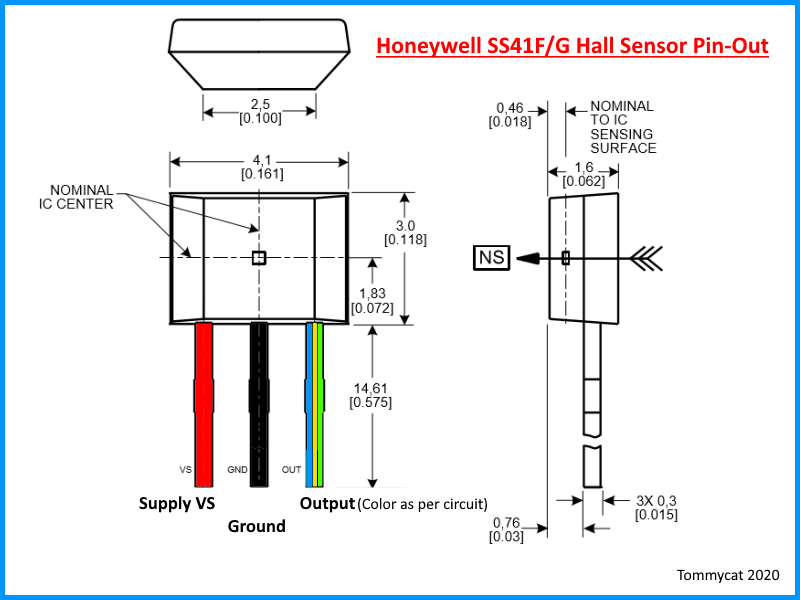
Perhaps these will help...


NktFBwJ.jpg


dAAKziF.png


As taken from this thread... see it for complete details.
Testing BLDC motor's Phase Wiring - Hall Sensors and Wiring.


Regards,
T.C.
 
TommyCat said:
Perhaps these will help...
As taken from this thread... see it for complete details.
Testing BLDC motor's Phase Wiring - Hall Sensors and Wiring.

Regards,
T.C.
Many thanks, this helps immensely, I couldn’t figure out from @amberwolf’s notes how the positive probe could be used for two things at once, but now I think I get it. To make sure I don’t make a horrible mistake, I’m going to construct my tester, take pictures of everything, and post them here before I do the test, just to make sure I understand the schematic correctly and am using the correct resister.
 
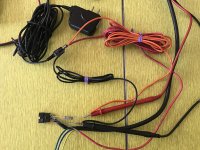
This is just a mockup, I'll solder and shrink wrap all the wires and probe connections to ensure nothing can touch (short out) during an actual test, I just want to make sure I understand the schematic before I do that work. The AC adapter is 5 volt, 1 amp, pin positive.
complete-tester.jpg
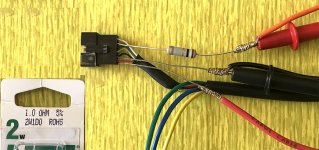
If this were a real test, I would be testing the blue Hall sensor wire. Please look at the package and let me know if this is the correct resistor for the job.
connected.jpg
 
Mock-up is not quite right...

If you were to move your meter's RED test lead probe to the other side of the resistor, leaving everything else the same. I think you would have it.

Review the diagram...
5vdc power supply to hall sensor 5vdc supply in and one side of the resistor, Red meter probe and hall sensor signal (output) wire that your currently checking, on the other side of the resistor.
 
TommyCat said:
Mock-up is not quite right...

If you were to move your meter's RED test lead probe to the other side of the resistor, leaving everything else the same. I think you would have it.

Review the diagram...
5vdc power supply to hall sensor 5vdc supply in and one side of the resistor, Red meter probe and hall sensor signal (output) wire that your currently checking, on the other side of the resistor.
I’ll flip the resistor around. I’m not quite sure why you instructed to review the diagram again though, is there something else not right or not recommended other than turning the resistor around?
 
rick_p said:
I’ll flip the resistor around.
The resistor doesnt' matter which way it is.

What matters is where the red meter lead is. It has to be on the hall connector end of the resistor, while the 5v has to be on the other end of the resistor.
 
In an actual test, you don't want to be using a 1 ohm resistor. :wink:

I've done a similar setup before but using a little 9v battery as a source. Most hall switches are rated for 24v.
 
rick_p said:
... I’m not quite sure why you instructed to review the diagram again though, is there something else not right or not recommended other than turning the resistor around?

Just wanted to make sure that you understood my written directions by comparing it to the illustration. So that you would end up with this...


fELkBjM.jpg


Although it does recommend a 10K resistor. :wink:
 
amberwolf said:
The resistor doesnt' matter which way it is. What matters is where the red meter lead is. It has to be on the hall connector end of the resistor, while the 5v has to be on the other end of the resistor.
Ah, I get it now, it’s the location of the probe being on the other side of the resistor from the power source. @TommyCat’s picture is worth a thousand words.

fechter said:
In an actual test, you don't want to be using a 1 ohm resistor. I've done a similar setup before but using a little 9v battery as a source. Most hall switches are rated for 24v.
I’ll go back to the electronics store and see if I can get a 10k ohms resistor. I have 9 adapters as well.

TommyCat said:
Just wanted to make sure that you understood my written directions by comparing it to the illustration. Although it does recommend a 10K resistor.
The schematic drawing wasn’t clear to me, but your picture is worth a thousand words, I get it now, the probe needs to be on the other side of the resistor from the power source. Nice photoshop work by the way!

The electronics store was extremely low on supply of resistors, the employee said they’re phasing out stocking component level supplies because there’s no demand for them anymore. I hope I don’t have to resort to ordering a 10k one online because at that point I might as well order one of those ready made testers for $20. :(

On the upside, this thread has been incredibly insightful for me, I have learned a ton, and I’m sure it will be found and appreciated by many others. My gratitude to goes out to everyone contributing. :thumb: :D
 
rick_p said:
The schematic drawing wasn’t clear to me, but your picture is worth a thousand words, I get it now, the probe needs to be on the other side of the resistor from the power source. Nice photoshop work by the way!

:thumb: Glad to see we are on the same page.

The photo editing program I used was paint.net if any one has interest in a free photo editor with good capabilities.

May I use your picture in my hall sensor testing thread? Better yet, if you have the time to submit a good picture of your final set-up that I could use. It would be appreciated.

Cheers!
 
TommyCat said:
The photo editing program I used was paint.net if any one has interest in a free photo editor with good capabilities.

May I use your picture in my hall sensor testing thread? Better yet, if you have the time to submit a good picture of your final set-up that I could use. It would be appreciated.
I have used Paint.net, it is a wonderfully powerful tool for Windows that is 100% free, I highly recommend it for Windows users who want to be able to edit images.

Yes, of course you may use a picture of my final setup, it’s the least I could do for all the help you’ve given me. I went back to the electronics store and they didn’t have any 10k ohms resistors, but there is another store around 10 miles from me that should have more of a selection to choose from. I’m going to try and make it over there this afternoon.

By the way, do you also recommend using a 9 volts as opposed to 5 volts as @fechter mentioned?
 
I went to another electronics store, the only other store in a reasonable distance in fact, and the only resisters they have that are close to the recommended 10k are 12k, which are 1/4w, 5% tolerance. I bought a pack in case it will work. Please let me know! Also let me know if it's better to use 5 volts or 9 volts for the power source.

Thanks, Rick
 
12kohm will work fine.*

9v works; if you want to test under "actual controller ocnditions" then 5v is what those use. (actually usually around 4.2-4.5v, because osme of them use a diode in series with the hall supply, probably in an attempt to prevent induced voltage spikes, etc from getting back into the 5v supply and damaging or interfering with MCU / etc operation).


* the higher the resistance, the less the current flow, and the more induced noise that is possible in the signal. The way the hall signal works is *almost* like a current loop (like MIDI uses), which is less sensitive to induced noise than a simple voltage-based signal.
 
rick_p said:
...Also let me know if it's better to use 5 volts or 9 volts for the power source.

I agree with Amberwolf. Using a voltage source that is as close to your actual supplied 5vdc source of your controller. Would be, IMHO, a better choice. Especially if working on something with "intermittent" operation. IE: A stronger power source may be able to overcome damaged wires or connections, or perhaps a weak sensor. Sometimes going from 5vdc to 12vdc provided by some controllers will correct a motor hall sensor issue.

The "why" of resistor size selection...

In this testing set-up, the resistor is used as a current regulator. To keep the current below the capabilities of the hall sensor's electronics.
In my notes, I have that a motor's hall sensor will "sink" or short the output leg to ground using about 6.8mA using 5vdc as operational voltage. (That's point zero zero six eight amps) This is a good reason why excellent connections and sound wires are a must with such low current.

Using the formula: Volts= Current X Resistance or it's equivalent Current= Volts divided by Resistance...

Dividing your source voltage used, by your resistor used, will give you the value of the current of the grounded signal wire.

Examples are:

1 ohm.... 5/1= 5 amp
1K ohm.. 5/1000= .005 amp
10Kohm.. 5/10000= .0005 amps

Like Fechter warned, a 1 ohm resistor would not be a wise choice. I think the maximum sink is 20mA. (.02 amp) 1K would be more in line with your actual usage. And the reason higher values are recommended that will also work, is that others may be using higher source voltages. Better safer than sorry. :wink:
 
TommyCat said:
I agree with Amberwolf. Using a voltage source that is as close to your actual supplied 5vdc source of your controller. Would be, IMHO, a better choice.
5 volts it will be!
TommyCat said:
Dividing your source voltage used, by your resistor used, will give you the value of the current of the grounded signal wire.

Examples are:

1 ohm.... 5/1= 5 amp
1K ohm.. 5/1000= .005 amp
10Kohm.. 5/10000= .0005 amps
Mine will be:
12k ohm.. 5/12000 = .0004 amps

With the idea being less is safer, mine should be safe.

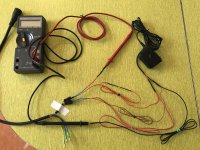
Finished tester:
complete-tester.jpg
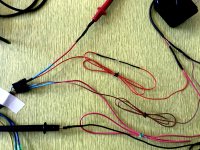
A closer look at the connections, note that again I am connected to the blue Hall sensor at the moment:
tester-close.jpg
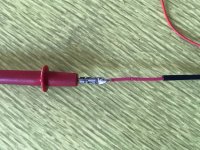
A look at the probe connection inside the shrink wrap:
probe-connector.jpg
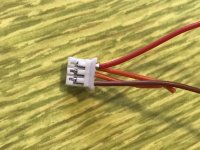
I dissected an old computer connector to use as mini slip-connectors at the bike's connector. Note that I have already partially removed the red wire, which conveniently has two wires spliced in it, which I used for the inline resistor:
mini-slip-connectors.jpg
 
TommyCat said:
Looks good. :)

How's everything testing out for you?
I went out to the garage to start testing last night but before I started on the Hall sensors test, for whatever reason, I decided to install the controller to make sure it was sending 5 volts to each sensor because that was something I had never checked. Well, as I was plugging in all the connections, the slip-connector for the main positive wire from the battery to the controller slipped right off the wire :shock:

When this whole process began, the first test I did was to disconnect and reconnect every connection... except the two wires from the battery to the controller, because they were shrink wrapped, and I distinctly remember tugging at them a little to make sure they felt snug and tight. It wasn’t until much later on that I decided to cut the shrink wrap to remove the controller to have a look inside it, and for whatever reason, I didn’t notice it being loose at that time.

Needless to say, I am completely embarrassed to discover this after all this trouble and support everyone has given me. :| I re-crimped it and then proceeded to solder both wires to their connectors. At that point I realized this may or may not have been the cause, but there was a good chance it was so I decided the fastest and easiest test would be to ride the bike and see if the problem arises. So far, I have been unable to reproduce the problem, even after stopping and starting, powering up and down several times. It was only one ride, so there is no guarantee I’m out of the woods yet because it was always intermittent, but I have to start work now and plan to go for another test ride tonight.

If the problem is solved I will say this, I apologize for dragging everyone though this with me, but for what it’s worth, I learned a ton, and hopefully this thread will help others. :)

One more note, I did test the controller output to the sensors after fixing the battery wire, and it’s getting 5 volts in, and putting out 3.3 volts to each sensor wire.
 
I find myself wondering if this bike charges thru the discharge leads, and if answering the question, posed early on, about if the problem only occurs after a charge, which the OP dismissed as it "couldn't possibly be part of the problem", would have saved a LOT of totally unnecessary, wasted, time, effort, and energy on the part of several people.

Every single thread in this section should have an automatic instruction to check thoroughly for loose wires and connections. This instruction should be detailed, with pictures, repeated at least three times, with a clear and emphatic instruction to perform the procedure AT LEAST twice.

Because they won't freakin do it, and they won't do it right the first time, and a clear majority of the problems are totally and completely due to this failure.
 
Back
Top