Headway 38120S condoms

voicecoils

1 MW
Joined
Sep 16, 2007
Messages
2,173
Location
Sydney, NSW, Australia
I've been thinking about the Headway cells and how to package them well for DIY packs.

A few things came to mind:
* having a small amount of space between cells is a good idea for airflow and mechanical isolation
* the body of the cell is live and positive (the cell 'can'). On the negative end, there is a close contact point between the negative contact and the positive can. This could cause a short if care is not taken.
* the can's body is covered in a thin blue plastic coating. It is only reasonably robust and can be cut or rubbed off from vibration.

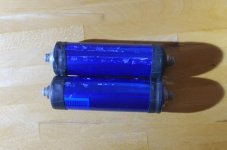
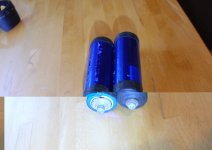
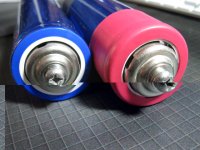
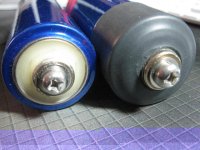
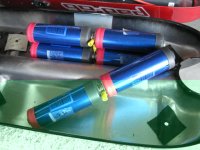
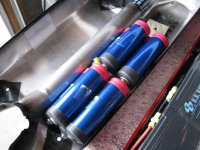
So...I decided to make use of some old road bike tubes that had big punctures, rendering them useless for their original purpose. I call the concept, headway condoms...

hw-condom-1.jpg
View attachment 1
hw-condom-3.jpg
hw-condom-4.jpg
(please excuse the old bits of RTV silicon on the cells)

The tubes were for 700x23c tyres. Tubes for 700x28c tyres might be a bit easier to stretch over. I didn't cover the whole cells so that their would be a pathway for heat to escape from the pack between cells. The possibility of a short between at the negative end of the can is decreased by a large degree. Sitting 2 cells side by side gives just a nice 1-2mm gap between the cells, allowing for a tight pack to still be constructed.

What do you guys think?
 
Excellent idea, and cheap too!


AVS
 
A+ good idea. Protects your cells from both vibration and STDs at the same time, it's like hitting two birds with one stone.
 
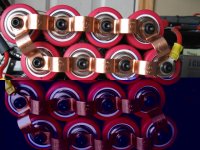
way cool, i am counting on the plastic to hold out for a long time, but used construction adhesive as an extra conformal insulation coating, and it holds the cells together:
 

Attachments

  • DSC00673.JPG
    148.5 KB · Views: 3,383
The cell's body is electrically connected? :shock: I'm starting think this might be an industry standard and I've never noticed it, but now that I do, it seems somewhat shocking. Regardless, that's a great idea to deal with this serious vulnerability.
 
I use nylon rubber for everything from solar CFL holders to battery holders. Good stuff. They look good with those condoms on them.

Here is my 5watt solar clf with a similar idea as yours but with a totaly different use.


Attachments

  • solar clf.jpg
    35.2 KB · Views: 3,294
Yes the can is live. I had a similar idea to add an extra layer where the pos and neg are in close proximity.
Colour coding the ends made it easier to remember which end was which, but its no guarantee that you wont stuff up.

Img_0736.jpg

Greg
 
voicecoils said:
So...I decided to make use of some old road bike tubes that had big punctures, rendering them useless for their original purpose. I call the concept, headway condoms...

That is a good idea!

When I first heard about this, I thought someone was covering the whole cell with rubber, with the excess insulation vastly reducing the cell's ability to shed heat. :evil:

But your implemention of wrapping the ends puts contact areas at the ends leaving cooling at the center, pads at the contact points, and protects that shorting vulnerability I am so concerned about on the negative end of the cell. :D :D :D

Good Job!

-JD
 
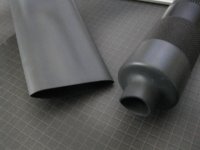
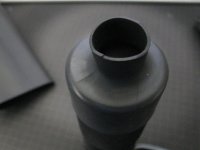
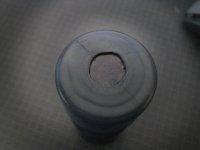
I had already planned on using some bike inner tube in my upcoming build, but not quite like like you showed here with it over the end like that... it's pure genious!!! This made me run out to the garage and try something... this is a piece of large diameter heat shrink (1.5"). Certainly more expensive than a used up innertube though. This is how it turned out :)

IMG_0607.JPG
IMG_0608.JPG

And with a little trim:

IMG_0609.JPG
 
Thanks guys, I think it's a great use for irreparable bike tubes that tend to accumulate.

The heatshrink scoot used looks like a nice option too, if you don't have any bike tubes around or want something more permanent, that looks like a good way to go. Did you heat shrink the end of a flashlight?

tailwind That looks super neat, nicely done.

swbluto That's correct, as I understand it. I think we have to keep in mind that cells are generally not manufactured for DIY use as the intended purpose. When cells are engineered into a case, pack or product they're well protected. Think tool packs or notebook computer batteries. Our market is minuscule still.
 
oatnet said:
But your implemention of wrapping the ends puts contact areas at the ends leaving cooling at the center, pads at the contact points, and protects that shorting vulnerability I am so concerned about on the negative end of the cell.

Thanks JD. I was trying to think of the mechanical and thermal issues in pack building along with the electrical concerns. I had your photo of the well insulated busbar stuck in my head 8) but insulating busbars seemed like too much effort!
 
voicecoils,

How on earth did you get 700x23c tube segments over the end of those cells?!? I've tried for about an hour and I can't get mine to stretch enough. Did you have to use some tool or mechanism to stretch them over the cells?

I'd really rather be able to get a 700x23c or 700x28 tube because they look to more securely cover the positive can edge on the negative side of the cell. I've put mountain tube segments on my cells for the moment and while they are snug to the can of the cell, help with shock absorption and help prevent the cells from rolling off my table they don't hug the end caps of the cells nearly as well as the examples in your photograph do.

Cheers,
--Adam
 
ahambone said:
How on earth did you get 700x23c tube segments over the end of those cells?!? I've tried for about an hour and I can't get mine to stretch enough. Did you have to use some tool or mechanism to stretch them over the cells?

You have to pre-stretch the segments first. Otherwise you're in for a big battle as you found out :wink:

If try to use a long segment of tube, it's much harder to stretch.

A tool could probably be made by cutting the right diameter PVC pipe in half (lengthwise) and using it to stretch the segments over the cell and then release one side of the PVC, then the other.
 
Thanks for the advice! Now that I know it can be done without some kind of super-duper-expenseive-hydraulic-stretching tool I'll give it another try!

Cheers,
--Adam
 
What about a pipe flaring tool like they use on exhaust systems? Not sure if it will work, for your application, but just an idea, and they are pretty cheap.
 
You could patch a leaky tube and inflate it a lot before cutting it into sleeves...

EDIT: another thought... rubber relaxes quite a bit with heat; a hairdryer could help expand pre-cut sleeves.
 
I combined all the great ideas, concepts and precautions from this thread and this is was my result :mrgreen:

Thanks for starting this thread voicecoils :D

They're gonna' be saweeet 8)


IMG_0779.JPG

IMG_0780.JPG
 
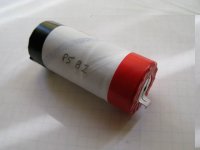
1.5 inch shrink tube... fits just loose enough to fit over the cell. Found out by messing around in the first couple of tries that shrinking it on tight to the lower cell body first was key. Otherwise when the end shrinks up, it pulls the condom off... and that's not good. :roll:

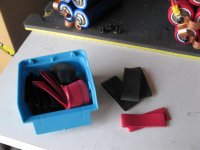
Don't know brands.... had to go to two different electronic stores in town. Found the red stacked in one store that was more of recycler than a retailer for new merchandise.... looked like it had been there a very long time. :lol: Found the black stuff at another more upscale supplier and it may have even cheaper cost, but can't precisely recall. :oops:

I think I can use a bit less tube on the rest of my cells
 
So I think I have down to an efficient recipe form 8)

1.5" shrink tube
Positive end 3/4" sections
Negative end 1" sections

IMG_0808.JPG
I used my trusty heavy duty paper cutter to keep the segment lengths consistent and the cuts straight :evil:

IMG_0809.JPG
Then as I heat them with my special $5 heat gun from Harbor Freight Tools :| , I make sure that I shrink the end around the cell body first while turning the cell in my hands. Then I shrink the end that extends over the end of the cell and tamp it down with my fingers while still warm. While my consistency was lacking, I think they'll work fine :mrgreen: . Next time I may add 1/8" to the piece lengths. :|

View attachment 1
IMG_0813.JPG
 
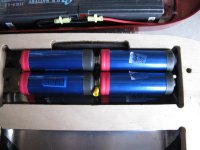
The reason this approach is just what the Doctor ordered is that my packing dimensions are fixed, and staggered stacking is needed to fit the cells in the battery compartment I am using. The fit and cell spacing is now perfect thanks to following the initial idea/inspriation of this thread. 8)
IMG_0794.JPG
IMG_0796.JPG
IMG_0797.JPG
 
crashnfool said:
How did you get the cells to stay together like that????
For holding them together sideways I plan on using an inner tube or maybe just a couple of zip ties. The rubber (heat shrink) contact points between the cells should be enough to keep them from slipping and sliding around... at least I hope so :roll:

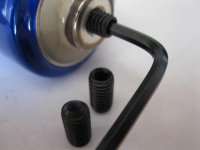
For the end to end cell connections, i am using some m6 x 10mm long set screws. 12 mm long might be even better depending on the thickness of strap or ring connector used for the balance lead. I am comfortable with doing this becuse of the rigidity of the battery compartment surface where the batteries will be laying against... they should be evenly supported to avoid stressing the battery terminals laterally. Besides I think these terminals appear to be very strongly constructed.

I tighten them into the negative side since it bottoms out nicely there... much more shallow than the positive terminal. Then screw the positive end of the other cell on to it. I may or may no end using blue locktite thread sealant, but I do not think it will be necessary. I want to be able to disassemble and reassemble them easily in the future.

IMG_0820.JPG
 
Back
Top