JD's BMC V3 Build - in progress

Man, I hate making newbie mistakes. :twisted:

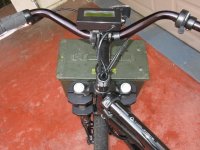
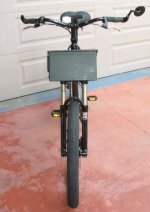
Got the Controller's from Ilia. Changed my BMC to Mini XLR. Hooked it up, it worked right out of the box, and on the bench was obviously much more powerful than the Kelly. Too late to ride, so I'll just set it up for tomorrow.

I can't find the pack joiner I was using, so I grab an old one from a box. Repeat my mantra as I hook up each cell - red-to-red, black-to-black. Start thinking about the pack I used to test the connection getting charged by the fresh charged pack, and whether I should leave them disconnected after testing... And in horror, saw I was sliding the power connector onto the controller, red=to-black. Yanked it away right away, but the controller fried as did a tab in each battery pack. )(#@*$)(*#@$)(* While I pulled the smoking packs from the case I found the pack-joiner I have been using with that pack, which would have gone red-to-red.

Stupid newbie mistake, I haven't done that for a few years. Now I Gotta work the pack, and buy another controller from Ilia. I hate making newbie mistakes. :oops:

Oh well, that means tonight is "Drink Night!" :D

-JD

-JD
 
Got the controller I bought from Ilia to replace the fried one.

I tried the replacement analog 72v35a xlyte and it pulled much better than the Kelly controller. At 36v the controller stayed cool, at 72v it did heat up, not as bad as the Kelly, but I think if I had been doing a long run it would have been a problem. Next I'll finish up my little a123 48v6.6a pack and see how that performs.

I got a chance to put andersons on the 'new' digital 72v50a xlyte and try it at 72v with the BMC V3. It was very jerky on startup, like the controller was cutting out, but once I got it over 8-10mph with pedalling it was smooth and fast. However, I could only turn the throttle up about 1/2 way - I am not sure what the correct rshunt value is (currently set to 1.399) but per my CA this happened when I tried to exceed 1150-1200w at different speeds on different grades.

Onward and upward!

-JD
 
I added 4 CPU heat sinks to my 72v clyte analog controller and it now runs cool to the touch at 75v. Probably two of them would be enough. They are cheap at $3 each.

http://www.google.com/products/catalog?sourceid=navclient&rlz=1T4DKUS_enUS273US273&q=heat+sink&um=1&ie=UTF-8&cid=11687352573304535473&ei=gwr3Su7mKZGeswPnpKnwCQ&sa=X&oi=product_catalog_result&ct=result&resnum=5&ved=0CCUQ8wIwBA#ps-sellers


001-8.jpg
 
Well, some progress on this.

The front hub is off being laced by John Rob Holmes - I just wasn't finding time, and he is actually cheaper than if I misordered just one side of the spokes.

I got the new BMC 48v50a controller from Ilia last night (my 4th-5th great transaction with Ilia/ebikes-sf), and you see it in the middle below between an xlyte analog and 18-fet for scale. Lots a wires - the leftmost 4 wires are actually jumpers for options. Once I get things sorted out I'll trim them back. Below that are assorted connectors. On the right are the power and phase connectors - instead of the 10ga on the diagram, they are all pairs of smaller gauge wire with really thin insulator. Today I trimmed these all way back (since I have long 8ga leads from the battery and the V3) and put andersons on them. I also finished the battery connectors and charging harness for the 48v6ah a123 pack for this bike, and got it charged and balanced.

Tomorrow I need to change the flat hall connector to the mini-xlr I put on the BMC. I wired the hall on the BMC to match the layout on the xylte controllers, so now I'll just match it wire-for-wire with the diagram I got from Ilia's site (copied below).

I also ordered a black disk rotor to carry the theme even further.

-JD


file.php


bmc_xlyte_wiring from Ilia.JPG
 

Attachments

  • BMC_controller_9178.jpg
    143.2 KB · Views: 1,335
Hey SWEET!!

I was wondering if there was a de-facto wiring standard for the mini-XLR connectors for hall sensors.


Now...I have a MAC Shanghai, which is a BMC clone (I think)...

So do I wire it as a Crystalyte or a BMC? :)
 
Mark_A_W said:
I was wondering if there was a de-facto wiring standard for the mini-XLR connectors for hall sensors.

Be careful! There is not, and you can blow hall sensors if you wire it up wrong. See how the picture above shows different standards between BMC and xlyte. I don't know MAC, but I saw a picture of one that reminded me of the old Pumas. Doesn't mean squat in terms of the wiring though.

========================================

I got the hall connector finished up, and I think it is correct... The wheels spins in the right direction, but throttle seems to drop off the more I turn it. Maybe the controller cuts out on 'runaway', or maybe a throttle issue. I tried a pair of xlyte throttles but neither one worked at all, but the one I hacked from a tidalforce at least spun the wheels.

I started to get ready for a test ride when I heard the patter of rain. This is the start of the SoCal rainy month last week or two of Dec and 2-3 weeks of Jan), forcasted for tomorrow but apparently here now. Hope there is a break so I can road-test!

Anyhow, I built a little 15s3p a123 M1 pack that will hang under the frame between the pedals. This will put the 8lb+ of battery weight in the center of the bike, and underneath the center of rotation (yaw?). I'm gonna build a little metal box for it and paint it flat black, so it should be for all purposes invisible to the casual observer. The wire end of the pack will be bolted to the double-kickstand housing, and the power/charging connectors will be accessed right by the rear wheel. The front side was intended to end right in line with the frame, but my design for joining the rows was flawed so there are big gaps between each column and the pack it will stick out a inch or two.

What I did was take (3) packs of dewalts unfolded into tubes, tape them to together, and refold them at two spots to form the "z" shape you see in the first pic below. I paralleled the three cells in each row by soldering a charging wire to all 3 factory tabs. In the next pic you can see the "z" formation collapsed, and the 4th 3s3p row stuck on top. In the background are the cells that were formed into the 2s3p section. Note that there are is only one row of cells in the 4th column - the double kickstand has a metal tab and spring that intrude into one side of this space, which is why the pack is 15s instead of 16s. I made a 2s3p section that is rotated 90* to the other cells to use the remaining space.

cells in a z_7941.JPG

View attachment 2

Although I only plan to pull 50a from this pack, I used 8ga discharge wires. I plan to bulk charge it in 15 minutes through a pair of 12ga charge leads. I also have a balancing-charger connector that I hope I don't have to use much. The pack has something like 240 usable wh, and I'll be very curious to see the whm I get from the overall setup.

For the power train part of this bike, I have added very little weight:

8lb 2.6oz - battery
1lb 14oz - controller
12.8lb motor wheel (Minus weight of average wheel)
??? Throttle. Cycleanalyst, 8gau motor wire upgrade, power switch/fuse, battery box

Of course, the RockShox Boxxer double-crown fork, the durable double kickstand, the Thudbuster, the Alex DX-32 rims, Hookworms, Kenda downhill tubes, and kevlar lines add weight too, but those are comfort issues rather than powertrain.

Right now I am hoping to end up with a ebike that is light, but can climb hills, achieve 35+ mph, range 6+ miles at 20+mph, lunch-charge in 15 minutes, and is so stealthy that people scratch their heads wondering how easy you make pedaling look. :p

Here is a pciture of the battery and the controller wiith connectors, and then a picture of the battery wrapped in cardboard, ghetto but good enough for my tests.

Batt and Controller_9182.jpg

batt in cardboard_9186.jpg
 
oatnet said:
Mark_A_W said:
I was wondering if there was a de-facto wiring standard for the mini-XLR connectors for hall sensors.

Be careful! There is not, and you can blow hall sensors if you wire it up wrong. See how the picture above shows different standards between BMC and xlyte. I don't know MAC, but I saw a picture of one that reminded me of the old Pumas. Doesn't mean squat in terms of the wiring though.


Oh, I wasn't going to wire it completely as per the diagram. With a MAC Shanghai and an Infineon controller, all the colours match, you don't mix and match. I just need to pick one "scheme", and the wire both sides according to that. Probably the BMC motor pinouts, then match the female to that.
 
Test battery up front.jpg


I've been busy, despite my lack of posts. Note the adaptor mounting the controller to the water bottle holder, hidden in plain sight. I got the black boxxer forks mounted, and JRH's excellent mounting of the "aircooler" front hub to the the black DX-32 rim with black spokes, and added a brake disk that is black except for where the brake pads touch.

Because there was no star nut in the lower crown of the boxxer forks, I was able to run all the wires/cabling from the handlebars down through it to clean up the install. The controller and power wiring are just roughed in, I'll do a permanent install when I mount the battery...

Which is the most important point of this build, Something totally revolutionary for the way I build bikes. Where is the battery? Wrapped up in the towel up front, strapped to the upper part of the Boxxer's stanchions. This does amazing things for the bikes ride and handling, because is puts the weight over your handling wheel, the front tire. On my xtracycle, with x5 rear motor and 72v12a life in the freeloaders, turning the front wheel or leaning the bike was more of a suggestion than a command. The frame would flex until all that weight in the back sprang into line. With the weight in the front like this, the rear wheel is just the tail wagging the dog. Leaning into a turn feels more snappy, precise. The extra mass also acts as a steering damper. I guess this is why motorcycles have gas tanks in that general region. Typically I would be worried about having mass so far above the center of gravity, but since it is centered directly over the steering input it appears to not be an issue, in fact I think it has improved handling, and it is certainly the spot with the softest ride on the bike! It was a real pleasure, when trying to fit through a door, to simply reach back and pick up the rear of the bike and move it around.

Test battery up front 2.jpg

But wait, it gets better. I ordered 16p/48v of those new 15ah prisimatic a123 cells and was considering for a mule to test them on. I was thinking about fitting the pack under the crank between the pedals, where the current battery was supposed to go. However, the cells are just a little too wide for me to be comfortable with, at 6" I was worred about ground clearance. Then I realized this pack - roughly 4" x 6" x 9" - would fit handily inside one of the Bell Handebar Bags I like to use. So the 8lb towel-covered battery is just for testing, ultimately I'll have a 14lb battery with more juice than I need for my daily commute, plus the ability to charge in under 1/2 hour. Being in a front bag will make it extremely stealthy. Since the shape is more compact than my "test" pack, it will have a smaller moment of rotation too.

But what about the aerodynamic impact, you ask? Oh, I have a fix for that too, onsite and just waiting for me to install... It depends on whether the cells arrive before I get it on and photod!

-JD
 
Great work oatnet, I love this build and have a similar one starting soon.
I will be using a dual suspenssion Giant NRS frame with tripple tree downhill forks and 24" wheels with 2.5" hook worms.
I want a "supermotard" look. I will start a build thread when I get the frame, a friend is donating it very cheap.
I too am keen for a 16s 15ah pack of prismatic a123s.
I am planning on getting a BMC V3 and BMC 50amp controller from ilia but am waiting for his results with modified phase wires.
How is your phase wire mod performing?
Keep up the good work.
Cheers,
Matt.
 
Phase wire mod is running cool, but I haven't really put serious time through it, still getting things sorted. The good news, however, is Prisimatic a123 Pron! My 16 (16ah) cells arrived today. They are stunningly thin - thinner than an AAA - and roughly half a standard sheet of 8.5x11 paper, not counting tabs.

So, (16) of these cells ships at 17.6 lbs, 7.9832kg. cell_man reports a shipping rate of 22.89USD on first 0.5kg and 7.16USD for remaining 0.5kg. At that rate, you should expect to pay 115.97 for shipping; I paid about $1/cell more, I pleased enough with the chemistry to not sweat it, but you might be able to negotiate a better rate than I got.

I've only had a look at the top one on the stack, it seems to have weathered the trip OK, I have to settle on a termination method. I'll be bouncing off the walls till I get that sorted!

-JD
 

Attachments

  • box on scale.jpg
    box on scale.jpg
    75.8 KB · Views: 4,454
  • contents.jpg
    contents.jpg
    71.6 KB · Views: 4,454
  • two cells in a tray.jpg
    two cells in a tray.jpg
    60.2 KB · Views: 4,454
  • thinner than an AAA.jpg
    thinner than an AAA.jpg
    37.8 KB · Views: 4,453
  • cell compared to a sheet of paper.jpg
    cell compared to a sheet of paper.jpg
    75.2 KB · Views: 4,454
I weighed the cell, and my kitchen scale reported 404g instead of the 401g manufacturer claims. Maybe my scale is inaccurate, maybe they intended some of the tabs to be trimmed off. Here are some dimensional reports:

View attachment 2

sides_8.25.jpg

edge_aaa.jpg
 
Dang, looks like a sweet ride! I may have to try the fork mounted pack on a build. I know I like how the bike handles with the packs up front on the top tube, so putting them on the fork would be similar I bet. Plus it would be decently easy to mount.
 
I bought (4) WenTeq clamps that are used to mount lead weights on race cars. The inner diameter is 1.25" (32mm), perfect for the upper stanchions on Boxxer forks (<2010), with mounting holes for 1/2" bolts. Overkill for what I need, larger than I would like, but the only ones I found that were up to the task. I test mounted them on a set of forks, pictures below. It looks like I will have some interference with the downtube on extreme turn angles, more extreme than I could use while actually moving, but worthy of a rubber stop.

I am going to lay the cells flat instead of on edge, which will make the box a little bigger. The 14lb pack will be 7"x 10" x 4.5", will I'm going to have an aluminum box built a 7" x 7" x10" ID. This leaves me the ability to carry a few things in the box, or expand the battery to 72v/21lbs if I end up scrapping the V3. The green towel on the front of the bike is about 7" tall and 18" wide, so picture a diamond-plate box about the same height but 4" shorter on either end.

-JD

clamps_9686.jpg

forks_9687.jpg

mounted_9692.JPG
 
disndat said:
Hey JD where in Socal are you?I'm in santa monica right on the beach.If you are close maybe we could compare bmc bikes.PM me if you want.

Chris

Hey Chris, sorry I missed this post. When I get enough time to get this bike fully roadworthy, lets give it a shot!

-JD
 
Hi John,

good to see some progress on the pack. The termination method you showed on the other thread looks interesting and very straightforward. Be interested to see how it works out. What are you using for a BMS?
 
cell_man said:
Hi John,

good to see some progress on the pack. The termination method you showed on the other thread looks interesting and very straightforward. Be interested to see how it works out. What are you using for a BMS?

Hi cell_man!

Please call me JD, the john is down the hall with the shower, tub, and sink. :lol:

I gave up on BMS's back in '07, and even today they seem like a high failure point in packs. :evil: I know the top dogs here are building reliable one's, but I lack the skills and time to assemble one :oops: , and I can buy a lot of replacement cells for the cost of a prebuilt one. I have been tempted to buy a few for LVC my VW Bus conversion, but haven't gotten there yet.

For charge balancing, I went to single-cell charging at the for balance. 8) I have a bank of 2a Voltphreaks chargers for smaller cells, and use a bank of Vicor 20a DC-DC converters for my larger cells like the 80ah in my VW Bus. Several reputable folks have claimed that if you parallel-charge quality LiFePO4 cells prior to making a pack from them, they will stay in balance. I will test that theory with this pack, and accordingly I have kept the cells paralleled for a long time, with several charges. If it doesn't hold true, I'll bulk charge most of the time and run a balance charge every few weeks, using the 20a or 2a charger banks.

For discharge/LVC, I'll use a cycleanalyst. The first few runs I'll watch voltage closely and get a baseline of how many WH the pack actually supplies. Maybe it is simply from learning to scan from flying, but at any point in my ride, I'll know how many wh I have pulled from a pack, and what the general voltage is like. I count on a CA to be my gas gauge, and I have never run a cell down with it. Of course, it helps that I size my packs to the build's duty, such that routine rides are within 70% of the pack's rated capacity.

While this works for my experience level and the way my brain is wired, it may not work for others. Don't try this at home kiddies!

-JD
 
Sounds good JD. I really like the idea of single cell chargers myself. I find the cells stay pretty well balanced as long as you don't discharge them very deeply and you might want to check the discharge on a cell level to see where the cells start going off the cliff as they say, but with single cell chargers it's never gonna get out of balance.

I've not had any problems with the BMSs I've been using but I'd like to rig something up to enable me bypass the Fets in a low current BMS and use a signal from the BMS to trip the brake signal or something. The 12S 30A constant BMS I was using handled 65A of controllers with 75A peaks shown on the CA just fine but I'm probably pushing my luck a bit.
 
I was in the process of laying out the dimensions for my front battery box, to cut it out of diamond plate and weld it in TIG class. I noticed, right in front of me, one of the old ammo cans I bought at a swap meet, without logic or purpose. It was the ideal size for the a123 prisimatics, and figured I'd give it a go instead.

I had the choice of bolting the ammo can from the base, which would let me lay the cells flat but looked out-of-place, or bolting it from one side, which looked reasonable but rests the cells on their edge. I bought a couple of these ammo cans to get a quantity discount (did I mention the bit about "without logic or purpose"? :lol: ), so for now I drilled from the side and I may try another one the other way later.

Dropped $22 at ACE for a 9/16 metal drill bit, and a bit more for (4) 1/2"x1" hex bolts/plate washers/lock washers. After a suprisingly fast session on the drill press (140mm apart, 20mm and 145mm from the bottom, the ammo can was ready for mounting. I bolted the 32mm clamps onto the boxxer upper stanchions, and the box went right onto them with no fuss. The clamps are large, but happen to land right in gaps in the frame so there is no interference, and they add some agressive look to the forks. 8) The upper crown does hit the top tube, but I put the bumpers cut from the stanchions no the top tube and they work great. Tight turns are not possible, but the rear end of this bike is easy to pick up and move.

The entire assembly (clamps/bolts/case) weights 5lb 6.4oz without the waterproof lid, and 7 11.5oz with it. This may sound like a lot, but is comperable to or lighter than a rear rack, a sturdy metal case, and hardshell packing on the cells etc. The lid is completely removable, and a whopping 2lb 5oz, I might replace it with something lighter, or I might live with it. This case could just as easily handle the 20ah a123 Prisimatics, just a little less padding.

Power switch and circuit breakers will be inside the case, I plan to open the lid to power on the battery. The lid interferes with the handlebars, so a bad human can't open it enough to pull out the battery. The stem comes off with a single bolt at the adjustable point so I can take the lid off easily enough if I need to.

I like the rough army green, but I will probably give it a few coats of gloss black rustoleum to match the theme. I still need to drill a pair of holes for grommets/8ga power leads, someplace discreet. The top handle rattles so it will come off, thinking about mounting a few cree LED lamps and a DC-DC converter to the the hard points it leaves behind.

This totally balances the bike! I think the size/dimensions are what someone might put on a regular bike to carry stuff around, so it doesn't stand out, adding to the overall stealth. I am tempted to put the black 18 fet methods controller on this, to drive a 5305 to see what 48v200a feels like on a 65lb ebike. :oops: Er, plus the extra weight of said controller/motor. :D

Now when I get around to terminating the a123 prisimatics they will have a place to go!

-JD

file.php


file.php


file.php


file.php


file.php
 

Attachments

  • 1_left_front_9765. 640JPG.jpg
    1_left_front_9765. 640JPG.jpg
    73.1 KB · Views: 6,840
  • 3_topleft_9754 640.JPG
    3_topleft_9754 640.JPG
    58.8 KB · Views: 6,840
  • 4_top_9755.JPG
    4_top_9755.JPG
    58.1 KB · Views: 6,840
  • 5_head_on_9759 640.JPG
    5_head_on_9759 640.JPG
    42.8 KB · Views: 6,840
I completed the battery for this build a ways back, but I am just finding time to compress the pictures and post them, so here they are. First up, the tab-to-tab terminations.

1-first fold-9879.jpg

2-2nd fold-9881.JPG

3-3rd fold-9885.jpg

View attachment 5

5-balance wire strain relief-9887.jpg

View attachment 3

7-clip-9896.JPG

8-fiber tape-9897.JPG

9-3 sheets of paper-9899.JPG
 
While I have high confidence in the tab-to-tab connections, the power leads coming from the end of the packs cannot be bonded via the folding method. Instead, I run the 8 gauge wire into the folds, and wick some solder up into them.

a1-fold in 8ga-9907.JPG

a2-8ga folded-9915.JPG

View attachment 2

a4-soldered-9916.JPG

 
The fitment of the cells is extremely tight, it would take an extreme amount of force to move them from one side to another. The bottom foam is compressed a lot too, the cells are held compressed, although it seems like that compression is not as crucial as we once thought. I think this side compression takes some of the load off the downward-facing side of the cell. In addition, since the ammo box is angled along with the rake of the fork, much of road-vibration is directed to the flat side of the cells. This makes the battery and its connections to the breaker/switch all self-contained. I have decided to keep the waterproof lid in place, I open it to power on, and from that point on everything is sealed shut.

RIDING WITH THE WEIGHT UP FRONT IS AMAZING. Revolutionary. I will build ALL of my future ebikes with the battery pack mounted up front. The balance is amazing. Every other one of the dozens and dozens of ebike I have build has had a rear-weight bias.

In some cases - like my xtracycle with a rear x5 and 72va15ah Life mounted in over it - directional input from the front wheel is more of a suggestion than a directive. Turn the wheel too fast, and the back end doesn't comply. With this build, the bulk of the weight is right between my front hands. It is still easy to turn, but due to its mass, the rest of the bike follows like the tail of a kite. This makes this one 10x more maneuverable than any bike I have built to date. I expected I would be adjusting through turns to accomodate the weight up front, but instead it was completely intuitive. Heck, it even feels better than my Tidalforce/EMS bikes.

As a side bonus, the weight up front keeps the front suspension nicely compressed, so the ride is as smooth as silk, but the battery gets almost no road vibration whatsoever. Standing on the pdeals, I ran over some significant speed bumps with my weight on the handlebars, I never felt the bump on the handlebars but the rear end bounced around wildly, the contrast was stunning.


I tried a test ride to work, loved the handling, liked the visual stealth, and tolerated the BMC buzziness. Going up a short hill on the return trip I melted the phase wires. :oops: I think they may have been pre-melted by the Kelly Controller, and there was some light conduction, because the controller would shut down if I tried to launch too hard. At the end of the ride, the battery box was completely cool on the inside, so I don't have any cooling concerns for this pack.

A few days later I swapped in an x5 5305, which did not demonstrate the controller shutdown problem, but was unremarkable at 48v. I tried a 100a controller, which helped some; despite a 100a/6c load, the battery remained cool, as did the folded-tab terminations, which proved wrong some folks on the a123 termination thread who were skeptical. Sadly, the x5 also added so much heft in the back that the bike was merely balanced, not front heavy, and much of the handling magic went away. So the light weight motor is crucial to finding nice balance, and being able to run it at a mere 48v is Crucial to the overall gestalt. After I repair the BMC and install a CA connector on the BMC controller so I can limit to 35a, I'll put this combo through some serious tests.

I also bought another 28s of cell_mann's 16ah prisimatic a123 cells. I'll use them to make a 100v16ah pack capable of 250a, and will use them on another frame to power that x5 with some proper power. I bought a larger ammo box that can handle all 28s, maybe the additional 12s cells up front will help make the bike front-heavy again. I will will wick some solder up the folded tabs to make sure they can stand 250a discharge.

But here is the message I hope you take away from this thread:
MOUNTING THE BATTERY MASS TO THE FORKS DRAMATICALLY IMPROVES THE FEEL AND HANDLING OF AN EBIKE.
THIS IS A REVOLUTIONARY GAME-CHANGER.
:D :D :D

-JD
 
Back
Top