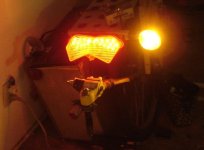
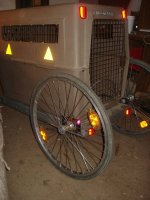
Amberwolf's DayGlo Avenger, MkII

Gave the whole bike and trailer (minus the top half of the kennel/carrier) a workout today. Found a couple cheapie-type bikes being given away on Freecycle, and I got picked as the recipient (this doesn't happen often anymore; too few people giving things away and are probably selling them instead). They're heavy steel bikes, a Royce Union MTZ something-or-other in good shape but with flat tires, and a Huffy AspenRidge in good shape with cracking tire sidewalls (not sunrot, looks like defects or slices) but with "airless tubes" inside the knobbies. Probably 80-90 pounds total between them (didn't weigh them).
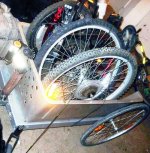
DSC02690.JPG

Around a 13 mile round trip, WOT on Low just about the whole way, fully charged before I left. I forgot the wattmeter, though, left it on the charger at home. :oops: Fair amount of pedalling for 2/3 of the trip; lots of it for last 1/3 as battery was so low that even on only 80-90% throttle it hit LVC repeatedly as the constant mild wind I had to ride into slightly gusted against my travel direction. As I reached home, I stopped as I passed the neighbor's house to chat for about 5-7 minutes, and it recovered from resting at zero bars (and "dead" light on) to 5 of 6 bars.

I noted as I pulled the battery (slightly warm) out to charge it that the controller itself was fairly toasty inside the cargo pod with my backpack and stuff against it; I think I need to secure it's casing better against the cargo pod's aluminum front wall--right now just the tabs on the ends make contact, the rest of it is about a half a millimeter away, which I had not noticed before. I'll file out the screwholes on the endplate brackets of the controller a bit to allow me to slide them upward far enough so that bolting them tightly against the sidewall will force the surface of the controller against the sidewall too, and also add a bit of thermal paste on the controller fins to help contact/heat transfer.

The Fusin motor was only warm on the outside case, but I expect it is toasty inside. I should put a thermal sensor in there for summer use. :)

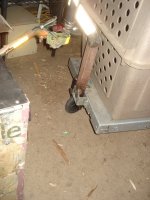
The trailer did quite well, especially since I deliberately picked some crappy roads to ride on to test it for behavior and pothole resistance, etc. One problem found is that even though the casters were held off the ground by about 1/2" for the ride itself (by tightening the stem hitch pivot so the trailer's front is lifted above ground level when the bike is upright), they often touched ground anyway, because of flex of the front edge of the trailer even when empty.
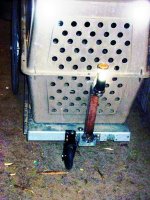
View attachment 1
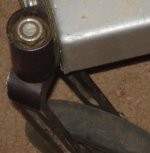
DSC02692.JPG
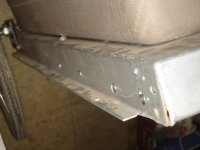
This is a serious issue, because it is causing such flex of the whole front end that by the time I reached home, it cracked the aluminum at the corners of the front end, just in front of the caster mountings. There is zero problem with the back end, which has more weight on it, so it is not likely caused by the wheel vibration, but rather back and forth flex of the hitch. I'll have to put a T-frame there that bolts the top bar of the T across the front end inside the aluminum "box", just behind the hitch, with the hitch bolted to that, and the vertical of the T horizontally behind that toward the back, bolted in a couple of places along it's length to the top panel. That should stop the major flex.

Then I need to fix the corners, and reinforce them so I can safely put weight on those casters again (which only needs to happen when it's stopped/parked, usually). I'll probably just weld up some corner-plates to fit inside the corners and bolt to top, front, and side with the caster mounting bolts being the side bolts.
 
Hey AMBERWOLF: I am suprised that (RED GREEN) hasen't contacted you about haveing you on his show since you use a lot of duct tape like he does. :D :D :mrgreen: :mrgreen:
 
I used to, but haven't bought any in a couple years (other things to spend my money on) so all I now use is old brown packing tape (leftover when CompUSA shutdown; they were going to throw it away). And zip ties, sometimes, but most of the ones I get are ones given to me as leftovers from HF junk and the like (people buy them for a project, discover most of them just snap in half while tightening, then give to me instead of tossing them out...or they toss them out and I find them in the trash).

Last of my duct tape actually went to holding that pack's ex-shrink-wrap on along with an ex-clipstrip plastic sheet for protection against anything that might be on the bottom of my cargo pods. :)

Baling wire...I do use the equivalent of that a fair bit, and hose clamps. I'd use more of those if I could find more scrapped, but they cost too much for the good ones new, and the cheap ones won't do the job I need them to.

I have been told I should tell him about my bike project by more than one person, but I never found an email address to send such stuff to, and I doubt that he would actually ever read anything I sent (probably filtered by others, or he'd never have time to do anything but read fan mail!). :)
 
BLUESTREAK said:
Hey AMBERWOLF: I am suprised that (RED GREEN) hasen't contacted you about haveing you on his show since you use a lot of duct tape like he does. :D :D :mrgreen: :mrgreen:


bungee cord wrapped three times as the weight spreader between the trailer and the bicycle should probably work, a very short ammount that is springy and can be tightened on a pulley would be right. Can that aluminium crack can be held toether with an angle it's same size, like maybe from a steel drawer in the scrap heap?
:idea:
 
Gonna make a custom piece out of some recycled steel plate for the corners; that'll hold the cracked area together. Wish I knew someone around here with a TIG and skill to weld the crack itself, too, but I don't.

Not sure what you mean about the bungee cord--what would it be for?
 
amberwolf said:
Gonna make a custom piece out of some recycled steel plate for the corners; that'll hold the cracked area together. Wish I knew someone around here with a TIG and skill to weld the crack itself, too, but I don't.

Not sure what you mean about the bungee cord--what would it be for?


you could make a suspension system with a pulley, between where the trailer attaches to the bike. It's useful if you can cut the 'linkage' on the trailer shorter so you can then pull really heavy weights that would be 'suspended', bunjee cord is really good at that, I've used it on my NIVA 4x4 to pull other cars out of the muck by revving and going, transferred energy is passed into the bungee cord and then into pulling the other car out.

the cord's there to avoid pulling the aluminium apart.
 
I think I see what you are meaning, but the hitch already keeps the front of the trailer in the air, even if the wheels were removed entirely. The main reason those wheels are there is so that if I have a load in the trailer, it can rest on them when I am not seated on the bike, so the bike's front wheel doesn't get cantilevered up in the air like a bucking horse. ;)

The reason they are wheels rather than a lowerable jackstand is so I can just roll it around as a cart with the load still in it, while not attached to the bike. Otherwise, it'd be really hard to get it in and out of the house without unloading it first--a problem I always had with the Junkyard Chariot trailer. :)


That said, I actually had to take the wheels off on the way home Sunday night. I thought it would be ok to use the trailer to get some groceries, and also show it to some of the people I work with who are interested in the projects, before I did the upgrades on it. That was a mistake. :(

Nothing catastrophic happened, but with the groceries in there plus the top half of the kennel, it was around 20 pounds heavier than with the bikes the day before. Even with that weight as far back as possible, it still levered the front end downward, and kept touching the casters on the ground just enough to drag on them, which would pull them harder to the ground, spin them around shopping-cart style, then bounce the front end back up a little so they'd be almost off the ground again, and repeat this endlessly.

About 1/4 mile from the store towards home, I had to just call it and unbolted the wheels off the caster forks, and then removed one of the bolts holding the forks to the trailer, so I could pivot them up out of the way while riding, but still put them down as stands if I had to stop. Otherwise the bike'd be sticking it's nose in the air. ;)

WOW the trailer is quiet, stable, and easy to haul without the casters touching the ground...so i am going to have to rethink the whole caster idea at all. Probably end up putting them on latching pivots so I can indeed just rotate them downward when needed, and only then. Sad because I really really wanted a fourwheel trailer to make hauling heavy loads easier, without putting any of the actual load on the bike itself. :( Might still come up with something, just have to ponder a while.


The fracturing is much worse than it was at first, due to all the shaking caused by the caster bounce. It's gonna take most likely a full frame under the bed to properly reinforce this thing. I already knew aluminum would eventually crack; I just honestly had no idea it would fail this fast this badly. Probably wouldn't have if it werent' for the casters. :(

I've got material to weld up a steel frame to bolt to the sides of the panel from underneath. Then the hitch and the wheels will bolt thru the sides to the frame.

Been sorting thru the materials part of today; still gotta decide which things to use, since I want to keep it light. I mean, as it was I could lift the trailer *with kennel on it* over my head with both hands, and I'm a WIMP. :lol: I'd like to see if I can keep it close to that. So bedframe rails are out. :roll: Got a little square tubing and stuff like that, and of course bike frames with round tubing.

I am also working on some little LED boards to stick inside the reflectors on the trailer's rear edge, to be marker and brake lights. Turn signals will come later, as will markers/etc on the kennel, plus a little white light I can turn on for the dogs when they're in the kennel and I'm not on the road, if I need to see them at night.
So that's the story on the trailer for now.
 
In addition to the trailer, I had other work I had to do today, too. Hachi (or maybe Loki) munched on the rear derailer cable a little, and although it was only a few toothmarks I could see, which don't even show up in pics, I figured she might've crushed the cable or housing enough to cause me a prolem later on with internal friction.

While I was at it, I did a few other things I had been considering, one of which Liveforphysics reminded me of during the brake discussion in this thread:
http://www.endless-sphere.com/forums/viewtopic.php?p=262008#p262008

I got that big blue box of assorted bike stuff at the swapmeet a couple of months ago, and so far have done very little with most of it. Used a few reflectors on the new trailer, a pair of metal pedals on DGA to replace the old plastic ones, etc. But there is a lot of nice (to me) stuff in it, though very little of it is matching sets or complete items.
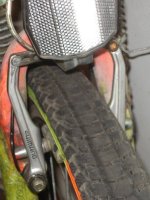
There was *one* set of good Shimano brake arms, for linear side-pull like DGA already had, but with a much better spring mechanism. The pic below shows DGA's original factory arms (left side of pic), which have never really sprung back evenly regardless of how well adjusted I got them. They are stiff enough, and have never caused a problem with braking, just sometimes didn't return quite right, and kept rubbing on the rim one side or the other.
View attachment 8
On the right are two different but very similar arms (both for the same side, of course :roll:) with a much better spring return mechanism, which looks like it would adjust far better and more reliably. Fortunately, I did have an actual pair of arms similar to those, with almost the same mechanism (possibly even a better one), by Shimano.
DSC02703.JPG
They seem to return evenly without any adjustments at all, which is good, because they're both missing the adjustment screw. :lol: They also have a much better pivot point. I am not certain but I think they are bearings, rather than the brass sleeve bushings the old arms had. I'm not taking them apart to find out (unless they break ;) ).

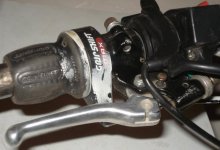
I'm still using the caliper-style brake lever off the stroller, since it has the locking pin for my "parking brake". Even though it is the wrong type, it does give me enough leverage to lock up the wheel on these brake arms (even the old brake arms worked fine with it, except for the return problem).
DSC02705.JPG
Only thing I don't like about it is it's a short lever.

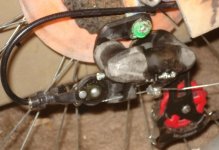
Since I had to change the derailer cable housing, I figured I might as well clean the derailer, too. While I had it off I realized how similar it looked to a couple of others in that box.
DSC02699.JPG
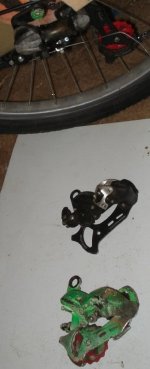
The green one is the old one off of DGA. The black one on DGA and on the white sheet are the ones from the box. They're all Shimano Tourneys, but mine was a #30, the one on DGA now is a #50, and the last is a #70. Both the 50 and 70 have a Directional Pulley on the back end to guide the cable for smoother shifting. Seems to work, too.
DSC02698.JPG
It's just about as worn as the one on DGA (factory stock part, from 2005), but it shifts a lot better, and doesn't rattle around loosely as it just sits there with chain going thru it like the old one. I'd've used the #70, but it was missing it's backplate and it's jockey wheels, and is a little looser at the main pivot than the 50. Might make it shift less accurately, and that's part of what I'm trying to fix. :)

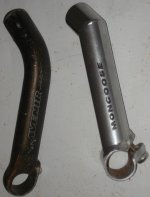
I also had these in that box:
DSC02700.JPG
and I like the dark one's shape a lot. Fits my hand nicely. But I only have the one. However, the little Royce Union kids' bike I got from Freecycle on Saturday had a pair of Kalen bar ends. They're just round bar types, but they match. :) I might go ahead and use the ergonomic fit one out of the box for the other one, instead, though. Be nice if I could find a second one for the other side somewhere, but that's unlikely.
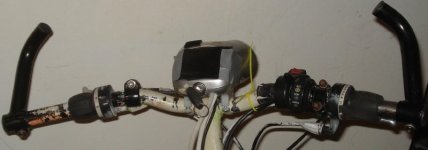
DSC02696.JPG
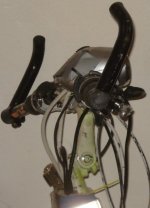
Anyway, they are more comfortable than just holding onto the bars while I ride, as they give me a place to shift my grip angle when my hands begin to go numb, rather than just letting go one hand at a time to fix that. Also protects the bar-mounted stuff if I have to flip the bike over to fix something. :)
DSC02695.JPG
Of course, I can't ride with both hands on there on the road in traffic, but I can do so on canal paths and the like where I'm solely on human power, and don't have a need to shift or brake very often.

I'd need to add throttle, and brake (somehow in parallel to the regular ones) at minimum in order to use these in traffic. Or move them from the bars to the bar ends somehow, but I don't really think that would work--not enough room for any of that plus my hands. Have to rig something else up to hold all that, somehow in parallel with the bar ends, and that's all too complicated to deal with just yet. :)
 
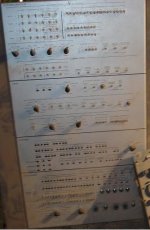
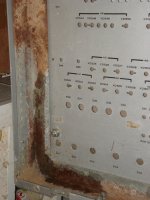
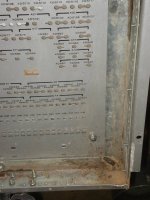
While clearing out room for some mroe pics, I found an old pic of what that panel the trailer is made from used to look like:
StarTrekTorpedoRoomPanelSmall1.JPG
 
I screwed up today, and now I get to rebuild the wheel around the motor. :(

It is really gusty out, mostly calm with sudden gusts that are enough to knock me over if they come at me sideways, whatever MPH wind that is. They're enough that I decided to ride on medium instead of low, because on just low the gusts were enough to almost stop me in my tracks from about 13MPH at WOT and me pedalling in F3/R5. At least on medium I'd just lose 6 or 7 MPH and the battery meter would go to "dead" (but still keep going).

I reached the point where the road meets up with a canal path, which I take as a (usually) safer and quicker route for about 1/4 mile of my ride home from work, and turned onto the entrance. Right there, it is pavement on one side and gravel immediately to your left, and gravel is usually scattered across the pavement a little from those exiting that drag some with them if they ride thru it, and then just beyond that entrance the gravel comes out more so you have to do a kind of question-mark maneuver around it.

I was going a hair too fast and hit the gravel, which I *almost* recovered from, but just as I started to straighten out, a sideways gust of wind finished me off. I just rolled away from the bike to shed the momentum, uninjured except for one small scrape on my knee where I didn't tuck in quite right. Didn't even tear the pants, just the fabric rubbed hard, probably helped by a pointy rock or something.

But the bike, despite hitting nothing more than gravel, managed to somehow bend the front rim over 1/2" out of true, sideways, near the valve stem. I loosened all the spokes there and leveraged with hands and feet, then retightened spokes as needed, and got that down to less than 1/4", but I still couldnt' get it enough to not rub on the brake pads even with them loosened a LOT, to the point where I just had slow-down power, rather than stopping power. :roll:

I still don't have an actual spoke wrench (lost the one I made years ago and keep meaning to make a new one, but , and somehow I left the regular wrench I usually use for these out of the toolbag. :( Ended up using my tiny Craftsman pliers that are wearing out at the pivot-lock, so I screwed up a few of the spoke nipples. For which I don't currently have any that will fit this large gauge spokes, I think. Figures. I should see about ordering a new set anyway, just to have spares. Gotta figure out what gauge they are first.

Made it home, but had to use the motor on medium WOT the whole way just to keep speed against the pads rubbing on the high spot and the gusty winds, and had to shift pedals down to 3/3. By 1/2 mile from the house, it was cutting out from LVC about every 10 seconds.

So while the double-wall alloy rim might be nice against radial loads, it doesn't seem to be strong against side loads. However, I'm sure it is much better than any of the other rims I have around; maybe they'd just have taco'd. :lol:

I'll have to take the rim off and see if I can straighten it, then relace the thing and retrue it.

Funny, but just last night I was thinking "Hmmm, I should replace the bumpy front tire with that thin Kenda I got that didn't fit my friend's rim right...but it's too much trouble to do that right now". Yeah. Well, I guess now that I have to take the whole WHEEL apart, I can change the TIRE easily enough. :roll: :lol:


OTOH, the "new" brake arms work GREAT compared to the old ones, even with my sucky lockable lever. "New" derailer, not so much. Doesn't shift anywhere near as smooth as it should, for some reason; keeps catching just before either up or downshifts. Gotta play with the adjustments, I guess.
 
Been busy, tired, and lazy so haven't gotten the wheel rebuilt yet; I just am using the rear brakes I fixed above, and left the front ones disconnected at the arms so they don't wear out the pads. Am working on a spoke tool made from 1/4" plate, dremelled and filed out for two sizes of nipple I have here now, will do the others once I have nipples in a different size to test fit it on.

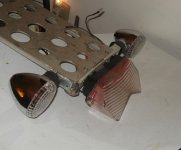
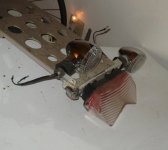
A generous soul from a totally non-bike related forum has access to occasional scrap but still functional motorcycle parts, and sent me this:

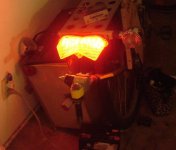
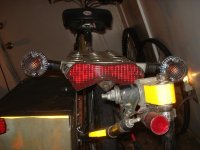
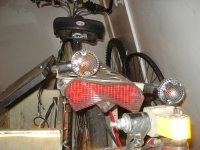
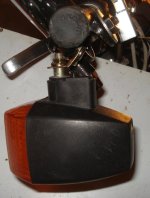
The tails are LED, and VERY bright for brake light, standard for tail. The turn signals are incandescent but that is easily fixed. ;) Even so, they're quite bright, just wasteful of power.

Now I just need to build mounting points on DGA's rack for one of the tails and a pair of rear turn signals, using incandescent for now. I will later also install front signals, but I'd like to make them LED first because I want them to stay on all the time as side marker lights.

When I do that, I will also put red LEDs in the rear signals as side markers, that will alternate with the yellow turn signal for even greater rear attention.

So to do that I'll probably use the clear-lensed chrome signals on the rear, and the yellow-lensed black signals on the front, so I don't have to drill holes for the red LEDs to show thru the lenses. Though, if I really want them to show much to the sides, I'll have to add them as separate side-lights outside the chrome shells, and I'd probably just use a red rear bicycle reflector as the cover plate for them if I do, and a sheet-plastic housing neatly siliconed to the chrome.

Not sure if I will put the other tail/brake unit on CrazyBike2 or just leave it's CFL tail and car 3rd brakelight bar. Decisions....

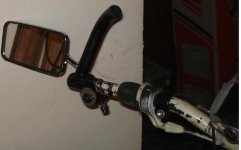
The mirror....I'll probably put this new one on CB2, and then bolt CB2's existing one to DGA. The new one will directly thread in and lock to the CB2 mirror mount. The old one on CB2 is held on by a separate nut and bolt to that mirror mount. I can more easily make a DGA bar mount for that than I can the threaded arm of the new one. :)
 
Well, I can't use the new mirror on CB2; it's threaded post is at least 2mm wider than the hole. :( I could possibly make an adapter, but if I have to do that I might as well be doing it for DGA and leave the one that already fits on CB2 there. :)

I am thinking about taking a seatpost clamp and running the threaded post thru it's holes (which will need to be enlarged), with wide washers on either side and a locknut of some type on the other end of the threaded post. I just have to find a nut to fit the post. It doesn't come with one because it normally just threads into the motorcycle's grip controls or fairing mounts, etc.
 
Seatpost clamp...perfect:
mirror rider DSC02736.JPG
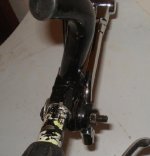
I just cut the little dimple off that keeps a seatpost clamp from sliding down a tube, so I could slide it all the way onto the bars. Left off one side's clamp and used a fender washer instead, other side's clamp holds the mirror's post:
mirror mount 1DSC02737.JPG
View attachment 11
Leaves just enough room for my hand to go on either the bars or the bar-end grip and clear everything. Might put some padding on the nut/bolt/washer part later.

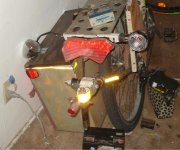
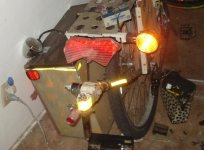
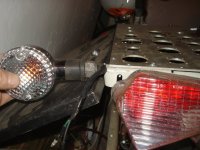
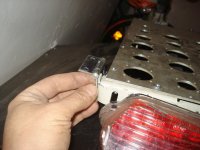
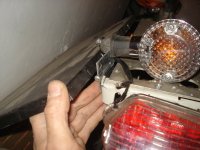
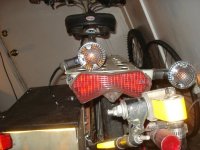
Got part of the lights mounted, experimentally. No mounting nuts came with them and at first I thought I'd have to figure something else out since the stems are much larger than any nuts I had laying around in the house, but I had an inkling and then found the lugnuts off the 85 Ford LTD fit ok. :) The bracket they're mounted to is a steel rackmount angle-bracket off some huge network box for 10BT and coax. I bent the ends in and drilled a hole for the righthand stem in the bent part. Left side needs something a little different, after the pics below.

The taillight screwholes lined right up with the rackmount's existing holes that were for bolting it to the handles for the network box. The mounting holes for the actual network box lined up with the ones I'd already had on the end of the rack before to hold my other light bracket. Funny about how that works out sometimes.

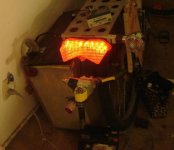
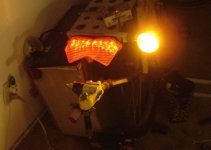
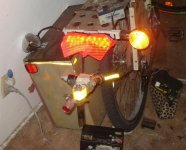
Tested with a tiny SLA, like 1.2Ah I think. Each pic taken twice, first with flash on and then with flash off, to give you an idea of the brightness.
Just the taillight:
tail flash DSC02724.JPG
tail no flash DSC02725.JPG
Then the brakelight:
View attachment 8
brake no flash DSC02727.JPG
Then the tail and a turn signal (damn, they're bright)
tail & turn flash DSC02730.JPG
tail and turn no flash DSC02731.JPG
Then the brake and turn signal (I saw spots every time I looked at them):
brake & turn flash DSC02729.JPG
brake & turn no flash DSC02728.JPG

Now the left side one is going to take more to mount, because if I just bolt it on it'll keep me from opening the cargo pod lid. :)
left turn clash with pod lid DSC02733.JPG
So I will hinge it instead, letting me swing it up out of the way when I need to open the pod:
left turn hinge DSC02734.JPG
left turn pivoted out of lid path DSC02735.JPG
I have to notch the hinge itself so the bolt/nut on the signal will not keep the hinge from "closing" and letting it sit horizontal. Then I'll probably weld the hinge to the bracket, so that it can't come undone from a single-bolt pivot I'd otherwise have to use.

I thought about a bracket welded or bolted to the trailer hitch or the fork stem it's mounted on, but then if I take that off for any reason I'd have to come up with a new way to do it. Might as well do it this way first. :)

Haven't pondered the front signal mounting yet. Or the battery pack I'll need to use. Can't tap off the NiMH pack; don't have a DC-DC of any type that can do the high current to turn on the incandescent lamps fast, don't wanna use lead (i'd have to use a 15-pound 17Ah, as the little 1.2Ah wouldn't last long enough, in all likelihood, though I will test that. I don't have any functional SLA between those sizes, as I gave away the two 7Ah ones I'd used on CB2 to someone that needed some for their small computer UPSes).

So probably I'll use either a 12V NiMH pack from cells out of those round wheelchair packs, or a LiCo 4-cell pack charged only to 3.6V each, for 14.4V total, and just check it's voltage periodically and before I charge it (using a Sorenson). No BMS on it.
 
There's 3 hours of time I wish I had back. :(

So in the middle of doing a little here and a little there, I'm also washing a bunch of blankets, sheets, etc, that have been stored long enough to get all dusty and some mouse tracks and stuff **ick**....about 9pm I got done with my "ES break" where I can be looking and posting here as I am sitting here doing whatever, anyway (eating, resting, looking up info on the web for some project, making notes so I wont' forget some idea, etc), and went to go modify the hinge for the signal.

I'd just finished notching part of it when I heard the washer beeping in error, and go find that it can't drain....great, I figure the pump is all clogged up from dog fur or chunks of padding from a blanket or something.

Tight space in the badly designed tiny utility room, so I move a bunch of stuff out of the way, then slide the dryer into the gap, then pull the washer out. Manually start draining it, and water flows right out into a bucket...so...

Try a spin/drain cycle, and it starts pumping out just fine. OK, WTF? THen I realise it ought to be spinning, too, but it's definitley not. It's not a belt drive, it's direct to "transmission", so this could be bad. Let it finish draining, then tilt it on it's side so I can get to the pump, motor, etc. Everything seems to be working, but....

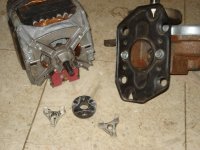
There is a coupler between motor and transmission that absorbs offsets and vibrations, and shock loads at stop and start. Its two plastic pieces with a rubber core, and both transmission and motor have a double-flatted shaft:
View attachment 1
The plastic bit on the motor side must've gotten hot or something, because it was totally rounded out where it contacts the shaft.

Thankfully, I happen to have a washer picked up from Freecycle.org a while back, which I've been picking parts from. It is nowhere near the same model, but it happens to use exactly the same kind of coupler, and is undamaged. :)
DSC02751.JPG
So I pulled it out and got the coupler off, and swapped it over. FOrtunately it did not require taking out anything but the pump and then the motor to get the broken coupler off and the new one on. And tested the washer just fine.
So now after about 3 hours of work and cleanup, I can restart the wash project again. :roll:

I think I'll keep the extra coupler parts in a pouch on the back of the washer, just in case.

Anybody need some Whirlpool washer parts? ;)

Cost a bundle to ship, though. :p

Nice windings though. Maybe save to rewind something? If only it weren't just an induction motor. :(
 
FINALLY.

Almost. Still have to wire it up and make the switch & flasher and brake relays, but at least they're mounted, and I can temporarily just wire up the taillight itself, which will be a massive improvement in lighting. :)

The hinge is lightly welded to the cross bracket, with a notch in the rotatable part for the signal to bolt into.
DSC02754.JPG
So it swings up out of the way for the pod lid to open and close.
DSC02755.JPG
It doesn't seat down quite straight, but I don't really care.
DSC02756.JPG
It's also offset forward by about an inch, but I don't want to put a bracket on the other side to make it match just for this. I *might* put a hinge on that side too, though, so I can flip that one up out of the way for parking and stuff. Have to find a similar hinge in my stuff to the first one.
DSC02757.JPG
I do have to tie the wire out of the way, probably running it up and over the hinge so it does not have to stretch during pivot. Then it will bundle with the other signal and the tail to run to the pod where all the stuff will get fastened down.
DSC02758.JPG
 
Got to work today, so I didn't have time to do the wiring and stuff, but I did wire up that tiny SLA to run just the taillight. It's easily visible even in midday daylight as a taillight, and it's extremely visible as a brake light, close or at a distance, and for at least 70-80 degrees to the side, and still visible but not as bright beyond 90 degrees because it lights up it's housing too.

At night as a taillight it's about half as bright as my CrazyBike2's CFL taillight, but as a brake light is brighter than both my CFL taillight and the 3rd brakelight bar above it put together.

The hinged signal on the left works pretty well to allow access to the pod, and does not rattle around with little bumps, either. I was worried it would require some sort of damping or a spring to keep it pulled down but it's own weight works well enough to keep it in either position, extended or stowed.
 
Now that work is done for the week, I am going to see about wiring up those new lights on DayGlo Avenger and see if I can get it to be NiteGlow as well. :)

Lazer-taillight to burn out your eyez, with photon-cannon turn signals to vaporize the remains.
 
I spent a lot of yesterday pondering a few things, including what to do about switching the brake light on as needed. Some of it I spent trying to get USPS site to work correctly for me to ship Olaf's gears and shunts off, but it failed to cooperate, and I ended up spending over an hour at the PO in a comedy of errors that did finally result in shipping the package out. Dorky dog antics followed once I got home, and I didn't get much done after that.

Today after a bunch of calls to places for money-related things, I finally got the bits together to put the lights to work. :)

Basically, the turn signals will have ground running to the common wire between them, and power will flow from battery to a regular flasher unit (for now the one off CB2, later the one off the 85 Ford LTD parts car in the driveway if it'll work). The other side of the flasher will go to the common of the turn signal switch, and one pole of the switch will go to the left signals, the other to the right. A single 3-wire cable goes to the back signals (used to be 3-conductor outdoor speaker wire by Belden, ground is a shield and has no insulation except the case).

It's not the neatest job I ever did, but I have done worse.
DSC02764.JPG
The bracket the switch, relay, and flasher are mounted to is just a little aluminum squared-S bracket off some rackmounted fans. I used one just like it to attach the third brakelight/tailight assembly to DGA's rear rack back before I build CB2 (and moved that stuff there). The bottom rack screw hole mounts the bracket to the ebrake mounting, using the ebrake moutning bolt, running thru both. I bent the tab holding the switch forward/angled a little so it'd be easier to reach with my thumb while riding. The switch is mounted in the other rack hole.

I superglued the relay to the bracket above the switch. It won't hold forever, but it's ok for testing.

The flasher is just ziptied to the bracket, out of the way between it and the HB. That way I can easily remove it to put back on CB2 if I need to.


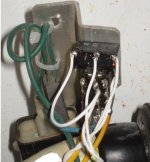
The brake/tail light gets it's own 3-wire cable, same type, same ground. Tail goes right to power. Brake goes to N.O. on a little 5V-coil relay I yoinked from some dead Canon all-in-one laserprinter/fax/scanner thing I got in a pile of similar stuff from someone a few years back. I'd already pulled them all apart way back then, and put the metal stuff in one box, the plastics in another, screws in a bucket, and electronics/fans/motors in a big box. I've already pulled parts off here and there as needed. :) I also pulled the relay coil-suppression diode and wired that across the coil.

The common of that side of the relay then goes to power (12V), on that tiny little SLA; it ought to last long enough for most of my trips, I think. At least until I can work out a good alternate, either LiCo, NiMH, or whatever.
DSC02763.JPG
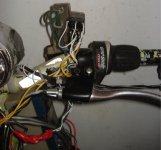
The relay itself is driven from the e-brake hall. Power side of the coil goes to 5V on the hall line, then negative of the coil goes to the hall signal line. I'd had to splice the ebrake cables together when I got the kit anyway, a short ways from the ebrake, so that is where I attached the wires to.

I didn't bother with a switch for this stuff yet, I just used a connector off the ScootNGo stuff from ages back that already had SLA spades on one half and just snipped wires on the other. It'll stay connected fine, and is easy to disconnect when I want to turn it off. Later I'll get fancy when I change lighting battery type. You can see the connector hanging loose in the lower right.
DSC02762.JPG
The SLA has alligator clips from the wall-charger off the old Ryobi weed trimmer hooked to it to charge it back up after testing, so there's extra mess there at it's bottom end.


I did end up adding the front signals as well, but really only because the flasher wouldn't work without at least two bulbs in parallel, and adding the signals was easier than building a different flasher, since I really ought to have them anyway. :)
View attachment 1
There is a rubber boot normally at the base of the plastic signal housing covering up it's mounting hardware. I left that off for easy access to the bolt and plate inside. Bent the plate up a little, filed out it's second hole (nominally it's for the wires to go thru) enough for the bar-end mounting bolts to go thru them and fix them to the bike.
DSC02760.JPG
Leaves them basically hanging below the outer bar-ends and out of my hands' way whereever I have them, and also not likely to get banged around much when leaning the bike on things/walls/etc. if I have to. Only took about 10 minutes to think of the idea *and* implement the attachment, so it's one of my more inspired moments. :) Probably will have a disastrous failure I didn't foresee later on to make up for it. ;)


Since blinkies and stuff are kinda pointless in pictures, I did a short messy video to show them off. The room is lit with one 15W CFL just like the ones in CB2's headlight and taillight, and one 100W incandescent reflected off the cieling.
[youtube]J4N3_icyDOA[/youtube]
 
I figured I ought to know how long that little 1.2Ah SLA would actually run the lights, so I charged it fully, then plugged the battery into the lights, which turns on the taillight. Switched on the left turn signal, and let it blink while I typed up a post in a different thread and had a couple of involuntary naps (as usual).

As I was typing, about 17 minutes in, the flashing stopped, with the light about 1/3 normal brightness and the tail barely lit. Just a minute or so before, it had been nearly normal brightness for both, so there is a huge falloff really fast with this battery (not surprising given it's size and that it's at least 3 or 4 years old), once it reaches it's limit.

So call it about 16 minutes of continuous flashing with tail. I'm sure it'd be more, maybe 20-25 minutes of intermittent short amounts of flashing, plus some brake light use. That's about twice as much as I am usually riding for at a stretch, so it should do fine for the moment. Longer trips I'd need more Wh than that, but they're currently rare.


Oh, and yes, the SLA is just hose-clamped to the stem. ;)
 
I rode around for a while in traffic this evening, a bit before sunset and then a bit after, to see how well it all worked. Nothing fell off, all kept working, and best of all, noticeably had an effect on other traffic paying attention to and in some cases yielding to me (as they should anyway but don't usually do with hand signals) in the situations where that arises.

I did still have the usual few that pretended I didn't exist. One notable time was as I came up to a stop sign, where the road I was on intersected with a major mile road, with no traffic behind me. I still signalled my right turn intention, and I know my brake light made me even more visible as I held it waiting for a break in traffic on the major road.

A roaring engine some ways behind me had me glance in my mirror, to see a big pickup truck type thing roaring toward the intersection, and I wasn't even sure he was going to stop, but he managed to squeal to a stop to my left, with his tires pointed leftward, and no signal going that I could see from that side. He'd pulled so far forward that I had to pull forward myself to see around him to tell if it was safe to go yet. He definitely didn't have a signal going, but I would guess that with the wheels pointed left he probably intended a left turn, since he was so far leftward in the no-lane-markings road. Could be wrong, though.

Once I saw a suitable gap in traffic that would let me get onto the road and also make it all the way to the left turn lane without impeding anyone, I did so, but being sure to watch this guy, and indeed as soon as I began to move and turn he started to squeal out into the road and went around me to the right, swishing the back end of his truck around when he lost traction more than once. I'm surprised that he waited for a gap at all....

Just like hand signals, I can't assume that people will notice, care, or yield to lighted signals. But it is much safer to ride with the lighted signals rather than hand signals, day or night, if for no other reason than it keeps both my hands on the bars for control with the holes in the road we have around here.


I got a few people interested in the bike because of the lights, some in cars while we waited for lights to change, and some pedestrians or other cyclists asking about the bike/etc. Some were just interested because it is different; some genuinely interested in possibly doing something like this themselves or having it done.
 
Since I had to get dogfood today, I spent some time yesterday finalizing the first idea to test for making the trailer usable, without breaking apart. :)

A friend had brought over some little L brackets, two of which proved useful for further securing the rear wheel mounting plates to the flatbed.
View attachment 8
DSC02774.JPG
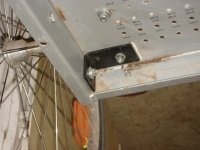
A rusty rackmount cabinet angle-steel rail I'd had in the scrap pile got used for the front, cut in a U shape by notching the points where corners were to be bent into it, then welding the edges of those cuts together after bending.
DSC02775.JPG
DSC02777.JPG
It's bolted to the front face via the bolts that hold the hitch on, and the front top by a central bolt.
View attachment 5
Not shown in the images is the bolt at each end of the rail, which stops at about the midpoint of the trailer.

The sides are secured by using the pre-threaded holes in the rail itself, for rackmount type screws. Since I can't measure and drill holes in the right place like a normal person, I just bolted the rail in first with the main bolts, then as a last step drilled small pilot holes in aluminum flatbed using as a guide the center of each threaded hole, so I didn't touch the threads and wreck them.
DSC02780.JPG
Then from the outside I carefully drilled a much larger hole for the screws to go thru from the outside and secure the side face of the flatbed to the rail every few inches along it's length.

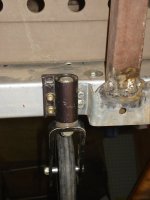
I decided that since the front casters are too small to effectively use as wheels on the road anyway, I'd just go with one in the center next to the hitch as a wheel to rest the front on when not hauling with the bike, so I can move a loaded trailer around easily by hand.
DSC02778.JPG
When it's actually lifted onto the hitch, it holds that wheel off the ground by an inch or so if I tighten the hitch high up; if I let the stem slip down all the way first then I can leave it riding the ground completely holding the front end's weight.
DSC02782.JPG
As you can see, the wheel is not really centered on there, but it doesn't matter for it's purpose.
DSC02781.JPG

Can't put all the pics in one post so...
 
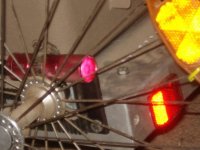
I'm still working on the lighting for the trailer, so for now I just moved the lttle flashlight taillight from the hitch to the nut that holds the axle mount on on the left side.
DSC02783.JPG
It's just held on with the same double-hose-clamp I used on the hitch stem. It's clearly visible from the rear or the left, and also lights the wheel itself a little.
DSC02785.JPG
It's not very bright, but it's better than nothing.
DSC02787.JPG
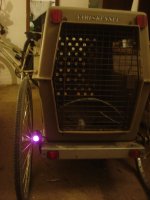
I don't yet have a pic of it, but the bike's tail/brake light and the turn signals are clearly visible at night thru the kennel. In daytime they're not, but I'm not too worried about it's visibility in daylight.

I do want to paint the whole trailer dayglo colors, but it's going to be quite a while before I can afford the paint; Krylon is the only brand that actually works and doesn't fade in weeks of riding, and it costs more than the others. For instance, I used Rustoleum on the DayGloAvenger, and you can see that all of it is faded totally, despite it's fairly minimal daily sun exposure. It also cracked and crazed, over it's own brand primer, painted per their directions.

That's why I always used Krylon before, but I couldn't get the dayglo kind around here except from HobbyLobby, and they kept messing with me on the phone when I called to check availability before I rode out there, plus they wanted a lot more for their Krylon even in regular colors than anywhere else in town; more than I had to spend. I should have just done it anyway, but instead I had chosen to waste over $60 at HomeDepot on the Rustoleum crap. That was about two years ago, maybe more, when I sort of still had discretionary funds. :(

Anyway, for now, it just has high-visibility reflectors and reflective tape on it, plus the one light.

Eventually I'll get one of the motorcycle tail/brake lights and some turn signals on it, wired up to a detachable harness that parallels them with the ones on the back of the bike.


Anyway, I tested it today with only 80lbs of dog food in it, and it worked ok. But I am going to have to stiffen the hitch on the bike itself, because it sags just enough somehow that the trailer front wheel skims on the ground rattling and spinning sometimes, rather than gliding above it 99% of the time like it should. I need to be able to keep that wheel off the ground that inch or two.

But everything stayed together, nothing fell off, and nothing cracked. Feels more solid back there while towing it empty or loaded, too.

If I don't end up ever putting larger caster wheels on the front end, I may move the rear wheels farther forward, perhaps 1/3 of the way from the back.
 
Another test ride today; this time with Hachi as passenger. She's still not entirely sure about the whole thing; she liked riding in the side pod a lot better but she can't even get into it now.


Most of the time she just lays down, but it takes a few minutes for her to do so after I start, and she may get up if I have to stop in traffic for any length of time. When she isn't laying down, the shifting weight back there makes it feel as if there is a side-wind gusting at me, and wobbles me around some. Not a lot, but enough to be uncomfortable, rather than dangerous.

However, with her weight in there, the trailer rides on all three wheels, pulling the hitch-fork downward on the bike a bit, just enough that I can't put the wheel high enough to stay off the ground. Only way I could ride any distance with her or any larger load in there is to take the front caster assembly off entirely. What I'd like to do is see if I can make a quick-release clamp that will let it pivot upwards when not in use, so it is entirely above the flatbed, but still stay firmly in place under heavy loads when not supported by the bike hitch, and only riding on that caster in front, for manually pushing the trailer around.

Seriously considering moving the rear wheels forward about 1/3 of the way. Might help with some of the cantilevering forces on the bike.

A different hitch point, at the rear axle, would be better, but with the cargo pod on there I don't have that option on the left side. I'd have to do it on the right side, and I'm not sure if there is a reason why all the bike trailers that use the axle point as a pivot attach point do it on the left instead, other than derailers possibly being in the way on some bikes.


I need to make a better bike stand so that I can keep the bike stable with the trailer attached and a dog wiggling around in there, when I am parked and not on the bike. Otherwise it is very difficult to deal with getting a dog in and out of the trailer or getting the trailer on/off the bike, as I end up having to hold the bike up at the same time. Even locking the brake levers down doesn't help, other than keeping it from rolling forward/back. Still falls over too easy. One of those seatpost-top stands might be a good start.

Also, I am going to see if there is space inside the steering tube under the handlebar stem nut but above the headtube bearings for a ball-bearing cotterless pin to lock the steering tube in place at the right angle for parking stability, so it can't flop around and complicate things. I have a few of these things from those foldup jogger's baby strollers. I just have to find the right spot to drill a hole thru head and steering tubes.
 
Further trailer stuff is going to go here:
http://www.endless-sphere.com/forums/viewtopic.php?f=2&t=18671
since it looks like it might be an ongoing developmental project. :)
 
Over in the above thread, I just posted about the first big trailer test with the new bracing/etc. This post is just to mention DGA's performance, which was pretty good, but shows me that to haul stuff around I'm gonna need to work on that bigger battery soon. :)

I went to Encanto park from my house, near Metrocenter. The way I went there should've been a little less than 8 miles, but was over 9 due to a wrong turn on my part plus a couple of little "detours" created by traffic conditions in one place and the other by two idiots that parked their moving vans across the street from each other, perpendicular to the street, with the cabs out in the street so far that even I couldn't get between them. Several cars were sitting there on their cellphones, presumably trying to get someone out there with enough authority to get these clowns to move the vans. :roll: I shoulda taken a picture but I was frustrated at having to detour around this and forgot I had the camera with me (so that I could get pics of Hachi/etc. at the park).

The way back I took (totally different route) was only about 7.8 miles, a hair more than the way there would've been. I didn't go there by that route because the time of day I headed out there it's pretty bad traffic in a few places along that route. It's a straighter shot with nicer roads, but the traffic would be a problem with the trailer.

Total was nearly 17 miles, I guess, over an hour and a half for the ~9 mile outgoing segment, including stops to check on Hachi and give her water (since it was still daytime/evening and kinda hot, though cooling off already). I forgot the PDA/bike computer in the process of all the other unplanned stuff I had to do to get ready to go, and the wattmeter, too. I put the wattmeter on while recharging to at least see what the total I used up might've been:
View attachment 1
295.1Wh to recharge it from basically dead as far as the controller is concerned. Kept cutting out on me even at 3/4 throttle on Low. Recharged total of 6.725Ah:
DSC02831.JPG
For a nominally 9Ah used NiMH pack, that's a deep enough discharge. I was running at only just enough motor to help me keep moving beyond wobbly-speed, along with a fair bit of pedalling (a lot of pedalling toward the end trying to stretch out the power so I wouldn't have to do *all* pedalling, especially to start from a stop). Usually I was at about 1/2 throttle.

I didn't stop (other than traffic controls) except once on the way home, because Hachi slept most of that. :)


Before I left for the trip, I found some problems with the hitch (actually found more than a day before but I totally forgot about it because of fixing up the Landrider for a friend shortly after finding the problem--posted about in the Crazybike2 thread).

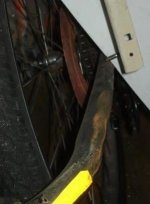
There is a vertical brace on the rack that holds the bike-end of the hitch at the proper angle to keep the trailer's front end off the ground, and both bolts that hold it on had sheared. One at the head, and the other at the nut end:
View attachment 4
DSC02801.JPG
Since I did not have time for pondering a really proper fix, I used a pair of hose clamps thru slots drilled in the brace:
DSC02828.JPG
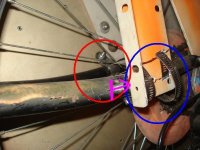
The pic is from after the trip, and you can see the clamps didn't hold very well, and allowed it to slip about an inch forward, lowering the hitch to the point that the front caster just rested on the ground while rolling. I didn't try to fix that on the road, and just rode what amounted to 3/4 of the way there and back like that. The clip circled on the other side is just there to keep the trailer from being able to pull the hitch fork against the tire.


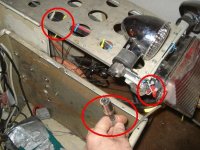
Here is the DIN connector that mates with the trailer.
DSC02827.JPG
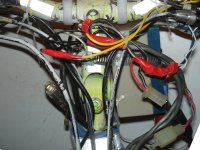
It's wired into the turn signals and brake lights at about the points you see circled. If the trailer is hooked up, then an aux battery in the trailer can power all the lights. Otherwise, I can use the one on the stem.

.
 
Back
Top