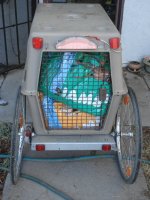
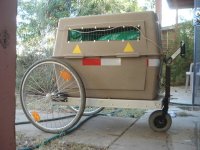
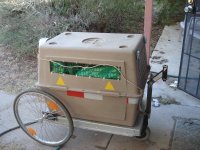
Amberwolf's Flatbed Kennel Trailer

amberwolf

Administrator
Staff member
Joined
Aug 17, 2009
Messages
40,777
Location
Phoenix, AZ, USA, Earth, Sol, Local Bubble, Orion
file.php


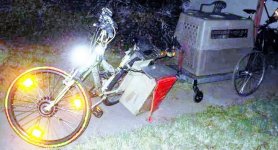
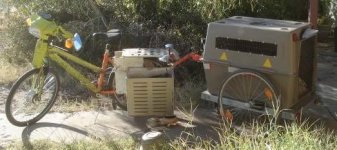
This thread is here to kind of collect pics of the trailer all in one place, along with some of it's details, so people don't have to go digging thru the DGA thread for them. The rest of the info is over in the DayGlo Avenger thread (the bike used to haul it around).

I'm also sort of considering making this a pusher trailer, too. Maybe with a treadmill inside for the dog to help charge the batteries. :lol:
hachi rides 052410 DSC02789.JPG

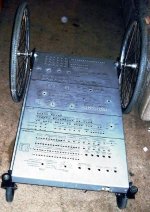
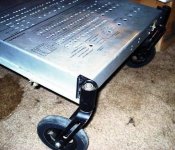
Trailer started out as a simple enough concept; a flatbed that I could take apart quickly to store when not in use, and could adapt to various uses and situations as they arise. My old trailer didn't really work so well in that regard, basically being the size of a non-folding wheelchair, and maybe twice as heavy.

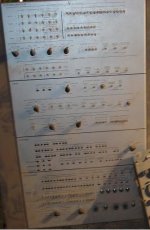
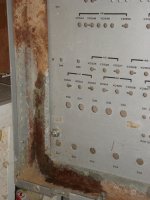
This panel:
StarTrekTorpedoRoomPanelSmall1.JPG
with all the stuff removed from it (saved in a bin for later use, of course) would be the base. It's very thick aluminum, folded over and welded at the corners, so sturdy enough (I thought).
View attachment 5
It is a faceplate off an old mainframe computer (or rather, a communications interconnect panel from between sections of such a computer). It happens to be identical to a panel once used in Engineering / Torpedo room on the movie version of the Enterprise, in one of the first three Star Trek movies. :) I wish I could find a picture of that scene, but haven't been able to online.


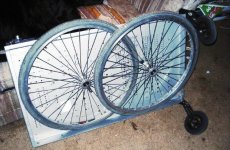
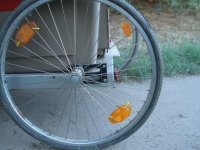
I considered a few options for wheels but it was easy to decide on the wheels from a scrapped Quickie wheelchair, since they are quick-release, with titanium axles supposedly capable of something like 600lbs. I figure I'd break the rest of the wheel before the axle bends. ;)
5FlatbedTrailerQuickreleaseWheelsOff.JPG
Plus they are so easy to stow with the trailer like this.

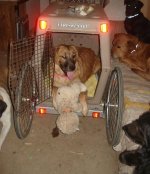
A very quick first implementation, which about half of survived into the one you see at the top of this post:
1FlatbedTrailerTopFront.JPG
View attachment 2
3FlatbedTrailerObliqueFront.JPG
 
There's no hitch yet in the above pics, but that will be detailed in the next post.

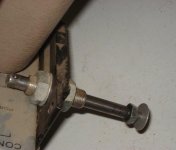
The quickrelease axles, wheels with sealed-bearing hubs, and the mounting plate they go into:
View attachment 10
QR axle by itself in the mounting plate:
DSC02794.JPG
Mounting plate face-on:
View attachment 8
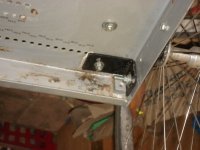
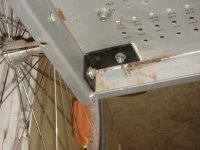
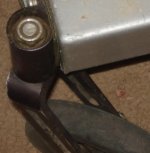
Since the flatbed side couldn't take the side loads and stuff, I put a rightangle bracket underneath at the rear, closest to the axle:
Rear wheel mountplate brace left.jpg
Rear wheel mountplate brace right.jpg


Turns out that due to a number of issues, the front wheel mounting points at the corners couldn't take it either:
View attachment 5
cracking corner right.jpg
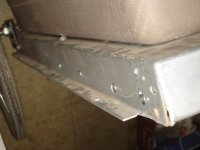
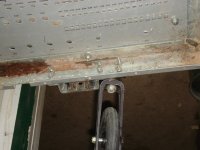
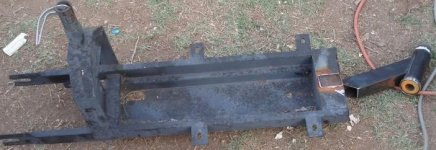
so I used some angle-steel from rackmount cabinet rails, notched and welded into a U:
front half flatbed braceframe left.jpg
View attachment 2
front half flatbed braceframe side screws.jpg
and also bolted the hitch plate thru the front edge of the flatbed onto that rail
front half flatbed braceframe center.jpg
and that also was the start of using a single center front wheel instead of a pair at the corners, mostly to see if another problem would be solved.

The front casters aren't intended to ride on the road, but rather only there for me to manually roll the trailer around when loaded, etc. So they're supposed to sit up off the ground by at least an inch when it's on the bike hitch. They also keep the bike from becoming a "wild stallion" with it's front wheel in the air when I park it and dismount. In theory all I have to do is let the trailer hitch ride down the stem after loosening the bolt, and the trailer can rest on the ground while both bike wheels are flat.

If I had larger casters and forks for them, like a 12" kid's bike wheel or something, I'd consider altering the hitch so that it pivots up and down at the bike frame and doesnt' hold the front of the trailer off the ground at all, so that the trailer always rides on four wheels.

But those would add a lot of weight (probably at least 10-20lbs), and part of the idea of this is to make the trailer as light as I can with as little rolling resistance as possible, to carry the most load on it. I might make a detachable front bracket that holds those, to use only when I know I am going to need it for a really heavy load.
 
The hitch I had previously used the design of on my old trailer, and since I still want to use it sometimes, needed to use the same hitch on this one.

I did experiment with some other hitches on CrazyBike2 for the flatbed, but like M1-M4, they were not entirely successful. ;)

It's basically a 26" front fork bolted thru the retaining washer lip holes into my rear dropouts' accessory points, with a metal plate securing it at an angle to the rear rack setup:
Hitch3.jpg
Part of a cheap steel stem is inserted into that, but not using the jamnut/wedge. Instead, a piece of allthread has a washer (the same diameter as the inside of the steering tube on the fork) trapped between two nuts and lockwashers at it's far end, and the washer is welded to the tube at two points on it's edge by having drilled a hole in the tube so I could see the washer and ensure a good weld to it.
View attachment 9
Then the allthread is fed into the stem, as the stem is inserted onto it down into the tube just like normal, and a nylock nut on the allthread pins the stem into the tube so it can't come out. A second stem, this one off a BMX type bike, is placed with it's handlebar clamp parallel to the first stem's clamp, and a long bolt is passed thru them both, with a few washers about the same size as handlebar tube along the bolt within the clamps, to give the clamps something to hold to and keep the bolt from wiggling around. A larger washer between the stems prevents binding, and at least one at each end holds them together.
Hitch2.jpg
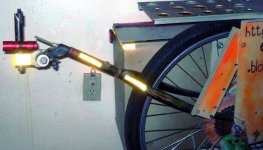
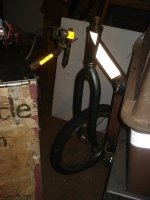
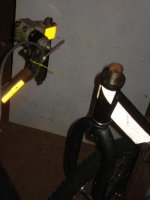
It is quite stiff to move by hand, but the weight of the trailer easily moves it around. Stiffness makes it easier to attach the trailer, and keeps it from bouncing around when I ride without the trailer. The trailer simply is lifted down onto the upward-pointing stem, and the stem bolt is tightened to keep the trailer from being removed easily (it probably could never fall off unless a bolt shears). The red flashlight is a taillight to mark the stem, just hoseclamped on. (I do not yet have regular lighting back on DGA). Also has 3M reflective tape on there. I only have yellow and white, so white is used up front half of the bike, and yellow in back. Rather have red, but I use what I have. :)


Now for the hitchpost on the trailer itself...
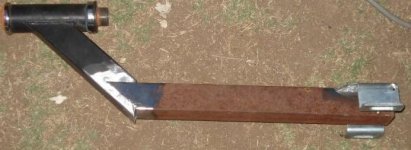
I figured a simple neck of square tube and an angle forward should work, and found I had what was needed already laying around. Neck and headtube off the old ScootNGo carcass:
scootngo frame.jpg
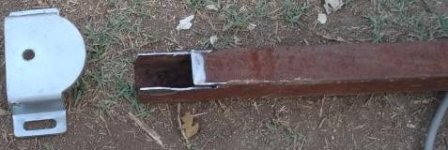
Some square tube for the vertical mast, notched to fit with a 1/4" thick steel piece off of some stickshifter a friend gave me out of his old van's leftover stuff:
square tube and shifter plate.jpg
View attachment 5
turns into this:
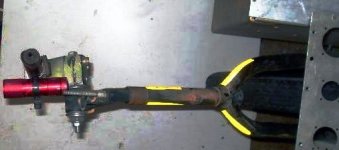
hitchpost1.jpg
hitchpost2.jpg
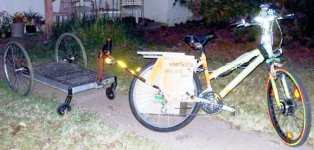
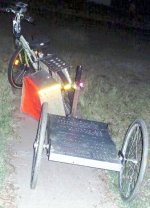
Then after welding the parts together, it's bolted to the front edge of the flatbed, and then slips over the stem that is the hitch on the back of DGA:
DGA and flatbed right.jpg
View attachment 1
DGA and flatbed rear.jpg

.
 
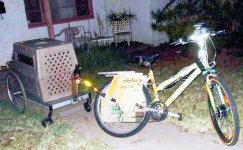
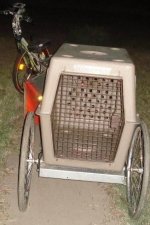
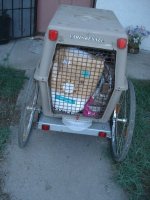
Test-fit shots of the dog kennel on the flatbed, not yet bolted down.
DGA and kennel left.jpg
DGA and kennel right.jpg
DGA and kennel rear.jpg

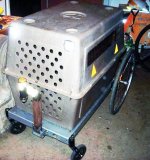
Then I bolted the kennel in using large fender washers against the plastic to reduce the stress on any one part of it:
DSC02796.JPG
and added some safety reflectors from the bin, plus some 3M reflective tape a friend saved for me:
Kennel front oblique.jpg
View attachment 7

A small hole in the gate end top for a lock:
View attachment 6
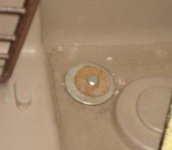
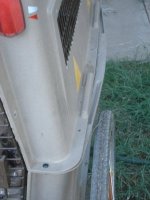
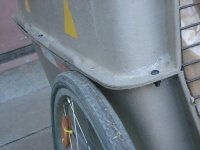
replaced the silly plastic and potmetal fasteners that secure the top and bottom halves together with these:
View attachment 5
though I still need to add a metal washer/retainer here:
View attachment 4
so the plastic can't break or be cut there.

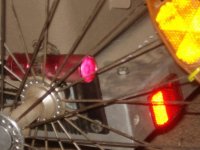
Moved the flashlight tail marker off the bike-end hitchpost and put it on the rear left axle mounting nut:
View attachment 3
taillight flashlight 2.jpg
taillight flashlight 3.jpg
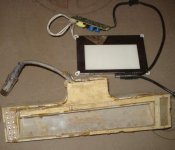
but that's not nearly enough light, so I will be using a motorcycle LED taillight/brakelight, parallelled with the one on the bike itself, on a mounting bar that will secure to the top rear of the trailer. I'll also be using motorcycle turn signals at some point, but for the moment I'll be repairing and reusing the signal/marker module from the original DGA lighting:
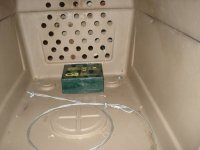
DSC02803.JPG
The white rectangle there is a very thin 12V CCFL backlight and inverter from a scanner lid, and will be mounted inside the top of the kennel lid, with a remote switch on the handlebars so I can turn it on and off to check on cargo/passengers without dismounting.
 
Some assorted pics now. The first real test trip for it, where I left off the top half of the kennel to transport some bikes (gathered off Freecycle.org) in it
View attachment 5

The new single-front-wheel mount
View attachment 4
Front wheel on ground.jpg
Front Wheel ground clearance on hitch.jpg

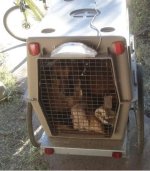
Hachi when she used to fit in the cargo pod on DGA, before growing so much that I *had* to finish this trailer. :)
Hachi in DGA pod1.jpg
Hachi in DGA pod2.jpg
 
Hachi... that name seems familiar. Ummm from karate class twenty years ago.. Number (ichi ni san...) eight in Japanese?
 
Yes. :) It's a kind of convoluted reason for it.

Nana, her mother, is (according to her original owner) named after the Peter Pan character. But it also means Seven in Japanese.

Hachi was AFAIK the seventh of nine (borg dog) puppies. Technically eighth, as her only sister, born before her, didnt' make it.

So she could've been Nana, too, but that would get confusing. So, like in the Japanese manga and anime and live-action show Nana, the second Nana gets nicknamed Hachi.

Just to be stranger, one of the reasons the second Nana in that show gets nicknamed Hachi is because she follows the first one around like a little puppy dog, and Hachi is apparently not an uncommon dog's name in Japan. :lol:

My Hachi does unfortunately live up to her 7 of 9 borg dog role, however, in that she is always assimilating new technology, adding it's distinctive flavor...er, distinctiveness to her own. :p
 
I think I have all the first set of build pics and details up. Any questions about it I can get more pics or explain.

There will be more changes and more pics as I do them, too.
 
HAHAA treadmill for the puppy to help charge batteries only you Amberwolf only you :p

You could proabably modify a "human treadmill" for a home setup for the puppys
to run along and charge batteries, poor things though, get all the exercise but don't go anywhere
best mount a lampost or a tree next to the treadmill for the them too :mrgreen:

As for the onboard trailer treadmill rather than charging batteries perhaps have it directly hooked to the axle
so they input power directly to the wheels, be the first human/electric/canine hybrid :lol:

KiM
 
First time I ever saw dog on treadmill was this (last few seconds, around 0:40)
[youtube]dLMW3kQfYQE[/youtube]

I think you're right that it would be more efficient to run the dog treadmill directly to wheels, but then I'd need a throttle control for the dog. :p

Given the extra weight involved in the treadmill rollers, surface, frame, etc, I doubt I could get enough energy back to make it worth carrying, but it is a funny picture. :)

It would be easier and probably safer to just build one of those side-of-bike harness frames to have the dog(s) harnessed to the bike to pull/push it along directly. I don't go that fast anyway, especially if I've got one of the dogs with me.
 
amberwolf said:
My Hachi does unfortunately live up to her 7 of 9 borg dog role, however, in that she is always assimilating new technology, adding it's distinctive flavor...er, distintiveness to her own. :p

LOL :lol: :lol: :lol:
 
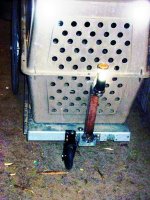
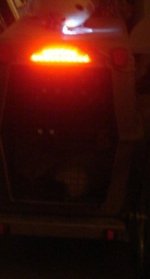
Today was the big test day, taking Hachi all the way down to Encanto park (total round trip almost 17 miles) to meet with a friend from out of state I might see twice a year if I'm lucky. I only had time to add the motorcycle tail/brakelight and a larger capacity battery (to be sure I didn't run out of lighting on the way back in the dark). I just had too many little problems, like getting my hands to do what my brain wanted them to, and getting my brain to make good decisions. :roll: Turn signals will be next.

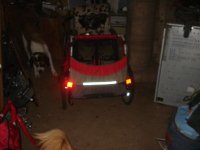
Reflectors to either side caught the flash, so it looks a lot dimmer than it actually is. Room is lit with 100W incandescent and 15W CFL.
DSC02822.JPG
Due to my ineptitude today, it's all kind of a hack, compared to what I wanted to do. I'd intended to make a bracket the turn signals and taillight will mount to, which can be moved from the top rear of the kennel down to the flatbed rear edge, whenever I have the need to use the trailer without part or all of the kennel. But I couldn't seem to tighten the vise or clamps down enough to hold the metal in place to drill holes in it, so after an hour or more of messing around with that, I had to put that on hold to just get the light on there and deal with the hitch problem I found (more on that later in the post).
View attachment 11
It's just screwed into the top rear edge of the kennel by three machine screws. Wire goes on outside of kennel so dog can't assimilate it. :lol:
View attachment 10
The connector is just a 5-pin DIN AT-style keyboard plug, saved off a dead keyboard. Unfortunately they chose to put only 4 wires in it, so I will have to replace it when I put the turn signals on. :roll: This plugs into the matching female DIN on the bike, the one I originally used for DGA's old lighting, so that I could move it's lighting from rack to trailer and just stick a coily extension keyboard cable between them. Don't need the coily for this trailer.


Battery is a 12V20Ah CSB SLA. I'd rather've used a 7Ah but the only ones I have right now have dead cells. I did leave the 1.2Ah on the stem as a backup, disconnected. I didn't expect to have to use it, but i figured if Hachi ate the wiring I could just plug it in instead of fixing the other one. :)
DSC02826.JPG
I didn't fasten it down, just put it under her blanket/towel padding stack, away from the icecubes I scatter around for her to munch on as we go, and the wetted-down areas of the towel that help keep it cooler in there as air flows thru and evaporates it. It didn't move even with her turning around in there a lot due to the long trip.

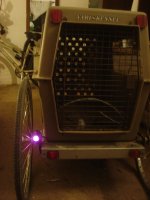
A better shot of the taillight in what amounts to darkness (no flash)
file-15.jpg
and one in room lighting no flash
View attachment 1

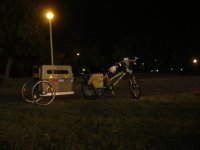
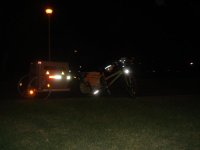
A pic of the bike at the park, with flash to show the reflective stickers and reflectors on the trailer (most of the bike ones aren't visible due to angle; I should add more for this angle!)
DSC02818.JPG
then a pic with flash to see the whole thing
DSC02819.JPG

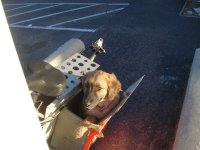
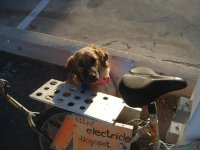
Then some pics of the guest of honor. :)
View attachment 6
DSC02815.JPG
View attachment 4
DSC02817.JPG
DSC02820.JPG
 
I did have one problem, but it wasn't as bad as I thought it would be. A temporary repair to the hitch at the bike end didn't work as it should have, allowing the front caster to rest on the ground instead of being held off of it.

It actually worked better than I expected it to, except on rough asphalt and on the concrete paths in the park and a sidewalk-style bike trail recently built on the path I took to get there. Clunkety-clack, clackety-clunk, like rolling a shopping cart along a sidewalk. :( And on rough asphalt it was rattly and noise as each little pebble deflected the caster to the side one way or another and it had to spin back, or was deflected again, etc.

Definitely need to think about alternate ways of doing that front caster with a much larger diameter tire, preferably a pneumatic one. I have a couple I think will work, about 10" off a powerchair, but the hubs are heavy aluminum and they are "airless", so I might want to pull the airless tube and put a real one in there just to lighten it up a little. Then I have to make a caster fork that will hold it.
 
Possible solution to caster size issue:

DSC02837.JPG
If I replace the trailer-end hitch's steering tube with a whole fork that's tall enough to put dropouts in the right place for a small 12-16" kid's bike wheel, it'll let me put a caster out farther forward to clear the wheel diameter without making me add heavy structural support to the front of the trailer.

Then to attach to the bike, I'd just need to reverse the bike-end hitch stem, both turning it right side up and moving it over to the other side of the bike-side hitch fork. (not shown fully) Just insert down into trailer's fork stem (instead of lowering trailer onto it) to connect them.
DSC02836.JPG
I could also add brakes to caster with a locking lever from baby stroller like i have on my handlebars for my front brake already. (not shown)

Now, flipping the bike end stem makes attaching/detaching the trailer harder, because I'd be lifting the whole bike's rear up, to then lower down into the trailer end hitch. I'd need to leave loading stuff into the bike pod until after the trailer is connected.

I would need to modify the trailer's hitchpost to move the stem point farther forward to guarantee tire clearance to front of trailer at all times.

Doing it all this way would put the stress on the actual steering pivot at the hitch rather than on the bike's dropouts or the trailer's front edge. Theoretically I can use a shock fork there to help with bumps and stuff. I don't have a light enough shock fork of the right size, but I might find one eventually, if I haven't scrapped the idea by then.

Not going to actually modify the trailer yet till I've pondered more on what kinds of problems it could generate.
 
More pondering:

A possible gotcha is that the hitch post is not vertically stiff in the forward/back direction, because of the twistability of the front edge of the trailer even with the angle-steel reinforcement, due to it's long lever arm.

So it's possible that under load in forward motion, the fork plus hitchpost could bend enough to have the tire touch the trailer's leading edge unless I give it a really good clearance of a couple of inches or more.

*Or*, the hitch post and fork post could bend *back* towards the trailer, causing there to be less trail on the caster, and making it jitter back and forth a lot.

It also occurred to me that if I can find the old little coil springs I was going to try to use on ReCycle way way back as rear shock springs, they might have enough springiness to be used as a coilover between the top of a U fork like in the pics and the bottom of the headtube of the hitchpost, preloading it by the tightness of the steering tube nut. I'd just have a big thick fender washer at the top of the spring that the bearing race (normally at the top of the fork) rides on.
spring fork.PNG
Maybe when hands work better i'll put up a better sketch that doesnt' look like it's made of wrecked bike parts.

I thougth about the yellow springs I got recently, but they are too long, the old ones I have aren't much spring but are small enough to fit, and might at least help with a lightly loaded trailer. I'm not even sure springs will do anything much but I am curious to try it both ways and find out.
 
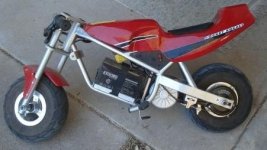
Some new donations to the projects may end up having me make a pusher trailer out of this:
DSC02898.JPG
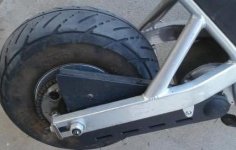
It's a razor scooter with little MY1016 24V motor, #24 chain (1/2") drive to a freewheeled tire, that interestingly enough is the same size as that on these donations just received:
View attachment 3
Unlike the airfilled ones on the scooter, they've got urethane foam "tubes" in them, so I could use them on the trailer without any worries about any form of flat tire with a loaded down trailer. Not as good on rolling resistance, but I'd rather deal with that than a flat with 5 or 10 bags of dog food on there, or something else even more annoying to have to unload and reload.

There are two sizes there, the smaller of which is about double the width and at least 1/3 again the diameter of the existing front wheel on the trailer, with a very similar fork and journal. I will be bolting on of those on as a direct replacement for the front wheel that's on there right now, and do a loaded test when I go get dog food tomorrow (sale ends tomorrow night and got distracted with stuff and then fell asleep until too late tonite).

After I make journals for them, and find three more bearings to fit them, the larger of the pair with the faded fluorescent green forks would be really nice as a pair on the front corners, just like in the original plan for the trailer, and wouldn't likely give me the same big problems I had with the too-small and too-narrow and too-hard casters I started with. I would probably put them inside the front corners rather than outside them, since I'd be custom-making the journals anyway, and then I could weld the journals to the front U-frame, making it all much stiffer.


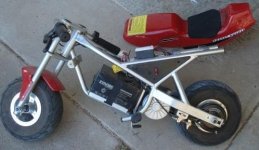
Another idea has me using just one "caster", centered in the front on the hitchpost (using the hitchpost itself as the outside support for the journal, which would go inside it). Then I would use the motor and brake and wheel off the scooter, all attached to a fork made of the rear frame of the scooter. I'd need to set up the throttle control on the motor so that it is simply keeping pace with the bike, taking a little of the load off the bike's systems.
DSC02901.JPG
It may not work well with it attached to the caster, as the fork's steering angle essentially needs to be reversed front-to-back if it's pulling rather than being pulled, but I think as long as it is never trying to go faster than the bike it should be fine.

The band brake would be nice to use to slow the trailer some; it's not great but it's better than not having a brake on it, like right now. :)

I'd probably have to regear it for higher speeds; I don't yet know how fast the scooter was meant to go. I already have a sprocket that would fit the rear wheel, and more chain I can splice in.

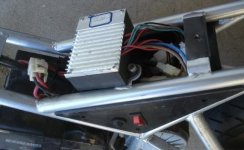
I don't know what's wrong with it yet, but the scooter "almost" works. Batteries are probably old and not very good, as it was made in 2004, and I doubt the batteries were ever changed out. But they had enough voltage when it was brought to me to turn on, though the throttle's low-power LED is lit. No charger, so I hooked it to a powerchair charger, and the low-power LED goes out, showing "full", so that part works. Charger appears to detect the SLA and begin charging it; we'll see how that works out.

If I twist the throttle I can hear a click inside the controller, probably that of a relay, but the PCB is partly potted into the plastic box, and I can't get into it to check it out yet. Have to cut the plastic away, but first I will recheck all the wiring. It might be just a corroded connection, or broken wire. Motor could be burned out, though it doesnt' smell failed (neither did my VERY dead ScootNGo motor until I opened it's case, though).

So it could be wiring, cotnroller, or motor. Probably not throttle, as it appears to work well enough to get the controller to click.

There is also an ebrake handle used for the rear band brake, though it's plastic. All the parts on this look very much like those on the ScootNGo, except for the size of the wheel, tire, sprocket, and frame, all of which are a lot smaller on this than the SNG.
 

Attachments

  • DSC02899.JPG
    DSC02899.JPG
    28.5 KB · Views: 8,633
  • DSC02900.JPG
    DSC02900.JPG
    27.8 KB · Views: 8,633
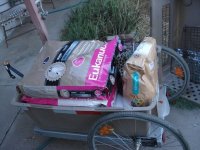
Had to do the dogfood run today. Meant to yesterday, but first I sat down and had an unintentional nap, then later (partly before and partly after the above post) wound up having to give all five dogs flea/tick baths (and spraying some watered F/T shampoo around the house to deter the ticks elsewhere), as the ticks seem to have suddenly bloomed out of nowhere. :(

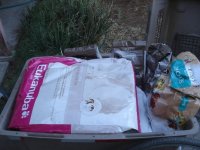
I can fit five 40lb bags of dog food inside the kennel, and in theory tie two more to the top. But I don't have safe storage for the last two right now, as I am not yet that far down in stock, so I only got five. 200lbs of food in that trailer is pretty unwieldy, but it can now handle it pretty well. There is a slight issue with the left rear wheel's mounting bracket, but I think just adding another U-frame like i did in front will take care of that.
DSC02909.JPG
Before I headed out, I swapped out the small caster for the smaller of the two bigger ones above. I also moved the new caster's wheel up to the top set of axle holes, since it is so much larger, to make the trailer bed closer to level. It's still raised a bit at the front, but not by much.
DSC02907.JPG
There is still a wobble, caused most likely by the caster and hitchpost both being off center in opposite directions. This is not an issue if the front of the trailer doesn't carry the load, so I think I am going to move the rear wheels forward about 1/3 of the way from the back and try it out. This will require some under-bed bracing across the trailer, so that they do not flex inward at the top and outward at the bottom. The rear wall of the flatbed mostly prevents that now, but there's nothing at the new mounting point to do so.

All in all, it still works much better than the old trailer. It'd still be nice to have a brake I can lock for it, though, when it's parked. Loading and unloading would be way easier, without worrying about knocking the bike over. :)

I also got a compliment from an officer who happened to be in the parking lot of the grocery store I stopped at before going to get my dogfood, when I pulled in to lock it up. He followed me from the entrance area of the lot to the store, but since he didn't wave me over or flash his lights or anything, I figured he was just heading out the other entrance that's in that same direction.

When I was locking it up, he stopped and got out (without parking first, just leaving it running :(), and came over to let me know he had never seen anyone with a bike trailer like that, not just one made with a kennel but one with all the "proper" reflectors (his term) and a working brake/tail light as well. Same for the bike itself, with the turn signals and such. He said he wished they all had them. :)
DSC02906.JPG
We talked for a minute about electric bikes as he has seen them but doesn't really know much about them, and didn't know there were motors that came premade in wheels--thinks this would be a nice way to get around when not working. I gave him a paper with my email on it; maybe I'll end up setting up a bike for him with motor, lights, signals, etc. :)
 
Got a great deal on dog food, used the trailer to go get it. Post in DGA thread about that here:
http://www.endless-sphere.com/forums/viewtopic.php?p=300436#p300436

Trip was a success, and I only had a wheel fall off once. :lol:

I guess I didn't check the QR skewer on the trailer's left rear wheel when I repositioned them both a few inches forward of their original location.
DSC03089.JPG
It pushed in and partially locked, but since the skewer didn't retract afterward, the ball bearings that do the locking didn't fully engage, and after about a mile the wheel came off in a parking lot I was passing thru. Fortunately it was empty of moving traffic at the time. :oops:

Even more fortunately, it was on my way to pickup the food, rather than after I had done so, or else I would probably have crashed and/or broken the trailer and possibly the bike/hitch/rack.

Now I know to double and triple check those things, since the things are worn enough to not operate perfectly, I guess.

I *barely* fit it all in
DSC03092.JPG
and I had to unscrew the lid of the kennel to pack it, then bolt it back in. But I lost a screw in the process, and had to leave one side undone:
DSC03091.JPG
Partly because of that, and partly because of insufficent bracing on the rear end, and the great weight of the load (at least 200lbs; I'll have to look at the list and add it up later), the left rear wheel began having flexing problems again at it's base, causing it to rub on the kennel's edge periodically during the trip home.
DSC03090.JPG
It happens on the left rathr than the right becaues the front caster is more on the right side than centered, so it puts more load total on the left wheel.

Power usage on the trip (using the Fusin motor/controller and the 36V 13Ah NiMH pack):

121Wh total
3.25Ah total
16.7A peak (controller limited, ran the whole way on "low" setting).
4.941 miles total (less than usual due to some shortcuts I took walking the bike/trailer across no-thru-intersections that normally I would have to ride at least 1/4 mile out of the way to get around).
8.3MPH avg

Outbound (unloaded):
2.22 miles
44.4Wh
1.25Ah

Inbound (loaded with 200lbs+ in trailer):
2.721 miles
76.6Wh
2.0Ah


I apparently forgot that I didn't have enough storage containers empty to hold all the food, so about two and a half hours of shuffling stuff around were required to make room for it all, so that pests can't get into it and ruin it before the dogs consume it. (and to keep it fresher and to keep the dogs from wanting to tear the door down to get to it, if they smell it strongly. ;)

Now to eat some of my extra crispy dinner that I kept forgetting to turn/stir whiel I was putting the dog food away. :roll:
DSC03093.JPG
DSC03094.JPG
DSC03095.JPG
 
I've got another Quickie chair here (functional, though) with threaded axles I could use, but they are just steel, not the titanium that these QR axles are. ;) As long as I check to be sure the QR pin retracted, I should not have any problems like that again. I also just this instant thought of a way to thread a screw or bolt in from underneath the trailer that would block the QR pin from pushing thru, thus locking the wheel on. Have to see fi that one is practical or not, but if it is I'll probably do it just for safety.

This is the first time in all it's trips that one of the wheels has unlocked like that, and that is with some serious potholes, bumps, and various loads (including wiggling fuzzy loads). So I am not *that* worried about it, but a bit concerned. It would suck to be at speed with one of the dogs in there and have a wheel come off. :(
 
Mmmm...dilemmas. Tomorrow (Saturday) I have to do everything I can to finish fixing up that ST:TNG transporter console for display at Coppercon, but I just got the opportunity to pickup two trailers from Freecycle, and that is going to take at least a couple hours, probably three or four.

One is an Instep Ride Along Bike Trailer, which I could turn into a pusher trailer for any of my bikes (well, probably not CrazyBIke2), with cargo pods or bags mounted on each side and a motor running the pedal chain or even a hubmotor in the wheel. Since it doesn't need to keep the pedals or chain, and it is probably a fixed-gear rear wheel, I coudl easily mount a front hubmotor in there rather than a rear.

The other is a Bell two-kid bike trailer that had more attention from a dog than it really needed. ;) I'm familiar with that problem. :( (Hachi chewed on a bike tire a few days ago; I need to put up a pic).

This is in the trailer thread because I'll be using this kennel trailer to pick them up. Should be an interesting ride; it's long enough I'll need to take both NiMH packs to have enough range and still haul the load.

Oh, and I still havent' fixed the problems with the back of the trailer yet, so I hope the load wont' be too heavy.
 
A friend stopped by to drop off some DayGlo paint, tires, and other things, and he offered to take me to get the trailers in his truck. Given the likelihood of winds and storms later in the afternoon/eve when I'd probably still be on my way back with the stuff on the bike, I took him up on the offer.

Uneventful pick up of them, and they are in pretty good shape. Turns out that the hitches are complete (though the tires are all flat), but I would only have been able to use the Bell trailer to haul the pedal trailer if I rode The Velcro Eclipse, as it's clamp-on hitch requires using the left side chainstay, which is inaccessible due to the cargo pod. I suppose I could've clamped it to the U-fork I have as my hitch for the other trailer, but I'm not sure there'd be enough clearance at the rear of teh trailer to ground then.

It did end up raining cats and dogs for a short time, with very high winds (more than 45 degree angle rain, nearly horizontal at some points). So I'm glad I took him up on his offer. :)

Anyhow, here they are:

THe pedal trailer is foldable for storage, just between the seat and bars.
View attachment 12
Hitch clamps on seatpost or seattube.
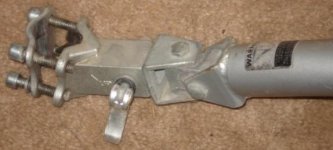
DSC03171.JPG
Folding joint
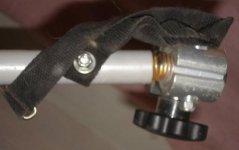
View attachment 10
Clamp-on bars. I'm thinking that if I take the bars and the seat off, I can bolt a platform across there and over the rear wheel to give me cargo space, with something down the sides to tie things to and keep them clear of the rear wheel. I have two big computer-tower carrying cases from CompUSA's old training classes stuff that would probabably work fine; I considered using them on the bolt-together semi recumbent cargo bike originally and there are pics in that thread:
http://endless-sphere.com/forums/viewtopic.php?p=247481#p247481
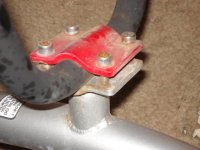
DSC03174.JPG
Freewheel was rusted so much that it would not freewheel. A squirt of WD40 mixed with gearbox oil fixed that, though it's still very loud and probably needs scrubbing out. Chain is rusty but works at the links. I will almost certainly not be using either one on this trailer, and isntead will put a hubmotor wheel in it.
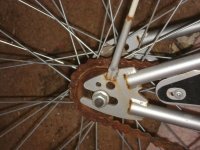
DSC03175.JPG
Also, there is a neat little flagpole holder already welded onto the rightside dropout area, with a couple feet of stub of the old pole still in it. I'll probably fix that up with a flag.

It is a 24" wheel, and I may have to cut the brake-crossmember and the "kickstand plate" (neither of which have holes in them to bolt those things to, but are present nevertheless) to allow tire clearance.


The Bell trailer definitely needs some new bits for the covering and stuff--all the straps have been chewed up by a dog, although oddly none of the plastic clips have been, just the cloth part. Good in that I can use those elsewhere. Most of the straps are belts to hold in kids, which I don't need.
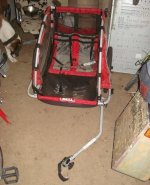
DSC03176.JPG
All of the mechanisms in it seem intact, and there don't seem to be any problems with the frame.
View attachment 6
The hitch and it's safety strap are also intact.
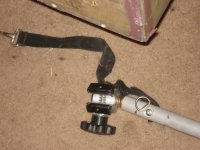
DSC03179.JPG
It has reflective strips on it that cause the camera to shutter down on flashbounce, so some of the pics are pretty dark.
DSC03181.JPG
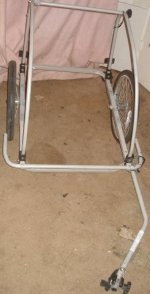
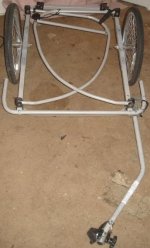
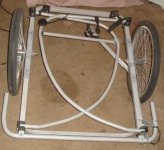
It also folds up, so I could use it as a flatbed even without removing any parts from it.
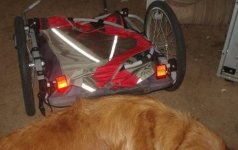
DSC03182.JPG
THe wheels are quickrelease pushbutton like my kennel trailer's, but much smaller, and I doubt their axles are titanium. :lol:
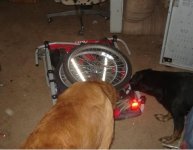
DSC03183.JPG
Folds up pretty compactly, including the hitch folding up underneath it.
View attachment 1
I wouldnt' have had any trouble carrying both of these in the kennel trailer, folded up with wheels off.

I'm not sure if I can easily make a pusher trailer with the Bell, but definitely easy with the other one. So easy that I made a new thread
http://www.endless-sphere.com/forums/viewtopic.php?f=2&t=21060&start=0
just for that and hope to start the conversion in the next week or two, whenever I have time.

My only question is whether I should lace up a 24" wheel with the 1000W GM/9C hybrid, or just use the FUsin or 9C hub in their existing 26" wheel.

After I verify that it will safely work as a pusher using a hub, I'll see about converting it to use a chain-driven wheel from a motor like a treadmill motor or something, just to see if it'll work, and to get back into making my crazy drivetrains that I have not been doing for nearly a year now. :)
 
I've yet to do much else but strip off the torn up coverings, to make a bare frame out of the Bell trailer above. I may be able to patch up the original coverings to put them back on, but more likely I will make a solid deck on top, and a lockable compartment below (kinda like Zap's Woody), possibly with a pusher assist on it, but even with no assist it can still carry extra batteries for whatever bike it's attached to.
The model# label:
View attachment 5

The folding frame:
DSC03216.JPG
DSC03217.JPG
DSC03224.JPG

The hitch arm folding/locking mechanism:
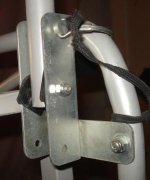
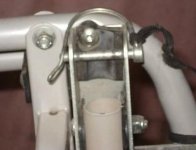
DSC03218.JPG
View attachment 2
DSC03223.JPG

The hitch itself:
DSC03220.JPG
DSC03221.JPG
 
I finally moved the wheels forward to about the 2/3 position (a bit further forward than that, actually), instead of all the way back. Since this is a lot closer to the angle-steel bracing in the front half, it should help with the spreading of the sides under heavier loads, as well as put more of the load on the rear wheels, with less pushing down on the bike itself.
DSC03936.JPG
It still is a front-heavy trailer so there's no problems with it pitching backwards even with Hachi in it
DSC03934.JPG
but I still haven't added the parking brakes on the wheels, so it can still easily knock the bike over even with teh bike's own parking brake on it's front wheel, especially when whcihever dog is in teh trailer starts moving around or while loading/unloading them (or cargo). Guess I really need to get those brakes on there.

What I will probably use is the lever-action brakes off the original wheelchair the wheels came from, simply bolting their pivot points to the bottom frame/bed of the trailer right in front of the wheels. That won't let me use them as actual brakes while moving, but they'll be ok as parking brakes, and should be very effective. No pic of the levers, as I don't remember which box I have them in. Have to go look later.


The trailer rides better with Hachi in it, with the wheels farther forward, though I don't know how good that is long term, as nothing worked out as planned for the test ride:
http://www.endless-sphere.com/forums/viewtopic.php?p=352278#p352278
 
It looks like the trailer wheels & axles from the kid trailer would be perfect for the front of a trike?
Did you use the steering head from a mobility scooter for your trailer hitch?
Thanks.
 
Back
Top