Bicycle Fairing & windscreens

Kingfish

100 MW
Joined
Feb 3, 2010
Messages
4,064
Location
Redmond, WA-USA, Earth, Sol, Orion–Cygnus Arm, Mil
Ref: http://www.streetfightersinc.com
Google “streetfigher”, or eBay “motorcycle light fairing” or "streetfigher fairing" for cheaper pricing :wink:

Greetings –
I was searching the web for headlight mounting bracket ideas and I stumbled upon this site, which occasionally I have in the past. There are two thoughts here:
  • One being the mounting brackets for the lights and the headlight assemblies,
  • And the other being the headlight fairing and windscreens.
Reviewing, the fairings appear small enough to be useful for MtBs with a DH fork. The Streetfighter models seem to have similar names so it is difficult to differentiate for conversation, though ones that I am keen on are the narrow Demon or Cyclops versions (220x290x160mm deep), and another that is called “Stunt Fairing – Universal” with the two 15W Halogen Beam with Blue Lenses (about 305x305mm).

Street-Fighter-demon.jpg

"Demon" or possibly "Cyclops"

Street-Fighter-bugeye.jpg

"Stunt Fairing - Universal"

The second fairing is appealing in that headlamps are small enough to replace with a HP LED such as a Cree XPG series torch. One could probably make the Cyclops version work with a little modification as well.

The weight of these items isn’t published; however they are very inexpensive, thus capturing my interest. They mount to a regular moto or DH fork which requires another bracket & purchase if not OEM-supplied. I am not fixated on Streetfigher, but they do seem to be well-placed.

Has anyone mounted one of these on their ebike or had luck with a similar product?
~KF
 
Look cool, I agree about the Cree XPG series or P7 torch upgrade on the headlight. it would be awesome!
 
Small edit: Modified the thread title to capture the windscreen interest.

I have been looking for more examples of small fairings but it’s sort of slim pickins out there, and a lot of crap. The cheapy units use Acrylic which would shatter if it took a rock; some of the Streetfighers use that to cover their LED sections.

On another front, I thought I’d address the windscreen department of the thread…

Windscreens for Bicycles/Recumbants:
Many know of http://www.zzipper.com ZZipper Road Fairings.
There’s also http://www.mueller-hp.com/ Windwrap Fairings

Windscreens for Motorbikes/Scooters:
This is really interesting article that links to other manufacturers; it’s a good place to start, aptly titled: Motorcycle Fairings and Windshields. Scroll about midway down the page to see the list.

From that I found a potential candidate for my DH MtB:
00522.jpg

(Link to product spec) although the windscreen itself is 0.125” thick, it weighs 6 pounds with hardware; beefy for the faster ebike-soul that dwells within. The price though is pretty awesome at < $84! 8)

~KF
 
DIY Fairings

Inspired by nechaus' question :)

I was going to start a new thread, but this old one will work just fine, so I’ll just repurpose it to explain how I made mine.

The idea of adding a fairing to my ride was not a new one, nor was it a foreign one; probably every normal red-blooded biker out there wants a fairing if we could afford it. It had occured to me that I could have Zzipper make one for me, although it’s not terribly difficult to craft one yourself if one has a bit of time and creativity. The goal here is to break up or slice through the wind, and even if the effect is slight it will make a large difference on a long ride, possibly adding to the top speed.

windscreen_1st_attempt_failed.jpg


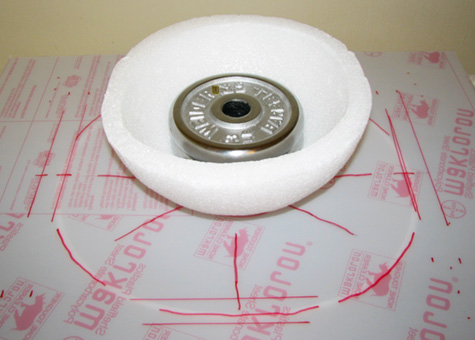
My first attempt using Polycarbonate was a joke: The manager of the local plastic supplier after presenting me with an overpriced estimate said I could make my own windscreen by placing the material over a large bucket and put weight on it, then dumped boiling water. He must have been on crack because it hardly deflected. Heat gun didn’t work out either because the material will bubble. The reality (and I knew this) is that it has to be soft focused heat – and I didn’t have a setup like that at home. Time to try something different.

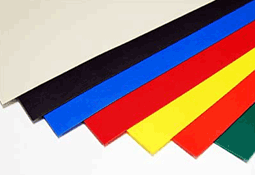
This time I switched to High Density Polyethylene (HDPE) which comes in 2x4 foot sheets that are 1/32-inch thick. Very pliable and can be affected by the lightest touch of a heat gun to set the bend.

hdpe_sample.png


HDPE is available in limited colors from Tap Plastics; more choices can be found if you’re willing to purchase a large order. These sheets here retail for $7.55 each.

fairings_0.jpg


Start with the basic bike. Here’s my 19-year old Specialized Rockhopper all neckkid and ready to mod. Before my first road trip in 2010 I stripped the whole bike down and rewired it.

fairings_1.jpg


The first faring experiment was The Black Body. I actually made this one twice cos I didn’t quite get it right the first time. The pattern was created by laying the bike down onto a large contiguous piece of cardboard, and then I traced out the shape with a pen. Butcher paper is also useful for drawing out patterns. The controller used to be right below the seat, but my leg would hit it and I had chaffing, so for the road trip, it was relocated to the front of the bike. This greatly reduced the length of phase wiring. The fairing keeps the profile of the bike nice and clean and streamlined. My top-speed instantly picked up 2-3 mph. The only disadvantage was with the force of crosswinds over bridges. There’s 18 5S1P bricks in each pannier.

fairings_2.jpg


After the road trip I created a battery bag for the triangle that could hold 9 batteries per side. The trunk bag holds another 12 for a total of 30. The controller was moved again to accommodate my DC-DC converter with a heat sink. Not exactly a happy arraignment, plus the whole business was not well visible as we’re heading into Fall weather.

fairings_3.jpg


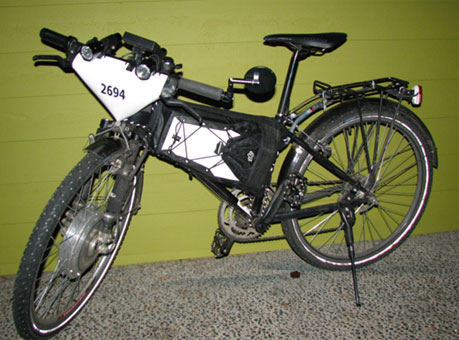
This was resolved by adding white HDPE side panels and crafting the first handlebar cowling. Like the original side panels, I had to make this one twice before I had it right. Permanent Red markers work best for all colors including black, and the finished product can be wiped down with isopropanol to remove the ink. By this time the weather turned frosty and I have the Schwalbe Marathon Winter Reflex mounted front and back. The problem with this configuration was that my battery bag was still getting wet, and I couldn’t have that!

fairings_4.jpg


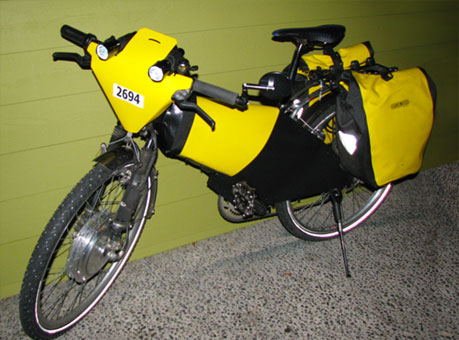
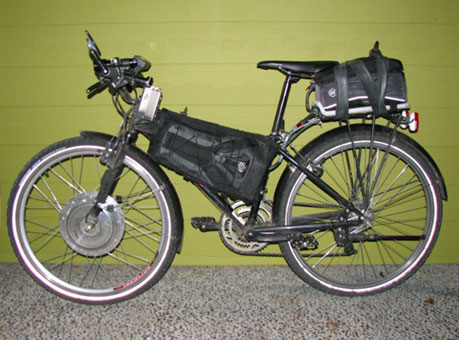
This is my favorite version – and coincidentally the last for this ebike. I call it the Yellow-Jacket look. This sported a better handlebar cowling design with a 5-piece battery bag fairing. Beautifully matches the Ortlieb panniers too. The battery bag cover included:

  • Front wrap made from tough black polyvinyl material, stitched up.
  • A black sheet of HDPE as a rock guard; it’s difficult to see in the image, but it runs along the bottom parallel to the downtube.
  • Twin triangular rear panels made from black HDPE.
  • Yellow wrapper also made from HDPE. This had Female Velcro stitched inside at each end.
The rear sides were attached first, they’re zip-tied in place. The yellow wrap goes on next, and is hole-punched so it can be laced together with tension. The rock guard is mated to the front wrap and has its own lacing that pulls it tight and is secured to the yellow wrap, leaving the rock guard hanging. After all the lacing is secured, the rock guard, with matching male Velcro stitched to it fits snugly against the yellow wrap creating a nice moisture barrier over the lacing. The yellow wrap really makes for a nice slick surface for winter weather riding.

fairings_5.jpg


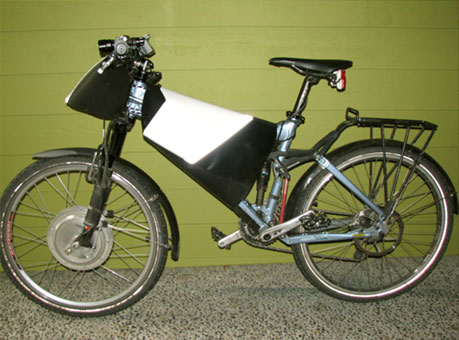
Unfortunately the Rockshox gave out on that bike. It had a 1” steerer which made sourcing a replacement problematic. I found on one eBay, but it didn’t survive the trip home from the bike shop that installed it. I had to retire my good ol’ ebike. The equipment swap occurred over New Years 2010-2011 weekend. Thus was born my present ebike made from a 2009 Felt Compulsion 1 full-suspension frame. Once again I had an opportunity to rework the wiring. The battery bag swapped over fine, but the associated covering wouldn’t fit, nor the front cowling.

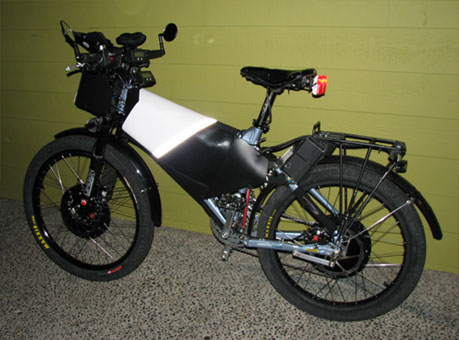
Again, using construction paper I crafted up a new model which like before took me two times to get it right. The handlebar cowling made from three pieces: Black HDPE wrapped and bound to the handlebars and the front fork using zip-ties. The white stripe was added to provide additional visibility. The third piece is between the fender and the folded assembly; difficult to see – though it provides a framework that retains the shape and doubles as a moisture barrier. Most of my electronics and wiring are located directly behind the cowling, and that third piece really keeps all of that business high and dry and clean.

fairings_6.jpg


The battery bag wrapping was changed to conform to the new shape and incorporated additional fixes to resist rain.

  • One complete wrap of heavy duty black marine polyvinyl covered the battery bag assembly, sealing it off from weather and rocks and really just plain armored it well against pointy accidents. It’s laced up at the bottom similarly to the battery bag. The front was stitched to cup-conform to the bag shape and protects against direct rain.
  • Following is a wrap of white HDPE, also laced along the bottom. Along the length of the downtube parallel to both sides is a length of female Velcro on both wraps which when assembled, appears as a contiguous length.
  • The front wrapper and rock guard were unified as a single piece of black HDPE, and took a few tries to get this shape correct. It ties off by wrapping from underneath and over the top, and then zipped in place. The hanging rock guard part has two lengths of male Velcro and seals right up to protect the whole undercarriage perfectly.
As a finishing tough, I added reflective tape to the trailing edge of the white wrap and handlebar cowling.

fairings_7.jpg


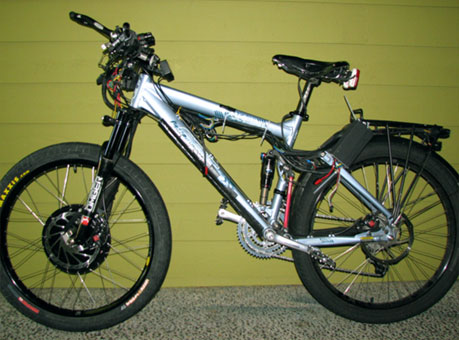
For the 2011 road trip, I stripped everything back off and rewired the entire system for 2WD. The controllers are now collocated over the rear wheel and the rest of the components are forward and hanging off the handlebar. New motors, new tires, disc brakes all around, turn signals, brake lights, dual flashers, wired for the trailer, and ready for bear.

fairings_8.jpg


Final version still in use today even after the road trip with the new Electra Black Plastic Balloon Townie Fender Set. One other change to the side wrapping was the inclusion of removable black side triangular panels. Behind the panels were connectors and wiring for the motors, the batteries, the trailer, and the bike computer (which I could never got to work as advertised). This I think was the best “look” for this bike, and every day of my road trip someone would always inquire where they could get one.

It’s almost perfect. :wink:

fairings_9.jpg


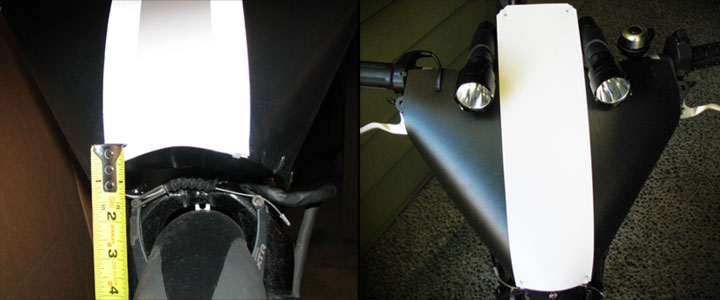
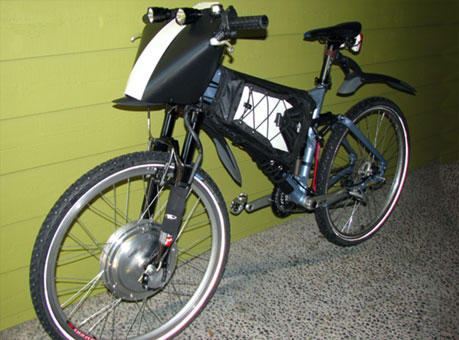
Front views of the Handlebar cowling:

  • On the left, when fabricating the height, make sure to leave enough room for the front shock travel. Note the two stripes of reflective tape on the white portion. The bottom part which you can barely see just above the brake caliper provides a great barrier against wind and moisture.
  • On the right, the single white HDPE length is held in place by clear/white zip-ties. The shape of the bend was augmented by using a heat gun on low setting, and it allowed the bend to relax, un-stress, and form a tighter controlled bend.

fairings_10.jpg


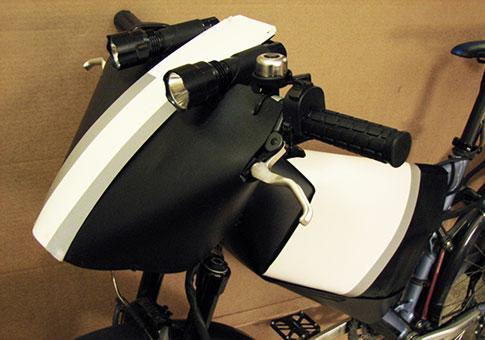
Another view of a slightly earlier version that shows the stitching along the rock guard section and reflective tape. The performance is very apparent when facing headwind; it just slices right through it! There’s plenty of room behind for electronics.

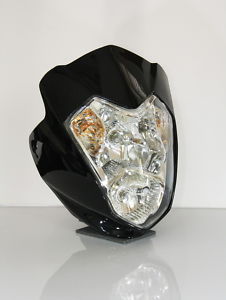
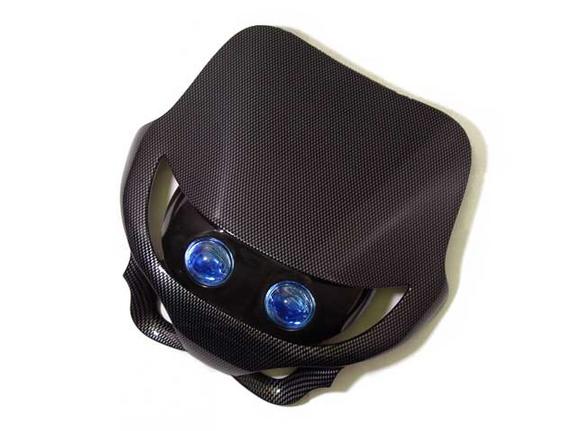
To me, this last handlebar cowling has a nice organic look to it, like the head of a bee. Or maybe… a wasp! Perhaps harmless, or maybe not. :twisted:

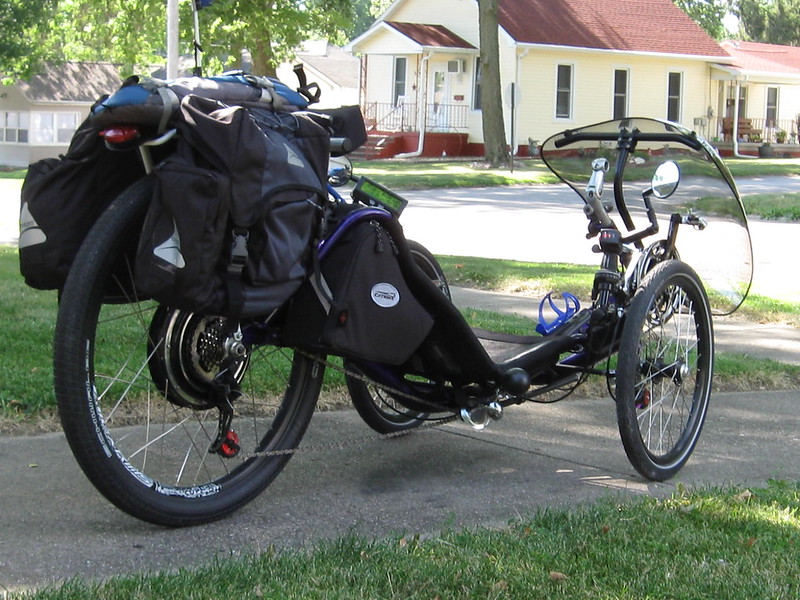
For other fairing uses, try perusing through Page-5 of my trailer thread.
Also my Epic Battery Bag Story

See you on the road, KF
 
In the late 90's, WisIl hpv was very active. One of their many projects was blowing fairings out of lexan. here is a write from WisIl Hpv about this project. Warren is also very active on this site too. Recently built an electric bobber.

http://www.recumbents.com/wisil/Bubbles/hpvbubbles.htm
 
I flirted with a fairing breifly with my race bike. While a fairing for comfort in cold weather makes a ton of sense, my crude coroplast attempt actually made my bike slower. It seemed to be mostly redirecting air flow to the least aero part of my body, the center of my chest.

If nothing else, try to make your fairings direct air right and left, rather than up like mine did. I had a 125 scooter for a few years with a similar problem. The fairing was short, ending at the bars. At 60 mph, having even more air directed at the center of your chest was very uncomfortable to me.
 
Have you tried to get a transparent windshield, similar to the one you see on the moped/motorbike?
windshield.jpg


Would be much better air fairing and would somehow protect from rain.

Not sure if there is any plastic able to do that with a heatgun? HDPE sheets don't seem to be transparent.
 
The mirrors and windscreen mount using motorcycle-type equipment which are 3X heavier. If we put motorcycle handgrips/brakes on a bike handlebar then we’ll be able to utilize fixtures such as this. :|

Take a look at What sort of mirrors ? for some of the hardware we investigated.
~KF
 
I'm not saying to use motorbike windshield.

I was just wondering if it is possible to custom made a windshield from plastic such as the one you've found (HDPE). Would be great to have something similar to the motobike without the weight.
 
Ahh well, I think that's completely possible :)

HDPE is opaque, so it would likely be either acrylic or polycarbonate. Acrylic has a bad rap with DOT and that's why these Chinese farings are banned, however polycarbonate is more resistance to rock hits and less likely to shatter. Safety Eyeglasses are often made from polycarbonate. 8)

~KF
 
Polycarbonate seems to be a very nice choice! Very strong and yet lightweight!

Buuuut, I do have the same trouble as you do with this material:
THEY ARE BUBBLES EVERYWHERE WHEN I USE MY HEAT GUN!!

I don't have any expensive tool, only a heat gun and an iron :(

Any idea how this problem could be simply sorted? :?:
 
We used to have a way to do this in Production: Use soft IR heat, and not direct heat. Be prepared for a learning curve (ergo … some waste). I think the guys that make those blister canopies use a precision-controlled oven; no help for us DIY unless you want to build an insulated box. I just had an idea: Maybe a radiant heater will work: It’s larger and puts out nice soft heat that can be directed by shiny reflectors. I’m just thinking out loud cos I believe that’s how the guys at Tap Plastics do it; ceramic radiant heat along exposed edges to bend (and they only do 90° bends).

The only other thing I can think of is a blower coming off a heat. I think we’re talking about 300-400°F, so it’s not something that is easily useable; you wouldn’t want to be in the same space without serious ventilation and protection. I know a guy down in Oregon and they powder-coat playground equipment; he has the largest walk-in/walk-out autoclave in the state. The oven is always on, and when in production, they open the doors at both ends, walk-in the new batch and park it, grab the finished batch and walk out in one motion, shut the doors and wait till the cycle is complete. They walk in dry and are drenched in sweat by the time they reach the other end – taking less than 30 seconds.

But as for what we can use for DIY? I think I’d build a plywood box, insulate it, then pump hot air into it until the polycarbonate can softly deflect to the desired shape, then vent the air quickly to set.

That would be my best guess, KF
 
Thanks Kingfish, it seems that for us DIY guys, there isn't much we can do :lol:

Plywood box is an idea, but it's quite difficult I think and not sure about the result. Best would be to have a strong material easy to work with heatgun such as your HDPE
 
Wind tunnel testing would be helpful, but on my bike any streamlining over the Wald front wire basket might help in a strong headwind. As it is, I curl up somewhat into an uncomfortable crouch like someone on a noisy stinkercycle. Good workout for the upper arms. :lol:
 
Here are the interesting ones I've bookmarked. The autospeed article talks about annealing the acrylic he uses, which I hadn't seen discussed before wrt bubble fairings, but I looked it up and lexan seems to need annealing too.

http://www.recumbents.com/wisil/bubbles/hpvbubbles.htm
http://autospeed.com.au/cms/title_Custom-Bubble-Canopies/A_111051/article.html
http://www.advrider.com/forums/showthread.php?t=388284
 
Apparently it's possible to bend lexan with heat gun:
"I use Lexan alot.

I made a motorcycle windshield for a Goldwing using nothing but a heat gun to get the proper curvature.

The trick is to keep the heatgun moving or you will form bubbles. We conformed it to the fairing and screwed it in place, once it cooled it was set and looked just like the origninal factory piece.

Have also had good success welding Lexan together using a hot air plastic welding gun and Lexan filler rods.

I've used a break to bend 1/4 and 1/2 inch Lexan but it seems that if you go much past a 45 degree bend that you'll get stress fractures. Bending to 90 is the cold limit, go past that and it'll break. Use a heat gun and you can tie it in a knot if you want."
http://www.practicalmachinist.com/vb/general-archive/forming-lexan-sheet-85875/

Anyone want to try?
 
cwah said:
Apparently it's possible to bend lexan with heat gun:
"I use Lexan alot.

I made a motorcycle windshield for a Goldwing using nothing but a heat gun to get the proper curvature.

We conformed it to the fairing and screwed it in place, once it cooled it was set and looked just like the origninal factory piece.
Anyone want to try?

Lucky you had the orginal windshield to use for a mold. I've found that once a fairing is formed (blown petg type), taking a heat gun to the fairing shrinks it and ruins the bubble since no mold is used on a blown fairing.
 
You really got a 2-3mph increase with your Black Body bike fairing? That's incredible. I know I need to work on the aerodynamics of my bike, and likely remove the front Wald basket which surely doesn't help, even though it's a thin metal grid.

I like your designs, and will probably do something similar for the handlebar fairing, perhaps make a little storage compartment inside it.
 
veloman said:
You really got a 2-3mph increase with your Black Body bike fairing?
At what speed was this? I imagine it might be possible for a non-aero mountain bike. I won't do it to my ebike because of the attention it will draw.
 
veloman said:
You really got a 2-3mph increase with your Black Body bike fairing? That's incredible. I know I need to work on the aerodynamics of my bike, and likely remove the front Wald basket which surely doesn't help, even though it's a thin metal grid.

I like your designs, and will probably do something similar for the handlebar fairing, perhaps make a little storage compartment inside it.
Velo, who are you talking to? :)
~KF
 
Kingfish said:
veloman said:
You really got a 2-3mph increase with your Black Body bike fairing? That's incredible. I know I need to work on the aerodynamics of my bike, and likely remove the front Wald basket which surely doesn't help, even though it's a thin metal grid.

I like your designs, and will probably do something similar for the handlebar fairing, perhaps make a little storage compartment inside it.
Velo, who are you talking to? :)
~KF

It's regarding your post, KF.
 
Understood. :) The faring et al was a maturing process of experimentation.

In 2010, I tried to go for my first Century and noticed that the wind really buffeted the performance at WOT. My forward and downhill speeds increased by tucking in tight. Naturally the thought occurred that if I could reduce the drag in any way then the bike would go faster.

The first experiment was to cover the basic bike in light thin HDPE. Definite improvement on forward motion, however lateral winds were problematic. As winter of 2010 approached I came up with the forward cowling, and actually that began as a bike plate from the 2010 Chilly Hilly event; I noticed very slight decrease in drag with the plate in place in cold weather as the rain is deflected around it. We get lots of rain here, so anything that blocks it or reduces the soaking is a godsend.

So – front faring began as a silly plastic plate, later became a simple wind & rain deflector, and later morphed into the more radial bee-head shape. All the loose wiring, the stuff that wind likes to grab onto and hang around, is now covered up. The bike slices through the headwind better. All wind blocks though have drag, and to reduce it I intentionally crafted a vent behind the nose just above the front fender that allows some flow of air into the chamber to reduce the ever-so-slight vacuum. The physics is similar to back-bleed pressure for ballistic projectiles and not too bad for torpedoes either.

The body faring morphed from simply covering up the wires and harness, to wrapping around the ever-increasing triangle battery bag which despite material waterproofing efforts – was still getting soaked. Secondary to the body wrap is visibility during pitch black winter nights in the Pacific Northwest.

The trailer faring is a combination of function and from what I learned from the bike: The entire underside is completely covering in one unified sheet to reduce ground effect. The nose-forward egg-shape is designed to induce the most drag at the rear which worked to self-center the trailing and attenuate tail-wagging-the-dog, especially at higher speeds. For the most part the contents remained dry under the marine-grade vinyl covering. The tied-down method worked, but was cumbersome to use; having two quick access compartments to fetch and stow worked out very well for food and over-wear.

Lateral crosswinds became less of a problem as the weight of the bike increased: The one time that I was entirely grateful for being bike-heavy was crossing over the Pistol River in southern Oregon along the coast northbound on US-101, and buffeted by at least 35 mph cross- and headwinds.

My thinking is that the best shape for a windscreen is a bullet or ovoid, but that is entirely unpractical. I have an idea where I’d like to go with faring technology. At the ebike level, HDPE works very well and is easy to manipulate. A modestly hard PC blister also captures my interest, although I have had less success coercing the material to do what I want.

Given that necessity is the mother of invention and that there is no end to the spirit of creativity, I look forward to ongoing DIY inspiration and what may come.
Cheers, KF
 
Cool, thanks for the thoughts and ideas. I love the DIY and ebike is a great application for it.
 
Mark and Carl Mueller sold their fairing business to Pat Franz at Terra Cycle in Portland, OR. He makes and sells all kinds of useful stuff. The website is http://t-cycle.com I have nothing to do with the company, other then buying a few things from them. The current fairing on my trike was made by Carl Mueller just before the business was sold. While fairings seem to work pretty good on trikes, they don't seem to do as well on DFs. Lateral wind forces appear to be a problem for that application.
7184961745_a03a9eefdc_c.jpg
 
Kirk said:
they don't seem to do as well on DFs. Lateral wind forces appear to be a problem for that application.

If its like 15+mph side wind. Sometimes an invisible high power thermal or ghost twister will lean you around and give you vertigo. I've run mine in shoulder width margins on highways with semi's going by and stupid people passing other cars in the opposite lane. Usually when a semi goes by, you'll get sucked/leaned into the vacuum, then it will push/lean you away as it goes by. Then enjoy the speed boost.
 
Back
Top